

- Startseite
- Photoshop ecosystem
- Diskussionen
- Re: Tool's area effect exceeds selection
- Re: Tool's area effect exceeds selection
Tool's area effect exceeds selection

Link in Zwischenablage kopieren
Kopiert
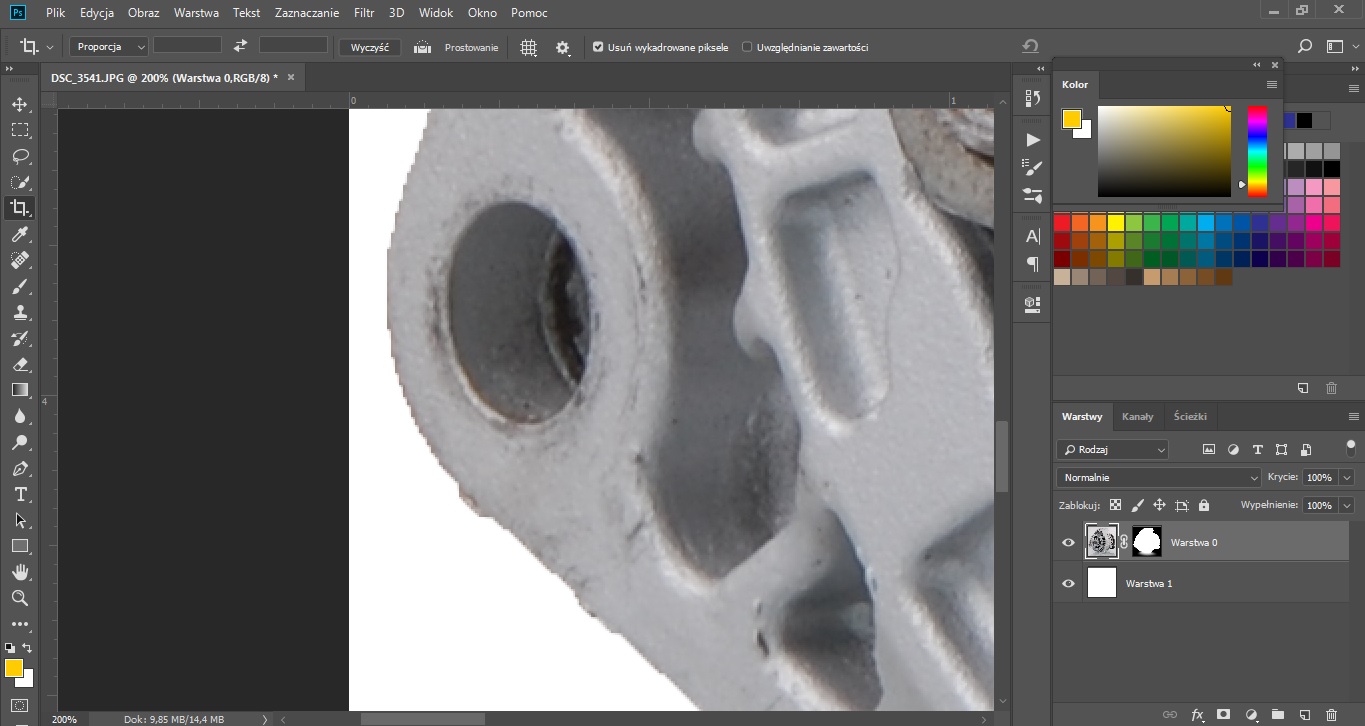
What I'm doing is selecting area, inverting it (around object) and using gradient transparent-to-black to create some sort of shadow. It used to work perfectly fine, but now it's sharpening edges of object outside of the selection. Fix please?


Entdecken Sie verwandte Tutorials und Artikel
 17
Antworten
17
17
Antworten
17

Link in Zwischenablage kopieren
Kopiert
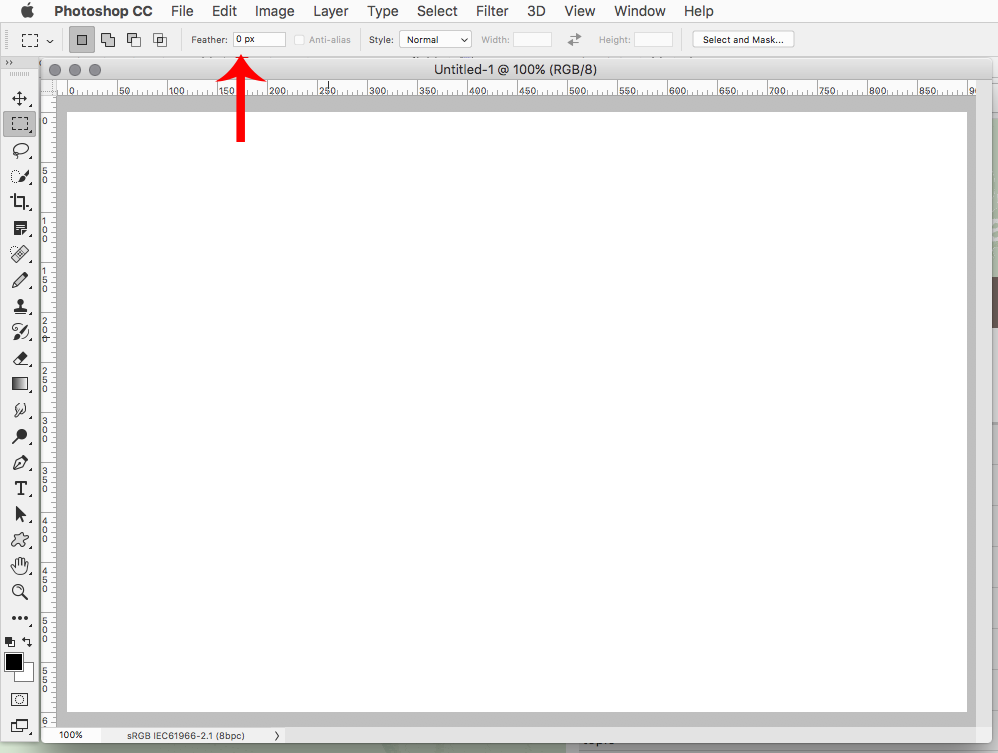
First thought that comes to mind is some feathering other than 0 px (zero) was set in the tool options bar for the particular selection tool before you made the actual selection.
What version of photoshop and operating system are you using?
Which tool did you use to make the selection?
Example of Feather for Rectangular Marquee Tool
Link in Zwischenablage kopieren
Kopiert
I thought of feathering but all feather options are set to 0. I used quick selection tool.
It was all working great until today. I'm using macro for this specific thing so it should go smoothly as usual.
Windows: 7 64
Adobe Photoshop: 19.1.3

Link in Zwischenablage kopieren
Kopiert
Could you please post screenshots taken at View > 100% and with the pertinent Panels (Layers, Channels, Options Bar, …) visible?
Link in Zwischenablage kopieren
Kopiert


Link in Zwischenablage kopieren
Kopiert
I guess I don’t fully understand what you are talking about.
Where is the Gradient Layer?
Link in Zwischenablage kopieren
Kopiert
Gradients being used on the mask
Link in Zwischenablage kopieren
Kopiert
The Gradient Tool is not even selected in your screenshots, so what should they illustrate?
Also: Why would you apply the Gradient on the Layer Mask instead of using a separate Layer?
Link in Zwischenablage kopieren
Kopiert
You asked for options screenshot, thought you want selection options that's why gradient is not selected. I do it on mask to reveal the original background - photo was taken on the glass for reflection
Link in Zwischenablage kopieren
Kopiert
I spoke of the Options Bar (Window > Options) but naturally I hoped for screenshots that demonstrated what you actually did and the unwanted result.
Link in Zwischenablage kopieren
Kopiert
Okay I've got an example for you.
This is how it looked before
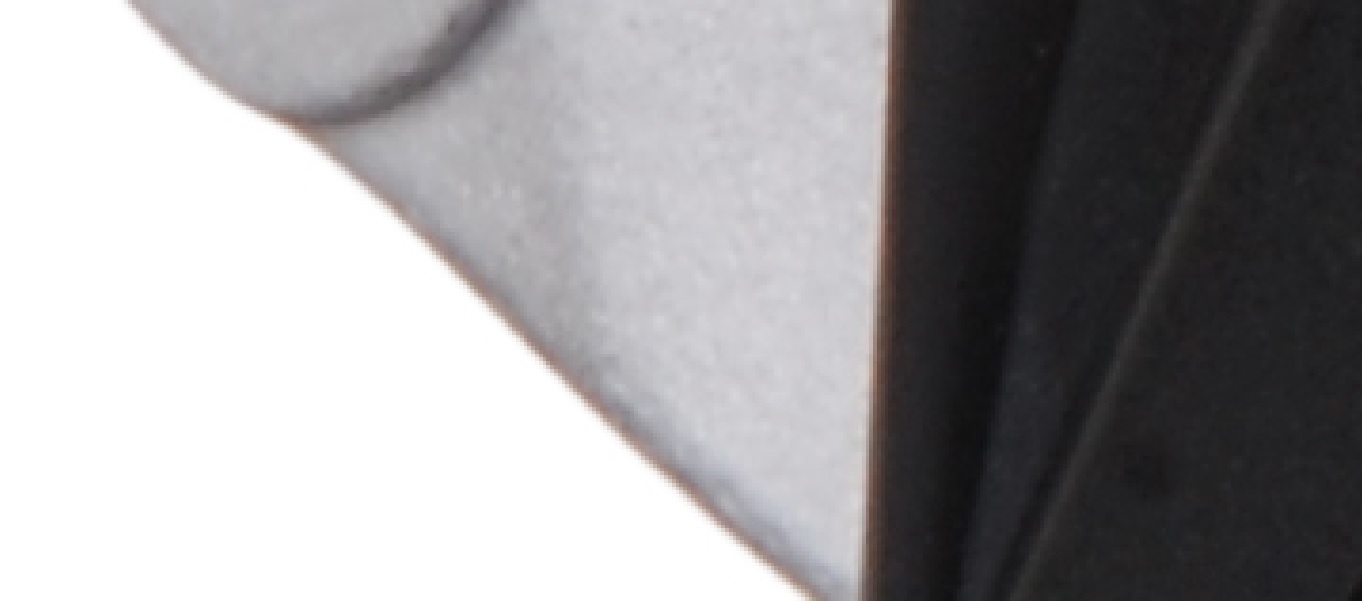
and this is how it looks now

Link in Zwischenablage kopieren
Kopiert
Please post meaningful step-by-step screenshots taken at View > 100% and including all pertinent Panels to illustrate what you are doing.
Link in Zwischenablage kopieren
Kopiert
1. Load picture to Photoshop
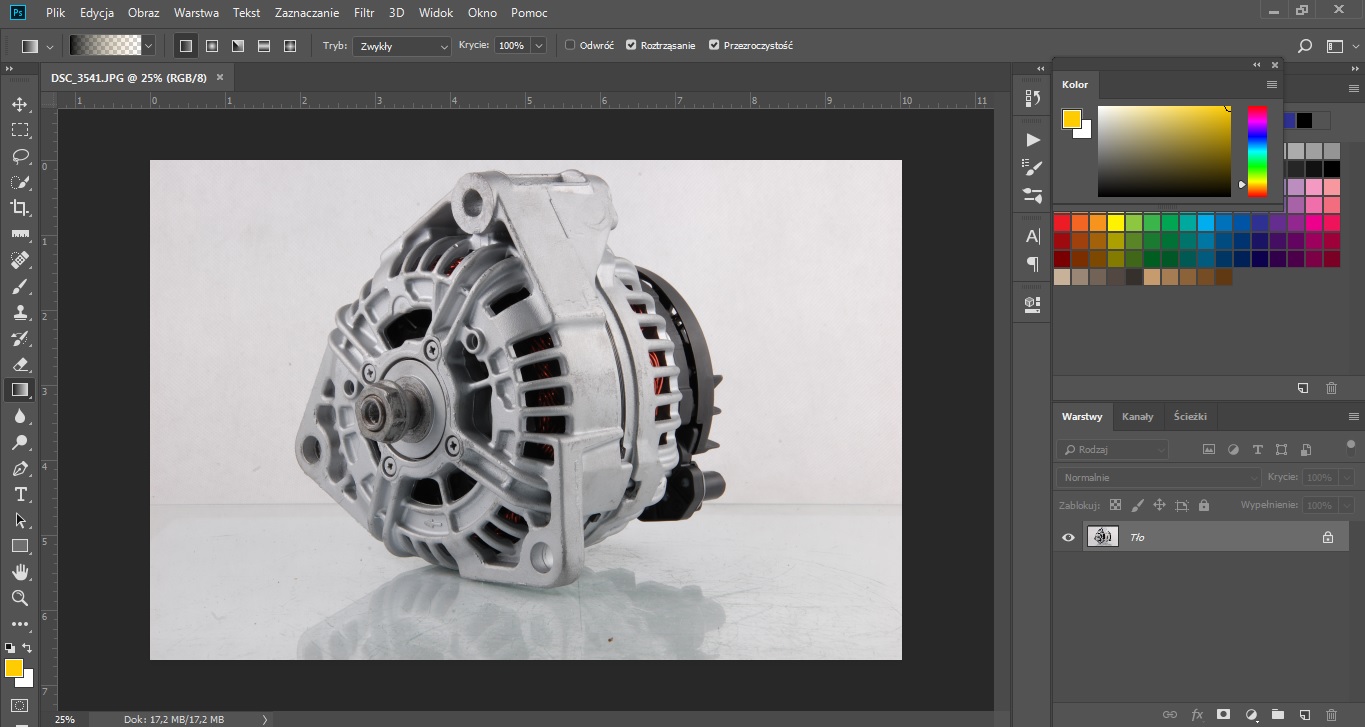
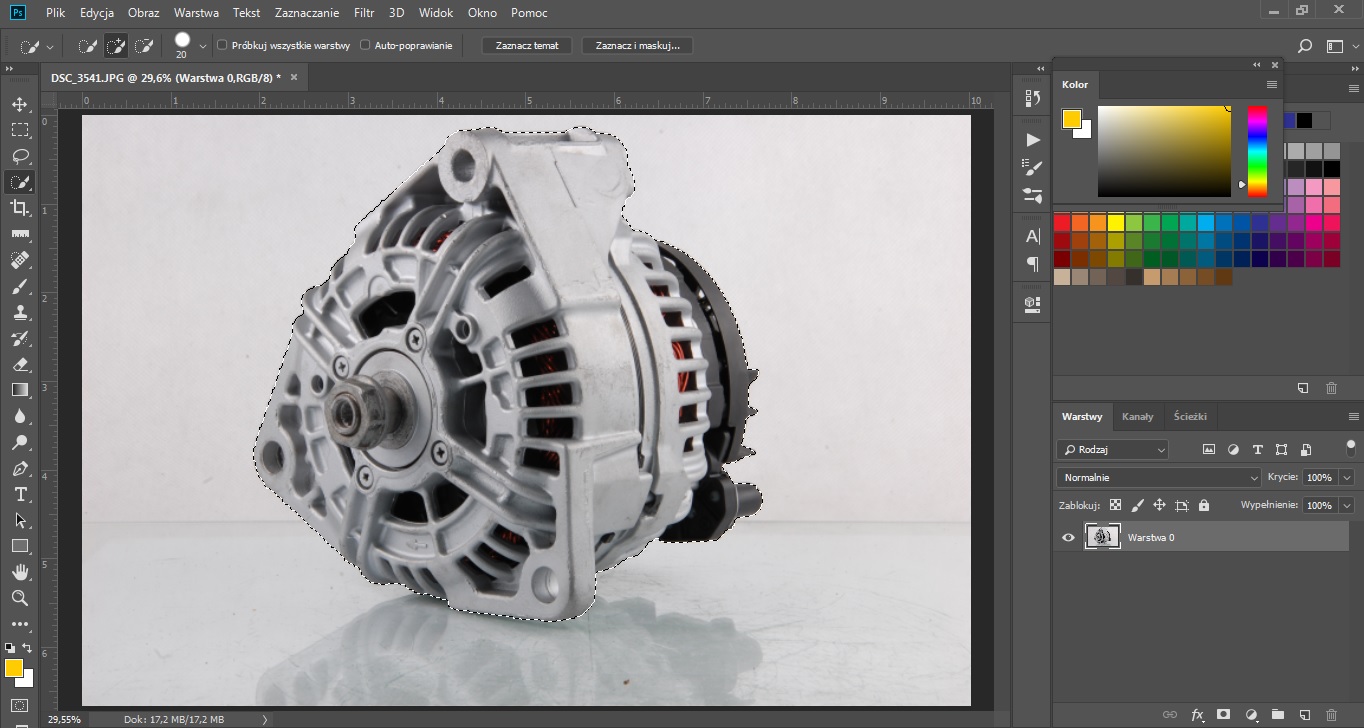
2. Unlock layer and select object with Quick Selection tool
3. Use mask and add white background
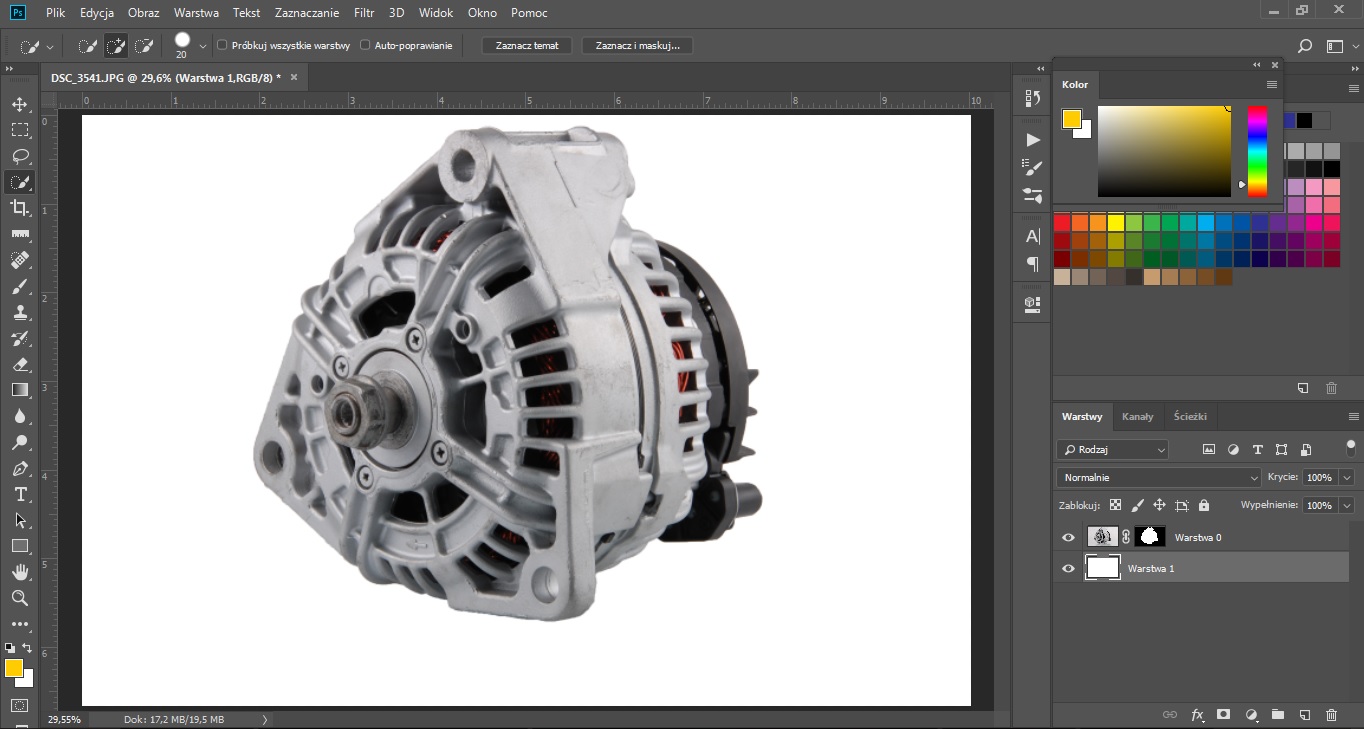
4. Crop image, use Rectangular Selection tool, select layer mask and use gradient to reveal some of the original background
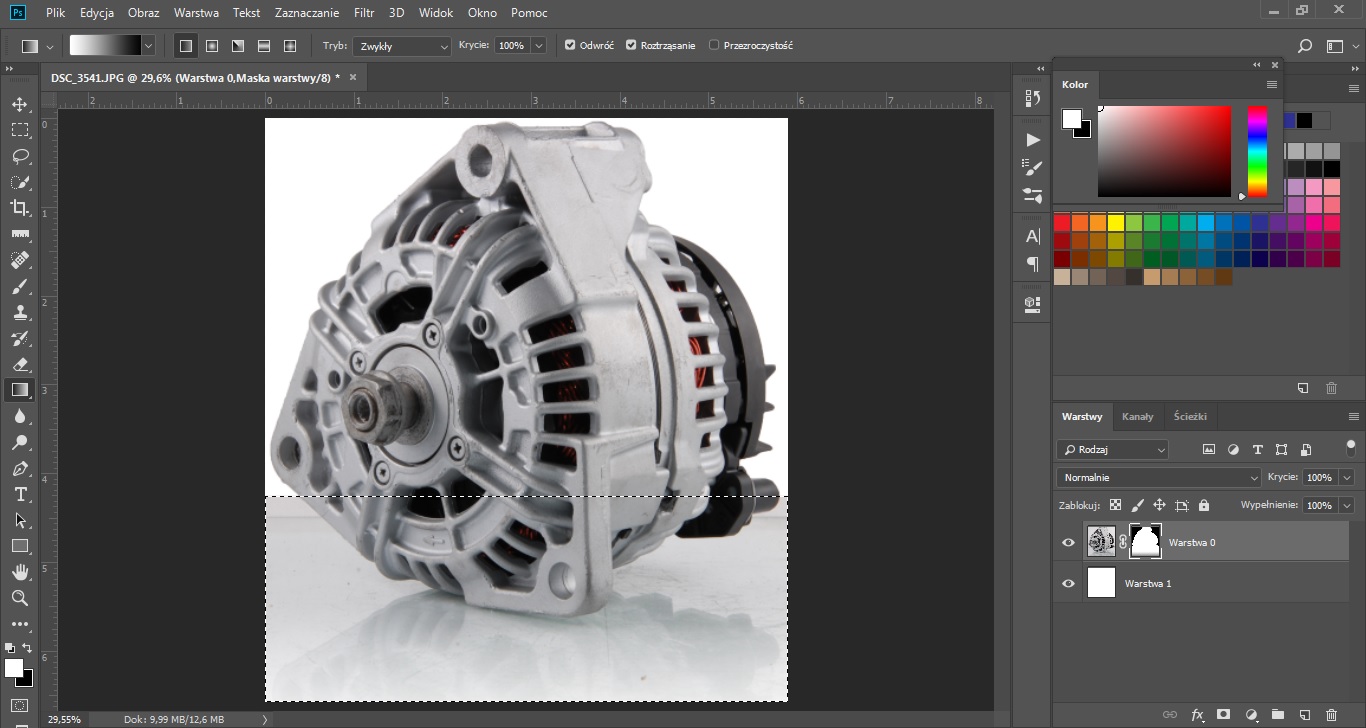
5. Load earlier saved selection of the object. While still being on the mask, remove unnecessary background with gradient.
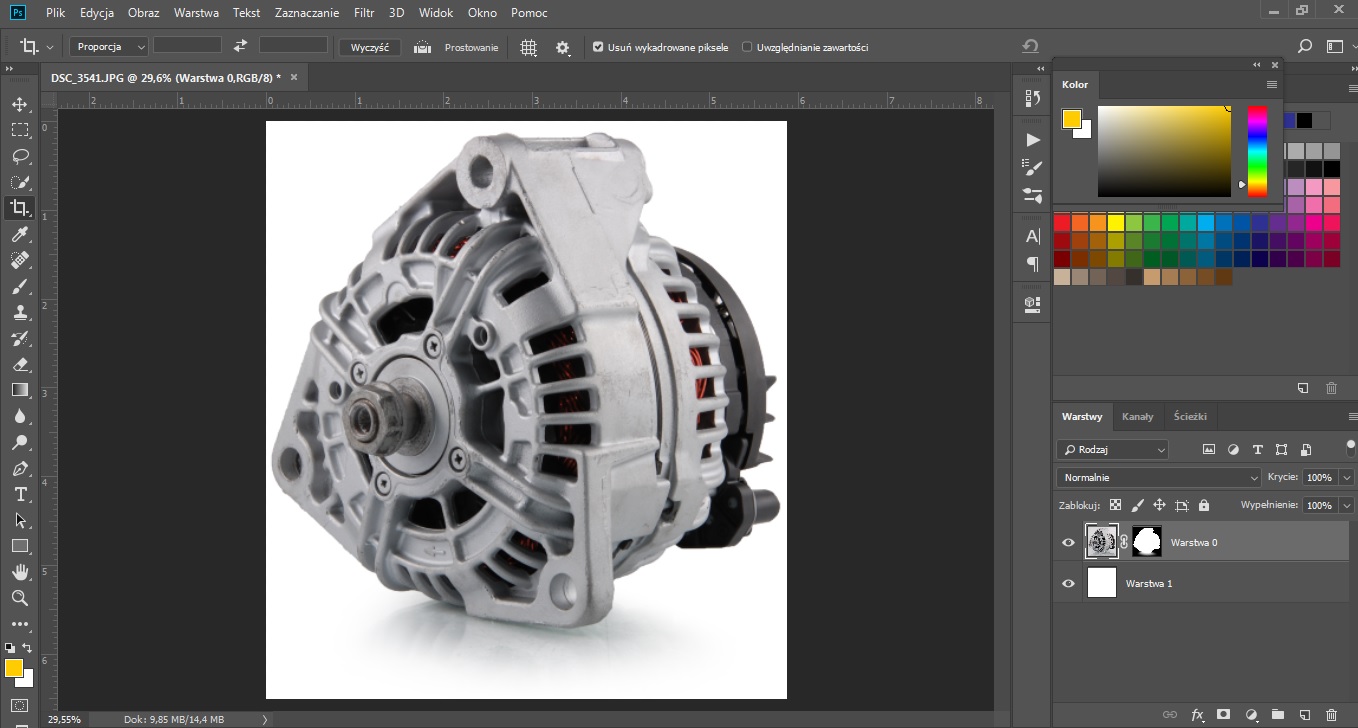
6. Effect
Hope it helps now
Link in Zwischenablage kopieren
Kopiert
Thanks for the screenshots.
In my opinion you employ a bad technique.
By loading the Selection that is identical to the original Layer Mask (or its inverse) and editing the Mask you are effectively superimposing two 8bit images and that can cause noticeable degradation.
I recommend you instead duplicate the image Layer and place the lower instance in a Group, apply Layer Mask to the Group for the gradient and then paint on a wholly new Layer Mask for the Layer in the Group.
This will result in a larger file (twice the pixel Layer, three Layer Masks) but the editiability of the individual Masking components should be useful.
(Actually a Group with a Solid Color Layer, a Gradient Layer and the image Layer Clipping Masked to the Group could provide the same result, but that may not feel as comfortable.)
Link in Zwischenablage kopieren
Kopiert

Link in Zwischenablage kopieren
Kopiert
For the Quick Selection Tool, check Auto-Enhance and that the Brush Hardness is 100% before making the selection and see if that makes a difference.

Link in Zwischenablage kopieren
Kopiert
Thank you guys for valuable tips. I would use pen tool if it was time efficient. In this case I have thousands of photos that needs to be cut this way. I have prepared macros for everything that could have been sped up. I will implement different macro with gradient, solid color and group. Shadow output looks pretty nice.
Once again, thank you very much for your time and tips.

Link in Zwischenablage kopieren
Kopiert
If you need precise selections, use the pen and not quick select. What is happening is that the selection marquee only shows areas that are 50% selected, IIRC.
Try adding a Levels Adjustment layer above your image layer. Drag the Black slider WAY to the right, you'll get a much better view of what areas are what shade of grey or actually 255 white.

Weitere Inspirationen, Events und Ressourcen finden Sie in der neuen Adobe Community
Jetzt ansehen
 AdChoices