Copy link to clipboard
Copied
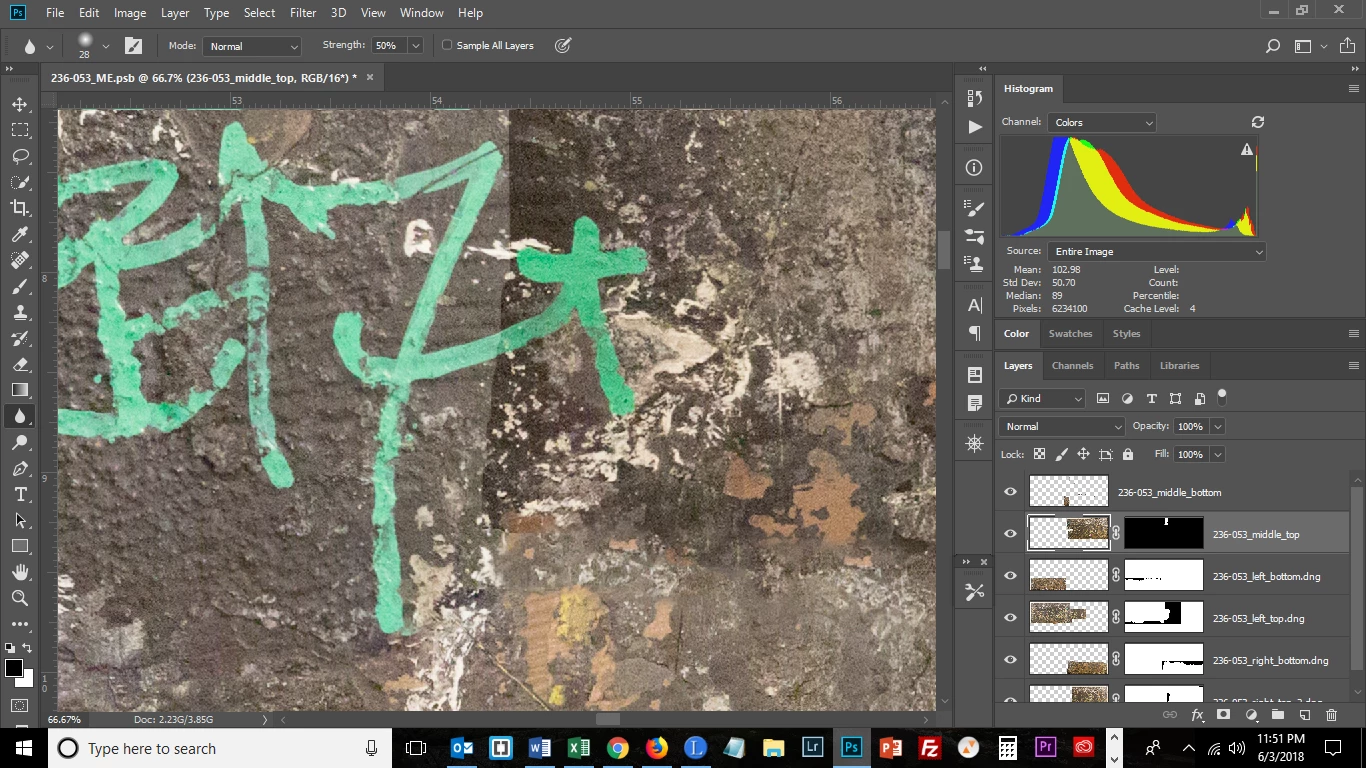
I've recently been introduced to the benefits of working with Smart Objects and watching videos on youtube, but haven't found the answer to this question: per the image below I need to play with the exposure and/or smudge the line down the center of the image where 2 images were tiled together. I can't use the smudge or blur tool here presumably because I need to do so on the intersection of 2 Layers. Therefore I need to (1) merge Layers or (2) create a Smart Object and/or Filter to do this effect or (3) create a Smart Filter and use Camera Raw Filter to darken the exposure on the left side or a combination of the above. So my question is which Layers do I convert to Smart Objects? All Layers or just the ones that would apply to this area of the image? Since I'm kind of not sure of what next steps will be is why I am asking. Thank you.

Copy link to clipboard
Copied
Smart Objects are probably not going to be helpful in this case.
Do you know how to clip layers to each other? In this instance, you'd just be doing it with Adjustment layers, which makes it fairly simple.

The above is one way to fix things, but when joining tiled layers you should always try to have an overlap.
What you do then is to select all the layers, and go Edit > Auto Align Layers
I have faked it with your image, but you can see the bit of the 't'character on the right edge of the left hand layer. I have also faked making that layer lighter again.

This is what happens

You have choices now. (There are always choices with Photoshop)
The easiest way to move forward is to select the layers again, and go Edit > Auto Blend layers with Seamless tones and colors checked. This is what that would do.
It's had a crack at it. Look at the layer masks and see how it has chosen a path blend the two layers.

Much better though to try and fix that left layer before merging, using the Curves Adjustment layer I showed you at the top of the thread.
After getting the tonal value close, add a layer mask to the left layer (Yellow highlight at the bottom of the screen shot) and run a black to white gradient across the intersection to merge the two layers together gently.

I have turned off the other layer in the shot below, to show how the layer mask works.

Shout if you need anything explained.
Copy link to clipboard
Copied
Thanks for your information. However, I am faced with the following problem: Although Photoshop when using the Panorama tool did not create a seamless transition between the 2 Layers (as displayed in the image) it did create a seamless transition on the rest of the 2 Layers (so where the top left Layer meets the bottom left Layer). When I selected the hand icon and dragged down as you directed, it darkened the entire Layer, so that while the section I displayed was corrected now the bottom edge of the top left Layer is now much darker than the top edge of the bottom left Layer. Which brings me to this question: When you said use the hand tool to "choose" the area you want to adjust, what do you mean by that? Is it a selection tool that can selectively delineate a portion within a Layer, not the entire Layer, because that doesn't seem to be the experience I am having. As soon as I click on the hand tool inside the Layer, the only option left to me is to drag up and down to lighten and darken, not to select a part of the Layer, and the lightening/darkening is affecting the entire Layer. Am I doing something wrong? Thanks.
Copy link to clipboard
Copied
Not the hand tool. The little hand icon at the top left of the Curves adjustment layer. I have outlined it with yellow below. What this does is allow you to click and drag on that part of the image you want to affect. The other approach is to just drag the curve in the Properties panel.
The icon I have outlined in green, clips the adjustment layer to lay below it. This has the effect of _only_ working on that layer, and not the rest of the image. I can't see anything in your first screen shot that would have caused that one layer to get dark when you moved it, unless it had a layer mask and the layer mode was set to something like MUltiply. If Photoshop had not put the layer in the right place with its Photomerge tool, then you might not have had enough over lap (you need about 30%)

Copy link to clipboard
Copied
I meant the icon you are referring to - the hand icon not hand tool. I clicked inside the left top Layer near the border where the green writing is and then dragged the point down to darken the area of interest so that it matches in tonality the area to the right of it, but the bottom border of this Layer is now darker than what's below. So you are saying that you can select an area of a Layer - not the entire Layer to darken - but how?

Find more inspiration, events, and resources on the new Adobe Community
Explore Now