

- Home
- Premiere Pro
- Discussions
- Re: Best way to remove or disguise sweat on dark t...
- Re: Best way to remove or disguise sweat on dark t...
Best way to remove or disguise sweat on dark t-shirt?

Copy link to clipboard
Copied
Hi,
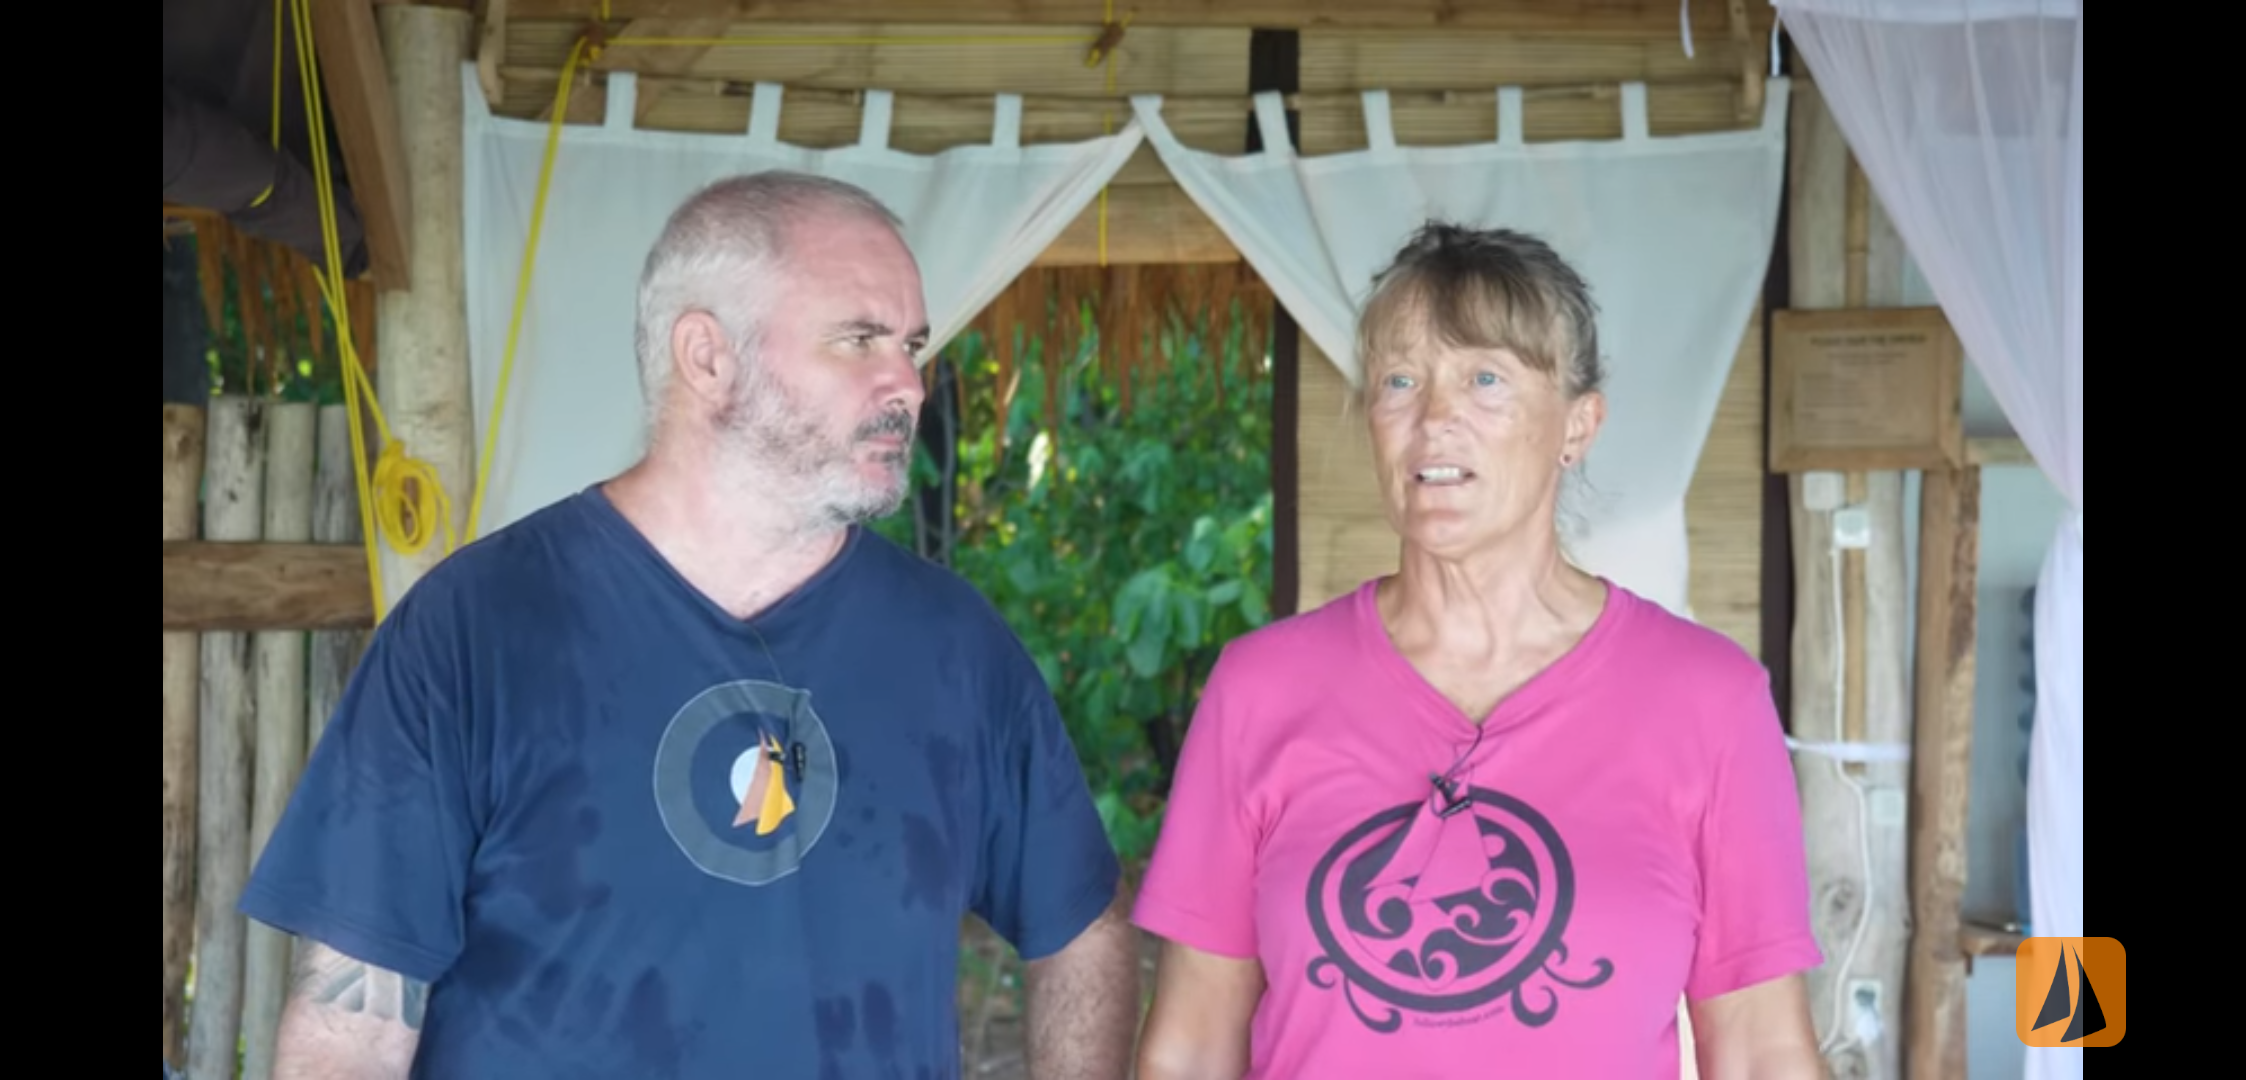
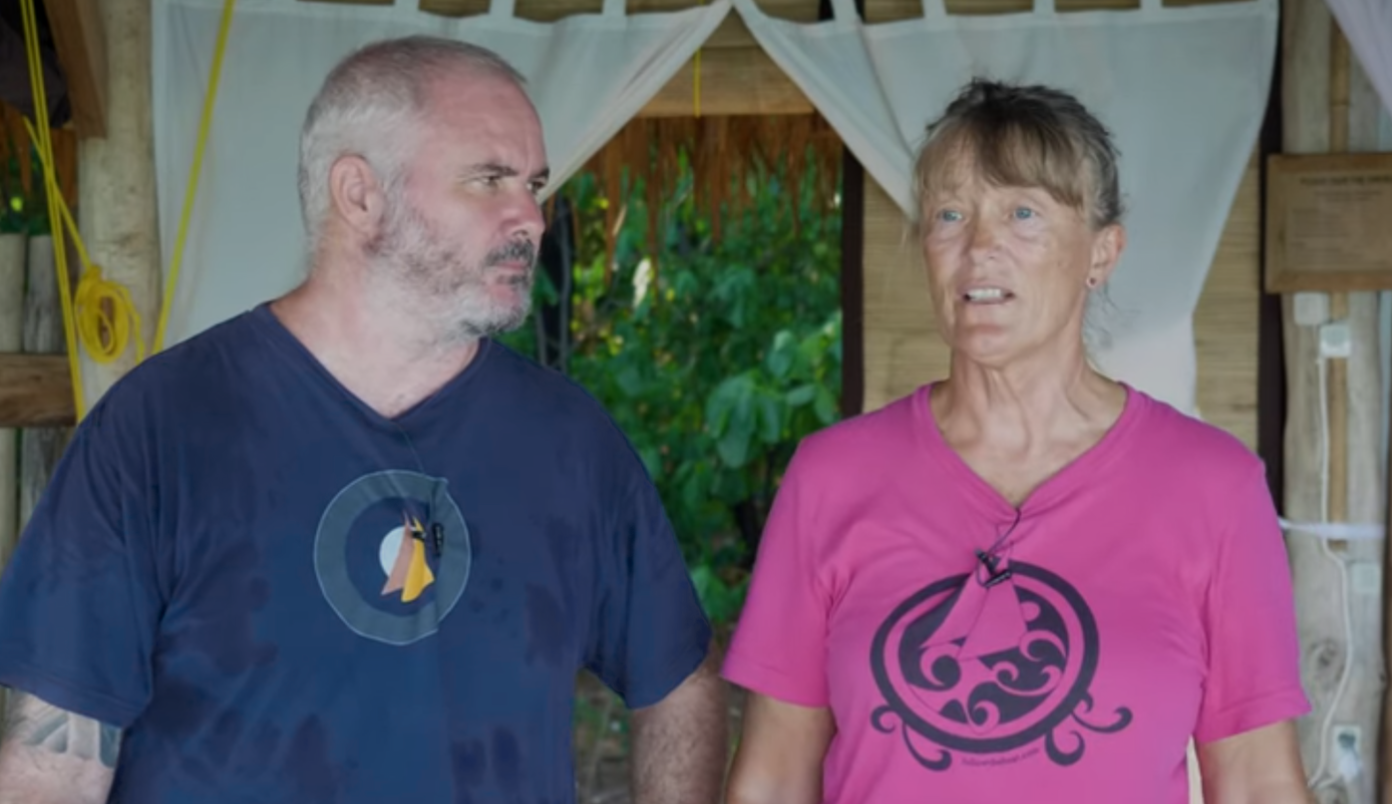
I have a 15 min talking head where the talent is standing square on to the camera, moving occasionally but on the whole relatively still. His navy blue t-shirt has a few sweat spots which get progressively worse throughout the clip (we're in the tropics).
What's the best way to disguise or remove them? I was thinking perhaps isolating the t-shirt and making the blue darker so the sweat patches are less obvious, but maybe there's another way or trick of the trade I don't know about. Any effects I should be considering?
Thanks in advance.


 13
Replies
13
13
Replies
13

Copy link to clipboard
Copied
In Resolve, I would qualify the shirt and play around a bit with Luma, Sat and Tint.

Copy link to clipboard
Copied
maybe try curves hue v saturation … select the darker blue (sweat ) and drag the curve down a little.. and it should lighten it up to get close to matching rest of shirt ...

Copy link to clipboard
Copied
multiply mode is good at merging colors together. try that in combination with curves
Copy link to clipboard
Copied
Hi Chris,
Wouldn't that require me to mask the t-shirt and then track it? Because the shirt changes shape the mask would need to be Interrogated on almost every frame. The clip is 15 minutes long.
Copy link to clipboard
Copied
well, forget about hue v sat ... that didn't work for me.
Jim's method is what I used … and it's getting there, but would take a bit of back and forth between various tools ...
Didn't have time to keep messing around with it...but it can be done nicely...


Copy link to clipboard
Copied
The easiest way would be the Lumetri Curves tab, using Hue vs. Luma.
Select the darker area, and lighten them some.
Might take additional layers which is easy, just go to the drop down at top of Lumetri, click and add another instance/layer.
Neil
Copy link to clipboard
Copied
went back into it... ( downloaded original image again ).. and using a combination of stuff ( curve hue v luma, qualifier (shrink grow etc. to narrow down sweat areas) and who knows what else I did... cause I was watching THE BLOB on TV while on laptop...and having a beer...
But came up with this... would add yet another layer ( or node ) and do a final thing for skin tone and the overall blue shirt and those curtains in back...

Thanks for this post, cause it forced me to learn stuff too !
Copy link to clipboard
Copied
whoops.. I just enlarged the image and see the sweat areas are a bit overdone with adjustment... but it is getting real close...
Copy link to clipboard
Copied
You will be happy to hear the THE BLOB got frozen into blob crystals that got transported to the North Pole, so it will never be a danger to humans again.
It occurred to me that there are SO MANY professional smart people here in the forum, who have very pretty badges ( like ACP and STAFF, and VIP or whatever ) that it is very likely someone of them ( in lieu of getting help from other sources ) will bite the bullet and actually download your image, stick it into a timeline, and USE what tools are available in the latest CC program... to not only answer your question but DEMONSTRATE a single frame OUTPUT... that shows you what can be done with this great program !!!!!
They are so smart and super FAST ( especially those who use control panels they love so much ), so it shouldn't take much time for them to show you exactly what you can do.
Copy link to clipboard
Copied
Hey Rodney, thanks for taking the time to look into this. Unfortunately I have yet to teach myself Resolve so currently your solution would take me a week to figure out. Yes, I know I should learn it but I'm struggling for time, especially as all my editing is currently done in Pr.
I do appreciate your efforts though. You've given me a kick up the backside to put some time aside to learn Davinci.
Copy link to clipboard
Copied
Hi Neil,
Yes, I ended up going down this route. What I found was that I could drag the middle point of the three points on Hue vs Luma right down to the bottom and change the color of the shirt to a much deeper blue. The only problem with that is that the grey circle on the shirt now 'flashes'.
Copy link to clipboard
Copied
Making a selection with the eyedropper then adjusting the side points so it only affects the part you want, and by having the curve near flatten as it gets back to the centerline "feathers" the edge.
For adjusting things like this, to avoid artifacts, it's best to do it in multiple small adjustments rather than all in one. Even across multiple tools.
Which is why I suggested multiple Lumetri instances. Part of the work in each. Most done with the Curves and maybe one pass with an HSL key.
Neil
Copy link to clipboard
Copied
Sorry, I didn't mean to give impression I'm promoting Resolve... I just don't have CC stuff... Instead of node you'd use probably an adjustment layer, and Lumetri controls... is basically the same thing but different UI and so on...
I'm on fixed income and can't afford to pay for a subscription and don't like having someone with hand in my pocket ( nobody takes money out of my checking account automatically for ANYTHING. It's just the way I am.
Good luck ! I think Adobe stuff is great !

Find more inspiration, events, and resources on the new Adobe Community
Explore Now
 AdChoices