Participating Frequently
June 6, 2018
Question

Footage turns washed out when Lumetri is applied.

  • June 6, 2018
  • 12 replies
  • 10969 views

I'm editing in Premiere Pro CC 2018 and for some reason, my footage becomes washed out as soon as I adjust curves in Lumetri Color.

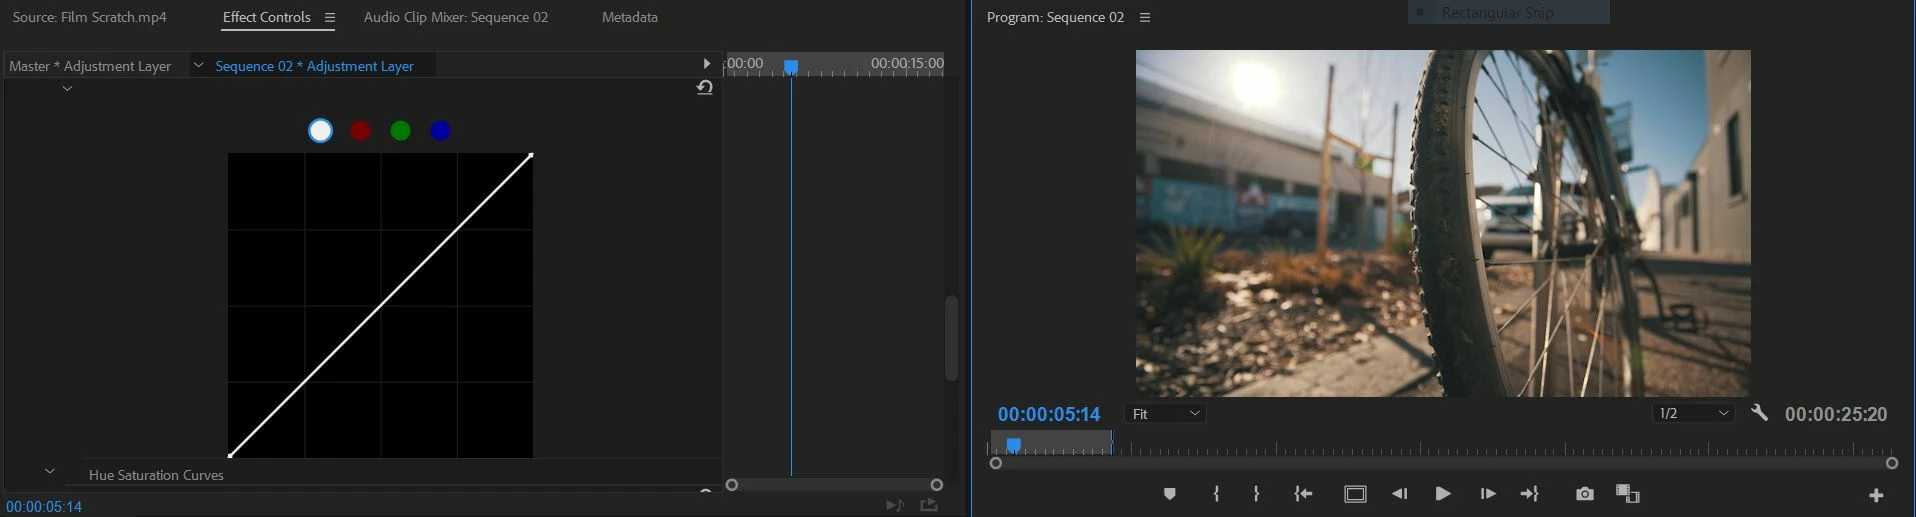
BEFORE I ADJUST ANYTHING:

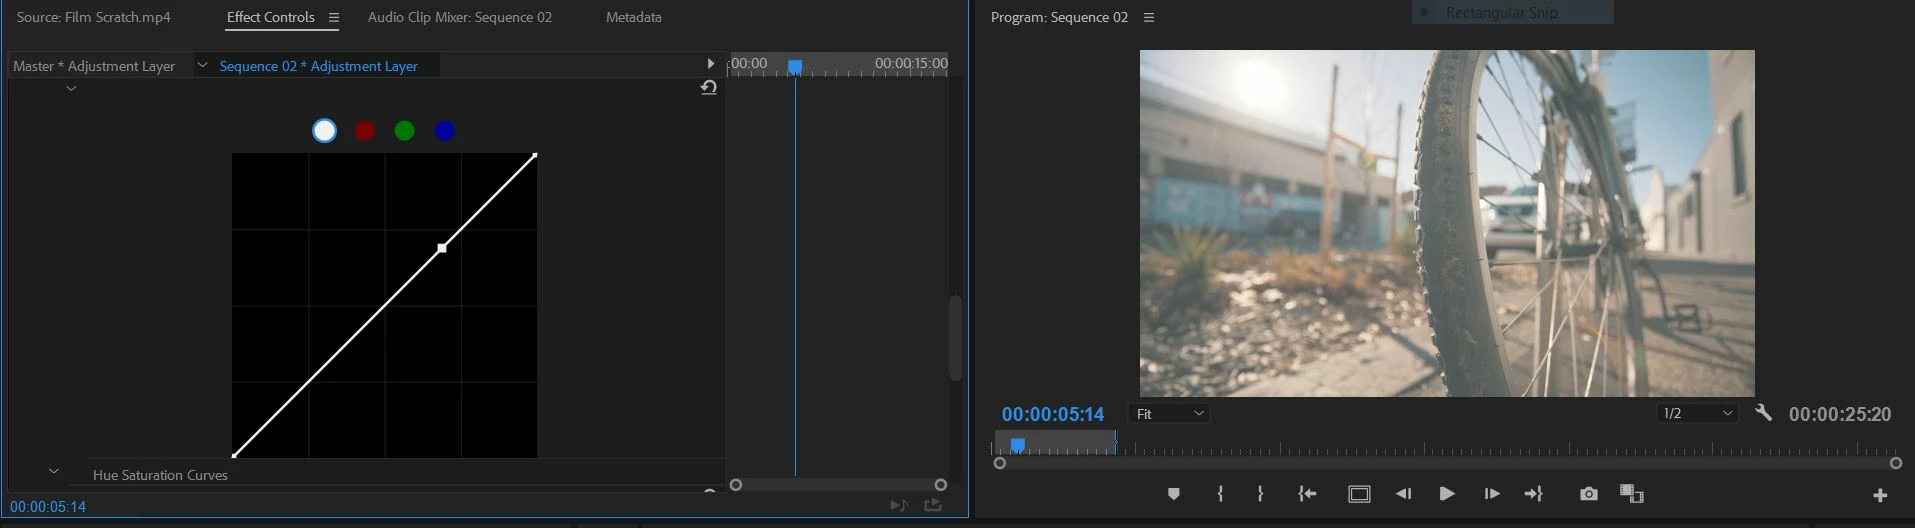
AFTER ONE CLICK ON THE CURVES:

Would appreciate any help available thanks!

12 replies

Participant
March 14, 2025

Still happening in 2025 sadly... 

New project on a freshly installed v25 on a formated computer, S25 Ultra 4k Footage in timeline with Lumetri Color applied to the source clip and a few adjustments on the Basic tab and a LUT (one that came with PPro) applied on the Creative tab with 48% intensity and a bit of Vibrance too.
After this any other change I try to make on the Curves, Wheels, HSL or Vignette tab washes out the image... soo frustrating. 

R Neil Haugen
Legend
March 14, 2025

What are your color management settings? Screengrabs of your entire Lumetri Settings tab might show something that needs changing.

Everyone's mileage always varies ...
Participant
March 18, 2025

I expecto that a "Pro" software would just work... import the video, edit, use lumetri and thats it... 

Participant
August 12, 2024

Still a problem in 2024. Only happens with one video in the timeline, all others are fine. This is insane.

R Neil Haugen
Legend
August 12, 2024

That would typically indicate an issue with that clip's color management. So ... post the clip's tech specs, including what created it, and what your entire color management settings are set to on the Lumetri panel's SETTINGS tab  the one named Settings.


Twirl down all sections, it will probably take two screengrabs, and drag/drop the shots of the Settings tab directly onto your text reply box.


In years of working at this, teaching and consulting, I've only ever had like four or five clips that couldn't be set to work correctly in Premiere if the format/codec was supported. Transcoding got them working though.

Everyone's mileage always varies ...
R Neil Haugen
Legend
February 28, 2023

Ahh ... that may be your problem right there. Users should never ever park LUTs in with the ones that come with Pr.


Why? That folder is accessed by relative location in alpha-numeric sorting, not by LUT name. As in, "5th LUT down the list".


And further, the three apps ... Pr, Ae, and MediaEncoder, will go to their own internal file structure for that 5th LUT down. So add them in Pr, and neither Ae nor Me will 'see' them as they do not exist in the other apps folders.


Adobe provides a chart in the user documentation for two different locations that Premiere will scan on-launch, and will include in the proper drop-down lists.


I prefer the Program Files {Package files} / Adobe/ COMMON/LUTs location myself.


If it doesn't have them when you go there, add folders for:

  • Input (Interpret Footage Input LUT dropdown list)
  • Technical (Lumetri Basic tab Input LUT dropdown list)
  • Creative (Lumetri Creative tab Look dropdown list)


After parking LUTs in those locations, restart Premiere and they will appear in the appropriate dropdown list. AND ... they will stay with the presets whether in Pr, Ae, or MediaEncoder.


Neil

Everyone's mileage always varies ...
Participating Frequently
February 28, 2023

Thanks Neil! For some reason this is the only place I'm seeing an option to put LUTs. I can't find the COMMON/LUTs folder you're describing anywhere on my computer. Are you saying I should put these custom, non-native LUTs in the technical folder, and apply them in the basic corrections tab of Lumetri, instead of the creative tab? 


If so, should I delete them from the Creative folder and keep that exclusive for native Premiere LUTs? I have certainly noticed the alpha-numeric sorting, considering every time I add a new LUT into my creative folder, Premiere will change my previosuly applied LUT to the prior one in the dropdown list, and I have to re-apply the new LUT I just imported into Pr. 


Thanks for your help! I only put my LUT's here because that's what YouTube tutorials tell me to do. LOL! 

Participating Frequently
February 28, 2023

Still dealing with this issue in 2023. It's particularly prevelant when I'm using Lumetri Color Presets that incorporate LUTs. Attempting to change the LUT in any way after the preset is applied results in this instant wash-out footage. Seperating the LUT from other corrections using an adjustment layer seems to be the quickest fix, but it is rather frustrating that I'm going on 4+ years of this bug. My Premiere is up to date (23.2.0), and this problem has happened on multiple kinds of footage, in different color spaces, new and old projects, mutiple Premiere updates, etc. It's an issue that's baked into Premiere's preset structure and unrelated to the kind of footage I use or the way I build my timelines. Which is frustrating because I use presets a lot! I'm really not sure when this will get fixed unfortunately 

R Neil Haugen
Legend
February 28, 2023

I test a lot of LUTs for various reasons, and use a range of Lumetri presets. I've not had this happen once. So I'm trying to figure out what is going on in your system.


What LUTs are these, where did you get them? Where do you park them on your computer?


Which tab of Lumetri are you using to apply them?


As this is happening on even new projects, what media is involved? And any other effects used?


Neil

Everyone's mileage always varies ...
Participating Frequently
February 28, 2023

These are third party LUTs I've purchased from a number of different video editors online. As a mac user I keep them under Lumetri>Luts>Creative. I apply them using the Creative tab. This has been happening for years on multiple computers, including older projects brought forward, and brand new projects (even as of today). Happened on old and new versions of Premiere 

Participant
July 11, 2022

Over 4 years later and this problem still exists! 


Was a solution found? It is driving me crazy!

R Neil Haugen
Legend
July 11, 2022

This isn't a common thing, btw ... so we need a bit of data to figure out what's going on in your system.


What's your media ... what camera, what format/codec? Is it SDR/Rec.709, or HDR, such as iPhone's HLG?


Is it only when you apply a curves effect in Lumetri, as the original post said? Or ... exactly when and how does it lose quality, and in what way?


Neil

Everyone's mileage always varies ...
Known Participant
July 29, 2022

I'm having this issue as well. Never seen it before. It still occurs with the renderer set to software only.


Shot on Canon C200 (FHD, C-Log 3, ProRes 422 10-bit) and EOS R (4K, C-Log, ProRes 422 8-bit)

All recorded externally on Ninja V

Original media - no proxies


I have a basic LUT applied to convert the footage to Rec709. The error occurs when I have both a Creative LUT and Curves applied. It happens with any LUT - built-in or purchased - and any amount of curves - even a minor adjustment. If I disable either one, the issue goes away, and the footage looks fine. It seems to be lifting the shadows, and shifting the footage away from magenta. Nothing clips, but it goes from a range of ~10-240 IRE to ~26-240. Please see attached screenshots.


Any help would be greatly appreciated.


Premiere Pro 22.5.0 (build 62)

Windows 11 Home 64-Bit

AMD Ryzen 5 6300

32GB DDR4 RAM

NVIDIA GeForce RTX 2080 Ti

R Neil Haugen
Legend
May 17, 2021

This is an issue that seems very dependent on "local" workflow and processes. I've never had this nor been able to replicate it.


What has been common is that it's either a LUT being applied or there's a video driver issue. The later is certainly easy to check ... go to the project settings dialog, set Mercury Acceleration to software only. If it behaves properly, you've got an issue with the video driver.


If that doesn't fix it, it's typically a LUT application issue. So ... are you using any LUTs, if so, ones bilt into the app or ones you've created or acquired?


If created/acquired, where are you storing and accessing them on your computer?


Neil

Everyone's mileage always varies ...
Participant
May 18, 2021
im storing everything (footage, My custom luts, And the project) on my
external SSD. Its doing it with every project now and just on this specific
computer. I opened the project on my laptop and everything works fine. Both
computers are Macs.

I uninstalled and reinstalled premiere and it didn't fix the issue. and i
did check and it's not the Video driver.

--
Adam Lora
Film & Photography
407.446.0181
www.adamlora.com
R Neil Haugen
Legend
May 18, 2021

What is your original media? What is your proxies, and were they made elsewhere or by PrPro?


Neil

Everyone's mileage always varies ...
Participant
May 17, 2021

Still having this same problem as well. 


Ive noticed when I toggle proxies on/off, my proxy footage is correct and when I turn off proxies its washed out again.


Any developments on this issue?

93filmsandmedia
Participating Frequently
March 10, 2021

This is still F🤬ng happening to me and even after all their amazing updates😤

jarredp8725002
Participant
April 30, 2020

SOLVED

i've been having a similar issue also! Whenever i apply the creative LUTS from Lumetri, the entire video becomes bleached. 

what worked for me was I would "nest" the clip (control + click, select nest), and bleaching would stop when i applied LUTS from Lumetri.


Hope this helps!

Participant
December 22, 2018

I've been having the same problem for quite some time now and I just updated Premiere Pro and I'm still having the same problem.  A work around that I've been doing is to apply the LUT in the Creative tab on an Adjustment Layer and only adjust the intensity of the LUT, than create a separate Adjustment Layer above that and apply your creative, curves, hsl, color edit, etc. to that adjustment layer.

kylem76464035
Participant
April 28, 2020

Same issue in 2020 it's sad. Premier is so buggy after all these years. You have to reset the program to loose the washed out look.