That's a good workflow, very nice!
The Canon controls are via what Adobe calls the "Master Clip" process, and any changes to a Master Clip tab will be applied to anything from that clip anywhere in the project. So if you have say C00142.XXX clip, and you make a change to the Canon settings in the Master clip tab on one sequence, those changes will apply to every use of any 'cut' from that clip on any sequence in that project.
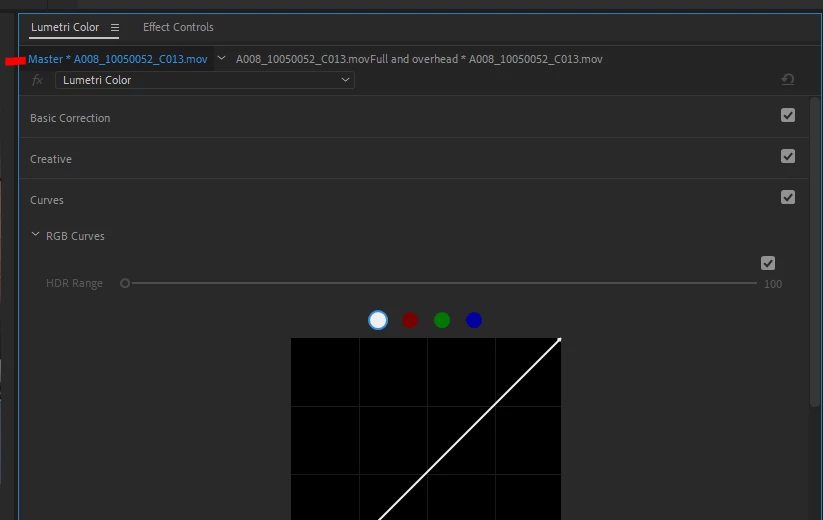
The following image shows the Master Tab highlighted in blue ... and you can access that tab in either the Effects Control Panel (ECP) or the Lumetri panel as below.
So ... "Master Clip" setting changes are applied to the clip and stored in the project panel metadata for that specific clip.
Using the "standard" corrections for clips, the tab that is not highligted in the above, means you are applylying the correction only to that instance of that cut of that clip on that sequence. And the corrections are stored in the metadata for that clip/cut on that sequence. Which is why if you delete the sequence, all the changes you have done to clips on that sequence "disappear".
You can apply Lumetri effect changes to either the Master Clip tab or the sequence clip tab. In the Master Clip tab, like your Canon controls, they will be applied to all uses of any part of that clip anywhere it is used in the project.
While Lumetri applied via the regular clip tab will again only be applied to that specific instance (cut) of that clip on that sequence.
Neil
