

Render messes my color correction of solar ecplipse

Copy link to clipboard
Copied
Hi,
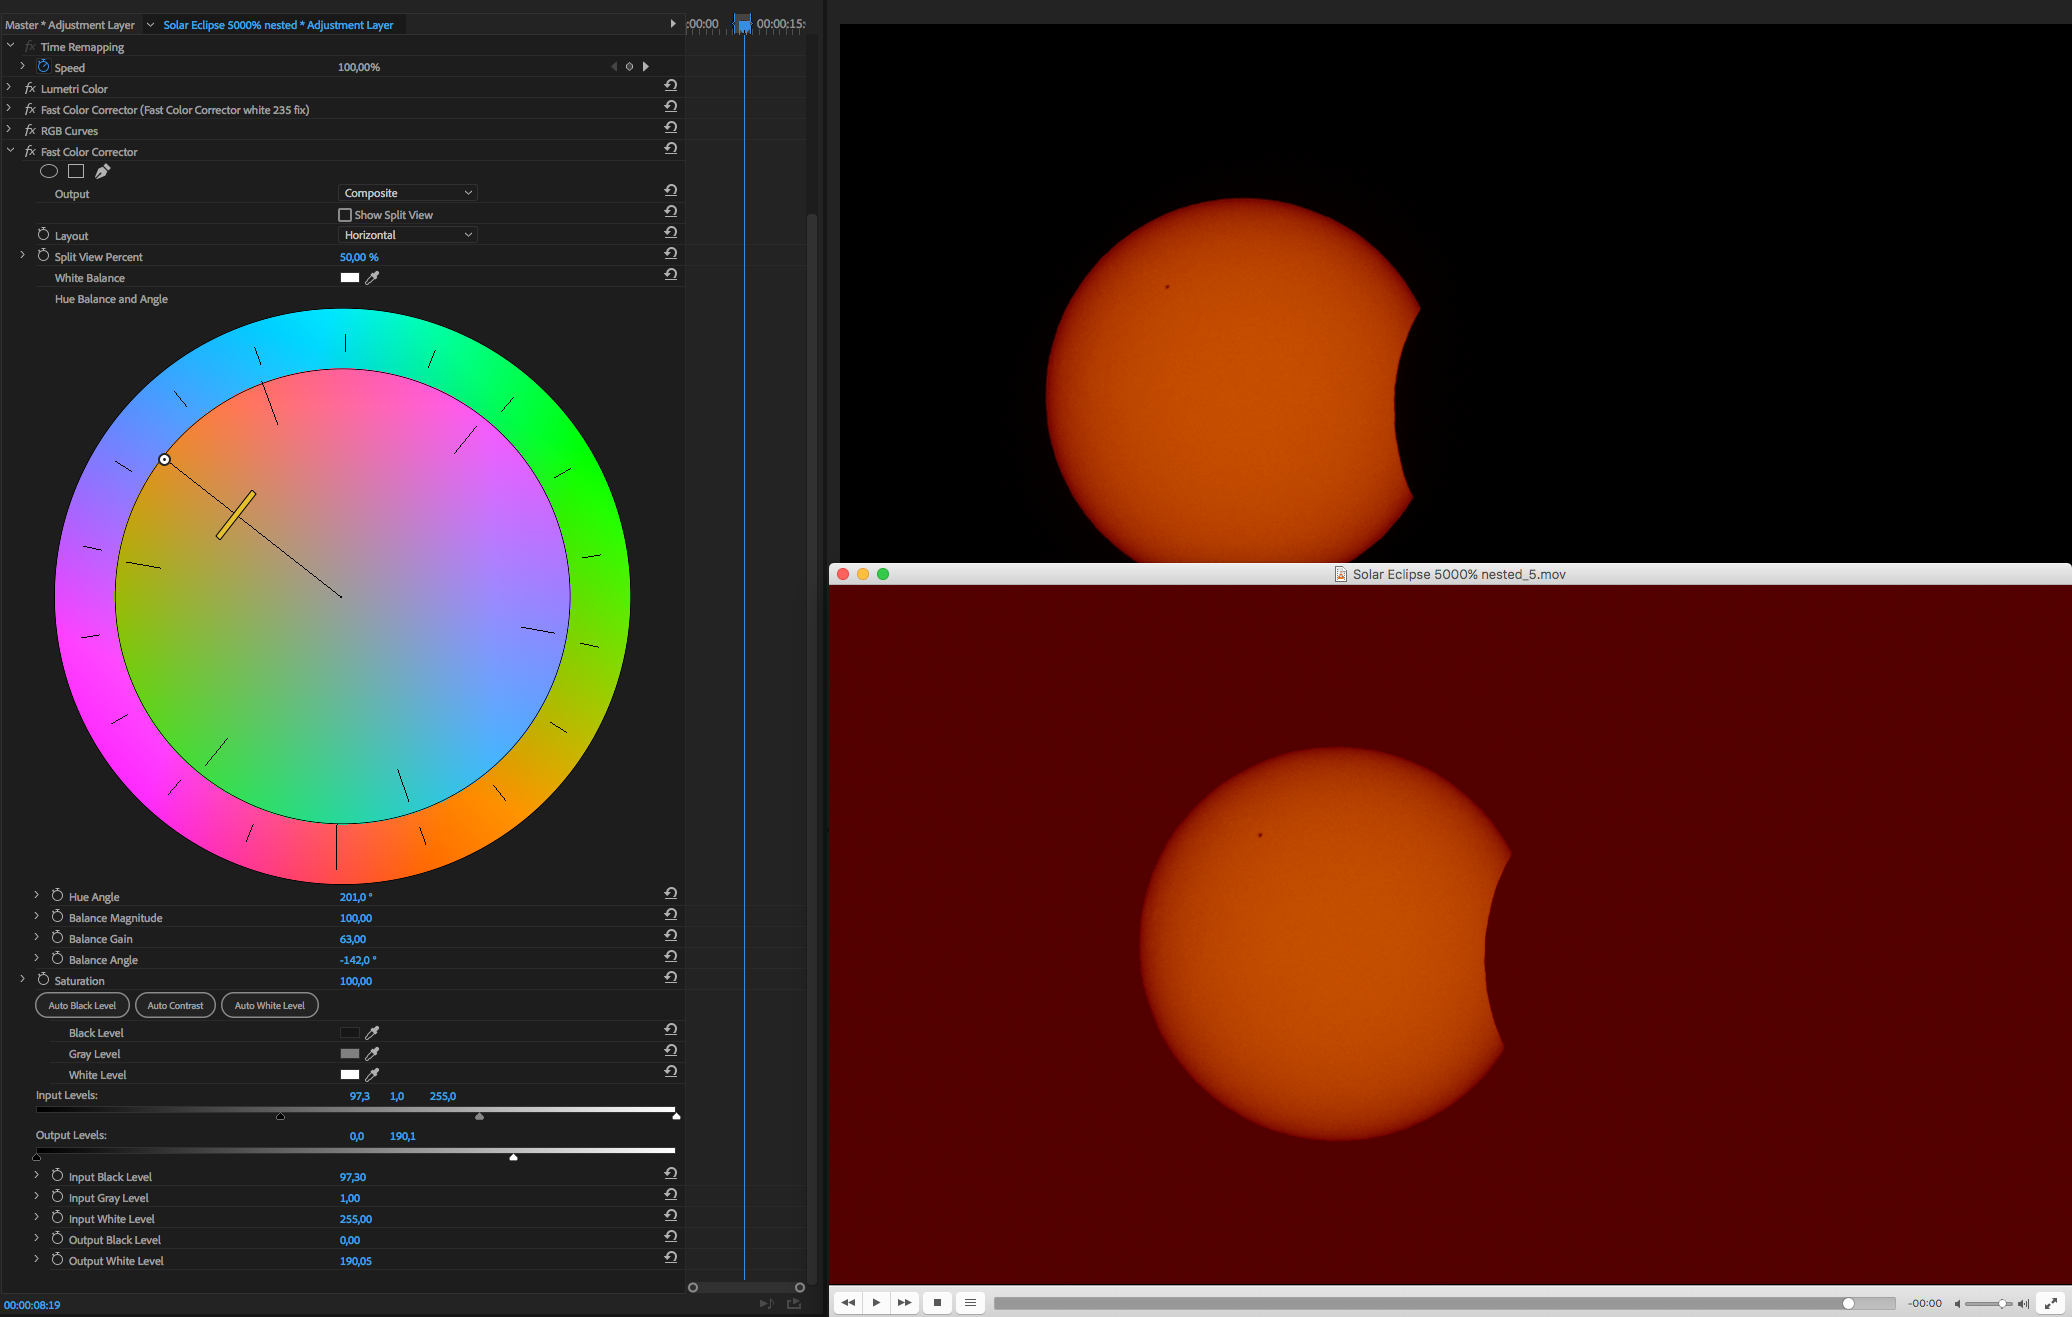
As you can see in the picture attached when I try to render it out the fast color corrector completely messes the render. I've created a strong color correction for a solar eclipse (original clip is b&w of course). I would gladly recreate this in Lumetri but I'm not getting anywhere near the vibrant orange color I'm getting with fast color corrector.
So if someone can point out what's wrong with the settings to get it to render correctly or how to do this with other non legacy tools I'd appreaciate it!
PS. When I export a frame it looks as it should.


 11
Replies
11
11
Replies
11

Copy link to clipboard
Copied
It looks like you're viewing that export from a Quicktime player on an Apple computer.
You've got two things jumping in here ... you may have a P3 monitor, which has a very different and wider gamut/space than the Rec709/sRGB that PrPro uses for b-cast standards. So often things have less saturation and contrast. Exacerbated by viewing the export in Quicktime player, which isn't just non-color managed, but plain color stupid.
If you import the export back into PrPro, what's it look like?
Neil
Copy link to clipboard
Copied
It's VLC player I'm viewing it on. I have an older iMac (no P3 monitor). If I import it back to Premiere it looks wrong. Same red blacks. 
Copy link to clipboard
Copied
Huh ... that's ... odd ... if it re-imports incorrectly, well .. you're right, it didn't export correctly.
I've tried the old Fast Color recently and it was still functioning fine on my pc.
Was this a direct export from PrPro or queued to MediaEncoder by any chance?
Neil
Copy link to clipboard
Copied
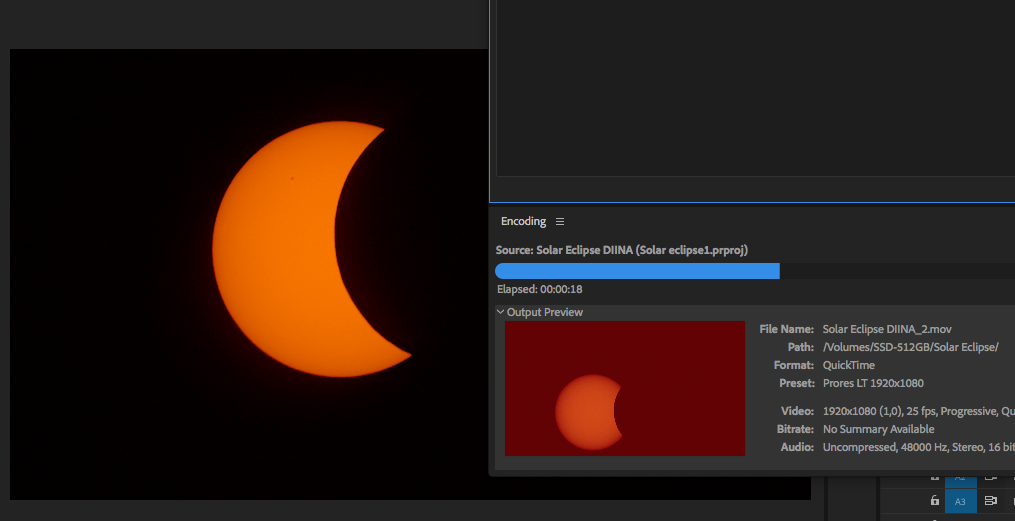
It was a direct export. But it renders it wrong from AME as well. It actually shows it in the preview window...
But what I did now was export it as Quicktime, import back to PP and apply a very strong curve to get rid of the red cast. Looks pretty good.
I guess I won't be filing a bug report on this one though being a legacy app.  But still if anyone knows how I could recreate this look with Lumetri or current tools I'd appreaciate it!
Sami
Copy link to clipboard
Copied
If you could link a drop-box or otherwise get me a couple few frames, I could give it a shot ...
Neil

Copy link to clipboard
Copied
I'd be interested in seeing that too ( the original black and white footage (obviously)).
I'm not sure I would call this 'color correction' or adjustments ( grading ). More like a matter of taking cool footage and giving it some color only for the sun. Probably differential and masking type stuff.
Maybe next time some fill can be added to the moon with a GIANT HMI LAMP !
Copy link to clipboard
Copied
Oh well, I wish I'd found this sooner!
https://photographingspace.com/colorize-solar-images/
That was actually so easy I'm embarrassed.  I've now got the look I was after with simple Lumetri curves adjustments and the file renders fine! I guess what one needs is to come here to ask for help and then realise how to actually google stuff.
Copy link to clipboard
Copied
Glad to see you got the article for some ideas ... I spent a couple minutes in Lumetri ... I don't normally use the "blacks" in the Basic tab, as it's a weird action, sort of like a tail hinged at 20 on the left hand scale. But as I wanted blacks so far "up", I dropped Basic tab blacks a chunk.
Then went to Color Wheels tab, and as shown ... pulled the Shadows luma slider all the way down, pushed the shadows/mid/highs color well up into the 'right' orange hues, and pushed the mid/highs Luma sliders up some also. Causing the Vectorscope YUV to show saturation way outta bounds, so back to basic tab to pull saturation back within legal bounds.
Took about a minute. Tops.
Neil

Copy link to clipboard
Copied
Looks great, thank you!
Copy link to clipboard
Copied
I tend to default to doing much work in the Basic, Creative tab and Wheels tabs on account of having both a Tangent Ripple and a full Elements control panel available. I have the full sliders of the Basic tab mapped to my three rings & balls for both Ripple & Elements, and the Creative tab's shadow/highlight tint also mapped to ring/balls. Naturally the Color Wheels are mapped there.
Which makes it very fast to work indeed. Typically I'll go to the Creative tab, use the shadows/highlights tint ball to make some place in mid-shadows across all three colors in the RGB Parade line up, then another feature in the highlights ball. Thus having a quick 'neutral' color in most cases.
Then run Sat to 0, then ... depending ... can go either to the Color Wheels directly or to Basic tab for tonal work, then back to Creative to up Sat to appropriate levels against Vibrance.
Past that, often I'll make some correction/s in the Hues ring in the Curves tab or go to the HSL panel for some corrections or do both.
And ... seeing the preview of the next release they showed at IBC last weekend, I'm looking forward to getting those several new Hue-vs curves panels. Much of the work where I need to use HSL (and especially use multiple HSL panels) for now can be done by hitting those types of controls. That will be a huge step forward.
Neil

Copy link to clipboard
Copied
You must have one of two viewing environments set up.
1. A dedicated I/O card (AJA Kona, Blackmagic Intensity, etc.) to a calibrated monitor.
2. An export from Premiere Pro played from hardware to a calibrated monitor.
You need to get the software, display driver and even the OS out of the signal chain. How it looks on the calibrated monitor is all that matters.


 AdChoices