Inspiring
December 18, 2023
Answered

Unable to break out nested layers when using nest as source

  • December 18, 2023
  • 44 replies
  • 5216 views

Today has been a day I'd rather forget in Premiere Pro 4.1.0. I'll just report this persistent bug here which is killing my normal workflow but t's not the only one to hit me today.


1. I often shoot in 4K and create a multicam source with the source reframed in 1080P as below

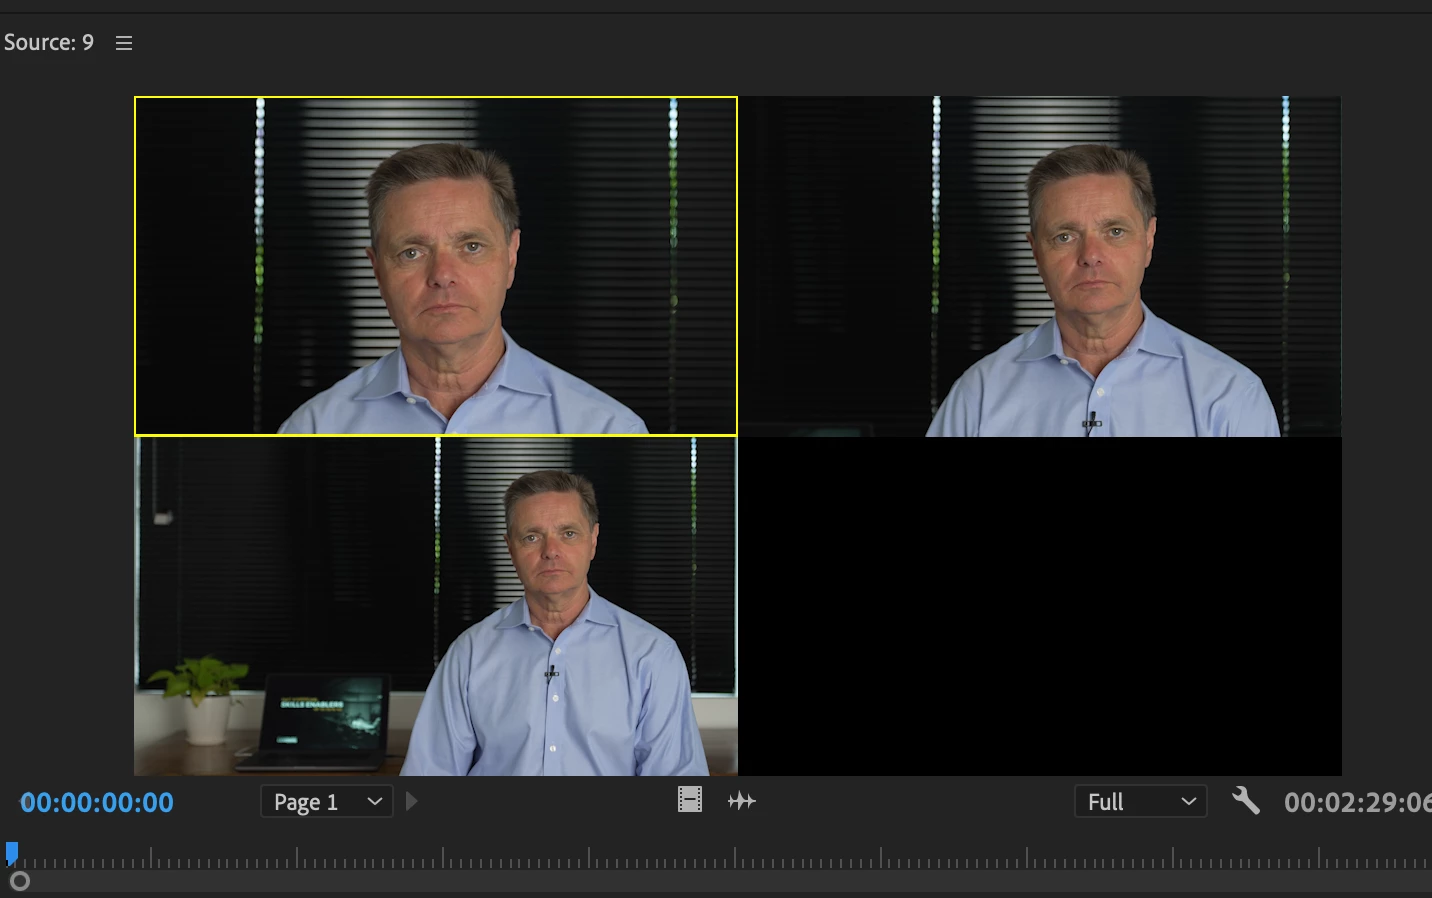
2. I then use that multicam as a source as seen above

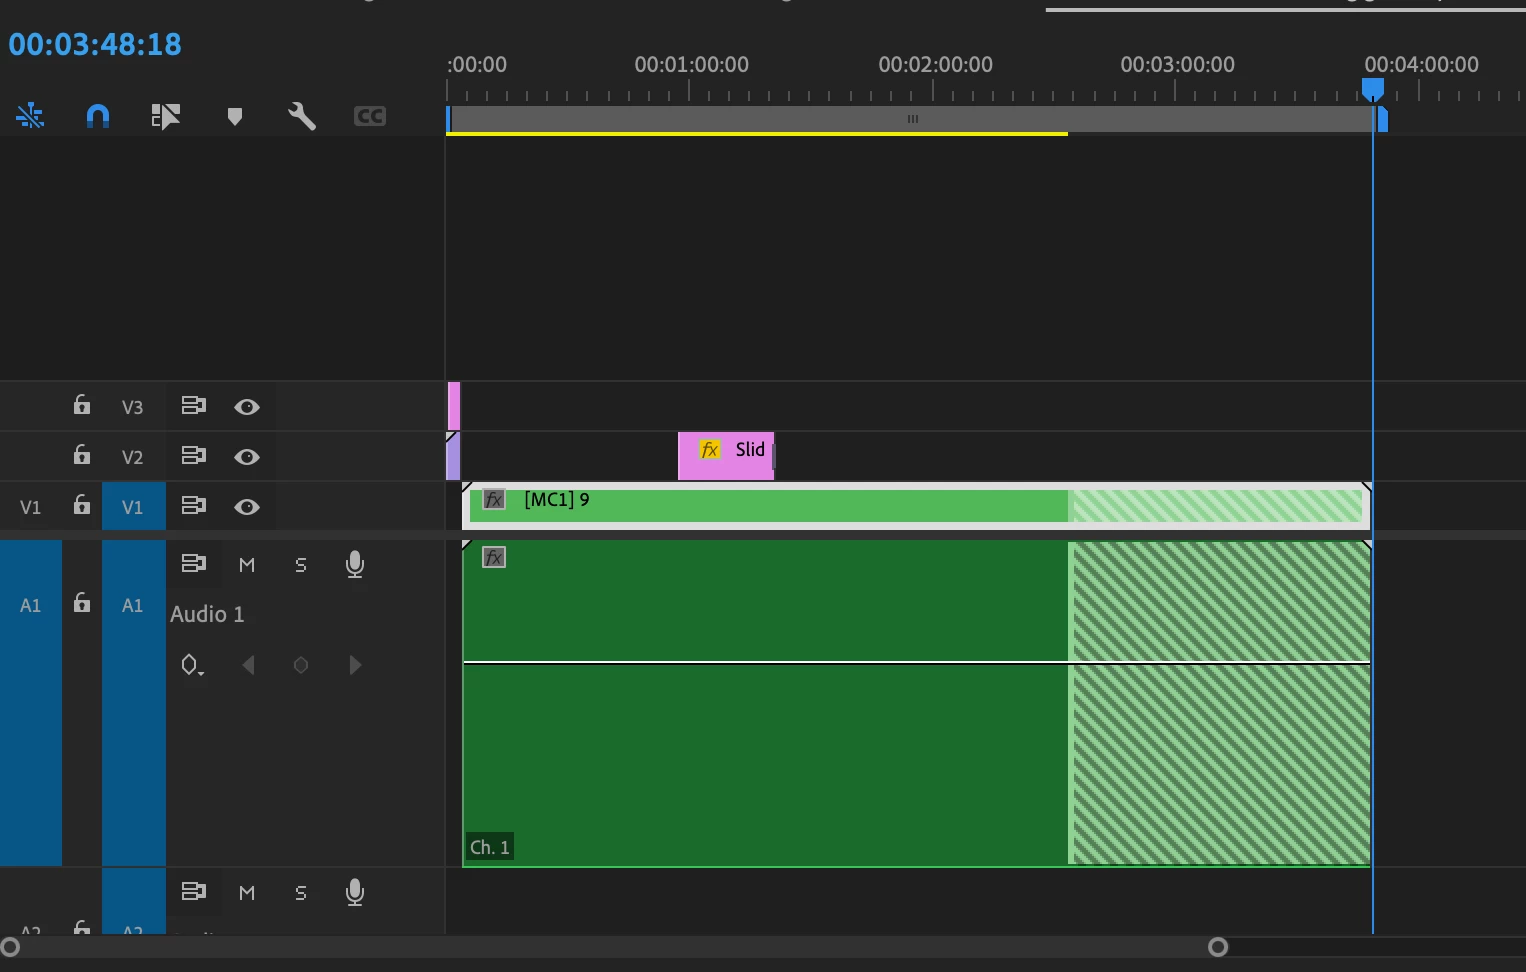
3. I cut it into the sequence as nested video

4. But I like to cut my raw audio in for two reasons - it may need to be adjusted in the essential audio panel and I like to see my waveforms when editing - something that doesn't work in multicam audio (why Adobe? A topic for another discussion)

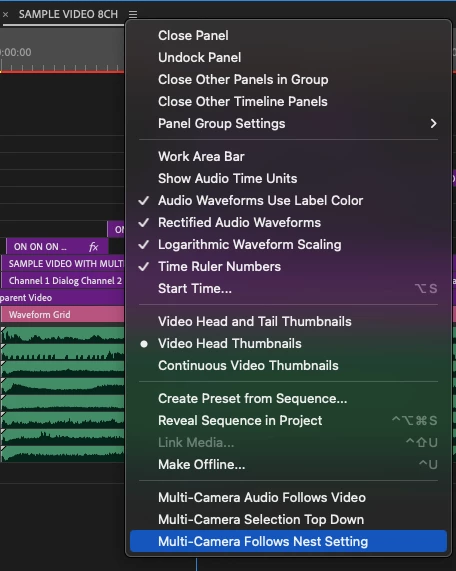
5. This is a workflow that I've used a thousand times before - both on this kind of multicam and 4 camera multicams - any kind of multicam. Today it's broken... if you look at the image above and below, no matter which way I toggle the nested source button it does not un-nest (is that a word?). I cannot see my nested source tracks, it only appears as source nest.

I should be able to see my individual video and audio tracks from the source. ie V1, V2, V3 and A1 - A5. this is breaking a significant workflow for me. 


I've tried making sure I have the source window selected (becaue I've noticed sometimes PP will ignore the source if you've previously dragged something straight form the project window), taking the sequence I'm editing into out of multicam mode (not that that has ever affected it before) but it's broken. At least for my setup. 


Yes, I can work around it by copy and pasting from the source but it involves a number of additional steps to keep the audio in sync that I wouldn't normally have to do.


System specs MacBook Pro


  •          Model Name:    MacBook Pro
  •          Model Identifier:        MacBookPro18,2
  •          Model Number:         MK1A3X/A
  •          Chip: Apple M1 Max
  •          Total Number of Cores:      10 (8 performance and 2 efficiency)
  •         Memory:  32 GB
  •          System Firmware Version: 10151.41.12
  • Operating System: Sonoma 14.1.1


This topic has been closed for replies.
Correct answer Ben Insler
could you at least put it to a vote?


Not to worry @JOHN MONDO, any opinions voiced are considered a vote cast, so the vote's been ongoing the momemt you started this tread 🙂   


We have restored this functionality with a new preference in the timeline panel menu called Multi-Camera Follows Nest Setting.  When enabled, cutting Multi-Cams into a sequence will revert back to the old behavior where the ...Nests or individual clips toggle is respected.  This is available right now in Beta.  Keep an eye on future version release notes for non-Beta availability.


Thanks for all the feedback from everyone here!


44 replies

Remote Index
Inspiring
January 30, 2024

@Ben Insler 


Hello Ben Inlser, thanks for your extensive notes here. They are illuminating if nothing else.


I avoid using Multi-Cam functions in Premiere Pro because of inconsistensies in design, some of which are touched on in this thread. However, the limited use I do make of Multi-Cam relies on the now disabled functionality described in the original post.


I am making some minor contributions to the thread with some of my own reactions for your consideration:


1. “You can control the correct channelization of your Multi-Cam by setting the Audio Channel Preset to Automatic when you create a Multi-cam."


The implication of your explanation which follows the above is that the “Automatic” configuration can deal with mono clips, stereo, or 5.1. What you have not outlined in your explanation is how the “Automatic” configuration can deal with channelization that uses Adaptive channels. (If so, how? If not, why not? Is this documented anywhere for users or are they left to guess or figure it out by trial and error?)


(parenthesis one: see my note below on how you contradictic official published Adobe documentation)


(parenthesis two: a minor point of etiquette - please don't announce, "You want your audio mapped to mono, which will allow each channel to cut into a sequence on its own track." I do not.)


2. "Let's say that you have a stringout of Multi-Cam clips … In workflows like this, users are endlessly forced to switch between Insert or overwrite... as individual clips or as nests."


Here’s a data point for you: this is precisely how I would expect this tool to work. (Whether editing is "endless" or not is another discussion.)


3. "We corrected this behavior … forcing Multi-Cams to ignore this setting and always behave as media, as they should."


Another data point for you: this is not how multi-cams should behave - they are not strictly “media” as far as I’m concerned, they are arrangements of media. (or more precisely, they are - like nests - arrangements of media that behave like clips in certain specific ways.)


4. "Adding and/or subtracting video and audio tracks from an existing Multi-Cam Source Sequence can result in very unpredictable flattening results that are hard to troubleshoot."


You have described the problem well! Users concur! I hope Adobe is working on a solution.


R.

Known Participant
January 30, 2024

Thank you! Let's just hope that Premiere will continue to keep its flexibility. It is specifically why I have chosen it for such complex yet easy to deal with workflows.

New Participant
January 26, 2024

This wasn't helpful. A multicam sequence is essentially a nested sequence.  If the "insert and overwrite" button on the timeline is blue, I expect to get stuff labled at the multicam sequence.  If the button is grey, I should get the source clips of the multicam sequence.  It no longer is working this way.  It needs to work the way it did.

R Neil Haugen
Brainiac
January 26, 2024

Thank you for that awesome post!


Especially how to 'force' adding other cameras ... that's ... useful, at need.

Everyone's mileage always varies ...
Known Participant
January 26, 2024

Wow, finally I've found this discussion!

Let me tell you my workflow and what I have lost with this change:

I edit music live shows and musical unscripted TV show. I usualy have 7-12 cameras in case of TV show and around 100 and up to 168(my biggest mcam yet) cameras in case of music live show. In case you are wondering - the concert can be shot for several sities/years.

When I edit TV show I have for example 12 cams * 2 or 4ch that will be used for sync. And then I have up to 20 channels of audio from sound department (vocal mics, ambients, mix). And after I edit the show I must pass whole audio multitrack (except cam audio) to pro tools station to make the final broadcast mix. This can be a lot of tracks.


I also have to mention that before editing there is also one step: sending the whole shoot as lowres mp4 file to producer, who edits show and sends me back as premiere project file. Then with Alt+Shift drag I replace every clip in this project with multicam clip. And of course it must have only one track of audio.


So, as you might already guessed, the safest, fastest and most precise way is to edit the whole show having one audio track containing all other tracks, then moving around with 25-30 tracks of audio. After the edit is locked I just decomposed it to multitrack for sound mixer and send it via AAF.


Now it is broken. I have to make copy of project file, edit version, roll back to ver 23 and make decopmose there.

Please make something with it!


PS. For those who are struggling with adding more cameras in already edited sequence and those cameras are not active in camera view. Make a copy of project just in case, but i've done it tens of times and it worked like a charm. Add camera to multicam sequence. Head to master sequence, place playhead over any multicam clip, press Edit cameras in Program view and turn on new cameras (place the checkbox). Save the project. Now go to explorer (on windows) and open project file with 7-zip or any other archive software. You'll see XML text file inside. Right click and press "Edit".


Then search for "<CameraOrder>". You'll find the string like <CameraOrder>0,1,2,3,4,5,6,7,8,9</CameraOrder>. The numbers inside represent cameras. If you have 10 cameras it will be like I've shown. If you added one camera then add one number in this row <CameraOrder>0,1,2,3,4,5,6,7,8,9,10</CameraOrder>. So you just hit find and replace and replace every <CameraOrder>0,1,2,3,4,5,6,7,8,9</CameraOrder> with <CameraOrder>0,1,2,3,4,5,6,7,8,9,10</CameraOrder>. Hit save and update file in archive.


Open project in Premiere. There you have added camera. And it works just fine, flattering and everything. Not a single fault for years.

Community Manager
January 19, 2024

@JOHN MONDO Did you ever make a new thread on this?

You're right - let's break this out into a separate thread as it is something that needs discussion. Because, like a lot of editors I have a dual screen setup where Essential Graphics, E Sound and the Lumetri Panel are always open.;

I have heard that we are making "selection follows playhead" sticky, even when the Lumetri Panel is open.  It will no longer continuoutly revert to enabled.  No ETA, but it's happening.  Watch the release notes.

MyerPj
Community Expert
January 3, 2024

Great stuff @Ben Insler, thanks! 🙂

Community Manager
January 3, 2024

Thanks for the detailed response @Jane28708435jkl5 


the full green multicam block in the top image is totally unweildy and hard to interpret.

At the risk of oversharing (and not at all intending to impose my own personal preferences), I disagree.  To me this acutally looks cleaner as it is clear that the audio and picture assets are associated together in the timeline while maintaining access to all the audio ISOs, and if track organization is consistent across the workflow, it's still relatively clear which track each subject lives on.  It also gives me access to the source audio at the source clip level rathre than having to rely explicitly on the stringout sequence.  As you mentioned though, this is more a case of expectation than functional limitation.  That said you do lose the subject labeling per track in the Multi-Cam, and I concede that this is nice to have from the Editor's perspective, sepecially if mic'd subjects are changing setup-to-setup.


the ability to toggle between source multicam *as a timeline* and record timeline and cut in just the specific tracks with in/out. No one I know has been able to figure out how to make that function in premeire the way Media Composer does.

Currently, the way you achieve similar functionality in Premiere Pro is to only have two sequences open: The seqeunce you are cutting into, and the Source Sequence loaded from your Source Monitor (load your source sequence into the Source Monitor and then select Open Sequence in Timeline from the Source Monitor wrech menu). Remember, Media Composer only allows you to have one Sequence open at a time, so we're forcing Premiere into a similar state here.


You also have to map the Application > Window > Timelines keyboard shortcut to your keyboard - for simplicity sake I'm going to pretend here that it's mapped to T.  This hotkey will activate the Timelines panel when it is not active, but once it is active, repeatedly pressing T will then cycle through all open sequence tabs.


With only two sequences open - your source and target - repeatedly pressing T will effectively toggle between Source and Sequence similarly to your experience in Media Composer.


Let me be the first to admit, there are limitations - we don't just suddenly have Media Composer all of a sudden (nor should we):


  1. Loading a new sequence into the source does not update the Source Sequence already open in the Timleine - you need to close the old one and open the new one.
  2. The Source Sequence is actually open in the Timeline, which should not be confused with viewing the contents of the source sequence as you do in Media Composer.  You can actually modify the source sequence directly from the Timeline while it is open.  By that same token, you cannot cut a source sequence into itself, so you'll notice that your source patches disappear when you are viewing your Source Sequence in the Timeline.  This is correct behavior.  Similarly, it is worth noting that the source/record patches will not swap around when toggling between source and desination timelines, reflecing which is mapped to what on each side from the perspective of your current view, as you're used to in Media Composer... again becasue this is a live Timeline, not a portal to the Source patch side. Which brings me to...
  3. By design, Source/Destination patching in Premiere does not work the same way it does in Media Composer, so please do not expect this to just work exactly like Media Composer now that we've forced Premiere to kinda feel that way.  


So we all just copy and paste from one sequence to another.

Techincally yes, this is the more "Premiere Pro" way of working in these scenarios.

The workflow for making these fake multicam sequences in the bottom image was to drag the video layer onto the timeline with the prefferred audio and click the "insert and overwrite sequences as nests or individual clips" button. Which is how I got to this thread in the first place, as now I need I different work around for our original work around

And now after all my rambling, the point where I actually should have started...
In your first image, if you select only all the audio tracks and no video, right click and select Multi-Camera > Flatten, do you not effectively end up at your second image?

Known Participant
January 3, 2024

Hopping in from a different thread. I work on doc series for streamers that have 5-7 editors and 5+ story people. On all the shows that have used Premiere, every office creates multi-cam sequences in a way that is totally not the intended functionality. It's a sacrifice that feels worth it because there are other aspects of Premeire that are preferrable to avid. Here's how we utilize multicams:


We create the multicam that looks like this:

But then we cut the video layer onto a normal sequence with the original audio to look like this:

Every single premeire job I've had in the last 7 years has done this. The multicam no longer functions, you can't match back to the audio, just the video. The logic behind this decision is that the full green multicam block in the top image is totally unweildy and hard to interpret. It's a pyschological thing for sure, and admittedly hard to explain, but every editor I've worked with strongly prefers the broken fake multicam sequence see in the bottom image to the big slab of green confusion above. 


One major thing AVID has over premeire, one of the only in my opinion, is the ability to toggle between source multicam *as a timeline* and record timeline and cut in just the specific tracks with in/out. No one I know has been able to figure out how to make that function in premeire the way Avid does. So we all just copy and paste from one sequence to another. We don't use the multicam function. So therefore, losing the match back isn't such a big deal anyway. 


The workflow for making these fake multicam sequences in the bottom image was to drag the video layer onto the timeline with the prefferred audio and click the "insert and overwrite sequences as nests or individual clips" button. Which is how I got to this thread in the first place, as now I need I different work around for our original work around 🙂


Thanks for the help, support staff! Hope this info is helpful!

Community Manager
December 21, 2023
Not really important but if you have not labelled your cameras how does PP "know" which is Camera 1. In this case it treated my Audio Recorder as camera 1 which gave the correct result.

If an audio-only clip is used as part of the Multi-Cam group, it will be used as the Camera 1 audio.  Otherwise, I'm fairly certain it has to do with selection order.


Well I've been doing it for years and the results seem pretty predictable to me. In what way do they become "unpredictable"?

Speaking off the cuff and without providing explicit stept to recreate this... Premiere can try to flatten to tracks that it doens't necessarily think exist becasue the Multi-Cam wasn't created with them, resulting in gaps in your sequence where media used to be.


Now you seem to be saying I can change things in the multicam like dimensions and colour correction.

Touché.  Some things are safer to mess with.  Others are not.  Let me put it this way.  If you're changing something, probably OK.  If you're adding or subtracting, probably shouldn't do it.  Be sure to test your workflows.


Thanks for working with me Ben and the detailed responses- I now have a totally new and more efficient multicam workflow. However I will continue to use the reframing 4K trick inside multicams. I'm comfortable with how PP treats those. clips

My pleasure!  Glad you got something from it all.