

Yi 4K red and orange the same.

Copy link to clipboard
Copied
Well almost the same.The pickup in the first half of this video is VERY red and the pickup in the second half is VERY orange,but as you can see they're almost the same colour.I don't remember them being like this before (but can't find any earlier examples).As you can see all other colours show near as [ ] perfectly.
Is there an easy way to get reds to be red again and oranges to be orange again as I don't know the correct way to do it with something like Adobe Premiere Pro?
https://www.youtube.com/watch?v=bUi67y73Un0
[Moderator note: these are public forums with rules against profanity. Please comply.]


 33
Replies
33
33
Replies
33

Copy link to clipboard
Copied
What are the two comparisons from? In detail, please ... as without a lot more information, there's no way to do anything but wild guessing.
Neil
Copy link to clipboard
Copied
The first one is not the same pickup in the video but is the same shade of red.The second one is the same orange pickup in the video and is the only still photo I have of it,but in real life it's a deeper orange than that.


Copy link to clipboard
Copied
Ok, I see now.
Remember, imaging is always a garbage-in, garbage out process. So you have to work the entire chain of things.
- First, you need a consistent way to get the most accurate color you can from the camera at the time of capturing the imagery. Whether that's an Expodisc over the lens for setting white balance, a Xrite Passport Color checker, or just a gray card ...
- Your monitor for your computer should be running the sRGB color space profile, and if at all possible, calibrated with an external puck+software system like say the ColorMunki, i1 or Spyder units ...
- Learn to use the Lumetri panel, especially the scopes (and the Vectorscope shows your hues most delineated), to both read and set your color corrections.
Now ... understand that even when you get good at this, different video players and browsers on different computer monitors will all show things a bit to a lot different. And get to work.
Oh ... QuickTime player has some issues, PotPlayer & VLC are better among the free "simple" video players. YouTube does one conversion when uploading your media, which may or may not get the proper color and gamma for you, which will show correct if they do a re-encode. If they don't, go into YouTube's "editing" mode for your channel, select a vid, select retouch, save without doing anything ... and within a few hours they will re-encode.
Neil
Passport: B&H Photo Video
Xrite ColorMunki: B&H Photo Video
i1 Display Pro: Amazon.com : X-Rite i1Display Pro - Display Calibration (EODIS3) : Photographic Light Meters : Camer...
Datacolor Spyder5Pro: B&H Photo Video
Copy link to clipboard
Copied
Thanks for the links R Neil.I'm happy that the white balance is as good as it's going to for what I do,which is just a hobby.I really don't want to be spending 3 or 4 times more then the camera cost to try to get more accurate colours,and I trust my method of taking a photo of my hand and a piece of grey cardboard to make sure my monitor is properly calibrated,which as far as I'm concerned is as good as it's ever going to get for my eyes.
The video camera (a Yi 4K) is set to auto white balance.I updated the firmware this weekend before shooting that lot,and interestingly before that even set to flat it had a very noticeable yellow tint to it and I had to dial in quite a bit of blue to get rid of it.It's now a lot more neutral and apart from contrast and saturation etc it now needs a lot less colour correction,and the image also seems to be more detailed than it was before.
It's using the Lumetri panel I really need help with as apart from basic corrections it's all voodoo to me.So instead of just pulling and pushing here and there,can I sample the correct colour from the still photo and then adjust the video to that?
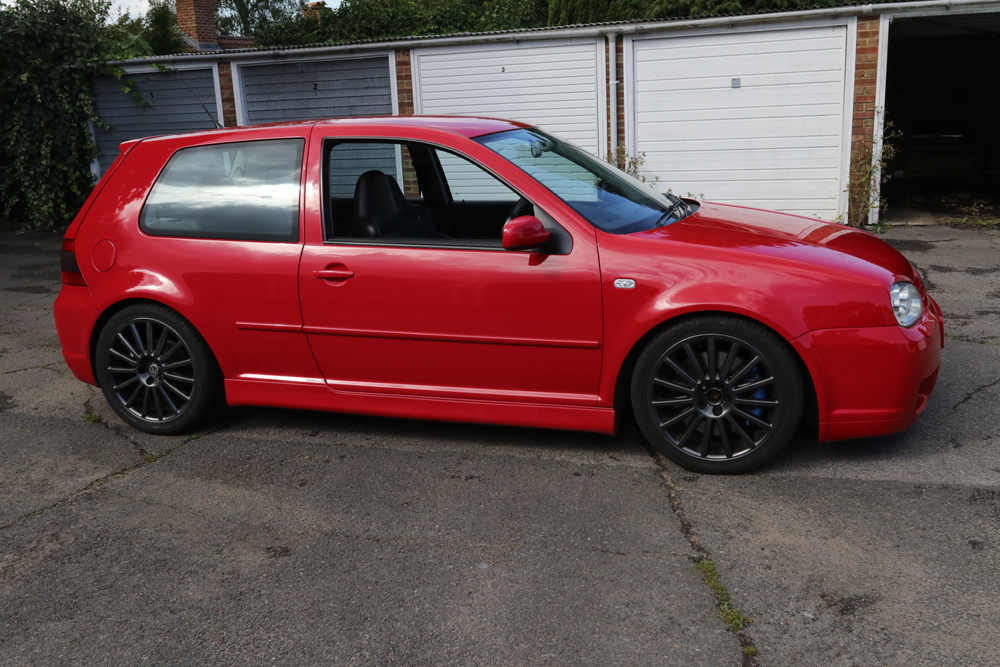
Here's an even better example of what I mean,and I think this problem is worst with shiny red that it is with flat or matt red..........

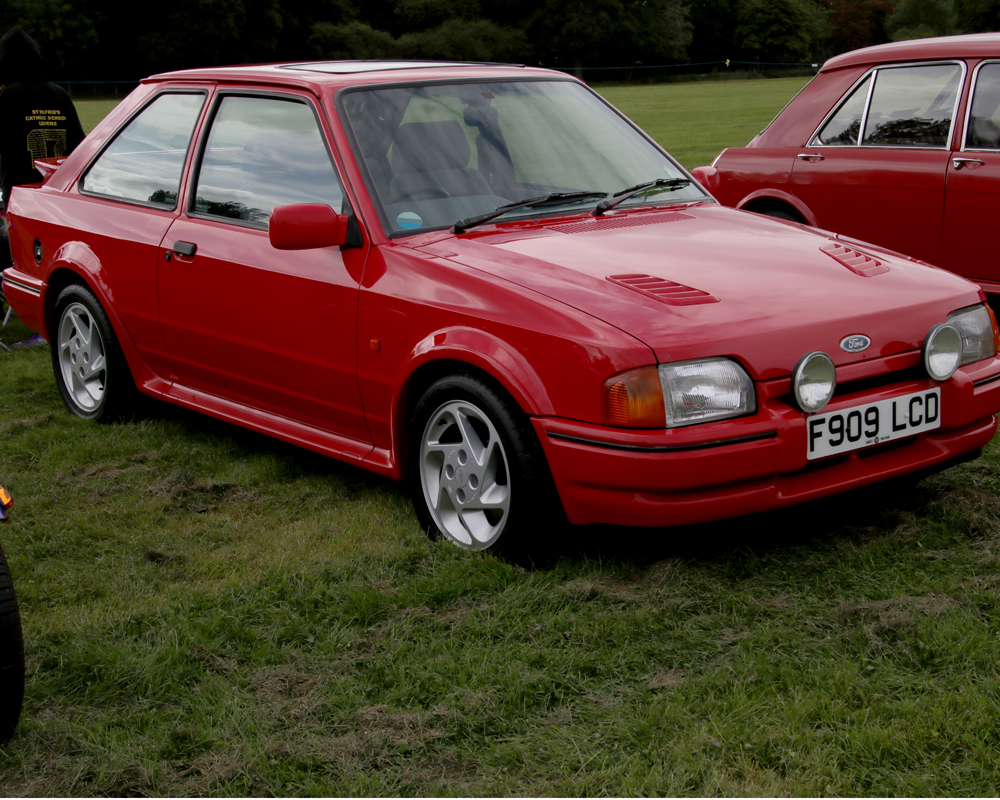
The same car of course in both images.
Copy link to clipboard
Copied
Auto white balance on the camera is the worst setting for this kind of thing. It averages color in the scene, you know?
So ... put a bright red car close in like that with a blue sky ... the camera will see an excess of blue and red, going towards a yellow-green.
There was a reason I said get a good white-balance in-cam to start. I realize you don't have the experience to understand, so ... it's time to learn.
You don't have unlimited color depth in your video to change the colors all over creation without generating video noise and artifacts. So just trying to correct in post will induce other problems.
Yea, I've got the experience in Lumetri to help a ton there ... but you've got to get a decent file in first.
Neil
Copy link to clipboard
Copied
Thank you and yes I believe I understand how white balance works.
The second image above was shot with a DSLR (a Canon EOS 80D) set to auto white balance.Yes I know this shows the difference between a £1000 DSLR and a £150 action camera,but would this not affect ALL the colours that I capture with it and not just shiny red?
The only difference between the two images of the same car is a couple of hours and by the time I took the photo it had gone cloudy so was less direct sunlight than the video.
The hand/grey card thing I mentioned was purely to check the monitor calibration and nothing else,which to my eyes is as near as **** perfect for what I do.

Copy link to clipboard
Copied
there is a ton of light from the orange truck reflecting onto the red truck. that is why.
saturation is based on amount of reflected light. also, the bright red color will look much different under low light.
I did a hue split test where you crank up the saturation and vibrance to see where the colors break down and merge 50%. this tells you the relative hue difference captured in camera. judging from it, you'd need secondaries to fix the reflected color.
you can change the hues up to a point. Here, I think, is the max hue split, without secondaries made in camera raw

Copy link to clipboard
Copied
The problem is that one is supposed to be red,almost the same colour as the red car above! The truck on the left in your capture is shiny dark red (sort of burgundy),the one on the right is bright and shiny red.
Copy link to clipboard
Copied
"The truck on the left in your capture is shiny dark red (sort of burgundy),the one on the right is bright and shiny red"
are you saying that's what you see in my picture or what its supposed to be?
because I see one burgundy and one orange. like I said, you can use secondaries to fix the colors.
Unless you heavily tweaked the hues in your camera before they got recorded to the memory card, I believe
that reds might be a limitation of that camera. the only way to know for sure is to use a professional color chart
then create with a 3d lut generator. that camera might have a crazy color gamut like srgb offset somewhere.
Copy link to clipboard
Copied
Big problem is OP is on auto-WB. Says he gets a bit of his hand, then gray card, then shoots the cars. Then wants to know how to sample his hand or gray-card, and apply that to the cars scene.
That's not how auto-WB works of course, as it's like auto-exposure, shifting constantly due to the colors seen. So ... knowing how this works, his recorded colors with those intense cars being such a large part of the scene are really going to be off, and as it will dramatically shift color response for every car, there's no place to standardize. It is doubtful he has the data to properly recover. And the setup shot with his hand & gray card is utterly useless.
Until he gets off auto-WB in the camera, he's got a significant problem.
Neil
Copy link to clipboard
Copied
good catch Neil, even the infrared light could have screwed up the white balance.
also, I don't think it helps that he tweaked the blues around. he could have shifted relative colors too close together for post grading.
I can tell that it will take more than a simple 1d lut to fix this.
Copy link to clipboard
Copied
Thank you for your help,but you're only half reading the information I've given.
"The pickup in the first half of this video is VERY red and the pickup in the second half is VERY orange"
Again the later post above "also I don't think it helped he tweaked the blues around",like I said this was only needed before the firmware update last weekend.
This is for the video taken a few weeks ago BEFORE the update......

And this is what I used for the most recent video shown in the first post up at the top.....

Copy link to clipboard
Copied
sorry for the misunderstanding. I was under the impression that the camera's hue/saturation settings were changed from default.
Copy link to clipboard
Copied
No worries Chris.
Now for everyone's entertainment here's a video of my own car which just happens to be red and shows the five different white balance pre-sets.Unfortunately these are all I have as it won't let me carry out any manual white balance calibration.These were made with everything in the camera set to zero or flat,and no post processing except for the titles......
This is what it looks like to my DSLR........
Copy link to clipboard
Copied
Thanks for the post, very informative!
In auto, the camera will constantly shift probably both the "temp" axis and maybe the "hue" axis of the WB calculations. And I mean constantly, frame-to-frame at times. From small to massive amounts, and correcting in post gets insane. What may correct 32 seconds in, doesn't at 35 seconds in ... that sort of thing. It's the same as auto-exposure. Move the camera just a bit so there's a big white area, it drops the exposure, and now your foreground area is gone dark.
I notice as you walk around the car with auto-WB on, the magenta levels change dramatically to my eye.
Using a fixed setting means you have some place that is "solid" to start from and can be modded to get somewhere else. Throughout the clip. Fixed white balance & exposure are keys to being able to control tonality & chroma in post. Well, at least without having to keyframe insane corrections one after another! That's to be avoided.
"Daylight" settings typically presume around 5200K to 5500k in color temp, at a fairly neutral hue. Think 9 am through 6pm on a long summer day, much shorter around the early afternoon period in winter. "Cloudy" will try to remove the higher blue levels of cloudy lighting, and so as your example, results in increased yellow and a bit of yellow-green in the image. Not sure exactly what that "native" setting was.
This seemed to be shot after sundown, in twilight lighting. Correct?
Copy link to clipboard
Copied
No,it was at about 1.30 PM today.I had to get them all with the same lighting conditions,so would have had to wait some time to get them all with the sun out,so did them all with slight cloud cover.
All these problems will go away when I can afford a DSLR with 4K video,but in the mean time I'm stuck with this so will have to make the most of it.
So any ideas please if we use a fixed white balance setting?
Copy link to clipboard
Copied
Test them. Biggest timesaver in video work ... test ahead of time. Thoroughly! Know what to change if things go wonky.
I'd suggest working with the one that looks most "natural" on the screen of the camcorder at the time you're shooting, though that's nowhere near an accurate one color wise. But the best you've got.
Do all the stuff from a similar time period on the same settings.
Then ... in Lumetri, we can talk about how to shift things to get the colors more toward where you think they should be.
Neil
Copy link to clipboard
Copied
i did a quick check and the daylight settings gives almost the same color as auto white balance when outside.
you can set the camera to daylight wb so that your wb stays constant in the shot, unless you walk indoors.
i matched up the car colors. I have no idea if blue is lined up because there is no color chart with many colors to compare.
this was done only for red. i eyeballed the other colors to taste in camera raw.
yi 4k new red car 64 cube file

Copy link to clipboard
Copied
Thanks for that,I'll give it a go later.
Meanwhile last night I was randomly clicking things and tried various different input LUTs,this is the result of the Alexa default LUT with contrast and saturation turned down......
Copy link to clipboard
Copied
And below all five with your LUT.....
Copy link to clipboard
Copied
i find it fascinating that a 3d lut made from a dslr color match looks somewhat similar to an alexa lut on a completely different camera. this means that your dslr has good color reproduction to able to match back across different camera sensors. pretty impressive, and even more strange that the native color hue of the yi are like alexa except smaller gamut.
Copy link to clipboard
Copied
I would expect a £1000 DSLR made by a camera manufacturer with Canon's pedigree to be able to do near perfect colour reproduction without having to tweak anything.The above photo of my car was taken using the same standard picture profile I use for all the photos I take with it which is "Fine detail".
Xiaomi are still relatively new when it comes to this sort of thing and are struggling to get it just right,but they're all steps in the right direction (mostly!) as most of the firmware updates are improvements over the previous ones.
If it stops raining this weekend I'll do the same video but with the DSLR ("only" 1080P though!).
Copy link to clipboard
Copied
Your expectation of the camera's ability to perform by itself is rather ... uninformed. What a camera body is technically capable of is rather different a beast than what any one user gets in various settings unless you understand 1) precisely what each setting does in every situation with that specific body and 2) how every step of your process (from exposure through any post) inter-relates.
And this doesn't matter if it's a relatively cheap 1,000 pound DSLR to a 20,000 pound RED. The user's knowledge of how to utilize the camera's capabilities in the end matters far more than the cost of the camera.
I've only had 40 years of professional photography as a career, before adding video 5 years ago. In the portrait stills crowd, I'm considered "somewhat" of a tech nerd. I built profiles for analyzing color negatives for printing back when we had our full color lab, for our own cameras as well as other studios. Each film needed a "standard" exposure profile, plus -2, -1, +1, +2 exposure profiles. A very intense detailed process to determine exactly the "standard" exposure rating for a film (which was never exactly what the manufacturer listed, for reasons of great depth), and then to make the entire set of negatives for every printing device or enlarger ... they all needed different sets.
I learned how to use a meter in the camera room to precisely set complex lighting and get every part of it nailed, which ... is not using a meter the way it was normally taught. I couldn't get the precision of the base exposure the way it was supposed to work, but from testing an altered method ... I learned to always got the base exposure nailed. Which was easy to test for in printing.
After we switched from medium-format film to digital in 2003, I had to test every setting on every camera to see what it did precisely, and select which settings worked best for our needs, what ISO ranges we could use, and how to stretch at need.
Including, I've naturally tested the actual output of our two bodies that do video for me in the same way. Both very good cameras, a bit "up" shall we say from yours, and yet, they have very different results for basic color/hue range of a scene, the way they handle skin tones, roll off highs & shadows, everything. One a Panasonic, one a Nikon.
According to your assumption, they should produce nearly identical images. They don't. (They do both produce very good images ... just very different color and some difference in tonality.)
And knowing how to blend their results in post takes ... work. Training. Testing. Practice. Shoot & test. From those results, shoot again & test. Again. Again.
Chris said he found it fascinating that a 3d LUT made from a DSLR color match works similar to that for an Alexxa. I have no surprise with that. Camera makers of those actual spendy beasts go to amazing lengths to create perfectly profiled LUTs to recreate a scene technically correct ... therefore, neutral. (Read: technically correct but boring.) Based on detailed test charts & such. But they only work perfectly IF you start with the camera and the same lens in the same studio with the same lights and scene set exactly the same.
Which is why Van Hurkman and others teach applying the normalization LUT to a clip such that you can go to controls processed before that LUT, and doing basic exposure, tonality, and WB corrections while watching your scopes & image to fit the image through that LUT to the program monitor as the best "neutralized" image possible. First step of grading ... and there will be several more passes.
Many of the colorists I know will take a manufacturer's LUT, apply it to a clip while watching their scopes, and see what it does. And then go about building one for that camera as their base LUT for X camera, that to them is a more ... pleasing ... look. And then create different variants of it for different situations, probably using a very different shadow curves shape for night shots, for instance, both in general tonality and color response.
And never use the manufacturer's LUT again.
When confronted with a new camera shooting some form of encoding that needs normalization, the first thing they do is quickly run through the normalization LUTs they built and stored for the other cameras they've worked with. Several will probably work well, but ... for this scene, one might be better. Then they just tweak it. Why rebuild London Bridge?
Also ... they don't tend to apply LUTs simply to every clip of media on a line, except for the ones in some Log or other specialized encoding that need a normalization process. Why? They're far faster at doing a quick trim for tonality & color balance than they can possibly match by spending time trying several LUTs. And they hit a few clips of one cam, the settings seem mostly similar, copy/paste to the rest of that cam in that scene. Done.
There's no perfection guaranteed by gear. The cameras are just a tool. And cannot be calibrated in the factory to yield "perfect" color/exposure in every scene, as there isn't any perfect exposure standard. Perfect for what? The skin, the sky beyond that's so much brighter, the shadows of that building? They are all different. What do you need most to have a particular look? Then ... what else do you need to have detail & color information of a certain sort? Build your on-set color & exposure around those, that gets you to post with something you can than work to where you want it to be.
Neil
Copy link to clipboard
Copied
Thank you for the lecture and life history,but I think you're "uninformed" as to what I want from something that is nothing more than a hobby for me.I am also not for one second questioning anyone's credentials who has helped me so far.
I appreciate the fact that a camera (movie or stills) is only a machine that has many different ways it can be used,and an almost infinite number of settings to alter the way it can capture an image.I also appreciate the fact that the photo is in my head and the camera is just a way of capturing that image.
I started taking photos as a hobby in the early 1970s with a Zenit B fully manual SLR camera,and back in those days on a schoolboy's salary every shot had to count as one 36 exposure roll of Kodachrome slide film had to last me at least a month.Back then we didn't have the luxury of being able to correct in post production,more so for me with slide film than if I was getting them printed.They weren't all perfect or even all that good,but they were good enough for me.
Today I still take digital photos with the same thought in mind that every shot has to count.I am happy with my hobby settings of finding a compromise that is close enough to reality that I can use them as they come out of the camera.I don't want to spend hours proving to a Youtube or photography forum audience why my life should revolve around taking everything as RAW images,and why people who take photos exclusively as JPEGs (for example ME) should be condemned to a life of purgatory.
I came on here to learn the basics of how to colour correct,i.e. in this case to make red things that had turned into orange things back into red things again.I'm interested to find out how that was achieved as I have been given a LUT that does exactly what it needs to,once I know that I will be able to do it all for myself next time a take a video and a banana comes out purple.
-
- 1
- 2

Find more inspiration, events, and resources on the new Adobe Community
Explore Now
 AdChoices