- Home
- Premiere Pro
- Discussions
- Adding handles to a nested sequence
- Adding handles to a nested sequence
Copy link to clipboard
Copied
Apologies if this is a novice question, I'm very new to Premiere, but in searching for the answer I only find endless explanations of the necessity of handles in applying transitions, but not how to do so in my specific case.
I want to apply a warp stabilization followed by a speed change to a clip that is already in a timeline with transitions. I envision my workflow looking something like this:
- Apply warp stabilization.
- Right click and "Nest..." it into a subsequence (existing transitions are removed)
- The frames before and after the clip are no longer available, so I go into the nested subsequence and extend the source clip's In and Out points to make that padding officially part of the subsequence.
- Now that the subsequence starts and ends at different points, I need to signal that the subsequence should start at a different point. (This is where I'm stuck. I've tried to set the In point of the entire subsequence, but it doesn't seem to have any effect.)
- Go back to the main sequence and put on the time scaling.
- Re-apply transitions.
I can't seem to create an "In handle" on my subsequence. I can push around where the source clip starts but that affects the video in the main sequence. Without an In handle, there's absolutely no way to position my transition correctly. What am I missing?
 1 Correct answer
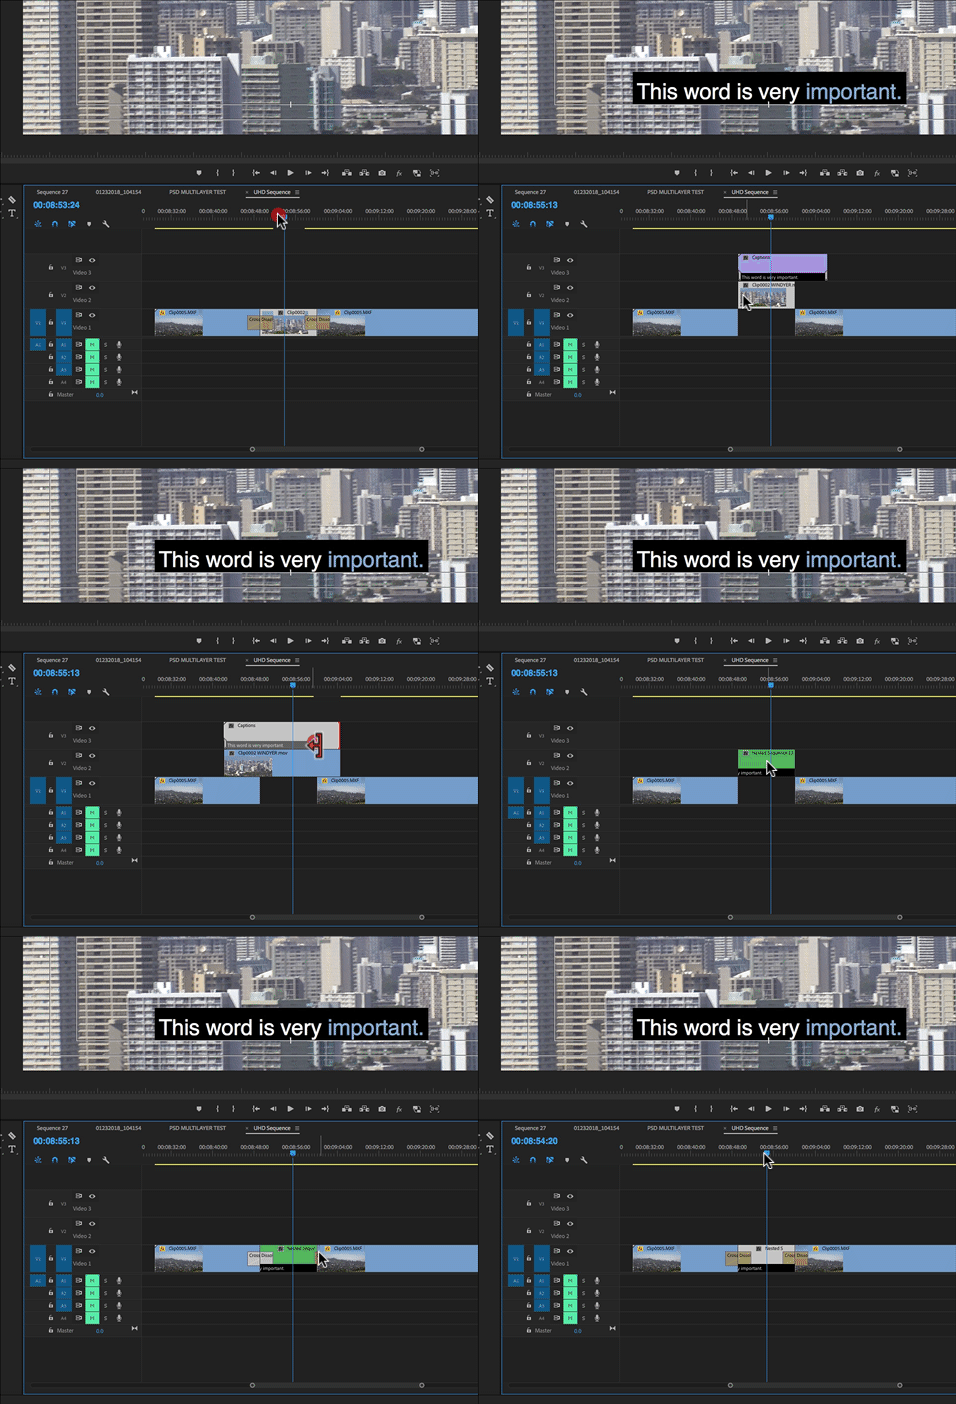
I'm not sure I follow what you are doing entirely, but create the handles by extending the clip(s) that will make up the nest before you create the nest. Then you will have handles and the nest will be sitting in sync on the timeline and you can trim the nest's in and outpoint to allow for the transitions:

MtD
Copy link to clipboard
Copied
I'm not sure I follow what you are doing entirely, but create the handles by extending the clip(s) that will make up the nest before you create the nest. Then you will have handles and the nest will be sitting in sync on the timeline and you can trim the nest's in and outpoint to allow for the transitions:

MtD
Copy link to clipboard
Copied
Thank you, that gets me just about all the way there, but is there an easy way to change the endpoints of the clip more precisely? In the case of a clip (as opposed to a subsequence), I have been double-clicking, navigating the clip source to the exact frame I want to In/Out on, and setting the In/Out points there. Is there a way to do this on a subsequence without memorizing the frame number and zooming way in on the timeline to fiddle it like I'm trying to clear up a signal on an old-timey radio dial?
Copy link to clipboard
Copied
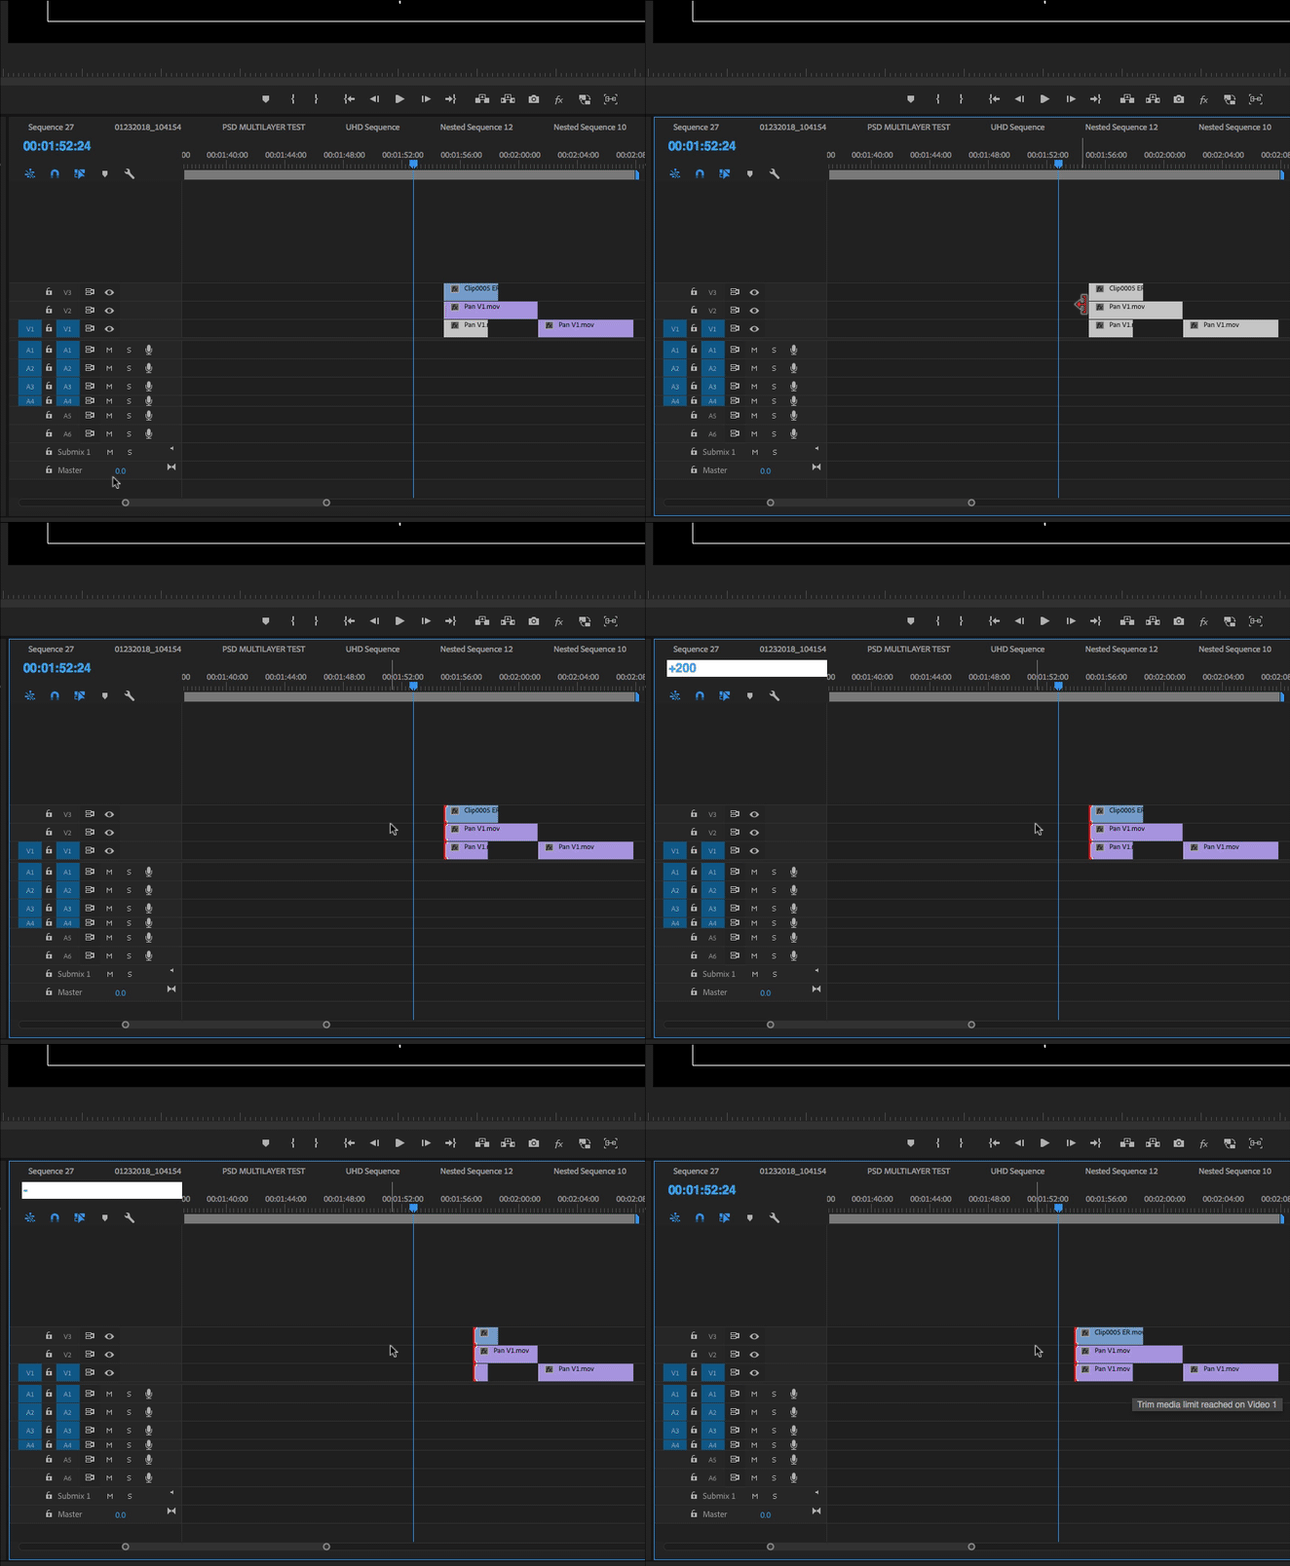
If you want to move the clip starts and ends by precise amounts, as opposed to arbitrary amount by dragging, just click on the start point of the clip with the mouse after it turns into the red trim cursor, then enter a negative (if you want to move the cut point earlier) or positive (if you want to move the cut point later) number on you numeric keypad.
So if you wanted to add 8 seconds of trime to the head of a clip, select the cut point and type - 8 0 0 Enter on your keypad.
You can make this change to multiple clips at the same time - just click down and drag over the clips to select them, then use the red trim tool to click on a cut point of one of the selected clips - the others will also be selected, and you can adjust all at the same time:

MtD
Copy link to clipboard
Copied
That's fantastic! Thank you!
Copy link to clipboard
Copied
I do the same, but it moves CTI only. What is wrong?
Copy link to clipboard
Copied
Trimmed nested sequence also does not allow me to drop a transition between. Help.
Get ready! An upgraded Adobe Community experience is coming in January.
Learn more