


Copy link to clipboard
Copied
Hi everyone ,
This is going to be dificult to explain but I'll try my best t o explain and I am quite sure that a lot you fine folks will understand what I am talking about and you will have all of the answers.
Mask ; It is seen very often usually on the newsacasts . There is a background clip of a scene and then in the left / right hand corner of the frame over the scene clip there is a "mask close up cut-out " still photo of the person's face who is related to the scene clip.
Example : Layer -1 : Background video clip of crowded beach.
Layer - 2 : In the upper left hand corner of frame over the beach clip , there is a "mask clip cut-out " of swimmer who the sea bathers said was attack by a big fish.
Question : How is this "mask effect " done ?
Thanks very much in advance.


 1 Correct answer

To go from this:
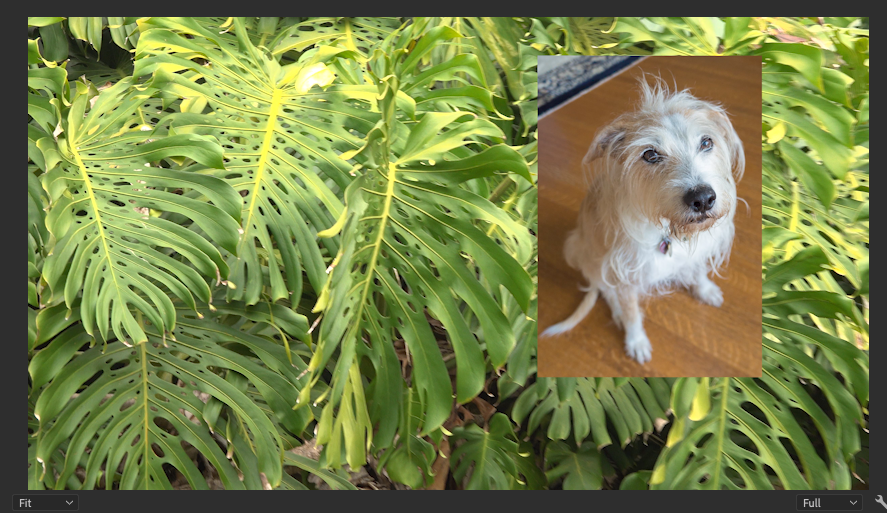
To this:
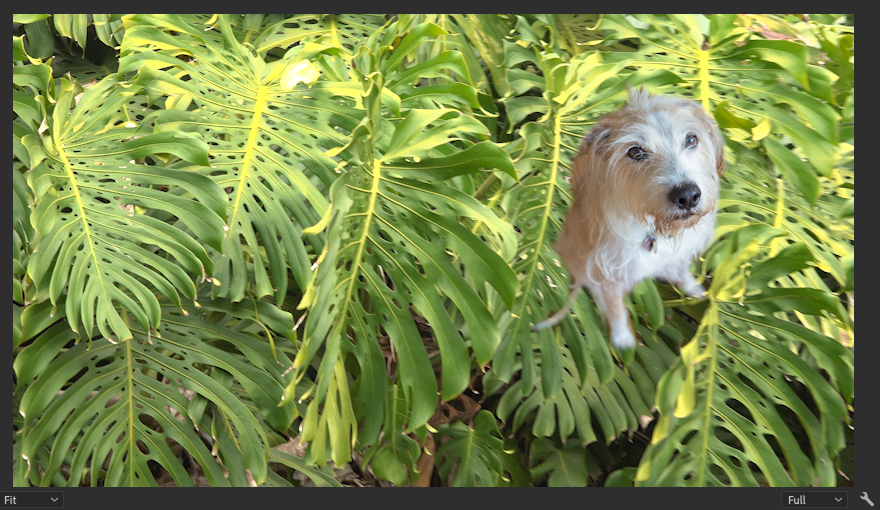
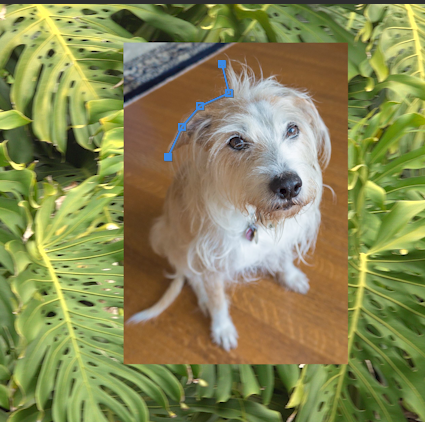
Click on the headshot in the timeline to select it, then go to the Effect Controls panel and use the pen tool to create an Opacity Mask:

By drawing with points around the area you want to masked:
MtD
 8
Replies
8
8
Replies
8

Copy link to clipboard
Copied
As someone who works in news, this is actually something that can be done very quick and dirty (and sometimes needs to be.) and often not even with the necessity of a mark. If I'm understanding, you're just saying a photo or a mugshot thats laid over b-roll of say the scene?
V2: Photo you want to show
V1: B-roll layer
- If necessary, use the Crop effect on the photo to crop down the image to see only what you want to
- Resize and position the photo where you want with Scale/Position.
- Add a drop shadow to the pic, and effects to the b-roll if you like (a blur or slight opacity drop).
If you're talking about a little more design control like with a Picture in Picture or OTS (over the shoulder) as we call them, you could make a sequence of what you want in the PiP, then add that sequence on the top layer of your main sequence and do something similar to the above: position/scale/etc.
Copy link to clipboard
Copied
Thanks But how do you get the perfect “ mask shape “ cut out of the person’s face ?
Copy link to clipboard
Copied
Are you saying you want the cutout to be specifically be only the shape of the person's face (as opposed to a box around it)? If so, then yes you'd need to mask the layer (probably with the pen for mask drawing to draw a bezier mask). I usually just mask the Opacity parameter.
Copy link to clipboard
Copied
To go from this:
To this:
Click on the headshot in the timeline to select it, then go to the Effect Controls panel and use the pen tool to create an Opacity Mask:
By drawing with points around the area you want to masked:
MtD
Copy link to clipboard
Copied
Thanks very much again , that’s exactly what I want to learn how to do : cut out a complete shape of a person’s face , blend and shape the mask cut out and reposition it to a different location.
Copy link to clipboard
Copied
Just as an addition to what's already been said in using Premiere MASKS in conjunction with OPACITY in the EFFECTS CONTROLS PANEL or other methods--if you need cleaner more detailed selection, you can use the more powerful selection tools and features in Photoshop like SELECT & MASK. This is a feature which allows you to get finer detail in selecting things like hair and grass. Once you make a selection in Photoshop, you can just save it as a Photoshop file (PSD) and import directly into Premiere.
Copy link to clipboard
Copied
Thanks, but I don't know Photoshop that's why I am asking how to do it in Premiere Pro.
Copy link to clipboard
Copied
Thanks very much Meg The Dog , that's EXACTLY the mask effect that I was talking about , you nailed it MTD. And also thanks very much also to everyone else for your responses.

Find more inspiration, events, and resources on the new Adobe Community
Explore Now
 AdChoices