New Participant
January 2, 2018
Answered

Working with different file types on a single timeline/project.

  • January 2, 2018
  • 3 replies
  • 1566 views

Hey Everyone,

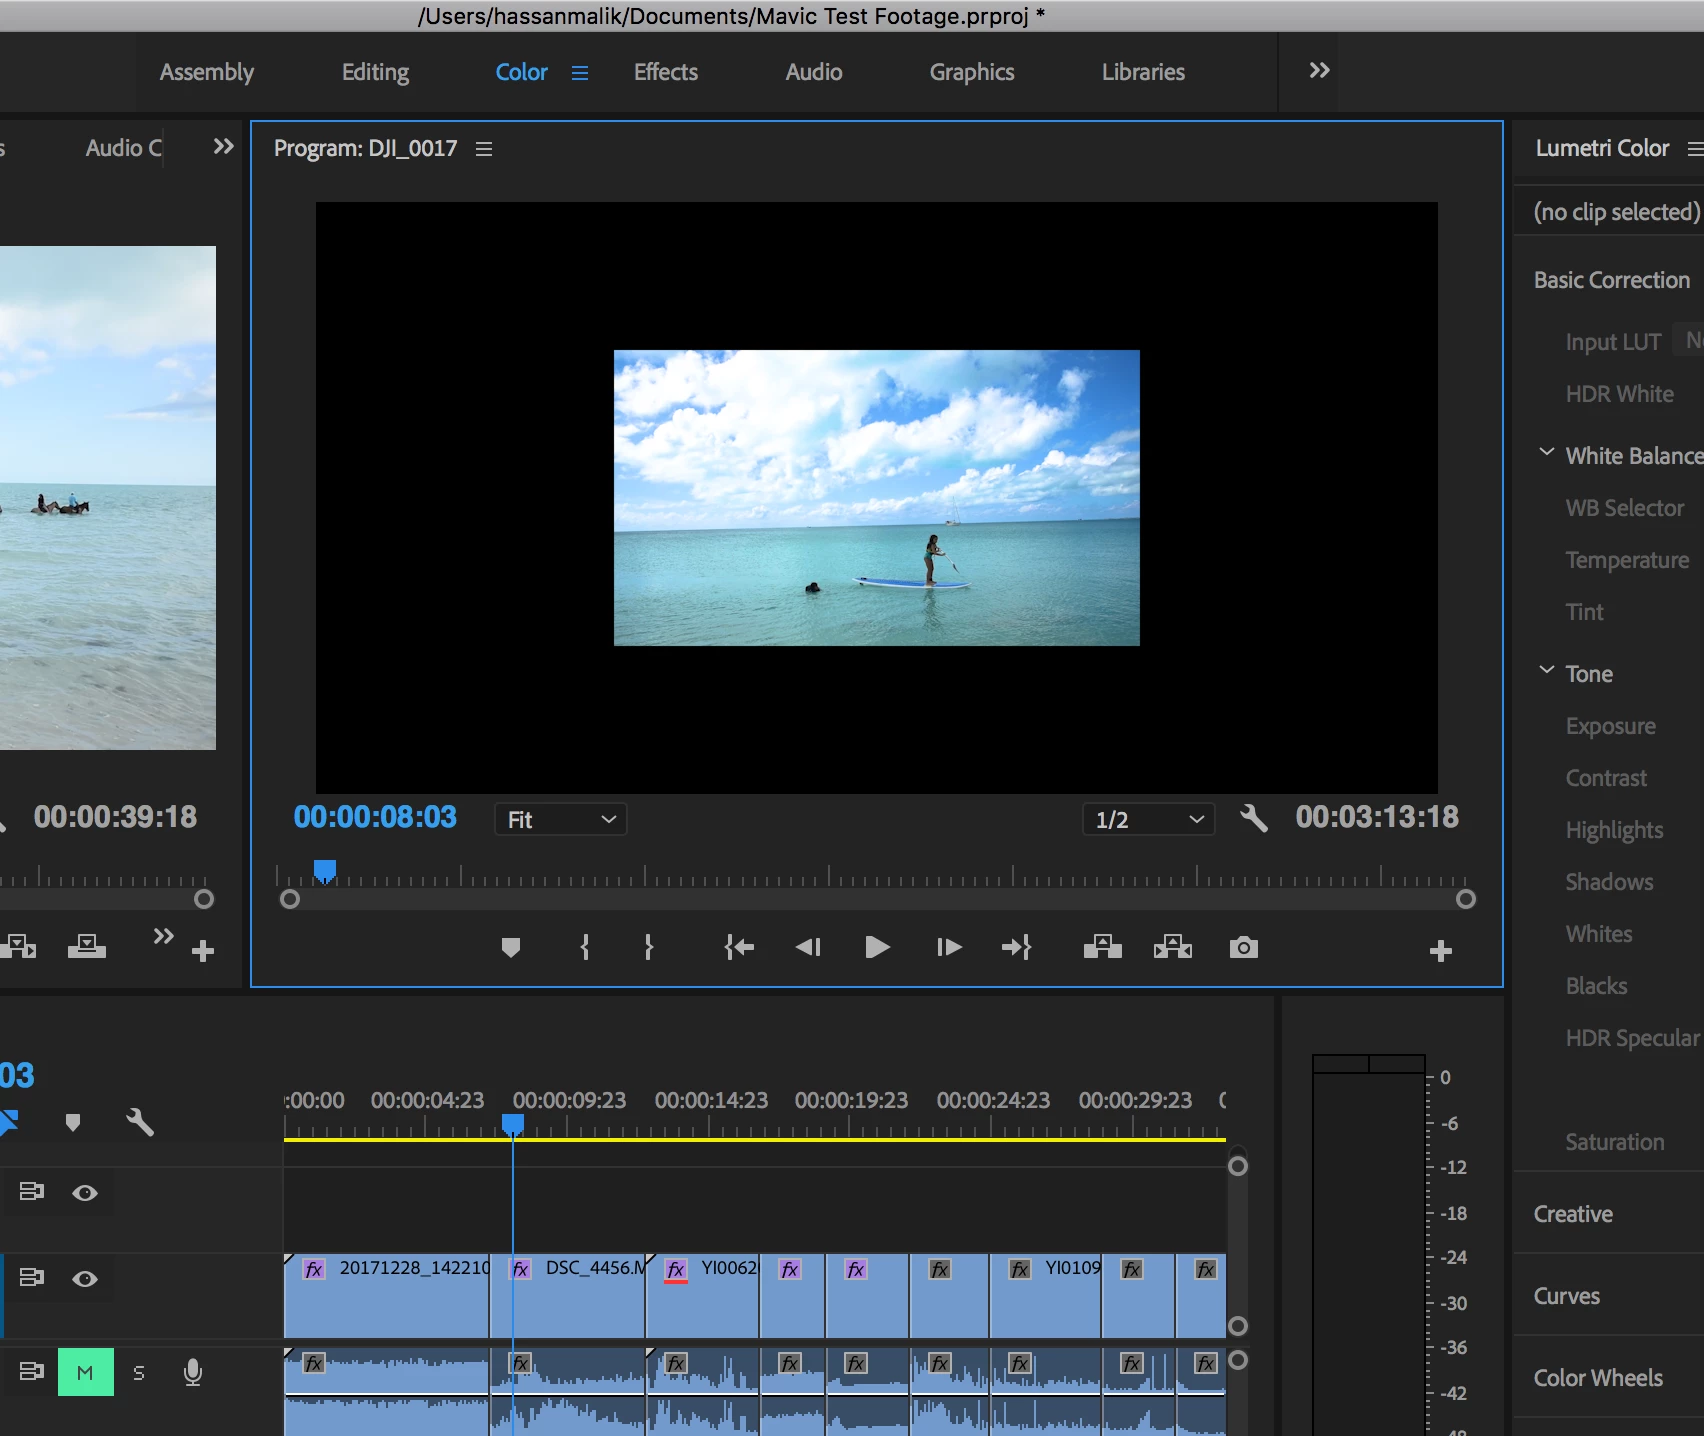
I'm new to Premiere and have a couple of different files such as Mavic drone (2k), Nikon 1080i. Exporting might be okay but I have noticed that in the edit window my Nikon footage is not filling the box like my drone footage is.

Is that something I should be concerned about when exporting?

Can I apply something to get my entire timeline on the same format?

    This topic has been closed for replies.
    Correct answer R Neil Haugen

    First question ... you can change the sequence settings, and accept the dialog about deleting previews. Much of the time that can work ok, if you've not done a lot of scaled cropping or effects timing things in/out of the screen such as graphic items. Even much of that typically makes it over.

    So ... I'd suggest duplicating the sequence, and on a new timeline with that sequence, changing the sequence settings, see what happens.

    Another way is to create a new 1080 sequence, go to "pancake" editing by dragging that sequence from the Project tab and instead of just dropping it into the timeline area with another sequence open, which would add it onto the end ... drag it to the top or bottom of the timeline panel so you get the blue border blocks showing and let go there, creating a second timeline panel. Select-all of the old sequence, then just drop it down onto the 1080 one.

    Next question ... generally, yea, unless you're working with say 4k, 1080, and 480 material. That last is so small, you'd want to work on at least a 1280x720 if not 1920x1080 sequence, and maybe show the smaller media in a small box.

    Neil
    3 replies

    Brainiac
    January 3, 2018
    Adobe Expert
    January 3, 2018

    Hi,

    You can create (2) Full HD sequences by default. Name them as "Mavic Seq" and "Nikon Seq". Then,

    1. Drag any Mavic drone (2k) clips into 1st Sequence ("Mavic seq")

    2. A pop up window will ask whether should you "Keep the existing settings" or "Change the sequence settings"

    3. Pick "Change the sequence settings" -this will allow the "Mavic seq" to follow your Mavic drone (2k) clips settings/resolutions

    4. Drag any Nikon 1080i clips into 2nd sequence ("Nikon Seq") and pick "Change the sequence settings" --this will allow the "Nikon Seq" to follow your Nikon 1080i clips settings/resolutions

    Then, you can create another "Master" sequence to put both nested sequences "Mavic Seq" and "Nikon Seq" altogether. In the Master sequence you can adjust the frame size accordingly by right click > Set to frame size.

    Najihah

    R Neil Haugen
    Brainiac
    January 2, 2018

    That looks like you have a project created from a 4k clip, therefore 3840x2160 or thereabouts, with a non-scaled 1920x1080 clip dropped onto the timeline.

    You could right-click on those clips, and use "set to frame-size" to scale that clip clear up to the frame-size of the timeline, but: it will lose a lot of quality "enlarging" it that much.

    It is more common to mix 4k/1080 media on a 1080 sequence.

    Neil

    New Participant
    January 2, 2018

    Is there a way for me to get it all down to a 1080 sequence or do I need to start this project al over?

    Also for the future, is it best to drop the lowest resolution clip I plan on working with first?

    R Neil Haugen
    R Neil HaugenCorrect answer
    Brainiac
    January 3, 2018

    First question ... you can change the sequence settings, and accept the dialog about deleting previews. Much of the time that can work ok, if you've not done a lot of scaled cropping or effects timing things in/out of the screen such as graphic items. Even much of that typically makes it over.

    So ... I'd suggest duplicating the sequence, and on a new timeline with that sequence, changing the sequence settings, see what happens.

    Another way is to create a new 1080 sequence, go to "pancake" editing by dragging that sequence from the Project tab and instead of just dropping it into the timeline area with another sequence open, which would add it onto the end ... drag it to the top or bottom of the timeline panel so you get the blue border blocks showing and let go there, creating a second timeline panel. Select-all of the old sequence, then just drop it down onto the 1080 one.

    Next question ... generally, yea, unless you're working with say 4k, 1080, and 480 material. That last is so small, you'd want to work on at least a 1280x720 if not 1920x1080 sequence, and maybe show the smaller media in a small box.

    Neil