Participant
February 1, 2026
Question

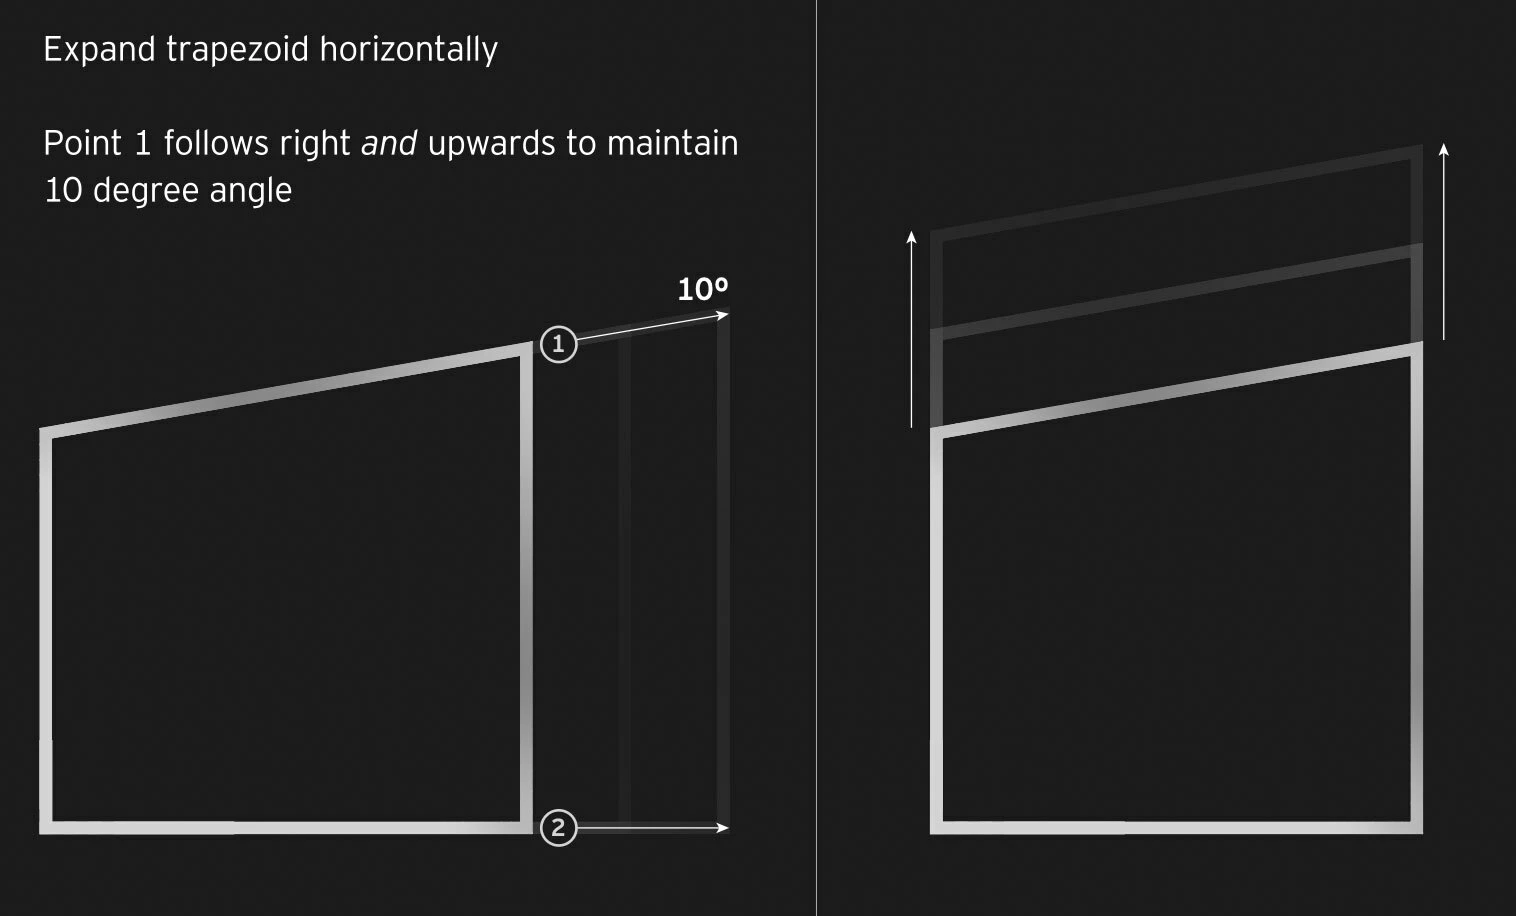
How can I create a trapezoid that can be resized horitonally and vertically, but maintain set angles?

  • February 1, 2026
  • 2 replies
  • 80 views

I’m trying to automate a trapezoid shape, that can be resized along the x or y axis (preferably with slider controls), but maintains four set angles. For instance, 90°, 90°, 100°, 80°.


See attached image as an example:


    2 replies

    Community Expert
    February 2, 2026

    I would use the Window/Create Nulls From Paths/Points Follow Nulls tool, add a second null for position and size (scale), and some creative parenting to maintain stroke width and adjust the height easily. Here’s the workflow:

    1. Create a rectangle
    2. Press ‘uu’ to reveal the rectangle properties
    3. Reset the Transform Rectangle position to center it and make nulls match the corners
    4. Select the Rectangle, right-click, select Convert to Bezier Path 
    5. Use the Window menu to open Create nulls from paths
    6. Reset the first vertex to the upper left corner
    7. Select the path, select Points Follow Nulls
    8. Rename the nulls to keep things straight
    9. Add a new null and give it a name like “Size.”
    10. Parent the Top Right to the Top Left null (your angled line mover)
    11. Parent the Top Left and two bottom nulls to the “Size Null.”
    12. Reveal the Scale and Position property of the Size Null and the Position property of the Top Left null, and enjoy animating your trapezoid.

    I’ve attached a couple of project files for you to try.


    Yaneev T
    Known Participant
    February 2, 2026

    hi!

    that’s how i’d do it within a shape layer. please look at attached screenshot.

    notes:

    a favorite expression lets me define and scale a rectangle from one of its corners:

    s = thisProperty.propertyGroup(1).size;   [s[0]/2, s[1]/-2]

    here i divide the X value by 2 and the Y value by -2, so that the rectangle grows to the right and upwards, sticking always to its bottom left corner.
    (this is applied to the “Position” property inside a “Rectangle Path” object, and refers directly to the adjacent “size" property)

    now duplicate the rectangle and group the second copy into a shape group, allowing you to skew it independently under the group transform attributes.

    i added “Merge Paths” in “Add” mode, to create one unified shape out of the two rectangles. note that this “Merge” needs to be placed under the two other elements, and make sure it is not inside the secondary group created for skewing, but outside, in the main group (here automatically named “Rectangle 1”.

    with the orange arrow i marked the Y value of the second rectangle, which you can now scrub and change, and assign any value to - maintaining all the angles.

    another useful thing - i use “UU” as a keyboard shortcut, which reveals all attributes of a layer, which have been altered by me from their default values, which is what you see in this screenshot.

    hope this helps!


    Yaneev T
    Known Participant
    February 2, 2026

    oh almost forgot:
    you can expression-link the second rectangle size to the first one, and change either axis independently - all the while retaining the same angles.