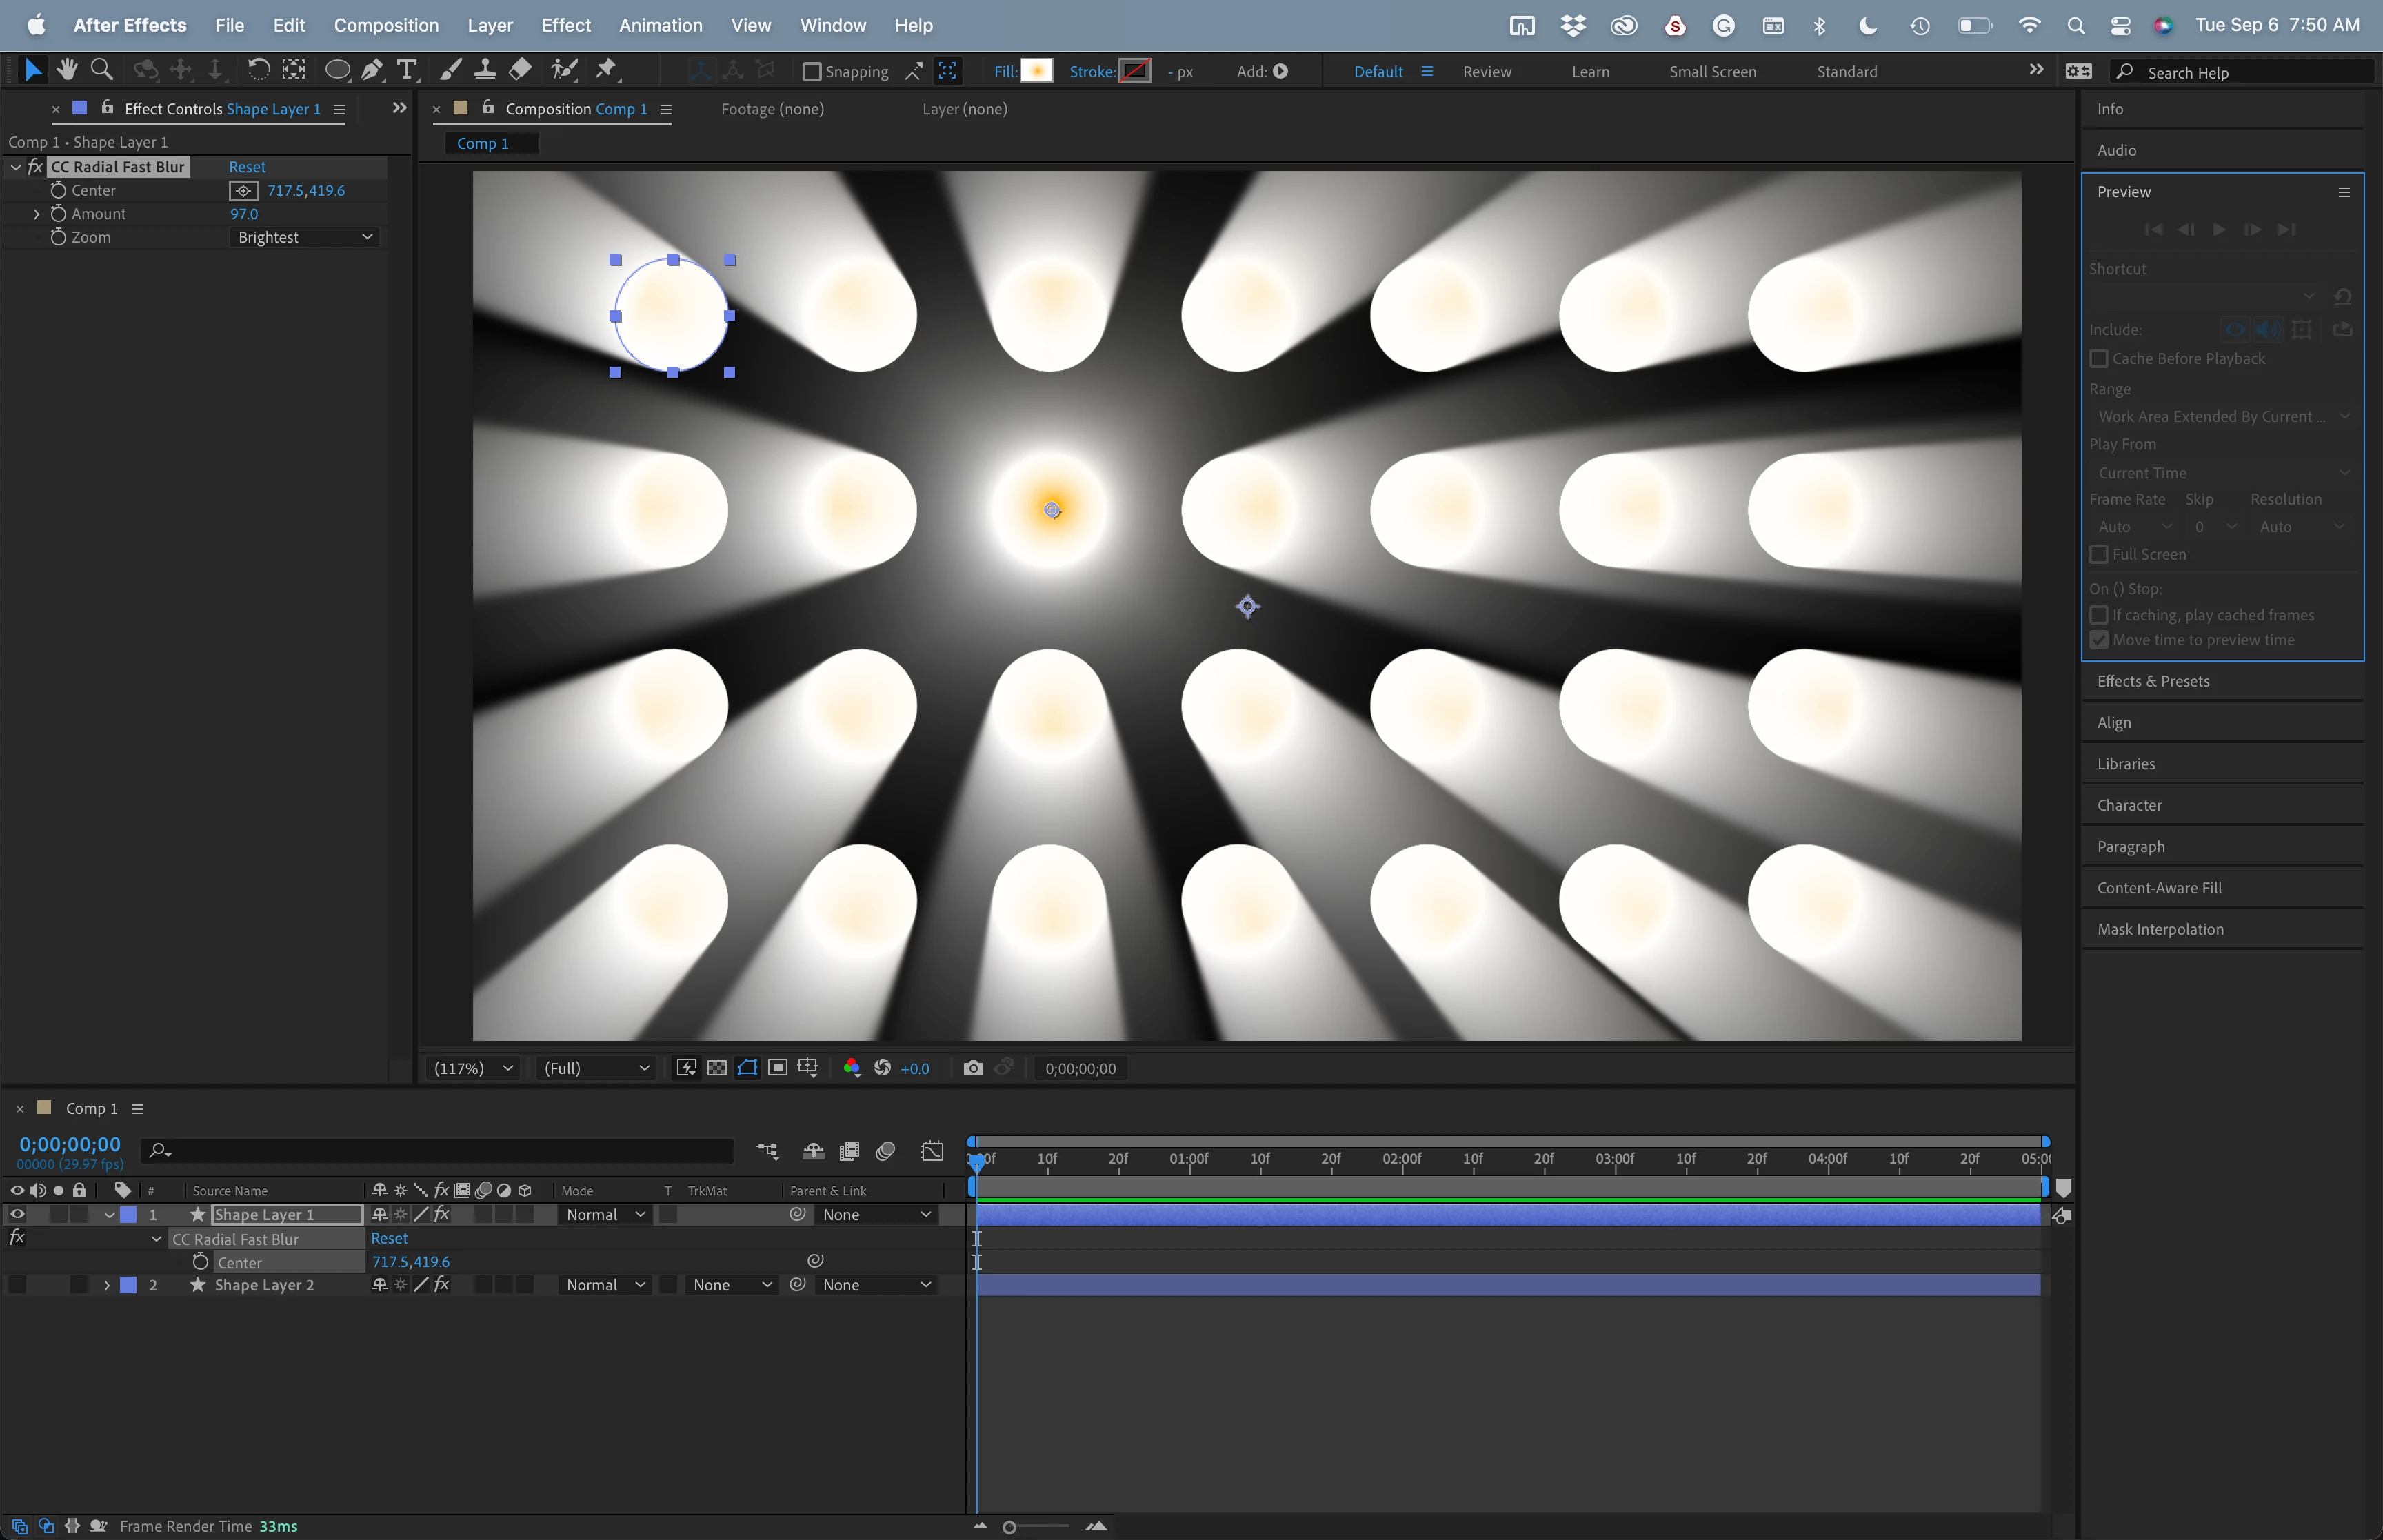
Your workflow has several problems, and they start with CC Radial Fast Blur, and that problem is compounded when you use it on more than one layer.
All of the Radial Blurs emanate from a single x-y position. this gives you no perspective control, and when the effect is applied to multiple "lights," as in your screenshot, every light seems to be pointed away from the blur center. That produces an unrealistic lighting setup. It more closely represents a light behind a wall with a bunch of holes poked in the wall.
To create a spotlight, you need a single copy of the light layer with a little blur to simulate atmospheric haze, another copy with radial blur, and then probably at least one more copy with the same blur settings linked by expressions, so you don't have to fiddle with more than one control. You get something like this:
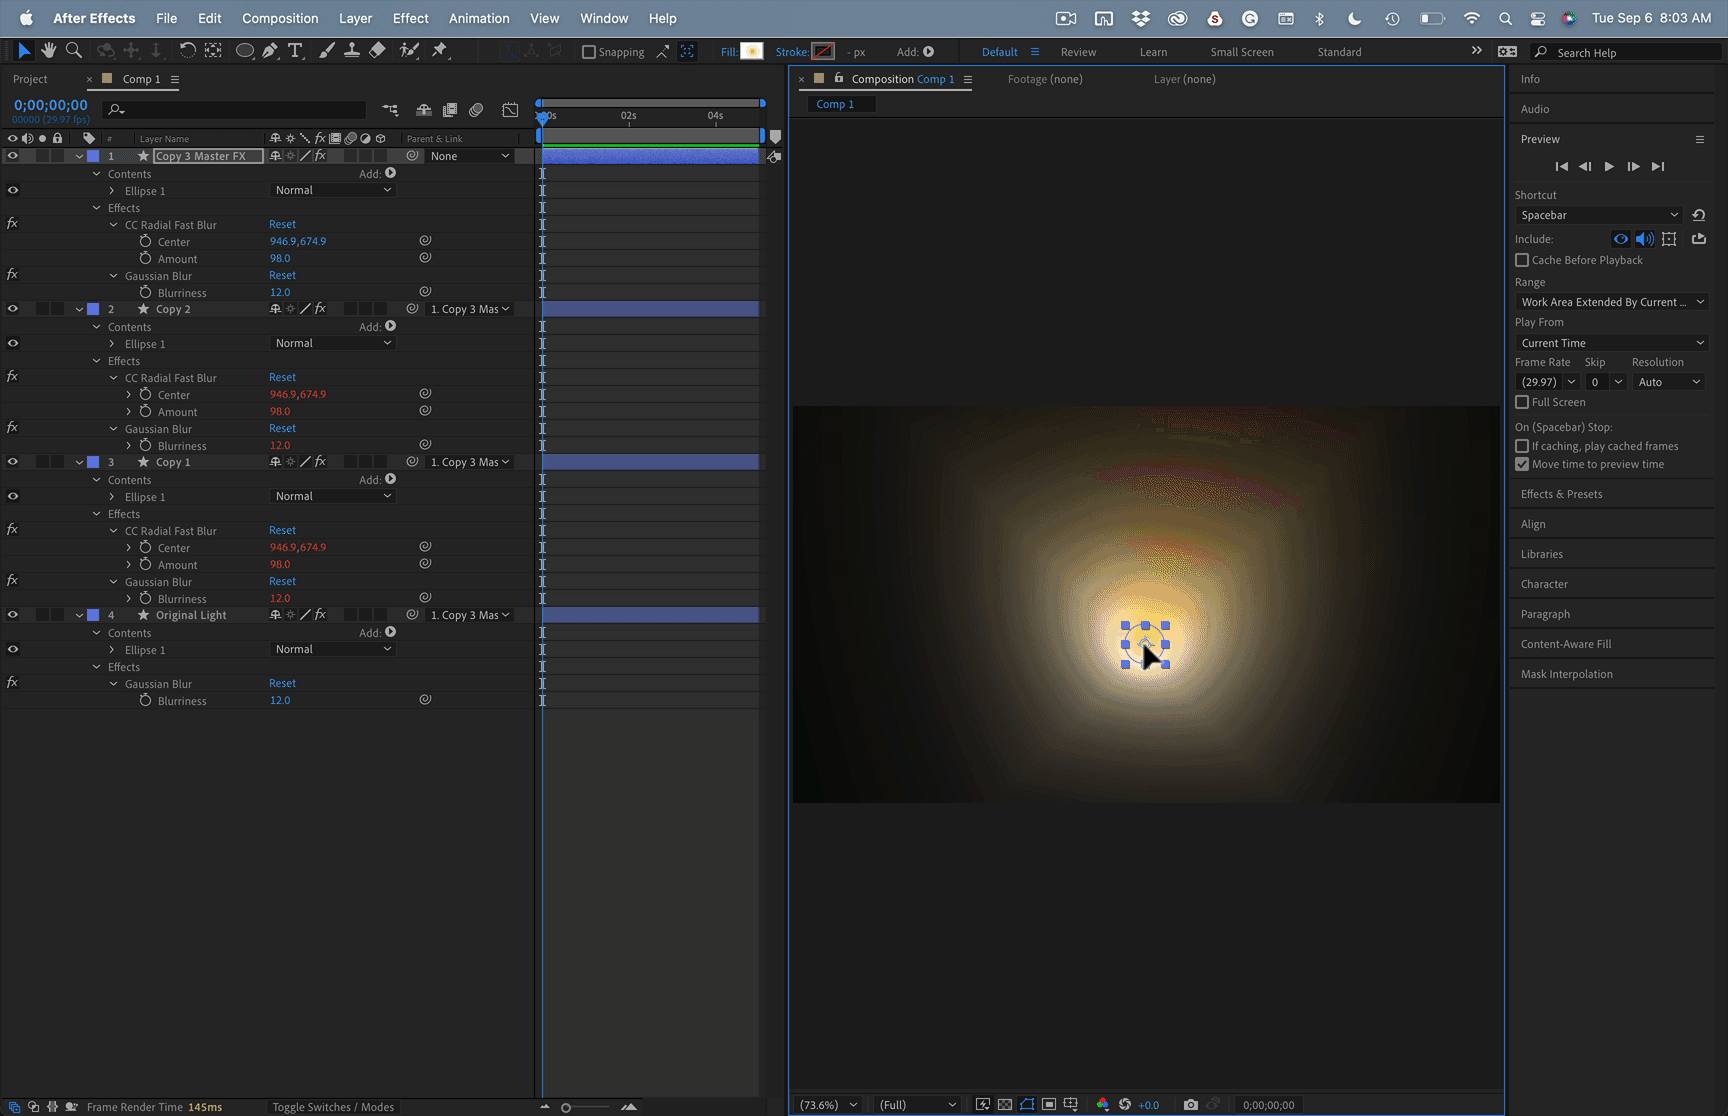
Now you have a simulated spotlight using 2D layers and a couple of effects. You need to duplicate the process if you want more than one light. It's not as simple as pre-composing and moving the pre-comps because the blur will not extend beyond the layer boundary. You'll have to group the layers.
Then you'll need to do the same thing with your text and image layers, but you'll need to generate only the edges and a black fill on a copy below the original layers, apply the blur/radial blur to them, and set the blend mode to Multiply, then use blend modes to simulate the holes the layers would make in the light beams by objects in front of the lights.
A much simpler approach would be to invest in a 3rd party plug-in like Trapcode Shine, make the layers 3D and let real lights interact with 3D layers.
Using an adjustment layer is not a good idea for this project. If you stick with a 2D blur like CC Fast Radial Blur, you'll need one copy of the effect on every layer you want to use as a light or shadow source. I don't have time to send you screenshots of the entire process, but I hope this helps.

