New Participant
November 17, 2023
Answered

How do I link a mask path to the shape path?

  • November 17, 2023
  • 2 replies
  • 2159 views

Not going to lie, After effects is not my strong suit as an editor but I'm in the middle of creating somthing and I need to know how I can link the shape path of a mask to a shape layer (rectangle). Just to be clear I need this to be linked so when the shape changes so does the mask.


Thanks in advance 🙂

Danny 

This topic has been closed for replies.
Correct answer Rick Gerard

If you use these two expressions to control the size and position of your Background shape layer, they will compensate for Baseline Shift and Paragraph Justification:


// Background/Content/Rectangle 1/Size;
ref = thisComp.layer(index -1);
box = ref.sourceRectAtTime();
wPad = 50;// could be a slider
hPad = 30;// could be a slider
[box.width + wPad, box.height + hPad]

// Background/Transform/Position
ref = thisComp.layer(index -1);
box = ref.sourceRectAtTime();
p = ref.position;
wCntr = box.width/2 + box.left;
hCntr = box.height/2 + box.top;
ref.position + [wCntr, hCntr]


I always use index-1 instead of the Text Layer name, so this kind of expression can be saved as an animation preset, and you don't have to name the layers.


The next step would be to create a layer for the Saber Plugin. In my sample comp, I named it Saber. Add a mask using the Rectangle tool (q). Then, select the path and use the selection tool (v) to drag a selection around the top left vertex. Use the Layer/Mask and Shape Path/Set First Vertex to make the top left vertex the first. You can then use the Window/Create Nulls from paths script and select Points Follow Nulls to create four nulls. You can then add the following four expressions to point to the Background layer and use its position, height, width, top, and left corner to position the nulls:


// Saber: Mask 1 [1.0]/Position
ref = thisComp.layer("Background");
box = ref.sourceRectAtTime();
p = ref.position;
l = box.left;
t = box.top;
ref.position + [l, t]

// Saber: Mask 1 [1.1]/Position
ref = thisComp.layer("Background");
box = ref.sourceRectAtTime();
p = ref.position;
l = box.left;
h = box.height/2;
ref.position + [l, h]

// Saber: Mask 1 [1.2]/Position
ref = thisComp.layer("Background");
box = ref.sourceRectAtTime();
p = ref.position;
w = box.width/2;
h = box.height/2;
ref.position + [w, h]

// Saber: Mask 1 [1.3]/Position
ref = thisComp.layer("Background");
box = ref.sourceRectAtTime();
p = ref.position;
w = box.width/2;
t = box.top;
ref.position + [w, t]


Your comp will look something like this:
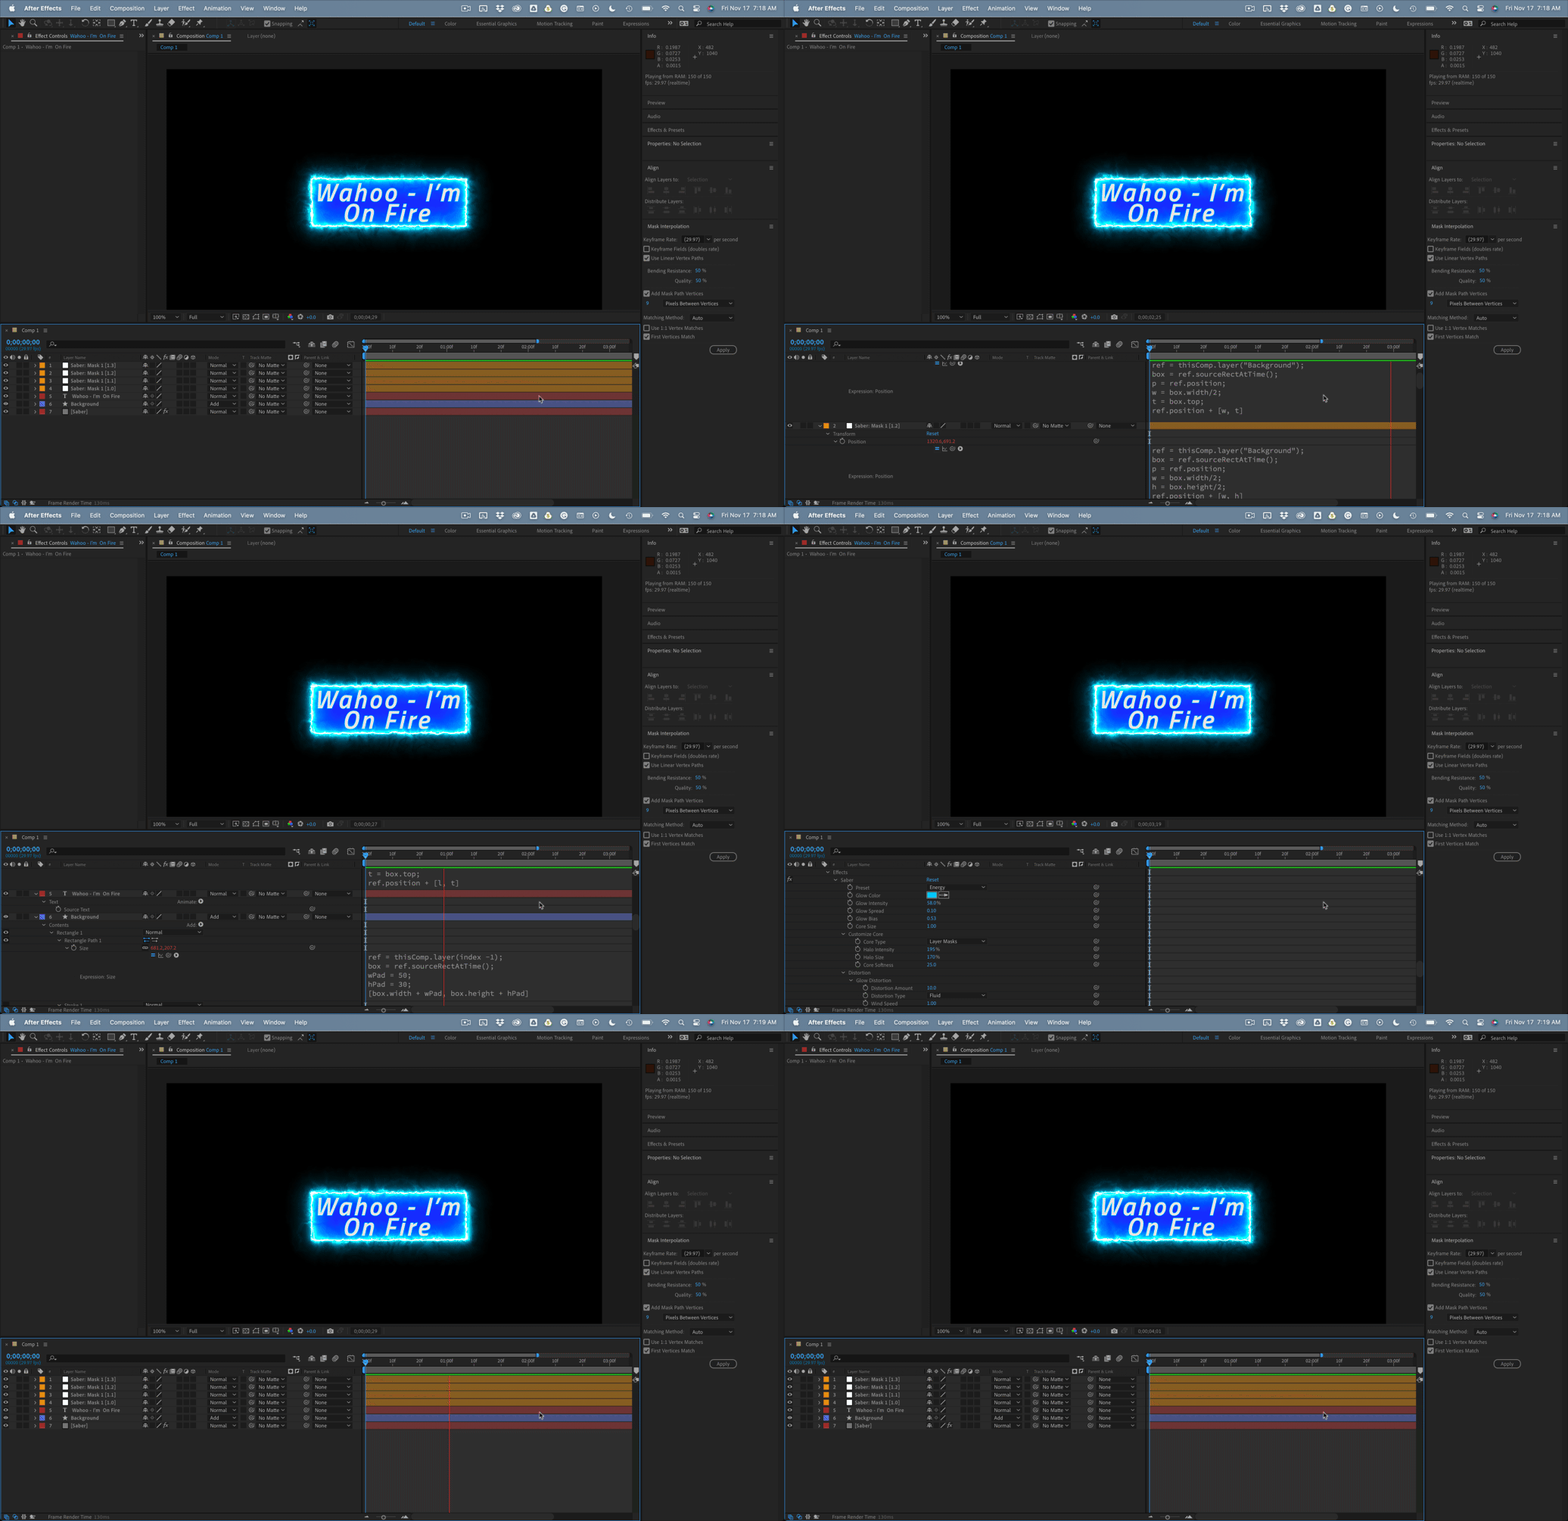
 

I hope this helps. The Create Nulls from Paths script is incredibly powerful. I use it all the time for motion graphics. This basic workflow is used in almost every one of the more than 100 MOGRTs I have created for Premiere Pro.


2 replies

Rick GerardCorrect answer
Community Expert
November 17, 2023

If you use these two expressions to control the size and position of your Background shape layer, they will compensate for Baseline Shift and Paragraph Justification:


// Background/Content/Rectangle 1/Size;
ref = thisComp.layer(index -1);
box = ref.sourceRectAtTime();
wPad = 50;// could be a slider
hPad = 30;// could be a slider
[box.width + wPad, box.height + hPad]

// Background/Transform/Position
ref = thisComp.layer(index -1);
box = ref.sourceRectAtTime();
p = ref.position;
wCntr = box.width/2 + box.left;
hCntr = box.height/2 + box.top;
ref.position + [wCntr, hCntr]


I always use index-1 instead of the Text Layer name, so this kind of expression can be saved as an animation preset, and you don't have to name the layers.


The next step would be to create a layer for the Saber Plugin. In my sample comp, I named it Saber. Add a mask using the Rectangle tool (q). Then, select the path and use the selection tool (v) to drag a selection around the top left vertex. Use the Layer/Mask and Shape Path/Set First Vertex to make the top left vertex the first. You can then use the Window/Create Nulls from paths script and select Points Follow Nulls to create four nulls. You can then add the following four expressions to point to the Background layer and use its position, height, width, top, and left corner to position the nulls:


// Saber: Mask 1 [1.0]/Position
ref = thisComp.layer("Background");
box = ref.sourceRectAtTime();
p = ref.position;
l = box.left;
t = box.top;
ref.position + [l, t]

// Saber: Mask 1 [1.1]/Position
ref = thisComp.layer("Background");
box = ref.sourceRectAtTime();
p = ref.position;
l = box.left;
h = box.height/2;
ref.position + [l, h]

// Saber: Mask 1 [1.2]/Position
ref = thisComp.layer("Background");
box = ref.sourceRectAtTime();
p = ref.position;
w = box.width/2;
h = box.height/2;
ref.position + [w, h]

// Saber: Mask 1 [1.3]/Position
ref = thisComp.layer("Background");
box = ref.sourceRectAtTime();
p = ref.position;
w = box.width/2;
t = box.top;
ref.position + [w, t]


Your comp will look something like this:


I hope this helps. The Create Nulls from Paths script is incredibly powerful. I use it all the time for motion graphics. This basic workflow is used in almost every one of the more than 100 MOGRTs I have created for Premiere Pro.


Danny5CC1Author
New Participant
November 20, 2023

Hi Rick, this is amazing and does evertything I want it to! 

However when I add your suggested size contorl to add padding everythng seems to break. There's always the chance I added in the wrong place but here's where I placed it (attached)

It seemd to have made the background box huge even when I reduced the padding to 0 and also the nulls (and Sabre) dont seem to follow the background when you add padding to it 🤔 🤔

Danny5CC1Author
New Participant
November 20, 2023

Actually forget that last comment, I found the way by adapting half of what you gave me above into my existing project and it works a treat!

Love your work and thanks a lot 👏

Community Expert
November 17, 2023

If you have used the Rectangle tool to create the shape (q), and you have not changed things in your preferences, you will have to select Contents/Rectangle 1 in the timeline, right-click and choose Convert To Bezier Path. Make sure the Rectangle 1/Path is visible in the timeline.


The next step is to select the layer that needs the mask, choose the pen tool, and click anywhere on that layer to start the mask.


With the Parent/Link column visible (Shift + Ctrl/Cmnd + F4), you can                                                                                                                                                                                                                                                                                                                                                                                       drag Pickwhip from the Layer/Mask/Path property to the Shape Layer/Contents/Rectangle 1/Path property.


As long as you don't scale, rotate, or move the layers, the mask will line up with the shape layer path.

If you need the shape layer to create a mask on another layer, you can use it as a track matte for any other layer. You can even keep it on. The Track Matte option is more useful. You'll find it in the Modes Column. 


I hope this helps.

Danny5CC1Author
New Participant
November 17, 2023

Thankyou this works great, however... I had an expression on the Rectangle 1 that got lost in doing this. 

The expression was to alway keep this rectangle slightly larger that the text inside it.

//size
margin = 50;

w = (thisComp.layer("TEXT").sourceRectAtTime().width)+margin*2;
h = (thisComp.layer("TEXT").sourceRectAtTime().height)+margin*2;
[w, h]


This expression doesn't seem to work on the new path I have created in your seggestion above. I don't suppose you'd know an expression that might do the same thing for the new path layer?

Community Expert
November 17, 2023

Your expression is for a parametric shape with height and width. 


If you need to use sourceRecAtTime() to get the size of a text layer, the easiest thing to do is apply it to a rectangle.


If you must combine sourceRecAtTime() and a mask, you first have to select the Rectangle, convert it to a Bezier Path, and then run the Create Nulls From Paths/Points Follow Nulls script. You can then calculate the four corners of your text using SRatT, top, height, left, and width to get the values for each corner. Tie these calculations to each of the four nulls that the script created will generate the mask.


You don't need a mask if you need to create transparency from the Rectangle that your expression would generate. You can use the shape as a track matte or Set Matte. You can even include a scale multiplier and calculate position changes to offset the mask. 


If you explained your design idea and project structure, we could probably give you a simple solution.