New Participant
April 23, 2017
Answered

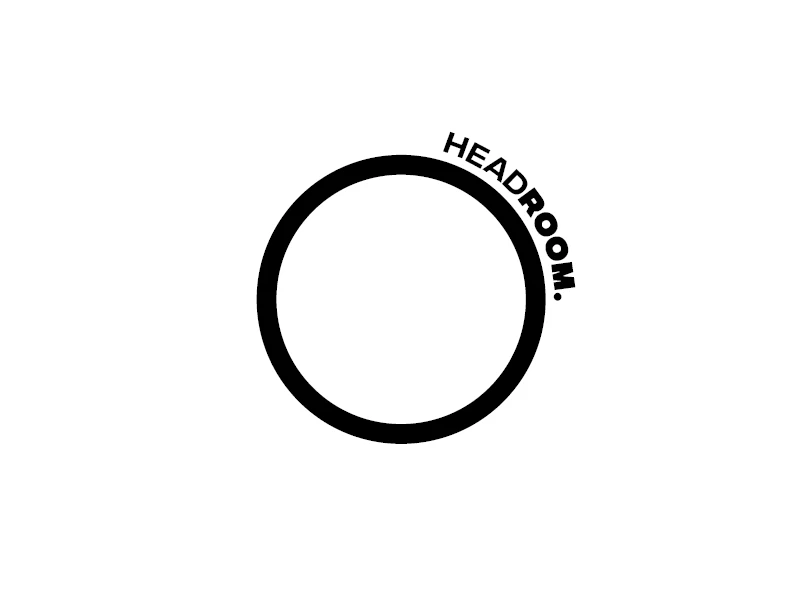
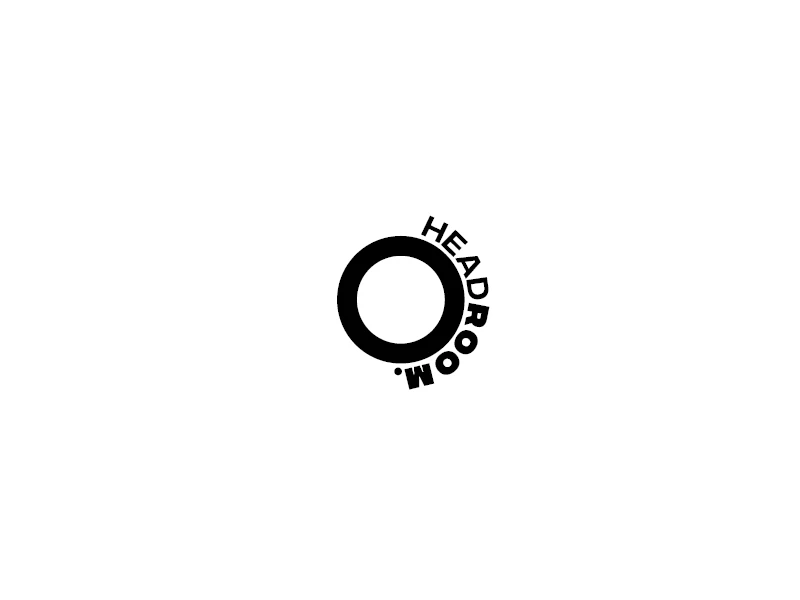
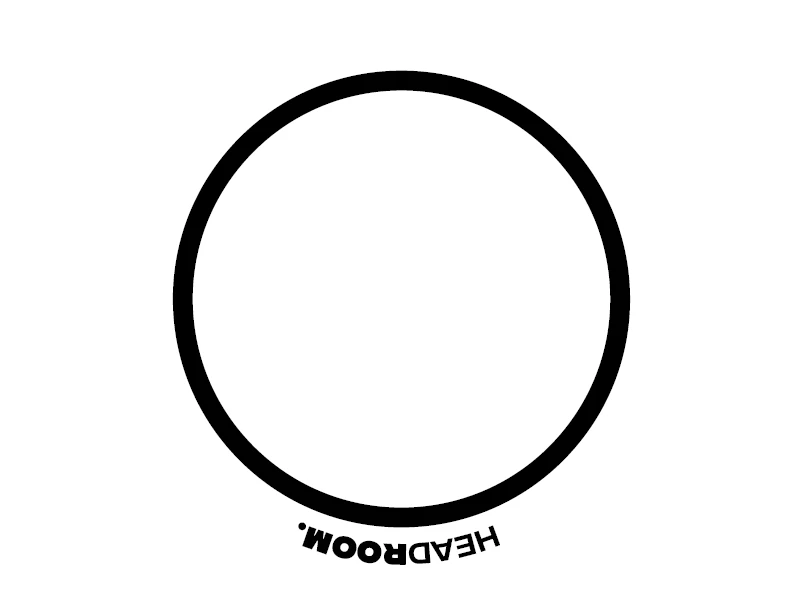
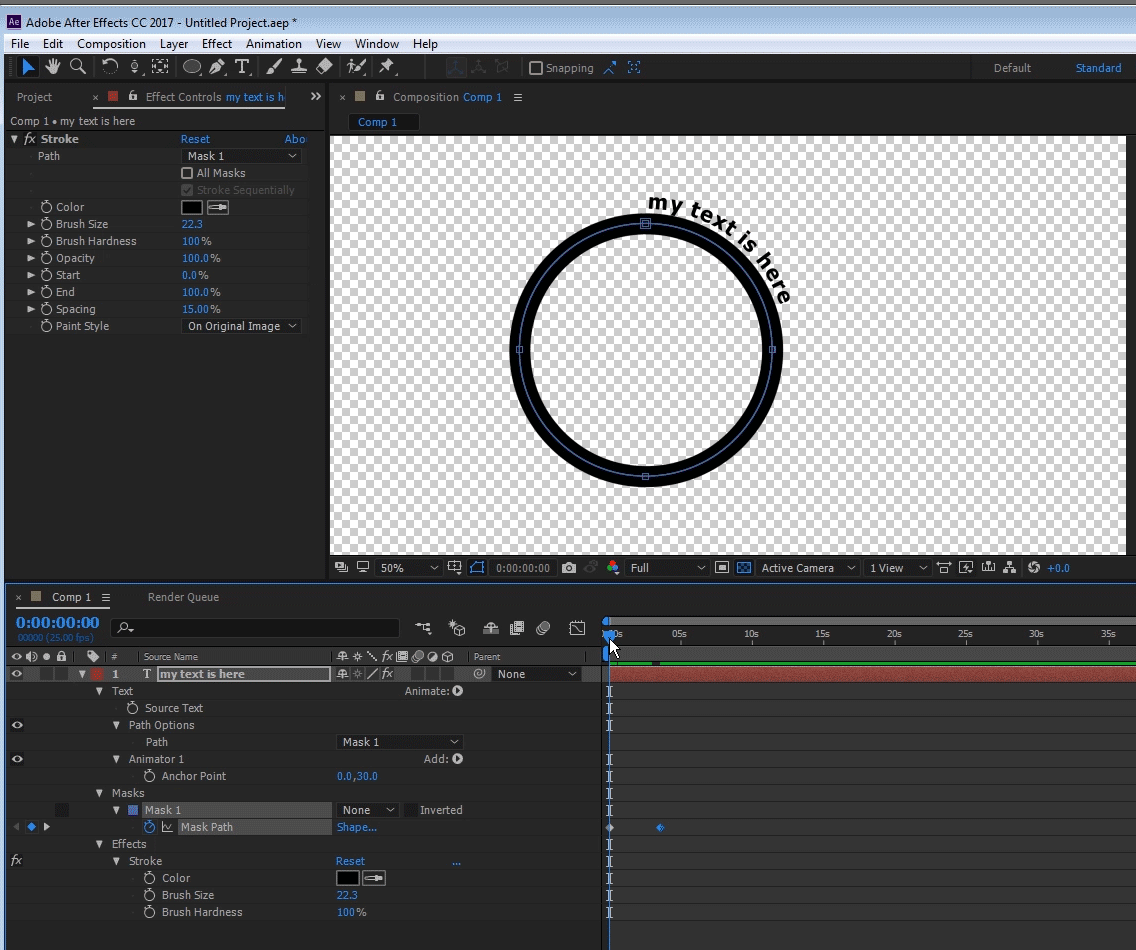
Type On Circle path size change, but retaining point size.

  • April 23, 2017
  • 2 replies
  • 3464 views

Having a bit of a dilemma.

I have some type on a circle, surrounding a circular object. I want this circular object to move, shrink and grow, retaining it's stroke size, and I want the type on the circle to follow it. HOWEVER, I don't want the type itself to change point size. I've been able to do this kind of resizing in InDesign very easily, just scaling the combined objects achieves the desired effect. However, I can't figure out how to do it in After Effects, as it just changes the overall scale of the grouping.

Anyone got a way to do this? Have attached examples of the desired effect.

    This topic has been closed for replies.
    Correct answer Roei Tzoref

    just follow these parameters:

    I have typed UU to show all modified properties.

    2 replies

    Roei Tzoref
    Roei TzorefCorrect answer
    Brainiac
    April 23, 2017

    just follow these parameters:

    I have typed UU to show all modified properties.

    Community Expert
    April 24, 2017

    You can also do this without the use of a text animator and a shape layer. Here's the step by step:

    1. Create an ellipse shape layer by selecting the ellipse tool
    2. Set the fill and stroke as desired
    3. Drag out a circle while holding down the shift key
    4. Press the u key twice to reveal all modified properties of the shape layer
    5. Zero out the position of the ellipse by setting Ellipse 1>Transform Ellipse 1>Position to 0, 0 to center the circle
    6. Right click on Ellipse 1>Ellipse Path 1 and select Convert to Bezier Path
    7. Spin down Ellipse 1>Path 1 and set a keyframe
    8. Move the CTI down the timeline
    9. Select the G key to select the pen tool
    10. Double click on any of the vertices in the circle to change to the transform path tool and hold down Shift + Ctrl/Cmnd to uniformly resize the circle to the desired size
    11. Click on Path to select all keyframes and copy (Ctrl/Cmnd + C)
    12. Press Shift + Alt/Option + Ctrl/Cmnd + T to create a new text layer and enter and adjust your type
    13. Press the j key to move to the first path keyframe
    14. Select the pen tool (g) and start a path anywhere in the frame on the text layer
    15. Paste (Ctrl/Cmnd + v)
    16. Press UU to reveal all modified properties of the text layer
    17. Spin up then down the text property then spin down Path Options and set the path to Mask 1
    18. Adjust the baseline shift to position the text properly against the circle
    19. Adjust or animate the first or last margin in the Path Options to position the text on the circle

    Once you have done this a few times it should take you about a two minutes.

    Just goes to show you that there is more than one way to do almost everything.

    Roei Tzoref
    Brainiac
    April 24, 2017

    Thanks Rick, a few notes to your workflow:

    between step 6 and 7: additional step required for setting the first vertex. if you plan to animate your path after you converted it from parametric to bezier, you have to set a first vertex or else you would get a funky movement. FYI when you convert parametric path to bezier, you do see an indication of a first vertex exist, but there really isn't.

    between step 16 and 17: additional step required to reset your text position or else its mask path won't be aligned with the original shape's path.

    Mylenium
    Brainiac
    April 23, 2017

    There is no automated way. You simply have to animate the keyframe values in opposite directions to compensate. Simply use a size text animator on the text instead of scaling it directly.

    Mylenium