3000Photos wrote Gutterfish - You said I did one thing, yet I didn't, and the video shows that. Sorry you're choosing to see a one sided view of things. |
I know what you did. What you did was constrain the feather to the top of the layer just like I said you would have to.
All I said is that you you're wasting your time trying to prove it to me. I never accused you of lying.
The difference between you and everyone else on this page is that you're the only who does not know WHY you couldn't get a simple feather to work.
As Rick & myself and DJ all told you....your workflow is incorrect and inefficient.
You got this to work, yes. But you're crummy workflow is going to cause other problems
in the future when trying to do other things completely unrelated to masking.
Look at me...still trying to help you out. I must be an idiot.
Inefficient means more steps to complete than is necessary and more rendering time. Sorry, your method is not what I would have chosen because it involves a lot more monkeying around than is necessary and frankly, will take longer to render. It was also inefficient because you did not understand how feathering works or take time to look at the results you were getting. We are just trying to help. To fix the problem you just repositioned the mask so that the feathering did not extend past the edge of the layer.
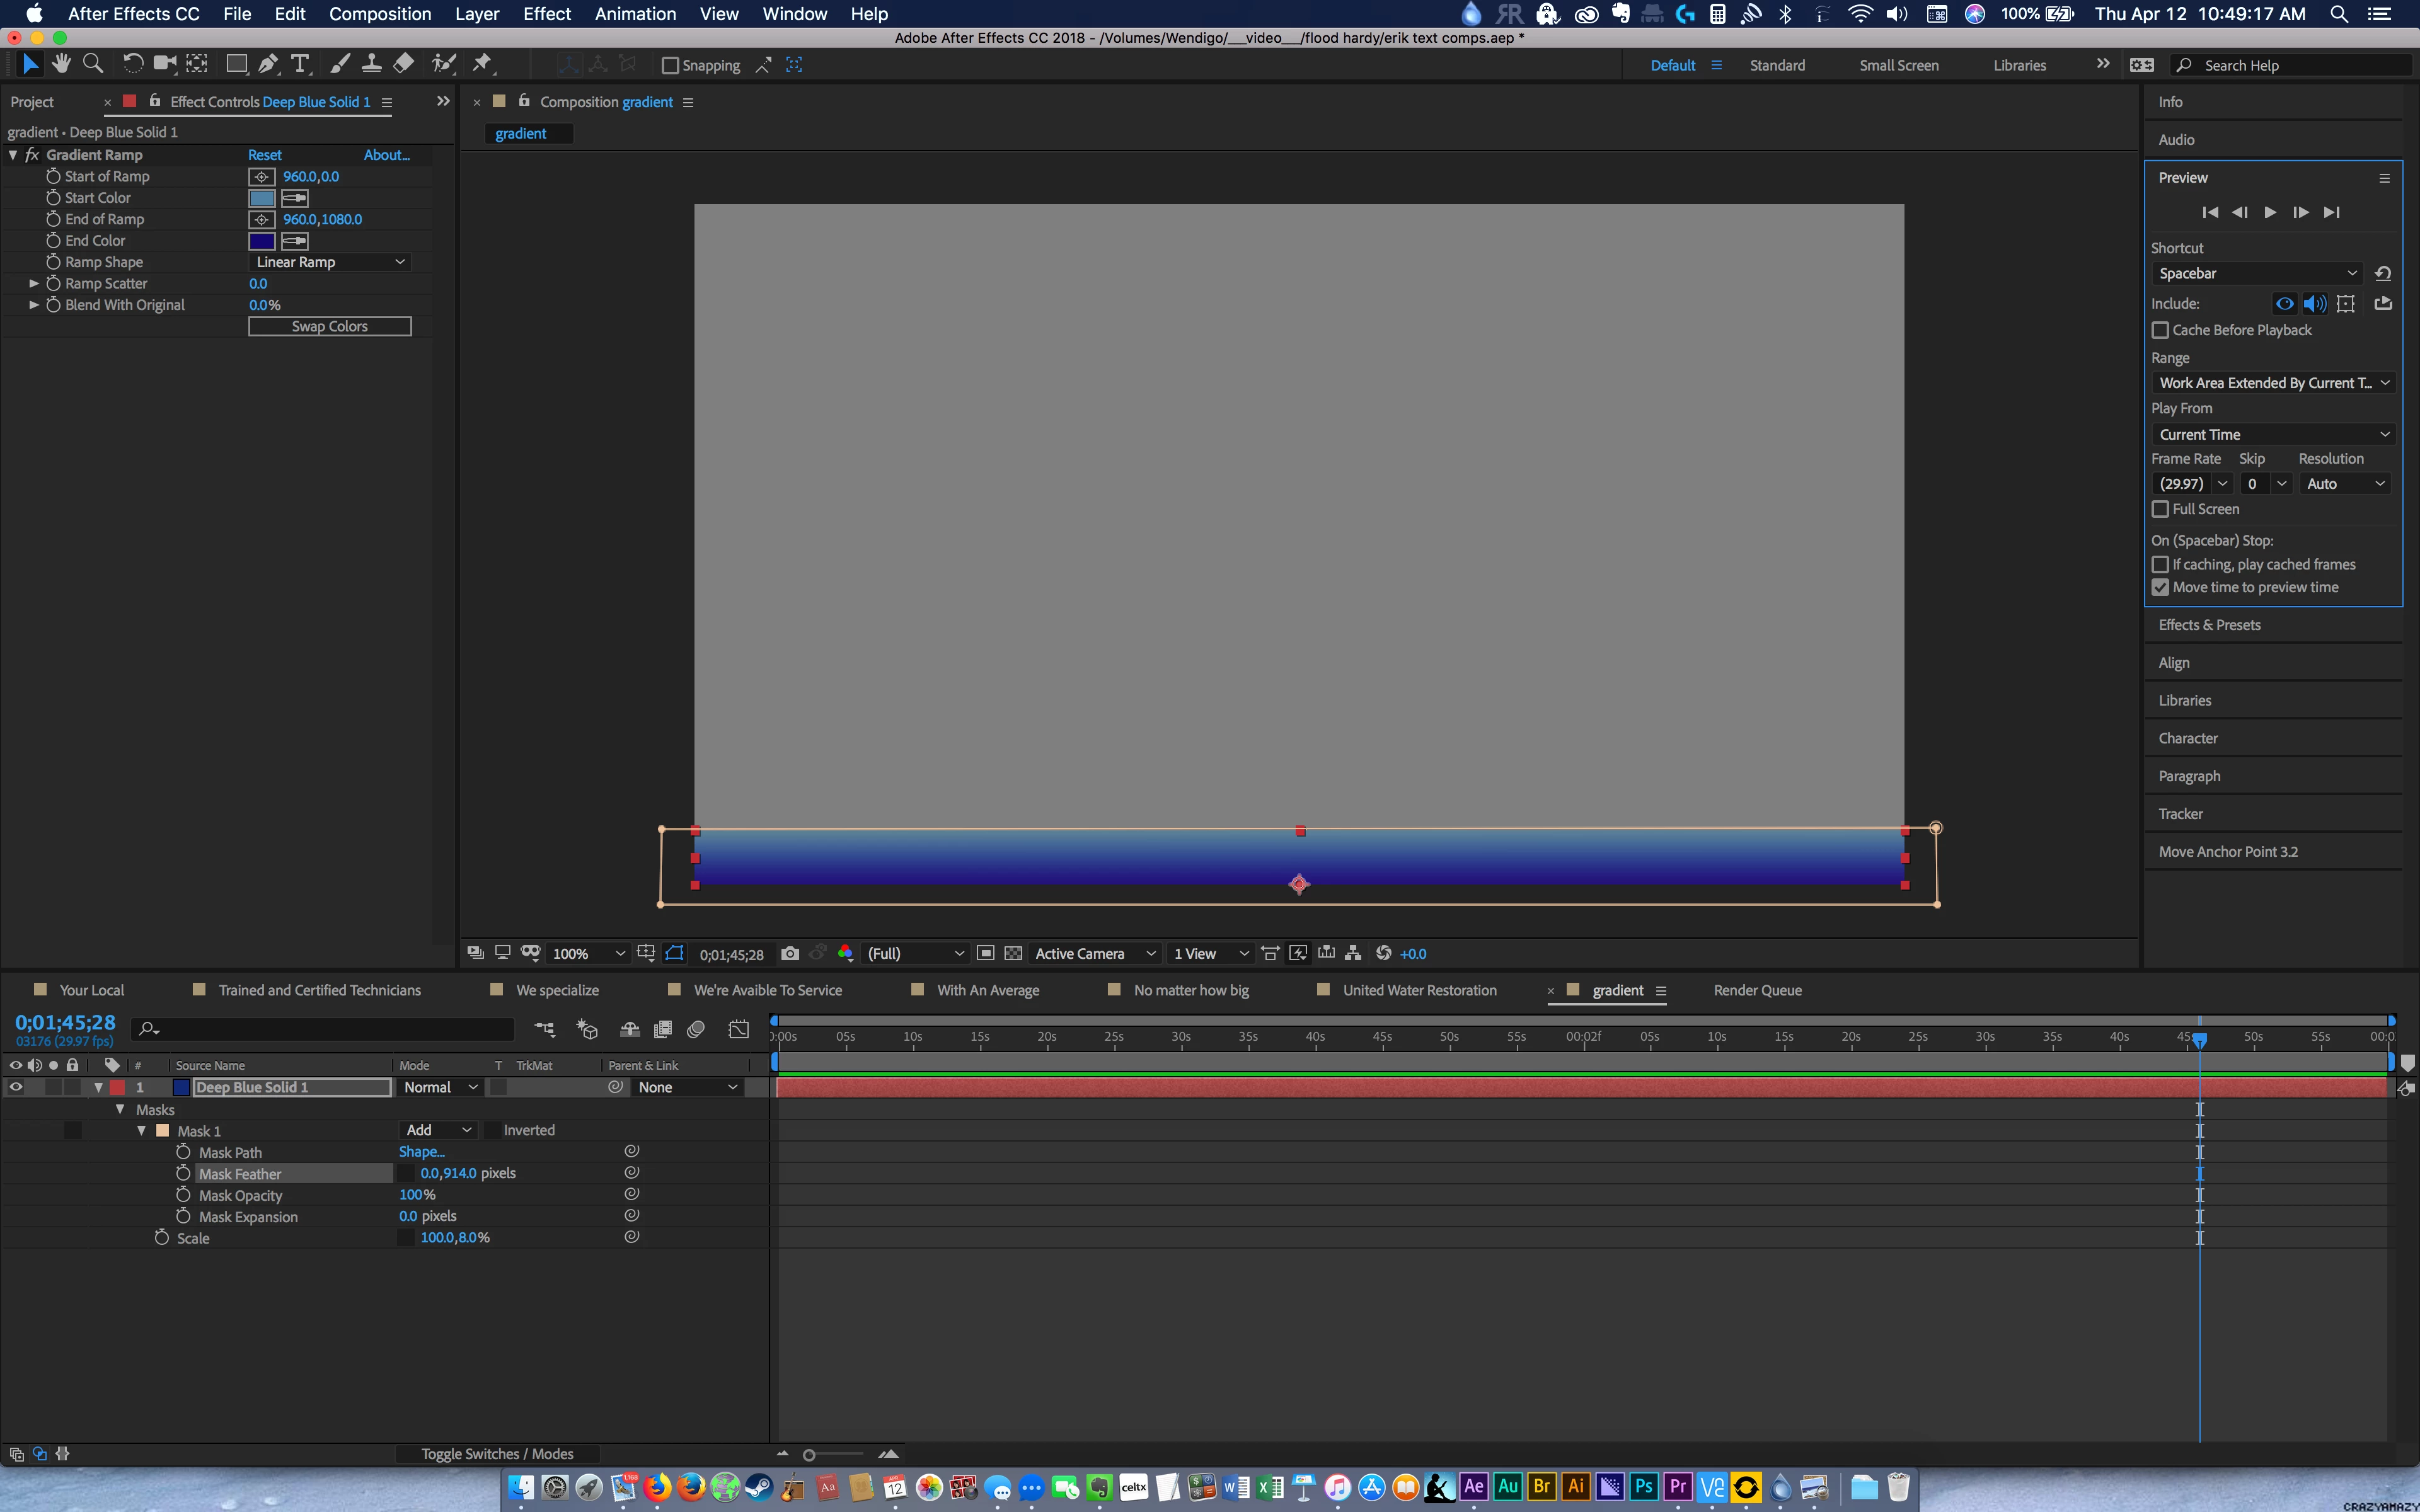
If all you needed was a feathered gradient then create a solid, set the comp panel magnification factor to about 25%, use the rectangle tool to draw a mask at the bottom of your frame about 1/2 way through the center of the faded transparency you want to create and extend it beyond the bottom of the frame a sufficient distance to allow for the feathering, press the f key to reveal the feather property, set the feather, add Gradient to your layer, adjust the start position for the gradient to match the top of the feathered edge, adjust the colors.
No scaling, no extra time calculating and rendering the scaled pixels, no other problems and done in about 2 minutes.
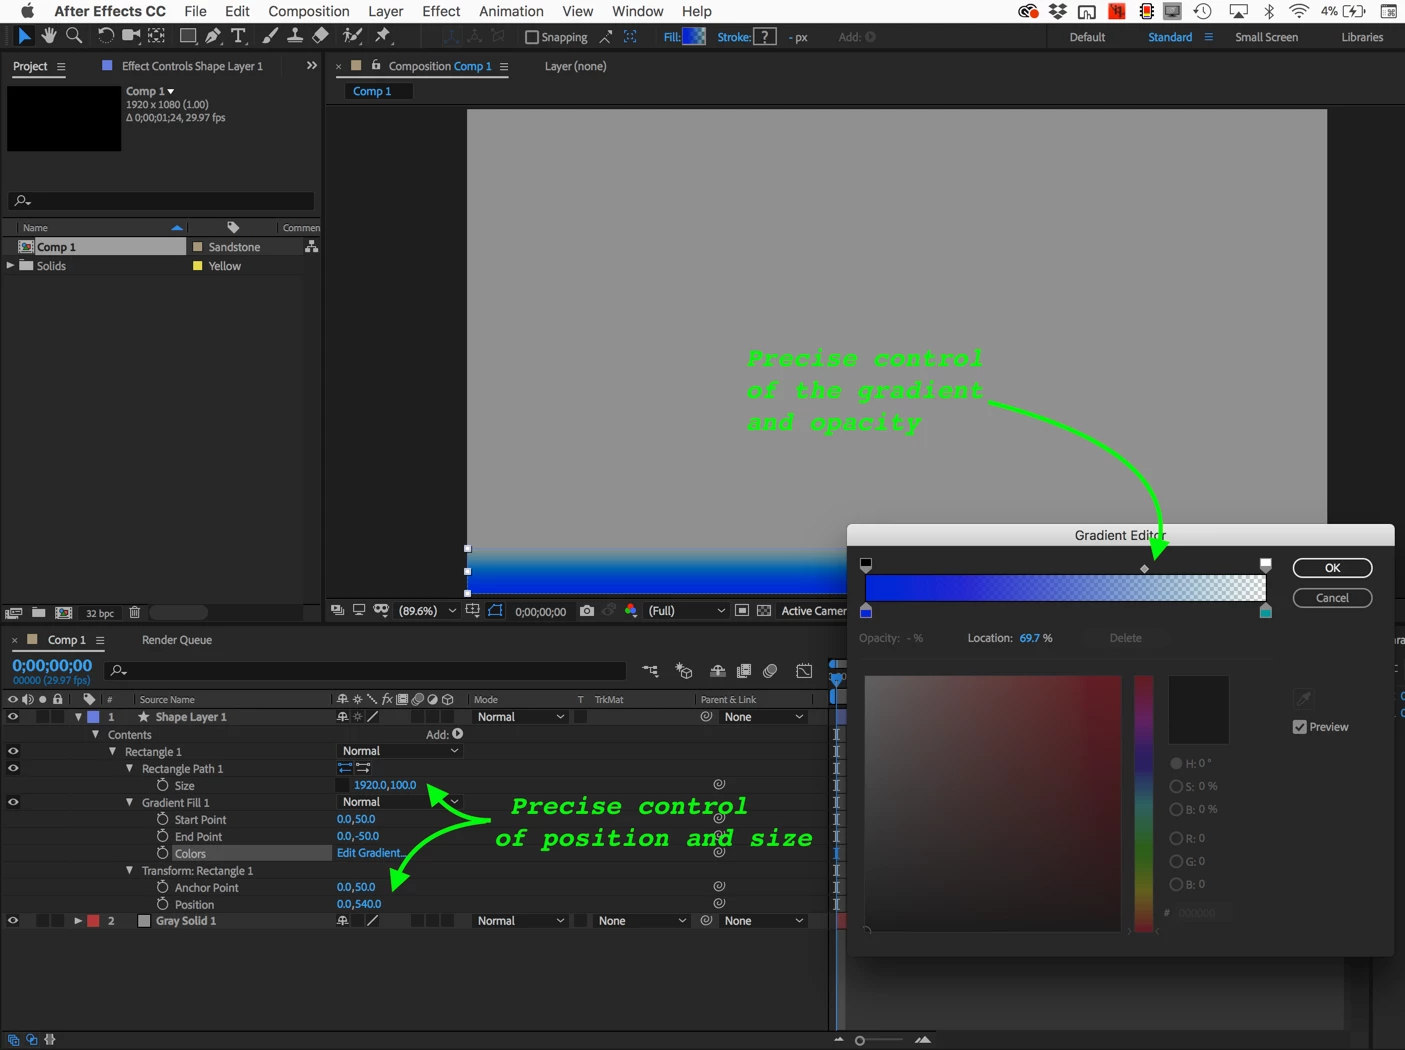
An even more efficient approach would be to use the rectangle tool to draw a gradient filled rectangle exactly the size you want at the bottom of the frame, press the U key twice to reveal all modified properties of the shape layer, edit the start and end color of the gradient and the opacity of the gradient and the start and end points of the linear gradient. One layer, no extra calculations, perfect numerical control over the size of the soft edge at the bottom of the frame. I did this in under a minute by simply double-clicking the rectangle tool with a gradient fill applied, pressing the U key twice to reveal all modified properties, clicking once on the Transform Rectangle > to expand the properties and tabbing through the values and entering numbers. Then I clicked on the edit gradient tool to create my transparent gradient with a lot more control. This method also imposes almost no rendering hit to your project.