

- Home
- Illustrator
- Discussions
- Re: Align stroke to outside on special text.
- Re: Align stroke to outside on special text.

Copy link to clipboard
Copied
It seems like Illustrator can't do what Affinity can in this regard? I am trying to add a stroke outside the text, not in-line. But I think because the text is filled with an image, it just won't work?
I also tried creating path and then trying to get the stroke to go on the path but again it won't work unless I remove the image from the text and then the stroke shows up.
I'd appreciate it if anyone has any idea how I can do this because if not I'll have to do it in Affinity and then PDF it over, but illustrator then converts EVERY letter of text into a separate path when importing layers🤦


 1 Correct answer

Select the text with the selection tool, not with the text tool.
Then open the Appearance panel.
Apply a new stroke to the text.
Move the stroke below the "Contents" and make it twice the desired weight.
Explore related tutorials & articles
 18
Replies
18
18
Replies
18

Copy link to clipboard
Copied
Try if dragging the stroke below the fill in the Appearance panel does wat you want.
Copy link to clipboard
Copied
Thanks a lot! That strangely worked the first time, then 2nd and 3rd time it didn't. So I just keep removing appearance options then retrying until it works. Is this a bug?? Either way, this little trick doesn't seem to stay present and unravels when copying the layer over to the main design. So I decided to convert to outlines so that it was permanent.
But that created an additional problem; For some reason, that forces there to be a black "fill" dummy layer which won't be seen when the image is present but that is not how printing works. So I am afraid it will print the black then try to print the image on top 🤔
If I try to make that black fill into transparent, it does a weird overlap of the stroke! Which again, will probably be printed before the image and mess with the colouring? So I thought make the fill white, but will that mean the printer prints the spot white twice? I am not sure if this is going to mess with the process!
Maybe I can convert the text to solid vector shapes? I am not sure how though.. I am brand new to AI.
Cheers


Copy link to clipboard
Copied
Can you please set the font to something like Myriad and then save the file and upload it to Dropbox or the like?
And then please describe step by step what it is that you want to do with the text. Copy to a different document? Maybe there is an appearance on the layer that clashes with the appearance on your text?
Copy link to clipboard
Copied
I will do when I am back on the PC, but for now if you'd care to watch this https://www.youtube.com/watch?v=2tmYhahfLVI and this https://www.youtube.com/watch?v=k5lWIjDATLs&t=75s
It will tell you exactly what I did, initially. But that "trick" isn't permanent and it wouldn't even let me copy it over to the main design so I used "converted to outlines" to make it permanent. But now there is like a "false" black fill layer underneath the texts image. Which is no issue when on screen, but the printer will likely try to print that black fill before the image so that is the problem 🤔
Cheers!
Copy link to clipboard
Copied
So you have created a clipping mask and then you want a special appearance on the text. Illustrator doesn't like to do that.
Try this instead: https://youtu.be/nYHdq4drU5Y
Copy link to clipboard
Copied
Thanks that worked but if you then disable the image layer (as shown), the inner stroke is still there! Not sure if that will interfere with printing?
And also can you tell me how I can now make a spot white under-layer for the text? As shown, I have copied each text layer and given them a white fill but it has gaps in the letters 🤔 Do I have to go back to the text creation process to make that whitespot duplicate layer, or can I do it after?
Thanks so much for your help 😁
Copy link to clipboard
Copied


Forgot to attach screenshots..
Copy link to clipboard
Copied
Then just don't hide that fill? Just an idea. As I said: Illustrator doesn't like to add effects to strokes on a clipping mask.
So you also want a white undercoat? I would suggest you use live effects until you get the OK for the design. Then expand the appearance and build this using multiple objects. It will save you some headaches.
Copy link to clipboard
Copied
Unfortunately, when I opened up the project today in AI, the stroke trick you showed me has just messed itself up and gone around the shape of the glitter image underneath the text. Back to the drawing board 😥

Copy link to clipboard
Copied
Works for me when I open yesterday's file. You still haven't uploaded an AI file.
Your life would be easier when you made this glitter into a pattern.
Copy link to clipboard
Copied
The program is so finicky. It drives me nuts! I can send you the file, are you on twitter or fb? @trueblue1878 I'd love to see if you can fix the stroke, as it won't go back the way it was for me unless I recreate it from scratch!
Yes, I'd like to do that and make the glitter into a pattern for future text. Can you recommend a good YT video for that process?
Cheers!
Copy link to clipboard
Copied
Please upload the file to Dropbox or the like and post a link in this forum.
For creating a pattern, there are some good tutorials in the Illustrator Helpx. https://helpx.adobe.com/illustrator/using/create-edit-patterns.html

Copy link to clipboard
Copied
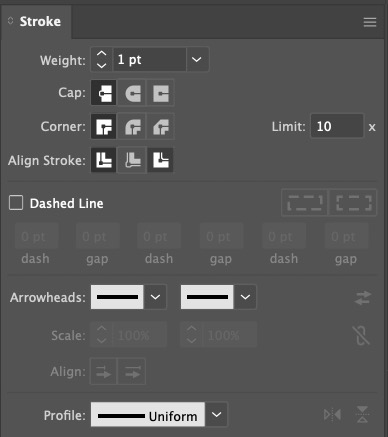
I'm having this issue with normal text, in a normal text box. Used to be able to select the text box, click a fill swatch colour, click the stroke, click a swatch then click slign stroke to outside... Now that's greyed out. I've tried creating fresh text box in case I had some appearence settings accidentally applied, this stops the option being greyed out, BUT I still can't select it. Clicking between the inside, middle and outside makes no change.
I realise I can use Object > Path > Offset Path - but that requires me to commit the text box to outlines which is so tedious when doing mockups and creates two objects to keep track of. Also, if I just straight up ouline the text, the stroke options work and appear.
So it seems to be a bug with live text? Running v 27.7 on a mac studio with latest ios.
Copy link to clipboard
Copied
Select the text with the selection tool, not with the text tool.
Then open the Appearance panel.
Apply a new stroke to the text.
Move the stroke below the "Contents" and make it twice the desired weight.
Copy link to clipboard
Copied
THANK YOU - about 5 steps longer a process than it used to be, and align stroke remains greyed out, but it has the right effect! I'm astounded they've removed such a common tool, especially as it still works fine in InDesign, but at least this is a solution!!
p.s. for anyone reading this later they mean drag "stroke" below "fill" after addign them via the Appearance panel - you might want to press the appearance hamburger menu > "clear appearance" first.
Copy link to clipboard
Copied
My description is 3 steps.
This option never existed in Illustrator. It does exist in InDesign though.

Copy link to clipboard
Copied
Heh. 15 years later, Monika, and you're still here and helping folks with your knowledge. Amazing. I recognize your name from ages ago when I used to be more active here. Keep it up!
Copy link to clipboard
Copied
Thank you for your kind words, Tom. Happy New Year!

Find more inspiration, events, and resources on the new Adobe Community
Explore Now
 AdChoices