

graphics around a circle

Copy link to clipboard
Copied
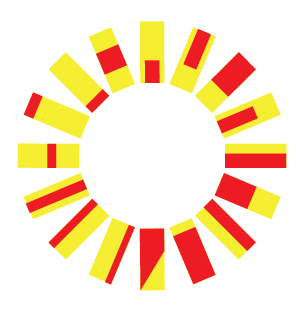
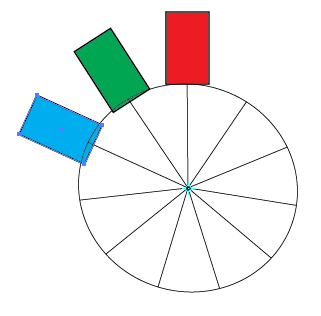
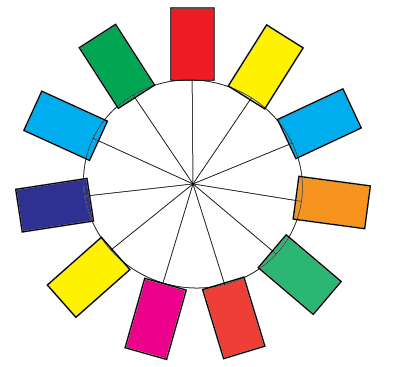
I'm trying to replicate something similar to this, with flags going around the outside of a circle, but is there an easy way to do it using a brush or something? thanks


Explore related tutorials & articles
 20
Replies
20
20
Replies
20

Copy link to clipboard
Copied
Dr Tyrell,
One way could be to create all the flags and turn them vertical corresponding to being at the top, then place the top flag, then add each flah in turn going anticlockwise as follows, Smart Guides being your friends:
Rotate each flag by the right angle (flag number less one multiplied by 360 and divided by total number, for 16 flags like in the image the first added flag would be 1 x 360 / 16 = 22.5 degrees, then 45 degrees, and so on), then snap to the flag last placed, until you add the last one to the right of the top one.
I believe that would be easier than starting to work out the complicated other ways.
Brushes tend to distort.
Copy link to clipboard
Copied
Thanks, that's more or less what I am doing already, the problem with this method is then editing them is a massive pain, I guess I could add each flag as a brush. Will give it a go. Cheers.
Copy link to clipboard
Copied
You may also consider Symbols, Dr Tyrell.
Copy link to clipboard
Copied
Dr Tyrell,
My suggestion(s) in posts # 1&3 (custom creation and Symbols) were based on the (mis)understanding of the image in your OP (original post) that you wish to have the corners of the flags abutted/snapped together, thus avoiding the (trigonometric) calculations required for the size of the circle if you use brushes or blends.

Copy link to clipboard
Copied
Try to use Sctatter or Pattern Brsuh.
You can also try to use Art. Brush
Any time you need prepare brash from all graphics (flag) in one step
Try different settings of these brushes
Then apply it for circle
pawel

Copy link to clipboard
Copied
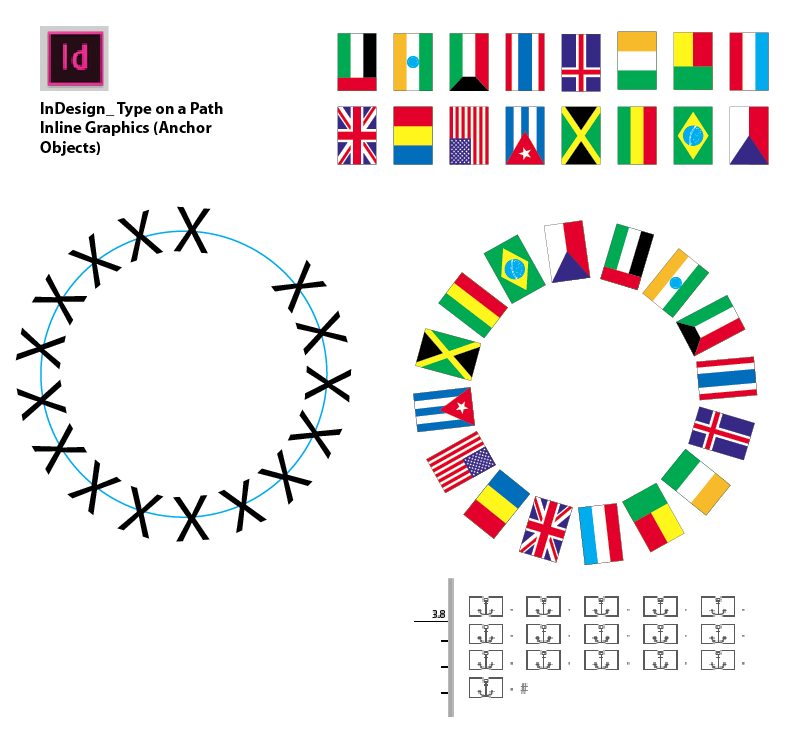
If you have InDesign, it would be much easier.
In InDesign, draw the circle.
Copy one of the flags.
Select the Type on a Path tool.
Click on the edge of the circle and paste.
Repeat for each flag.


Copy link to clipboard
Copied
Barbara, like you, InDesign would be my first choice rather than Illustrator!!!!
Easy to create, Easy to edit.
I put Inline Graphics on Illustrator’s Wish List long ago.
So far, deaf ears….
K
Copy link to clipboard
Copied
Yes -- the inline graphics feature is long overdue!

Copy link to clipboard
Copied
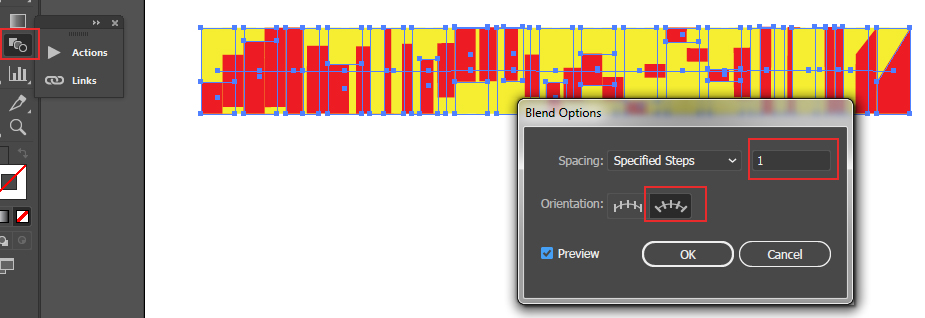
for the not too long set (such as yours, 10-20 items) you can also try the Blend tool.
1. Make your flags set (each flag is a group)
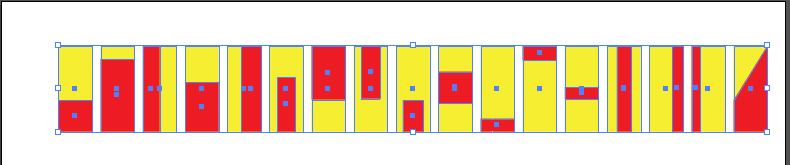
2. Connect them with Blend tool and set the Specified Steps = 1 and Align to Path option
3. Create the circle, use scissors to open the path and choose Replace Spine command in Object menu
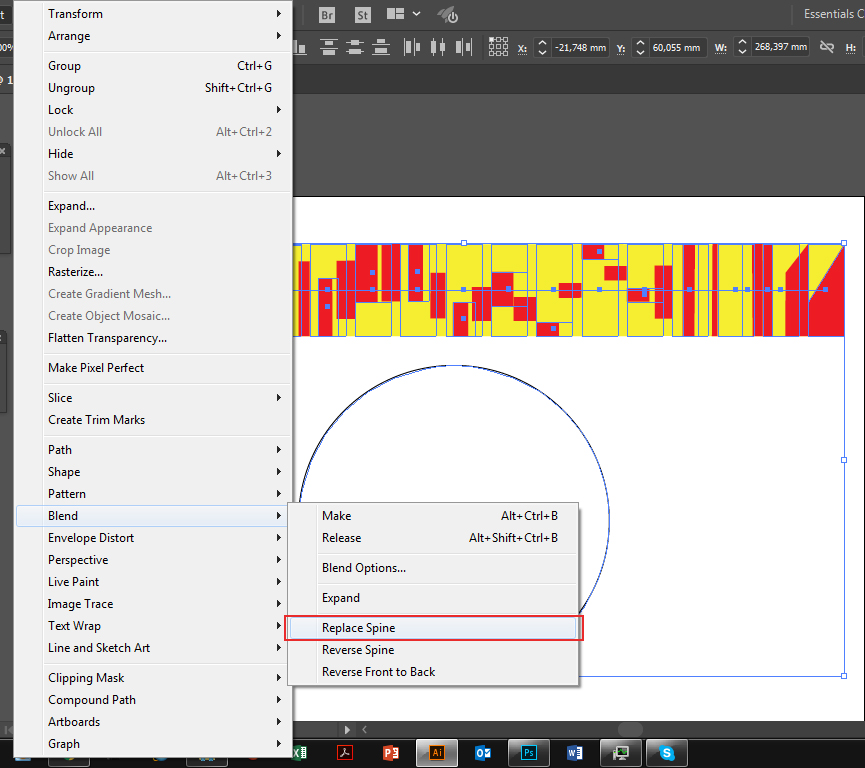
4. Expand and ungroup the result
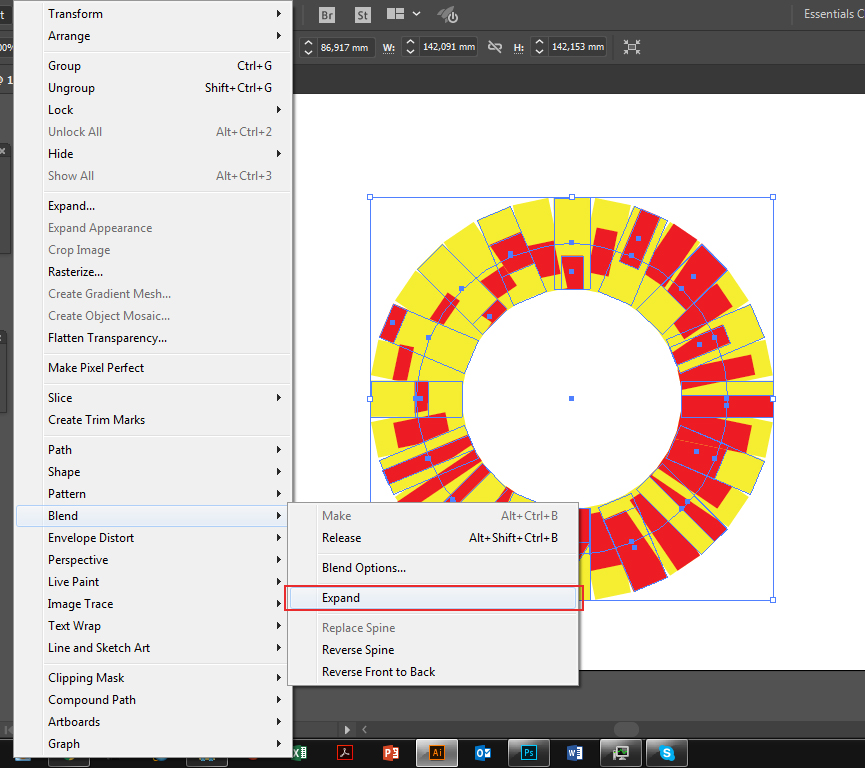
5. Delete the intermediate items
I used the same amount of flags as yours, 16. The process took about a minute 
Copy link to clipboard
Copied
I noticed that the flags in your example are somewhat distorted. You may not want that.
It's easier in InDesign, but if you need to do it in Illustrator, this is one method, and it avoids distortion:
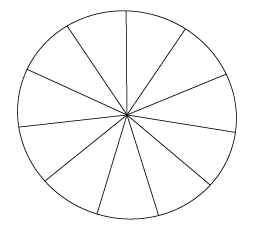
You can use the Polar Grid tool to make a template. Alternatively, you could use the Pie Chart tool.
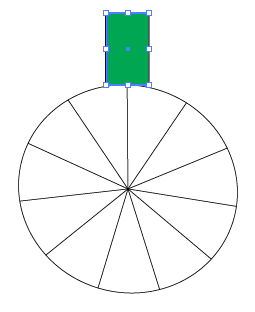
With the Polar Grid tool, drag out a grid. Don't release the mouse. Hit the down arrow key to remove inner circles. Hit the right arrow key to increase the radiating line until the number of lines is the same as the number of flags. When the lines are correct, hold down the Shift key to make it a perfect circle and then release the mouse.
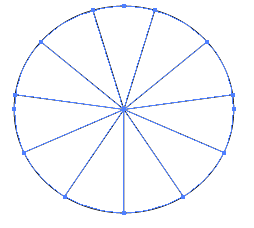
If necessary, rotate the grid so that you have a vertical line at the top. This is optional, but will make it easier.
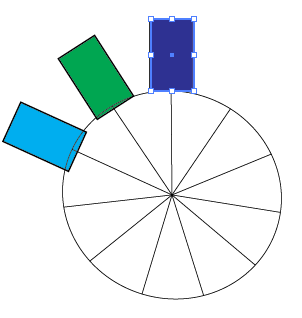
Select one of the flags and position it at the top of the circle. View > Smart Guides should be turned on as they will be helpful.

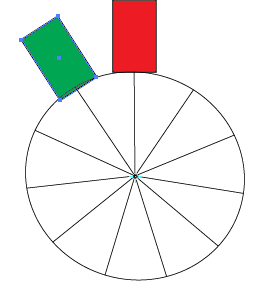
Select the next flag and position it directly on top of the first flag.
Select the Rotate tool and Alt or Option click the center of the circle. That will create an origin for the rotation and bring up the Rotate dialog.
Enter 360/11 (eleven in this case representing the total number of flags; enter the number of flags you need) Click OK.
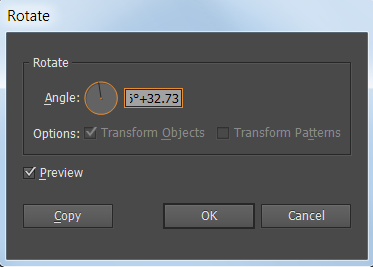
Select the next flag and position it directly on top of the first flag.
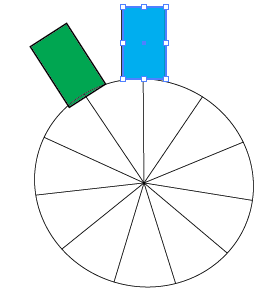
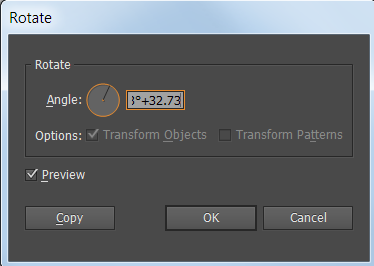
Select the Rotation tool and Alt or Option click the center of the circle. Illustrator remembers the last rotation, but you need double that amount so enter +32.73 or whatever the previous rotation was. In this case it is 32.73+32.73. Click OK. (The dialog box is cutting off the numbers)
Position the next flag on top of the first flag.
Alt or Option click the center of the circle with the Rotation tool. Add the same number of degrees. CLick OK.
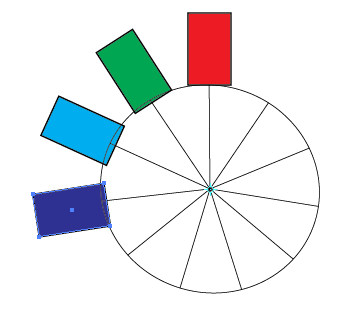
Keep repeating the procedure until all of the flags are evenly spaced around the circle.
Now suppose you need to scale the circle, but not the flags. That will be a multi step process.
Select the circle and the flags and scale evenly from the center.
Select the flags but not the circle. Object > Transform > Transform Each.
Enter the horizontal and vertical scale.

Hope this helps.

Copy link to clipboard
Copied
Inline graphics is needed in any decent program, but should not even be required for this. ACD Canvas, for example, can distribute a group of any objects along a path, without having to resort the Blend workaround.
JET
Copy link to clipboard
Copied
Barbara and JET, OH, I totally agree!
Why on earth, should we even have to fire up InDesign to make this simple repeat pattern on a circle.
InDesign is best for page layout.
I use InD Inline Graphics all the time. Not just for stuff like this.
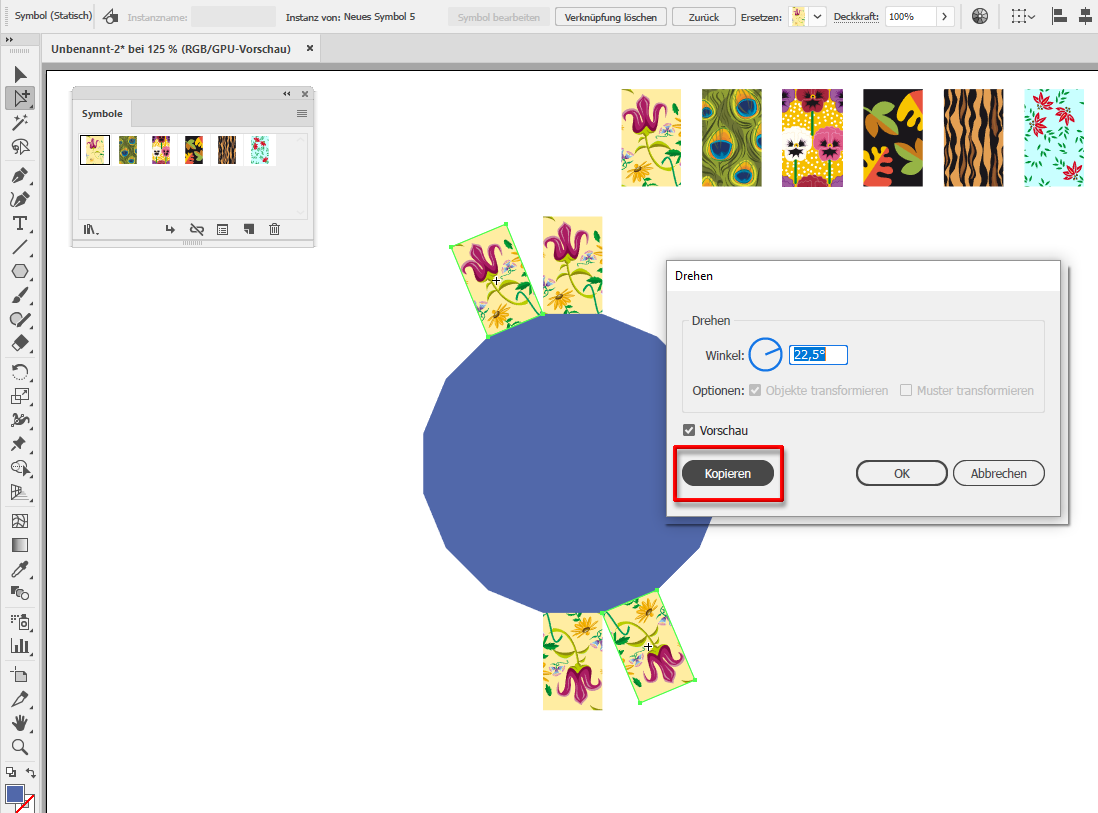
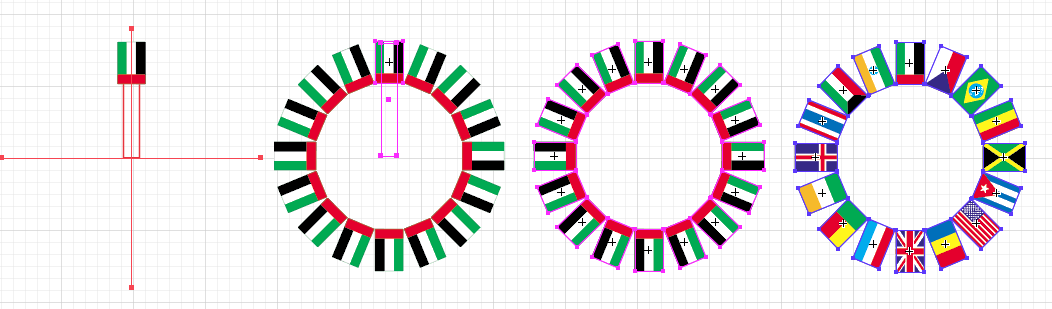
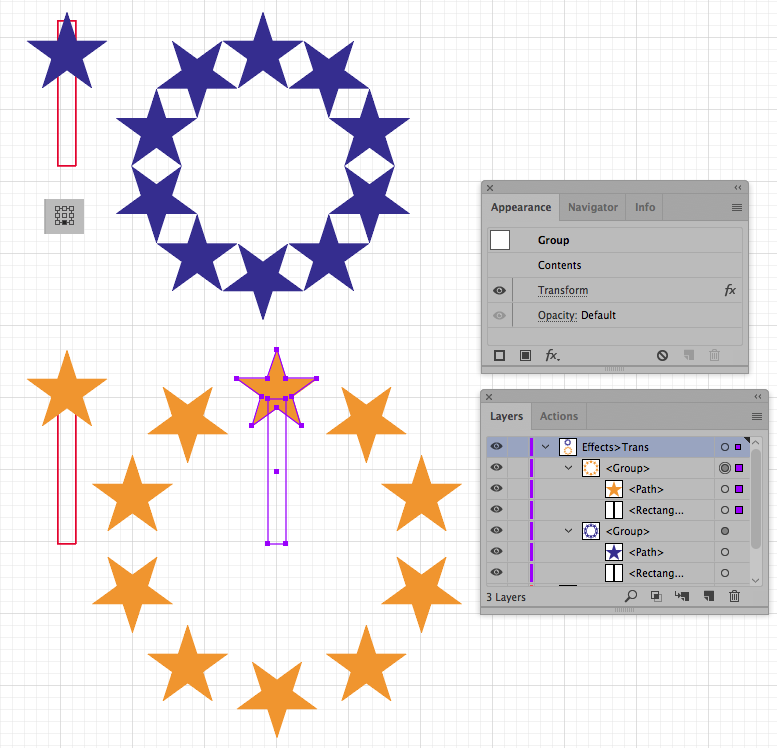
While this would be simple to use Illustrator>Effects> Transform Rotate @22.5, 15 copies. Then expand.
The problem is then is replacing each rectangle, in the correct position, the correct rotation, the correct size, each with a unique flag (in this case).
And of course, most importantly, easy edits.
K

Copy link to clipboard
Copied
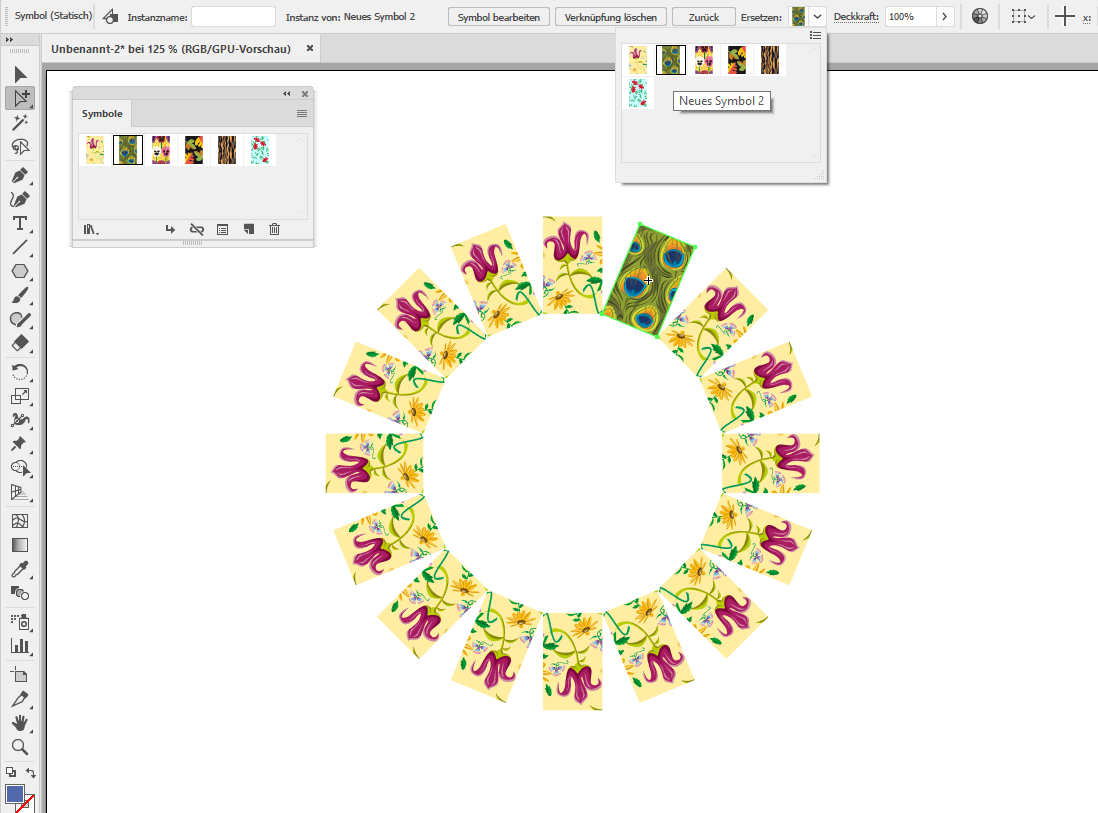
Hi Dr Tyrell,
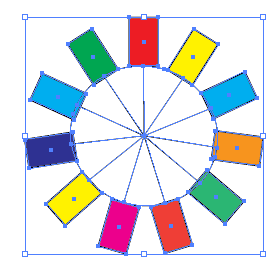
why not working with symbols?
At first create 16 symbols, one from every flag (I only created 6 symbols for this example).
All symbols should have the same size!
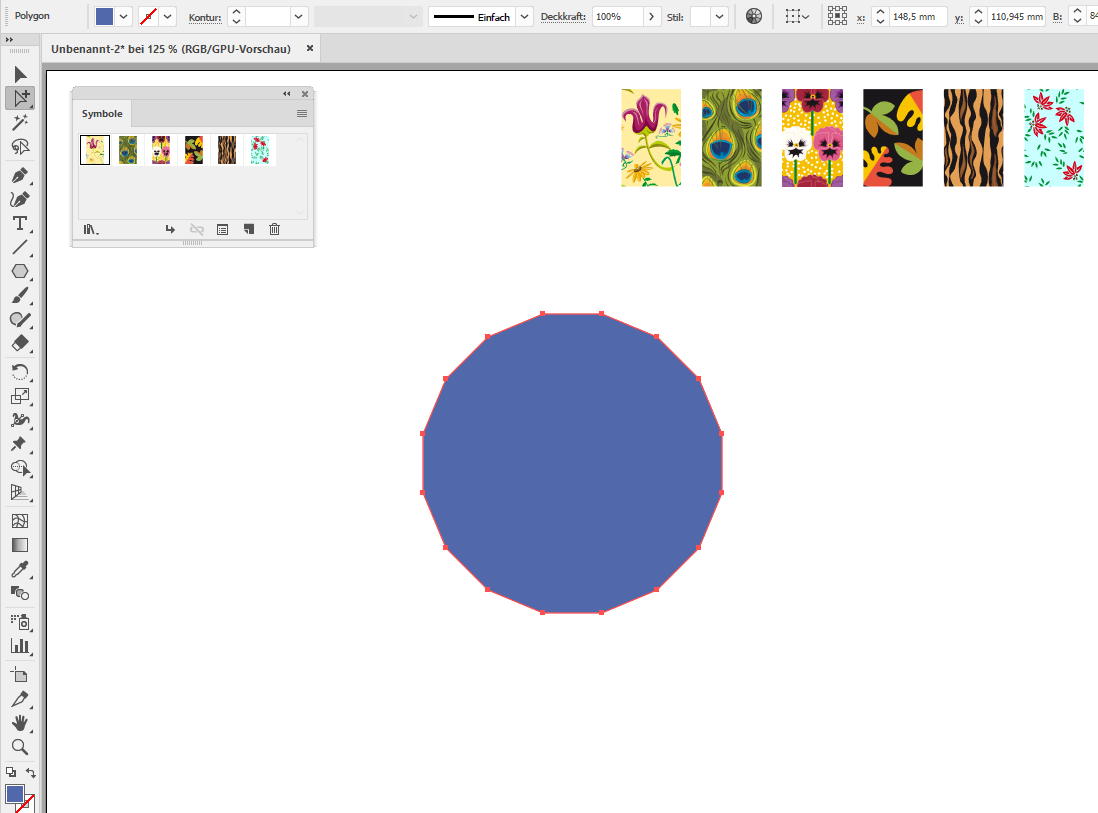
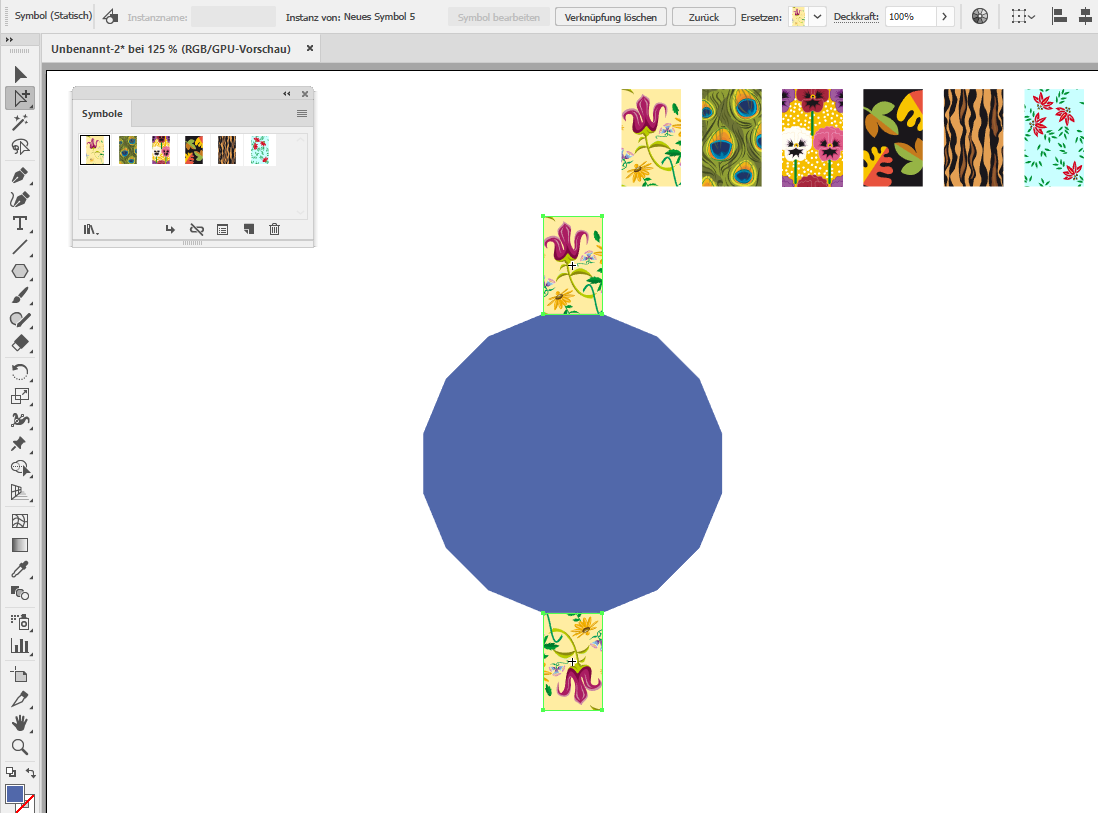
create your circle or better an polygon with 16 sides
arrange one instance of the first symbol at the top of the polygon and a second instance (rotated by 180°) at bottom
rotate (and copy) these two instances 7 times
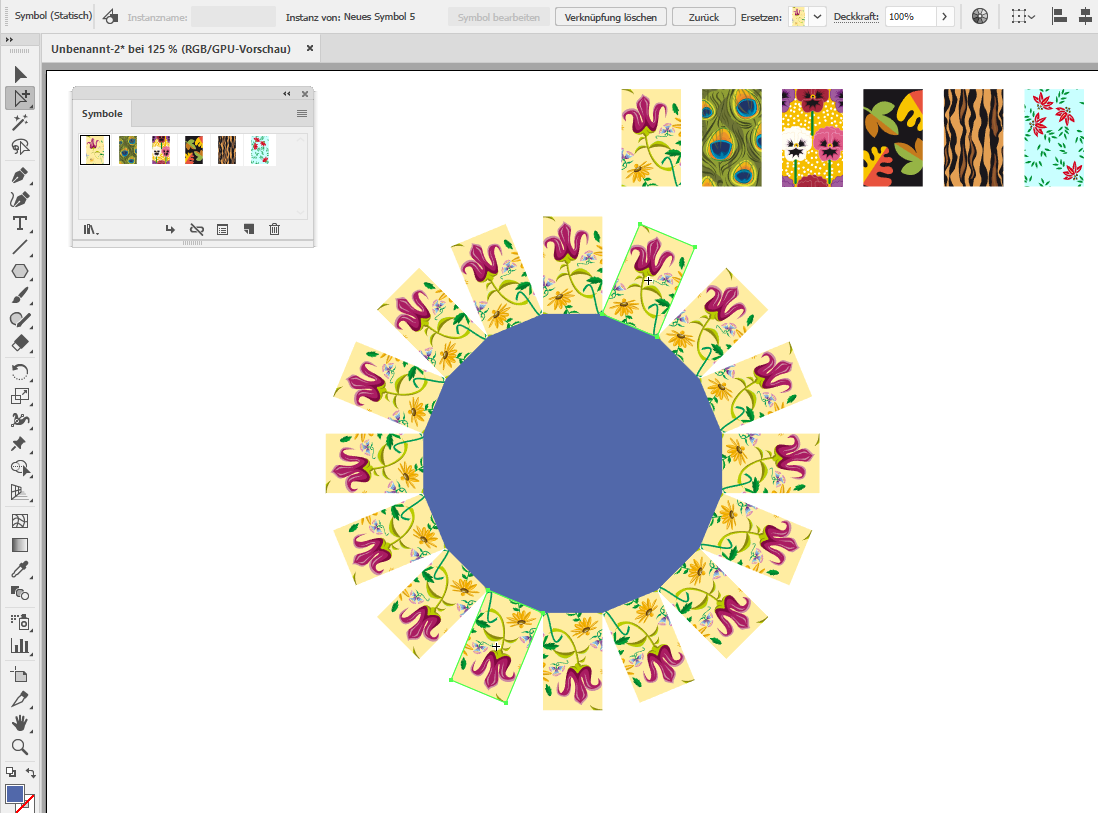
Now you can simple change the symbol while the instance is selected
Rotation and size of the instances are preserved.
---------------------------------------------------------------------------------------------------------------------------------------
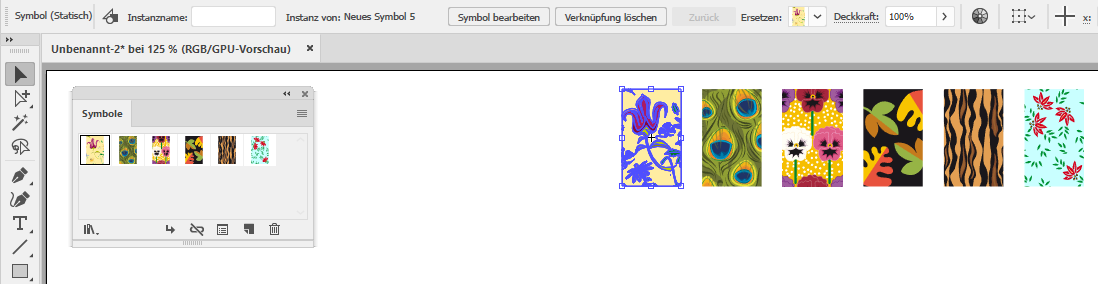
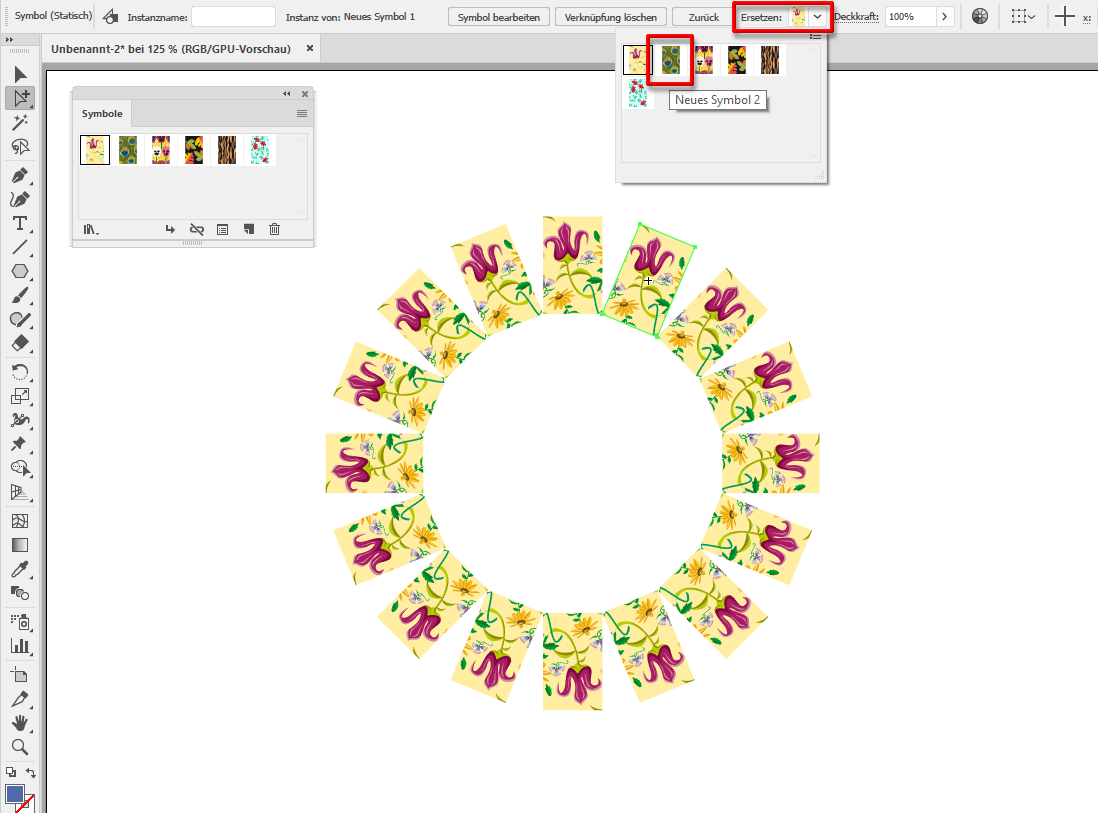
Every instance of a symbol could be replaced with another symbol instance. It's a very simple process.
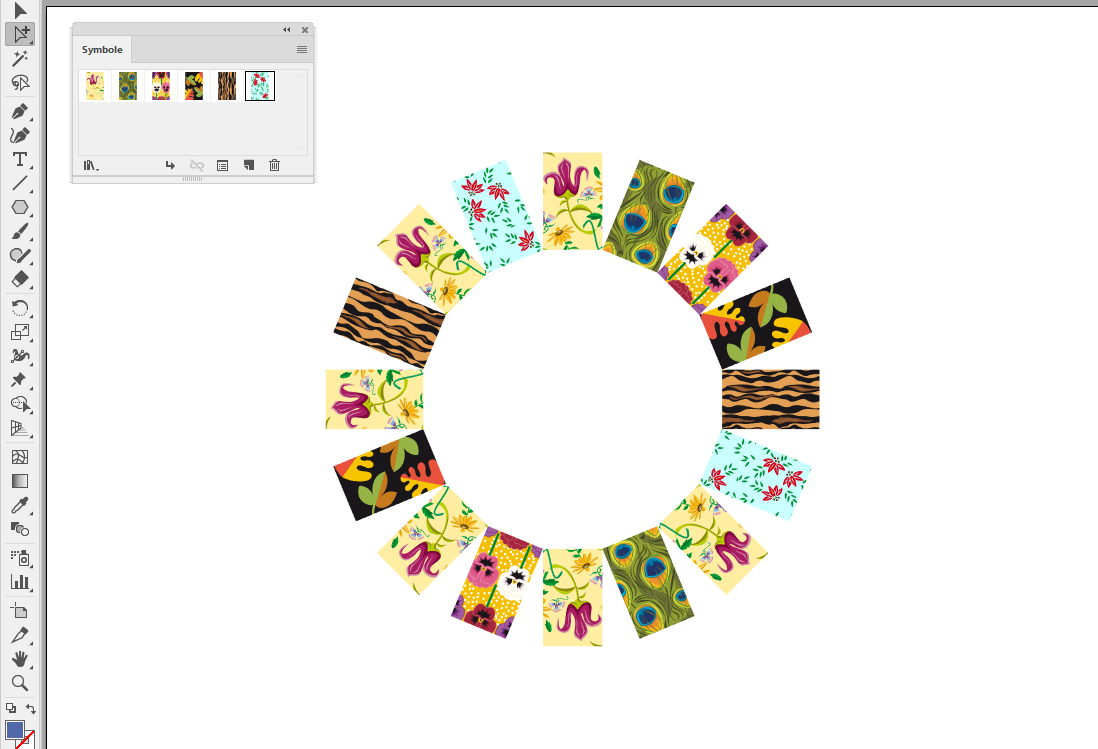
That's all and the best: it can be changed very easily.
Have fun

Copy link to clipboard
Copied
Pixxxel schubser, I found your reply very helpful!
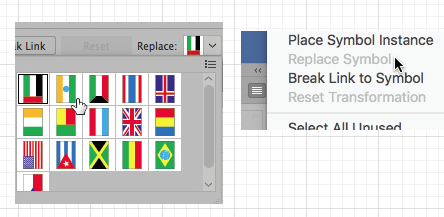
Using Replace Symbol is the key here.
In the Symbol Panel (fly out options)> Replace Symbol is ALWAYS greyed out. ?
BUT yet in the top control panel, (which I never noticed), Replace Symbol is available.
What’s up with that????
So my example here:
I used Effects>Transform. Expanded Transform. Replace Symbol.
Worked like a charm.
K
Copy link to clipboard
Copied
I did never use the symbol options till now (besides save). What I need I can do with the control bar or in the symbol palette itself (drag&drop).
The term itself is IMO not really correct. It should be: replace a symbol instance. But anyway - it doesn't work in the options. Perhaps a bug, or perhaps we only don't know, how to use. Perhaps we should have a look on illustrator.uservoice.com, if the problem already is known.
---------------------------
Yes I also use mostly the transform effect, like you. But be so kind and say me how do you determine thecorrect middlepoint for the rotation (where the additional anchorpoint must be created).
If you ask me - I would say:
- create the symbols, all with equal width (and heigth)
- determine the width
- create a hexadecagon (polygon with 16 sides) based on this width
- the middlepoint of this polygon is the rotation point.
Here in the (neighbour) illustrator scripting forum a script names polygonBySide exists. That helps you perfectly for this requirement. IMO it was written by CarlosCanto
Have fun

Copy link to clipboard
Copied
Hi pixxxel schubser here's the mentioned script
Re: Polygons: specifying side lengths
I also posted another method for distributing objects around a circle but for the life of me I can not find 
Copy link to clipboard
Copied
CarlosCanto schrieb
Hi https://forums.adobe.com/people/pixxxel+schubser here's the mentioned script
Re: Polygons: specifying side lengths
…
Excellent - exactly what I mean. Thanx CarlosCanto
-----------------------------
yes this is the normal method for the effect (but personally I prefer a single anchor point instead of the rectangle - easier to remove after expand appereance ) and you described the technique very well.
But in this case the flags should be corner aligned at corner (if I understood the TO correct). You have to change for this result your invisble rectangle with trial and error for the exactly height.
As in real life there are more than one possibilities something to do.
With the mentioned script you can create a Hexadekagon with the perfect size. And the middlepoint of this polygon is the position for the rotation point. Easy to handle with and very exact.
Kindly regards
Copy link to clipboard
Copied
pixxxel schubser,
Draw a rectangle and your shape. Center align.
Give that rectangle a Fill/Stroke of none. (Shown here in red so you can see)
Group. Apply Effect>Transform at a Group level.
In the Transform dialog, Rotate from the center bottom.
Tweak as you wish.
For example, if you move your shape(s) up, it will give you more space between your objects.
K

Copy link to clipboard
Copied
If you have Fontself, you can turn the flags into a color font, make a circle, and then use the Type on a Path tool to place the text on the circle.
Copy link to clipboard
Copied
Thanks everyone for amazing responses. I ended up using a combination of Barbara's transform method and pixxel schubser's symbol editing trick. Works a treat!

 AdChoices