

- Home
- Illustrator
- Discussions
- Betreff: How do I create a cut-out brush, that wou...
- Betreff: How do I create a cut-out brush, that wou...
Copy link to clipboard
Copied

To achieve this, I had to:
1. select the object (both fill + stroke)
2. object > expand appearance
3. pathfinder > merge
4. object > compound path > make
5. object > arrange > send backward
6. pathfinder > minus back
But this is equivalent to a cut-out brush stroke.
First I do my graphics for each page, then I will import it page by page into InDesign and add my text and my images.
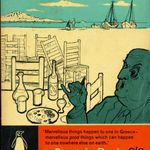
Some of the images I would add in the cutout frames like this one.
I thought this is better than brushing the edges of images in Photoshop because it allows more for changes to be made later.
But the procedure mentioned above doesn't work for "painting".
So I need a cutout brush.
Does anyone know how to make it?
Thanks in advance.


 1 Correct answer

You can use an Opacity mask.
A white rectangle with a white brushed stroke on top of a black rectangle.
Both selected and Make Mask clicked in the Opacity panel. Uncheck Clip, check Invert Mask
When you click the Mask icon on the right you can edit the mask by changing the rectangle or add/modify the brushed paths.
Don't forget to click the left icon when done or you will be stuck in mask editing mode forever.

Explore related tutorials & articles
 37
Replies
37
37
Replies
37
Copy link to clipboard
Copied
The black color of the document is not set in the document options, it's a fill.

Copy link to clipboard
Copied
Any kind of brush? Or just brushes that are like calligraphy brushes.
Do you need a path as a result or would masking do - like an opacity mask?
Copy link to clipboard
Copied
Pattern brush.
I am using it to "brush" the edges of images.
Opacity is not good because it will not cut out the color below.
And a path is a must yes because it needs to be cut out from the color frame below.
I need a cutout swatch.
So I can give a brush a "cutout" color.
Perhaps it can be scripted?
If no other way, the swatch should execute steps 3 to 6 mentioned above.
Step 2, the "expand appearance" not sure that is a must for the cutout to work.
Copy link to clipboard
Copied
Actually this shouldn't only be used for the images.
Cutouts should be used for my text modules too, like this one:

Because I added these as .ai svgs below my texts in InDesign, but their color cannot directly be changed in InDesign, only with "edit original".
If I use brush cutouts, then I can change their color in InDesign.
I might even be able to move these brush cutouts once imported to InDesign.
Not sure.
Being able to move them, I could move around my brushed images and my text boxes too, while being able to change their color and texture in InDesign, without using .ai svgs.
Copy link to clipboard
Copied
Or if using opacity maybe I can cut out the color below with blend modes?
Copy link to clipboard
Copied
The cutouts can be moved in isolation mode.
Not sure if they can be moved once placed into InDesign.
Copy link to clipboard
Copied
Can you please consolidate all your statements and make a list of what you want this workflow to be able to?
SVG based - is that a must? Or does AI work as well?
Editable - to what degree?
Opacity masks: please read about them. They can punch out things.
Knockout groups might work as well. They can be built into brushes.
Like so: https://www.youtube.com/watch?v=kFgKRyhn2Bc
And then you could add a fill to that and have the whole object punch itself.
Copy link to clipboard
Copied
Yes it needs to be svg based because I am stretching them around to fit my text blocks and images, in InDesign.
The graphics "frame" in A4 size with the brushed cutout shapes (for text and for images) will be placed in the InDesign pages in .ai format with PDF support.
Then I add my text and images in InDesign.
One other requirement would be to be able to move the cutout frames once imported in InDesign, and to be able to scale them, to fit the text and images.
Copy link to clipboard
Copied
But stretching is distorting the brushed areas, so that's not good. I will try to compose them so in Illustrator, that I won't need to scale or stretch them in InDesign.
Scaling won't distort them, but stretching will.
Copy link to clipboard
Copied
SVG would be needed in InDesign if you export an e-book.
Don't export an e-book? Then fine, the AI files (saved PDF-compatible) will perfectly work. Please watch this: please do:

Copy link to clipboard
Copied
I do both e-books and paperbacks.
Thanks for the links.
Trying to figure now (watching the video) how to punch through with the knock out feature..
Copy link to clipboard
Copied
I posted a demo file for the knockout group below in this thread.
The trouble with SVG is: brushes (and opacity masks and knockout groups) automatically are expanded when saving an SVG. There is no roundtripping with an SVG in Illustrator.
Copy link to clipboard
Copied
I see.
So I don't need to be in isolation mode when I am supposed to punch through the underlying color or texture with the knockout feature?
By the way as you see one solution is already found in this thread, except that I need to be in isolation mode and my brush is inactivated.
Copy link to clipboard
Copied
WIth a knockout group you can just use your brushes (or even some prepared graphic styles).
Draw a rectangle, apply graphic style. Done.
Please take a look at that file.
Copy link to clipboard
Copied
yes i have seen this file
But I still experiment how to do it with the knockout mode.
I managed to brush with cutout with the other method suggested by @Ton Frederiks , and it works, but it was very heavy on my resources, freezing Illustrator. I have 32 GB of RAM.
Copy link to clipboard
Copied
I will need to study the knockout feature more, cause I couldn't understand it yet for the punch through purpose.
Thanks.
Copy link to clipboard
Copied
You can use an Opacity mask.
A white rectangle with a white brushed stroke on top of a black rectangle.
Both selected and Make Mask clicked in the Opacity panel. Uncheck Clip, check Invert Mask
When you click the Mask icon on the right you can edit the mask by changing the rectangle or add/modify the brushed paths.
Don't forget to click the left icon when done or you will be stuck in mask editing mode forever.
Copy link to clipboard
Copied

But for me it will be white, not transparent.
Copy link to clipboard
Copied
Did you select both the black rectangle in the background and the stroked shape on top of it before clicking Make Mask?
Copy link to clipboard
Copied
Sorry, I did not select the black rectangle.

It works.
Thanks.
Copy link to clipboard
Copied
Now how to I make this as a swatch, so that when I brush, the brush cuts it out directly?
Copy link to clipboard
Copied
I am afraid that I do not know what you mean. You can directly brush in the mask area.
Copy link to clipboard
Copied

Now I understand.
I can create transparent shapes within the mask, in isolation mode.
But it won't work for my brushes, I get a restricted brush pointer.
Copy link to clipboard
Copied
No need for isolation mode. Just activate the mask area in the transparency panel.
-
- 1
- 2

 AdChoices