Chris  P.  Bacon
Inspiring
November 14, 2022
解決済み

How do I create a cut-out brush, that would do directly the Minus Back option from the pathfinder?

  • November 14, 2022
  • 返信数 3.
  • 5682 ビュー

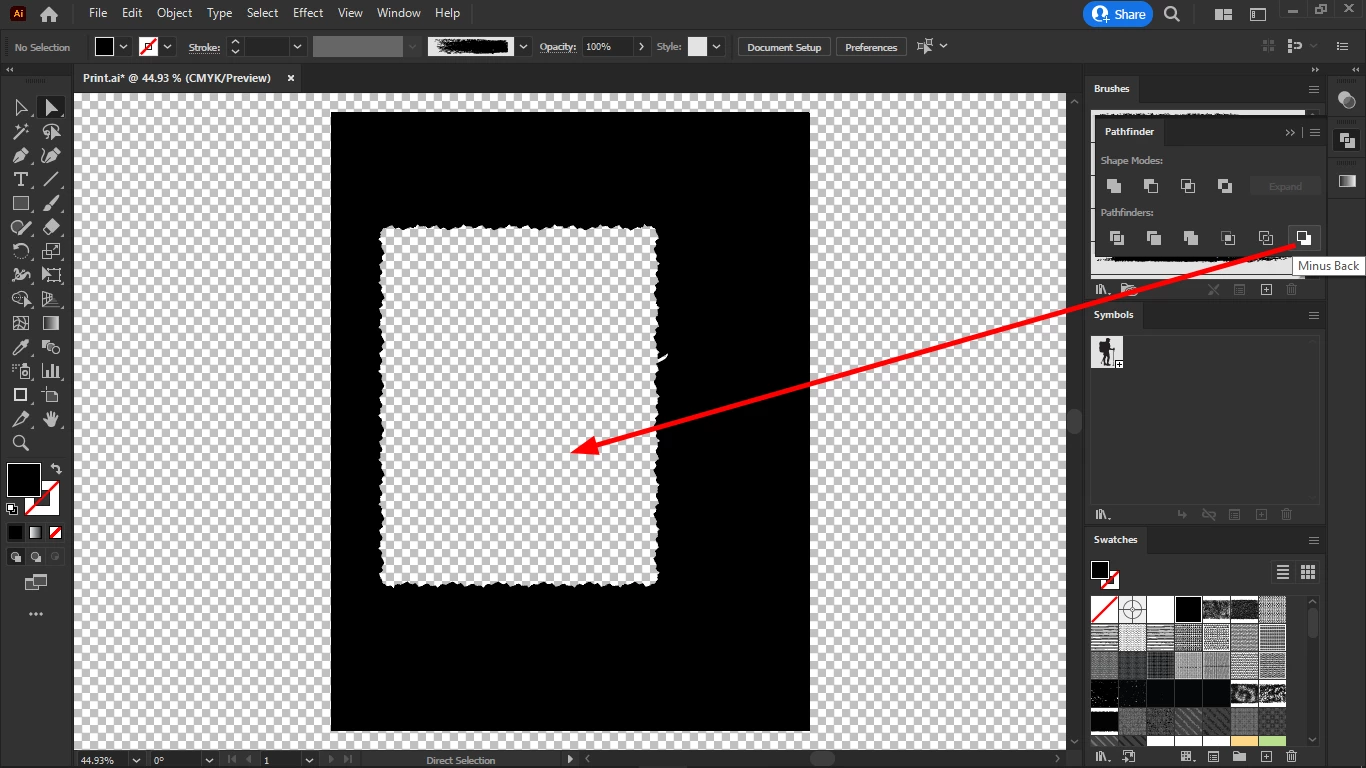
To achieve this, I had to:

1. select the object (both fill + stroke)

2. object  > expand appearance

3. pathfinder > merge

4. object > compound path > make

5. object > arrange > send backward

6. pathfinder > minus back

But this is equivalent to a cut-out brush stroke.

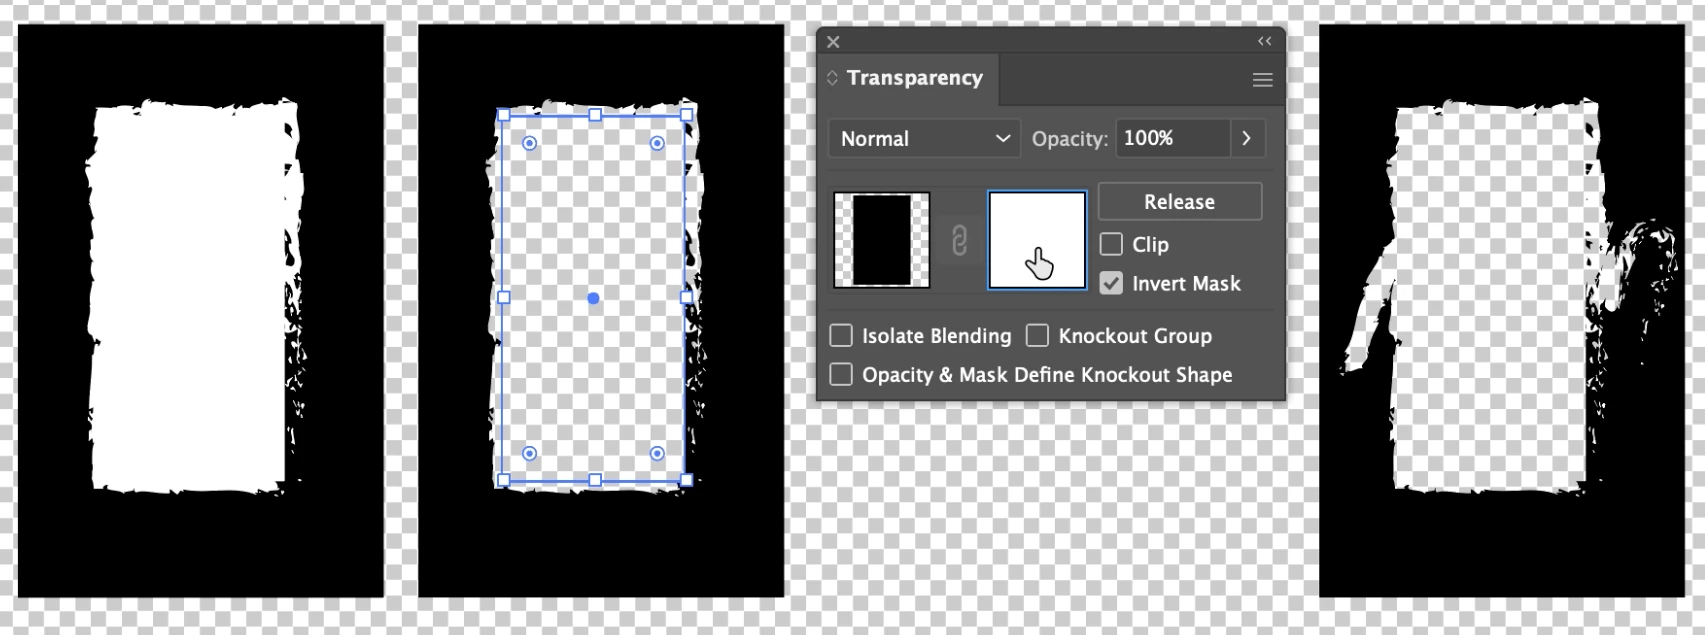
First I do my graphics for each page, then I will import it page by page into InDesign and add my text and my images.

Some of the images I would add in the cutout frames like this one.

I thought this is better than brushing the edges of images in Photoshop because it allows more for changes to be made later.

But the procedure mentioned above doesn't work for "painting".

So I need a cutout brush.

Does anyone know how to make it?

Thanks in advance. 


このトピックへの返信は締め切られました。
解決に役立った回答 Ton Frederiks

You can use an Opacity mask.

A white rectangle with a white brushed stroke on top of a black rectangle.

Both selected and Make Mask clicked in the Opacity panel. Uncheck Clip, check Invert Mask

When you click the Mask icon on the right you can edit the mask by changing the rectangle or add/modify the brushed paths.

Don't forget to click the left icon when done or you will be stuck in mask editing mode forever.


返信数 3

Ton Frederiks
Community Expert
Ton FrederiksCommunity Expert解決!
Community Expert
November 14, 2022

You can use an Opacity mask.

A white rectangle with a white brushed stroke on top of a black rectangle.

Both selected and Make Mask clicked in the Opacity panel. Uncheck Clip, check Invert Mask

When you click the Mask icon on the right you can edit the mask by changing the rectangle or add/modify the brushed paths.

Don't forget to click the left icon when done or you will be stuck in mask editing mode forever.


Chris  P.  Bacon
Inspiring
November 14, 2022

But for me it will be white, not transparent.

Chris  P.  Bacon
Inspiring
November 16, 2022

It is an Opacity mask, it can create various amounts of transparency by using gray instead of black and white, something clipping masks cannor do.


Do you know by any chance an easy or fast way to remove (delete or clip) the leftover image parts under the cutout shape?

They have rectangle edges and shine thru when using blend modes.


Monika Gause
Community Expert
Community Expert
November 14, 2022

Any kind of brush? Or just brushes that are like calligraphy brushes.

Do you need a path as a result or would masking do - like an opacity mask?

Chris  P.  Bacon
Inspiring
November 14, 2022

Pattern brush.

I am using it to "brush" the edges of images.

Opacity is not good because it will not cut out the color below.

And a path is a must yes because it needs to be cut out from the color frame below.

I need a cutout swatch.

So I can give a brush a "cutout" color. 

Perhaps it can be scripted?

If no other way, the swatch should execute steps 3 to 6 mentioned above.

Step 2, the "expand appearance" not sure that is a must for the cutout to work.

Chris  P.  Bacon
Inspiring
November 14, 2022

Actually this shouldn't only be used for the images.

Cutouts should be used for my text modules too, like this one:

Because I added these as .ai svgs below my texts in InDesign, but their color cannot directly be changed in InDesign, only with "edit original". 

If I use brush cutouts, then I can change their color in InDesign.

I might even be able to move these brush cutouts once imported to InDesign.

Not sure.

Being able to move them, I could move around my brushed images and my text boxes too, while being able to change their color and texture in InDesign, without using .ai svgs.


Chris  P.  Bacon
Inspiring
November 14, 2022

The black color of the document is not set in the document options, it's a fill.