Copy link to clipboard
Copied
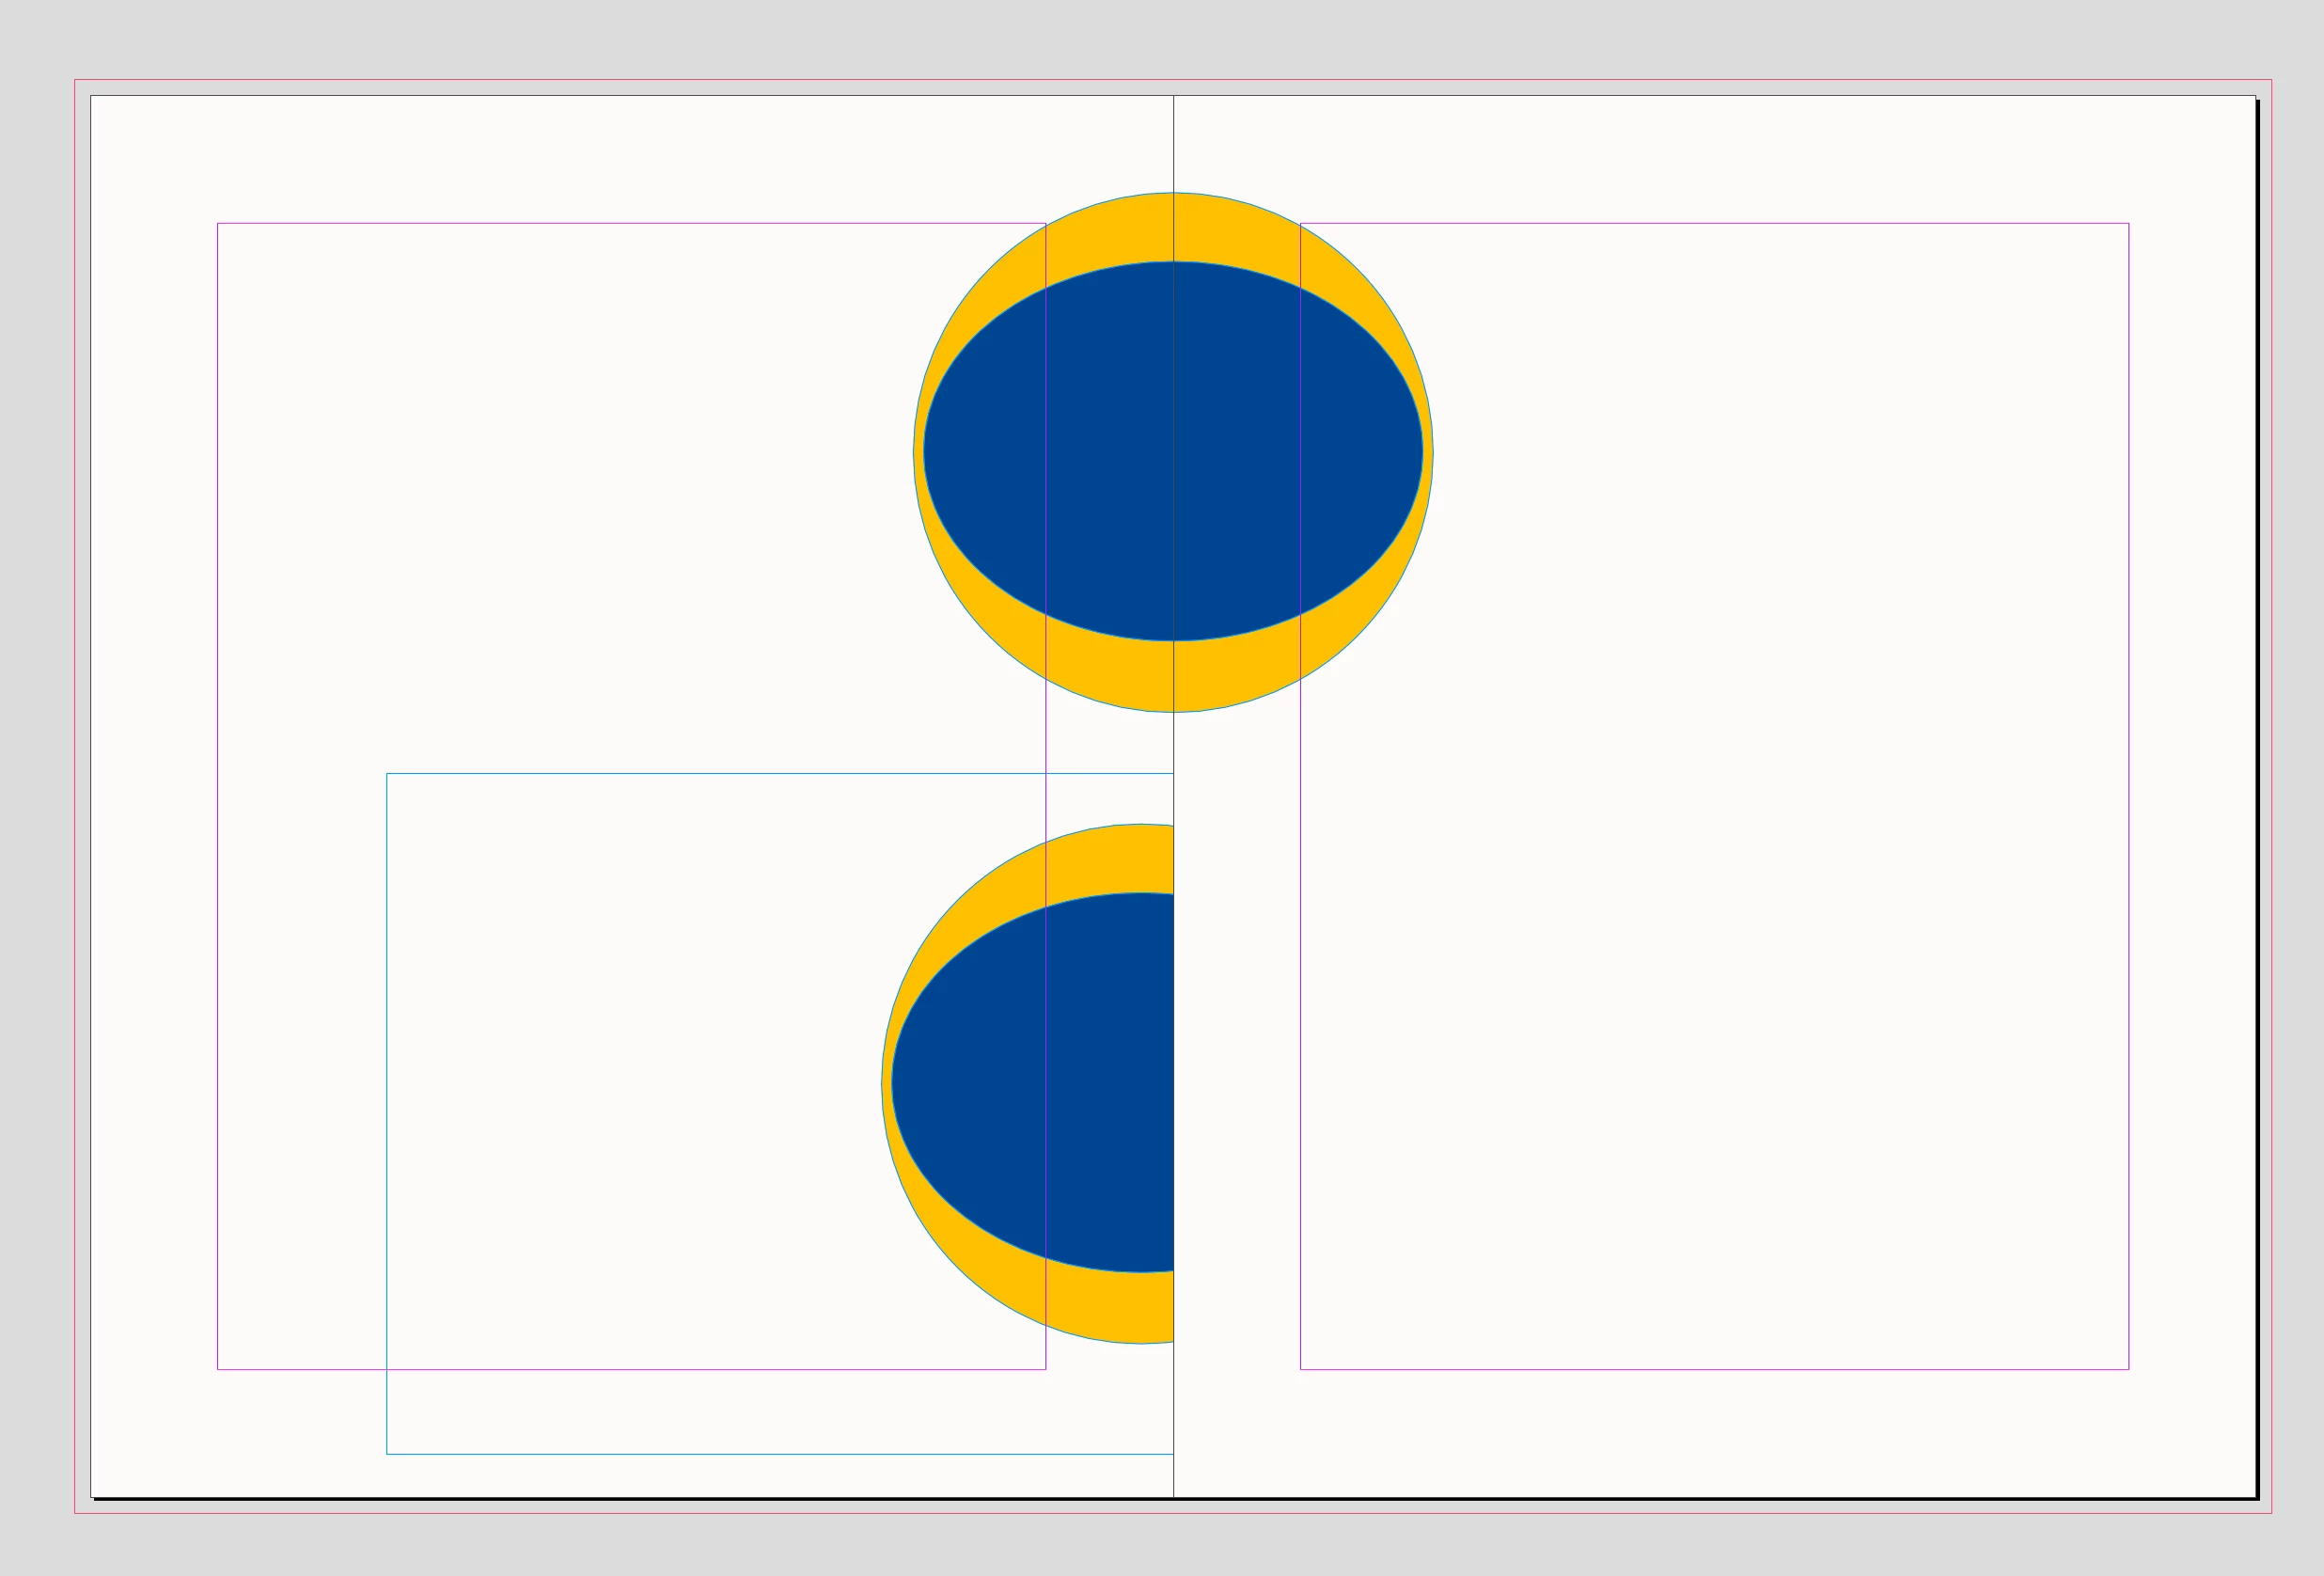
The blue and yellow shapes are grouped together, but they extend beyond the artboard and into the next page. How can I cut the shapes at the exact edge of the artboard in InDesign?
1 Correct answer
Copy link to clipboard
Copied
Hi @hibru305572725zfd,
Thank you for reaching out. It can be frustrating sometimes.
To help you better, could you clarify whether you’re trying to crop the shapes to fit exactly within the artboard, or are you looking to keep everything within the bounds of a specific page?
If you want to cut the shapes at the exact edge of the artboard, one method is to use the "Clipping Path" or "Masking" options. You can also try selecting the shapes and then creating a clipping mask using the artboard’s boundaries.
Leaving the discussion open for our respected community experts to provide further guidance.
Please let me know if this helps. We will be waiting for your response.
Thank you,
Abhishek Rao
Copy link to clipboard
Copied
yeah, I want to make the shape fit exactly within the artboard.
Copy link to clipboard
Copied
Hi @hibru305572725zfd,
Thank you for the clarification! To make the shape fit exactly within the artboard, you can follow these steps:
1. First, select the shape or group of shapes that you want to fit within the artboard.
2. Go to the `Window` menu, select `Pathfinder`, and then use the `Crop` option. This will crop your selected shape to the boundaries of the artboard.
3. If needed, you can manually adjust the shape by selecting it and dragging the edges to fit within the artboard boundaries.
4. Alternatively, you can create a new rectangle that matches the size of your artboard, place it on top of your shapes, and then go to `Object > Clipping Path > Make`. This will create a clipping mask that fits your shapes within the artboard.
Please give this a try, and let me know if you need further assistance!
Thank you,
Abhishek Rao
Copy link to clipboard
Copied
Copy link to clipboard
Copied