dublove
Legend
February 22, 2020
Answered

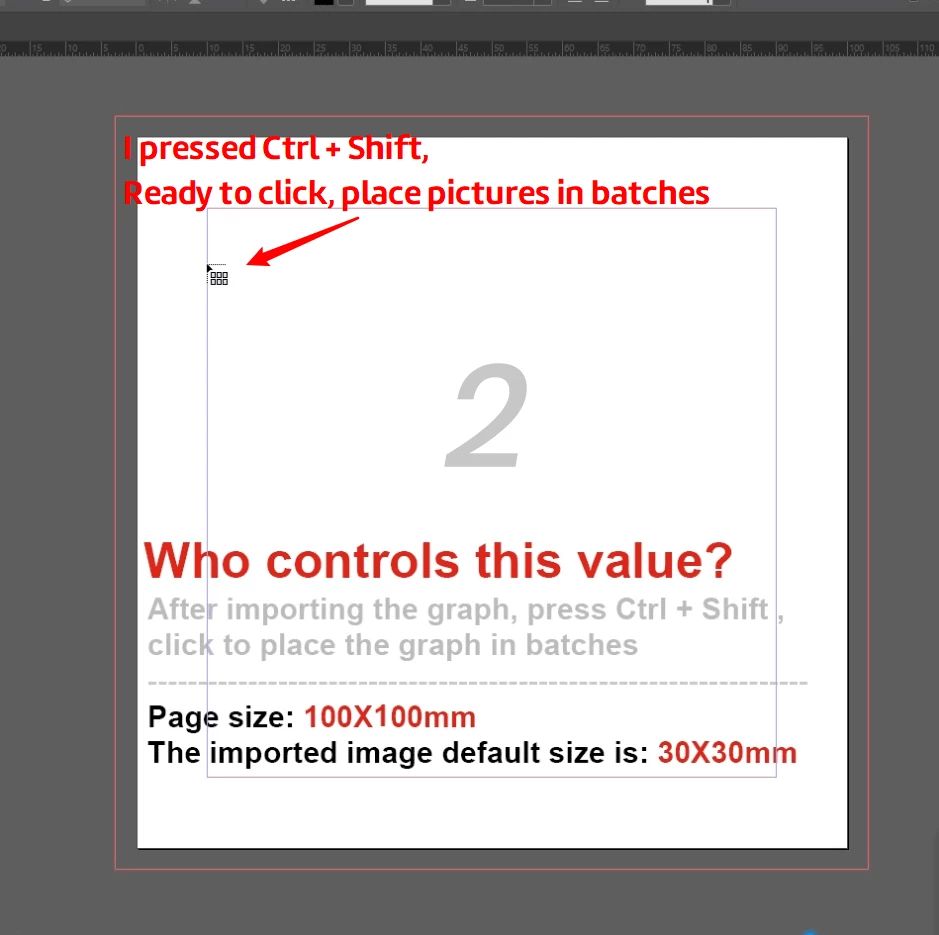
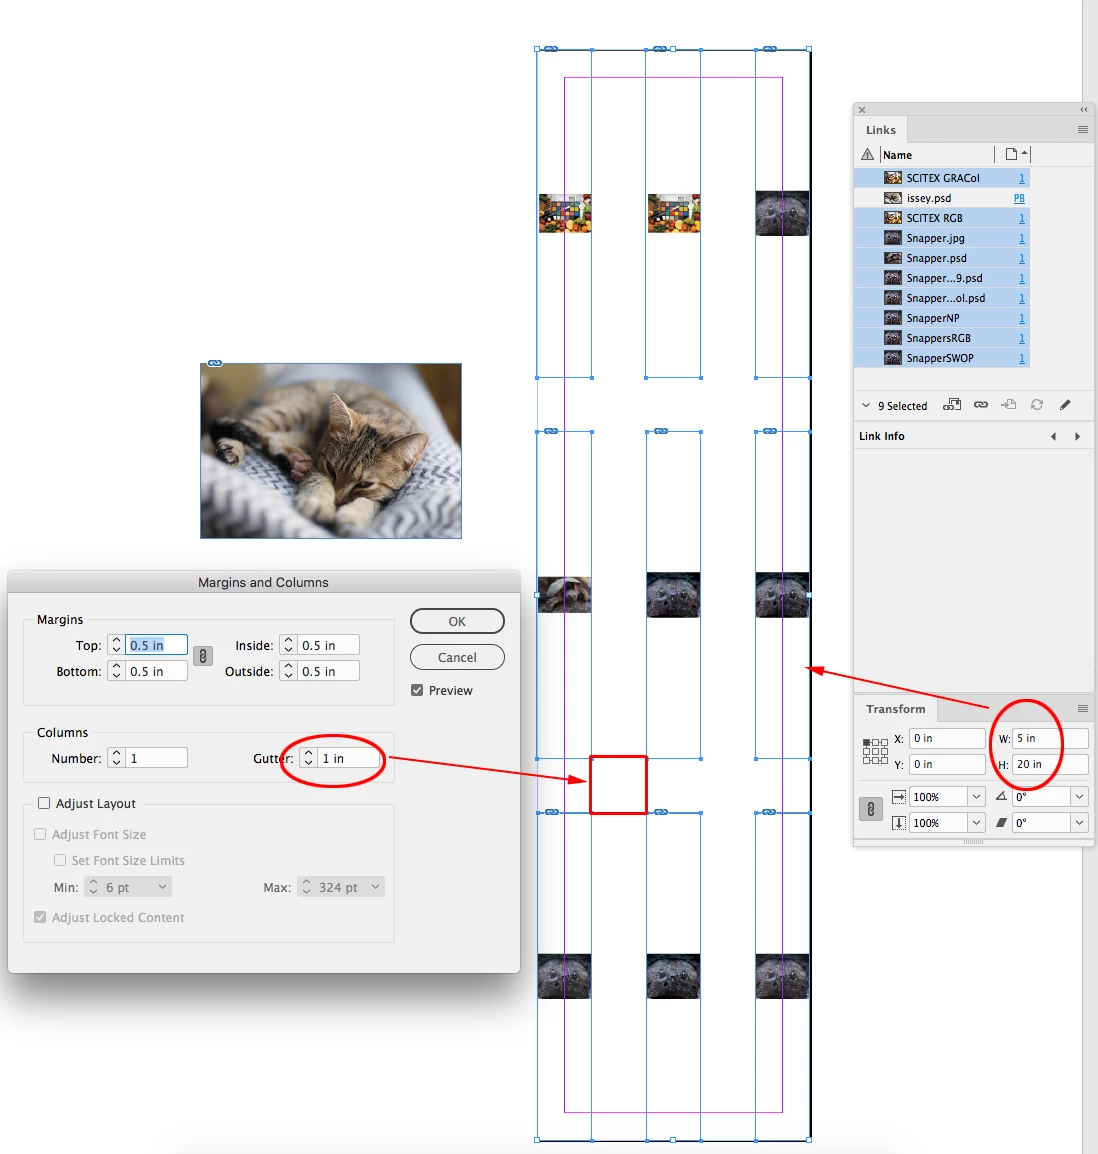
Import multiple pictures by ID, press Ctrl + Shift and click, where can I set the default size?

  • February 22, 2020
  • 4 replies
  • 5046 views

Suddenly found:
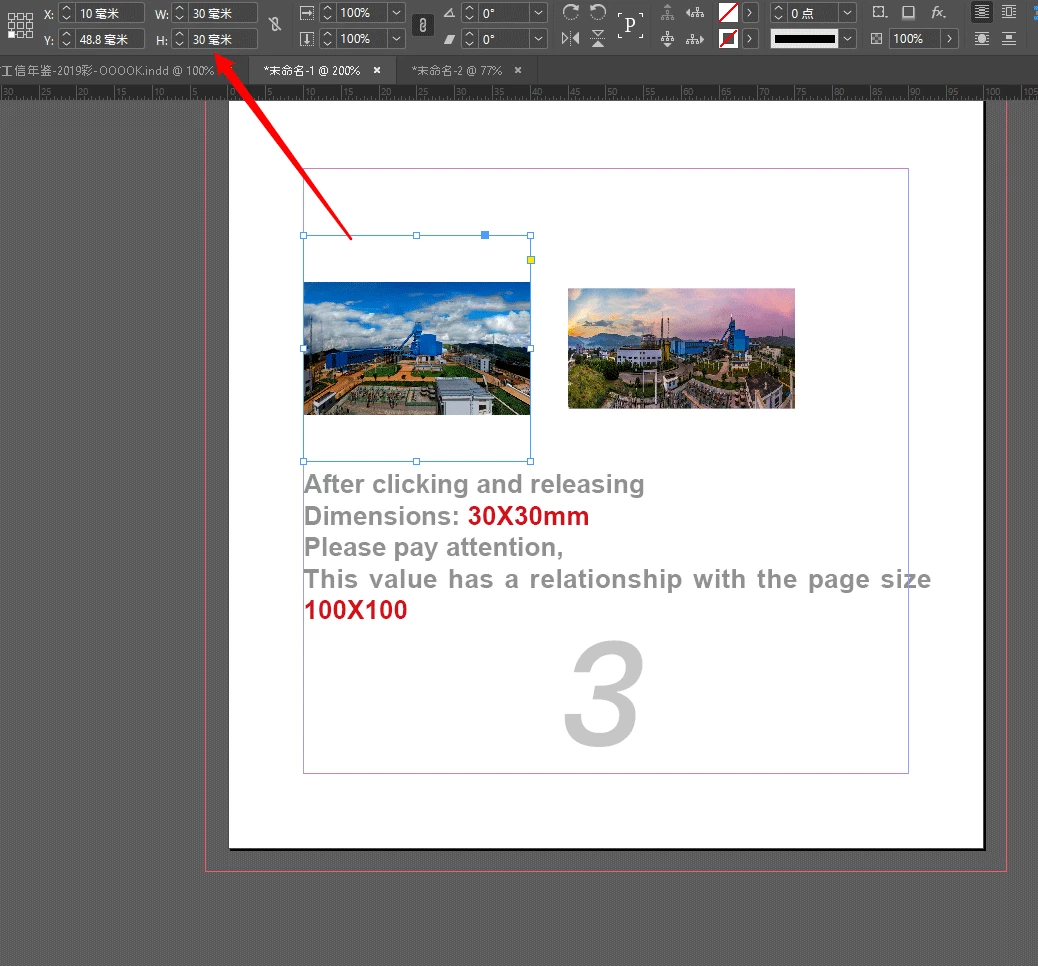
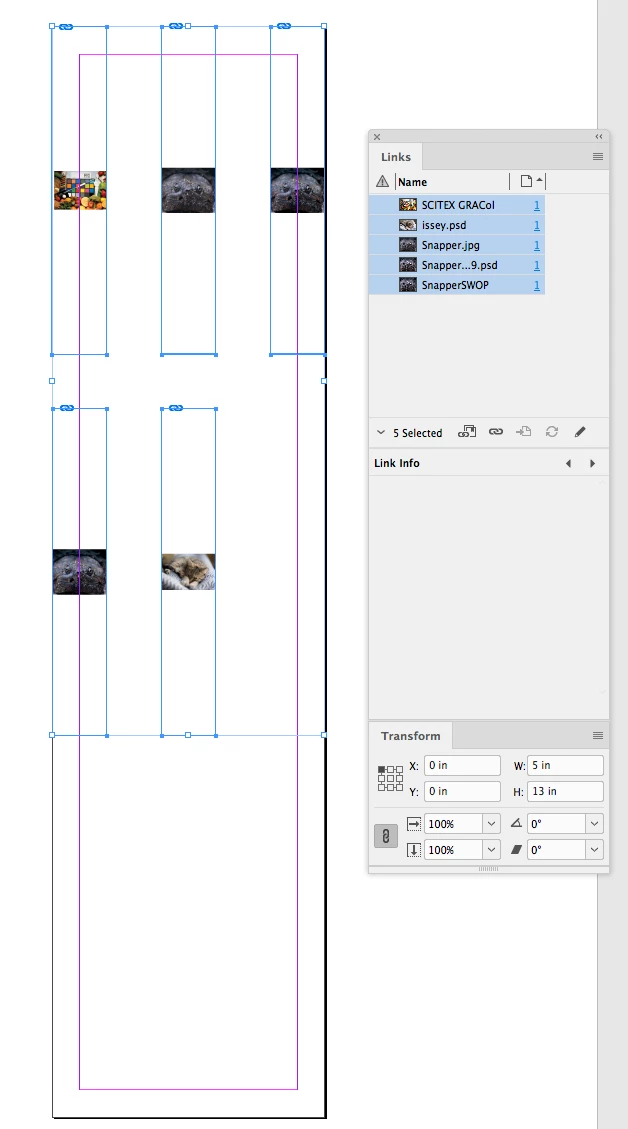
When importing multiple images, press Ctrl + Shift and click to quickly get a specific size image.
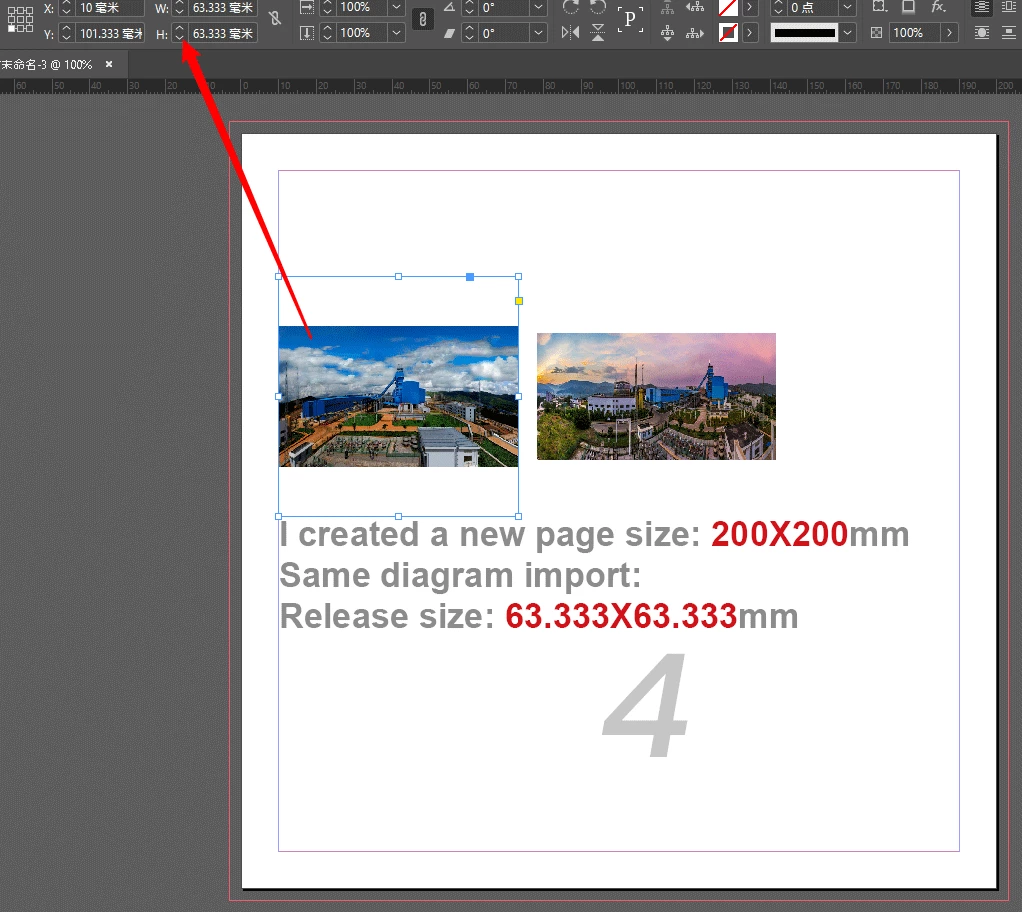
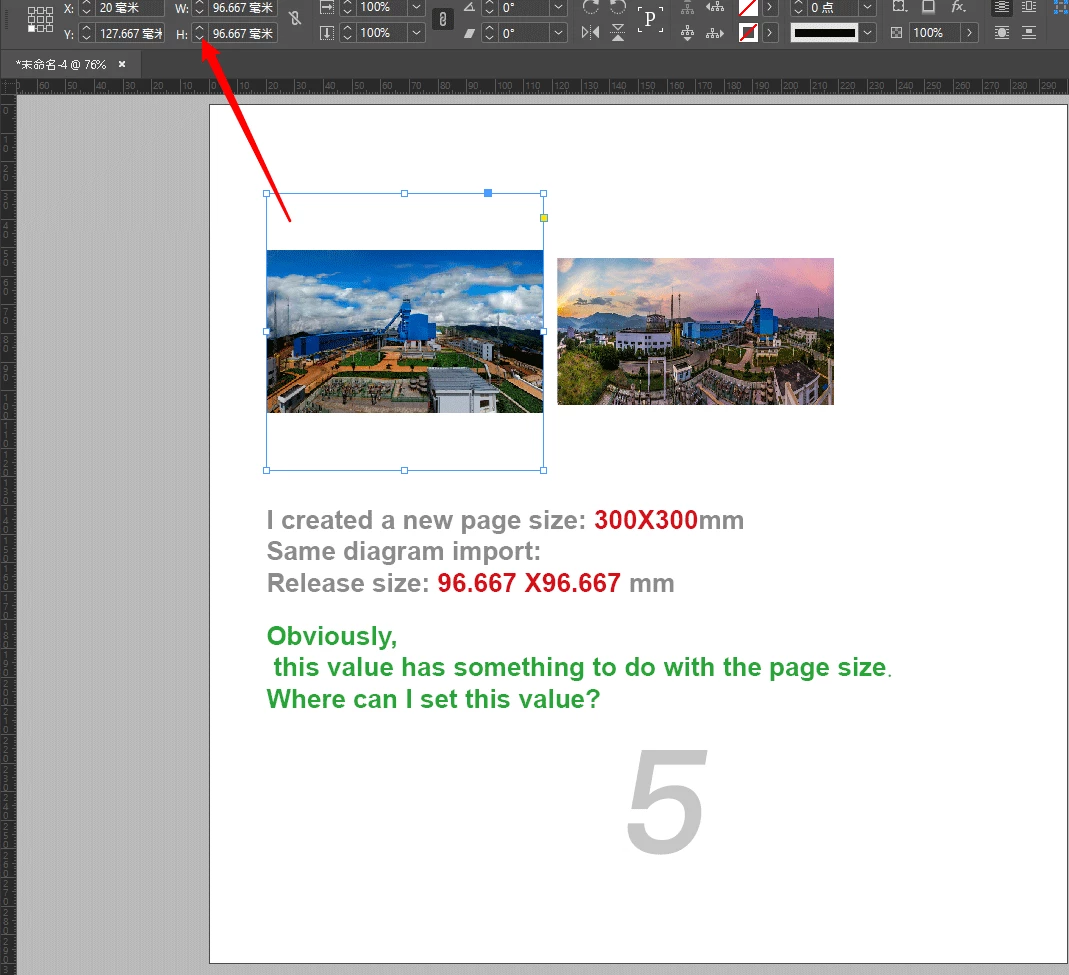
I think it would be useful if I could set this size, but after searching for a long time, I only found that this size was related to the page size.
Please heroes take a look at where to control this value.

The example is easy to reproduce, so no sample files have been uploaded.
Thank you ~

--------------------------------------------------------------

This topic has been closed for replies.
Correct answer rob day

Thanks Uwe, I had completely misunderstood the question—the Control-Shift threw me on OSX it is Command-Shift.


It looks to me like the grid is always 3x3—if I select 9 images the width and height of the grid group matches the page trim, and the gutter is the gutter dimension set in the page’s Margins and Columns... If I select more than 9 images, the extra images are added individually at 100% with single clicks. If I select less than 9 images, a grid with the same dimensions is populated left to right and down. Here my page is 5"x10", and I selected 10 images, the extra image gets added at 100% scale:


With 5 Images selected:

4 replies

Community Expert
March 2, 2020

喜狼_edny said:

For example, I need to generate a 80X80 frame after importing the map.

The key now is where do I go to set this 80X80.


Hi,

for that you need a specific page size in the New Document dialog.

And follow the rules Rob already layed out.


One example:

250 x 250 page size with 5 as gutter.


That's it. There are no other preferences you can change or edit.


Regards,
Uwe Laubender

( ACP )

Community Expert
February 24, 2020

Hi 喜狼_edny,

an interesting question indeed. When holding Shift and Ctrl and click you are using the "gridify" feature for placing images.

I cannot explain the default size, but I can explain default orientation and default gap between the placed images.


1. Default orientation is the orientation of the page as defined with New Document.

If the page is a square you get a square sized graphic frame. If the page is not a square, but done in portrait mode you get a portrait proportioned graphic frame. The same with orientation landscape.

FWIW: The aspect ratio of the graphic frame is not exactly the aspect ratio of the page, but nearly the same.


2. The default gap size between the graphic frames is exactly the one for gaps in Margins and Columns as defined with New Document.


Regards,

Uwe Laubender

( ACP )

Frans v.d. Geest
Community Expert
Community Expert
February 24, 2020

Right!

Well I am stumped about my own ignorance here! Never realized that this still existed. I always drag but indeed: if you Ctrl Click it sets multiple loaded imgaes in a grid.

See, never to old to learn, never realized that this was there after CS6. Dumb me!

Now, the strange thing is: when I tried this with an example I got very big images, but the size was about 175%, I have no idea why...  It seems very random. I gues this is a strange left over from old versions....


Eric Dumas
Community Expert
Community Expert
February 23, 2020

I would consider creating a Object Style and apply it to the frames first. There are options there to control the size of the pictures and how they fill the frame. 

dublove
dubloveAuthor
Legend
February 23, 2020

The frame generated after clicking is sure to be related to the page size.
If it cannot be set, it is a bug in InDesign.
It should show where it can be set.
Great effect: The default size of the imported image is the same as the width of the column, and it can be used directly.
Save a lot of things.

Frans v.d. Geest
Community Expert
Community Expert
February 23, 2020

You keep saying: click + ctrl + shift. Why are you holding down Ctrl + shift?? There is absolutly no need to use any(!) modifier keys EXEPT when you, yes drag to scale an already placed image!

Try clicking without any modifier keys, that will place your image at 100% of the original size.

Just try it and report back.

rob day
Community Expert
Community Expert
February 23, 2020

If you place an image directly on a page (not into an existing frame), the size of the image and its parent container will be its  output dimensions at 100% scale.


So Photoshop’s Image Size tells me that this image has an output dimension of 4.8"x3.2"


If I place it directly on the page without dragging, it will get placed at 100% scale at the same dimensions—the page size doesn’t matter:

If I drag while I place, I can drag to a desired percentage and release:

The placed image is at 55% of the original Photoshop output dimensions

Rulers set to MM


dublove
dubloveAuthor
Legend
February 23, 2020

Hello ~
You didn't understand what I said.
Is a batch import.
2 pictures, press Ctrl + Shift, click (no drag, no frame)
Must be more than 2 pictures.

The size in photoshop has no direct meaning for typography, and ultimately it depends on how big indesign is used.
So it can be said that this question has nothing to do with PS

--------------------------------------------------------

Here is the video

http://www.fileconvoy.com/dfl.php?id=gd14f9ddb95514cf810002298495212ac10036b44a5

---------------------------------------------------------------


I'm speechless, but I won't reply ...
My previous friends didn't understand, and asked me why I had to insist on using Ctrl + Shift.
Because this function is very easy to use, it can quickly enter multiple pictures, faster than object styles.

Geоrge
Legend
February 23, 2020

Please, pardon me. Are your questions have some things applied to real practice? Why don't you prepare frames early and don't place directly to this frames? 

Remember, never say you can't do something in InDesign, it's always just a question of finding the right workaround to get the job done. © David Blatner