Participating Frequently
November 21, 2019
Answered

Markup dimensions in InDesign file

  • November 21, 2019
  • 4 replies
  • 18042 views

Is there a way to markup a document in InDesign with dimensions?

Much like you can do in a drafting program, like AutoCAD.

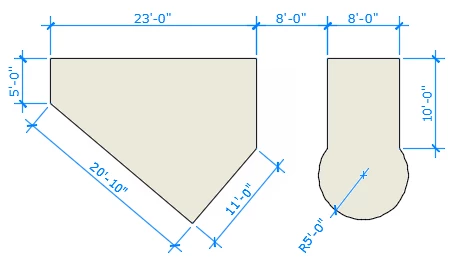
See sample screenshot below (made in AutoCAD).


Correct answer willcampbell7

I made a script for this, released yesterday.

https://www.marspremedia.com/software/indesign/dimensions-indesign

Made a video too

https://youtu.be/GD9nTcIDino

4 replies

Adobe Expert
June 2, 2021

"Would it be possible to generate just the measurement lines without the text?"


Hi Mick5C8B,

wouldn't it be easy to remove the text in one go with a simple Find/Change action?

They all have one paragraph style in common. By default its name is "Dimensions".


Ok. You could do it this way, run this script code on the document where you added a layer named "Dimensions":

app.documents[0].layers.itemByName("Dimensions").groups.everyItem().textFrames.everyItem().remove();


To William,

whalt could help: Build the text frames for the text on an extra layer.

That layer for the text frames could be easily made invisible or removed.


Regards,
Uwe Laubender

( ACP )

New Participant
June 3, 2021

Thanks for your reply, I will try this!

Adobe Expert
June 3, 2021

Hi Mick,

before you try anything with my one line of code, make sure that layer "Dimensions" exists AND make sure that there are still groups on the layer. If there are no groups, my script will run into an error.

If there are groups and you already removed a text frame from one or more of the groups, InDesign could even crash. So: be careful!


Regards,
Uwe Laubender

( ACP )

willcampbell7
willcampbell7Correct answer
Brainiac
May 11, 2021
William Campbell
Inspiring
May 13, 2021

Thanks. is there any similiar script for Illustrator?

willcampbell7
Brainiac
May 13, 2021

In progress now. Uses same interface with a few changes. I will post here and in Illustrator section when done.


William Campbell
Inspiring
November 21, 2019

This isn't exactly what you are looking for, but a user in the InDesign Forum wrote a script for me for labeling dimensions of a selected object.

https://indesignsecrets.com/topic/script-to-label-selection-with-height-and-width 


And in that thread, there is mention of a plug in, but I never tried it since the solution provided for me was excellent.

mosheyfriAuthor
Participating Frequently
November 21, 2019

Thanks, "pedley_s".

I've tried one of the solutions, but got an error (see screenshot) when running the script.

Anyone know what that means? I'm running latest version; InDesign 2020, btw.

Thanks.

JavaScript Error!

Error Number: 30477
Error String: Invalid value for set property 'appliedParagraphStyle'. Expected ParagraphStyle or String, but received nothing.

Engine: main
File: C:\Users\ [my user name] \AppData\Roaming\Adobe\InDesign\Version 15.0-ME\en_IL\Scripts\Scripts Panel\labelImageSize.jsx
Line: 7
Source: app.doScript(labelItem, ScriptLanguage.JAVASCRIPT, app.selection[0], UndoModes.ENTIRE_SCRIPT, "Label Image Size");

mosheyfriAuthor
Participating Frequently
November 21, 2019

I asked the question and discovered the answer!

The script below is the correct one.


Copy and paste the following lines in notepad and save as"labelImageSize.jsx" (must include the .jsx extension, obviosuly). Also, make sure you have "Arial" font installed on your machine, otherwise replace "Arial" with a font you have installed.


Finally, by default the dimensions won't print. If you want them to; check the "Print Layer" option within "ImageLabel" layer.


SCRIPT STARTS AFTER THIS LINE:

----------------------------------------------


//DESCRIPTION:Label image with its size
// Jongware, 13-Jan-2012
// No Guarantees, Etc.

if (app.documents.length && app.selection.length == 1 && app.selection[0].hasOwnProperty("paths"))
{
if (app.version < 6)
labelItem(app.selection[0]);
else
app.doScript(labelItem, ScriptLanguage.JAVASCRIPT, app.selection[0], UndoModes.ENTIRE_SCRIPT, "Label Image Size");
} else
{
alert ("No valid selection.\nPlease select one single object with the black arrow before running this script.");
}

function labelItem (item)
{
// Save current selected layer because adding one will make it active!
activeLayer = app.activeDocument.layoutWindows[0].activeLayer;
// Make sure the layer "ImageSize" exists
try {
app.activeDocument.layers.add({name:"ImageLabel", ignoreWrap:true, layerColor: [90,192,90], printable: false});
} catch (_) { }
reportLayer = app.activeDocument.layers.item("ImageLabel");

// Make sure the swatch "ImageGreen" exists
try {
app.activeDocument.colors.add({name:"ImageLabel", space:ColorSpace.RGB, colorValue:[90,192,90], colorModel:ColorModel.PROCESS});
} catch (_) { }
reportGreen = app.activeDocument.swatches.item("ImageLabel");

// Make sure the paragraph style "ImageSize" exists
try {
app.activeDocument.paragraphStyles.add({name:"ImageLabel", appliedFont:"Arial", pointSize:12, fillColor:reportGreen, justification: Justification.CENTER_ALIGN});
} catch (_) { }
reportStyle = app.activeDocument.paragraphStyles.item("ImageLabel");

// Make sure measurement units are in inches
hmmu = app.activeDocument.viewPreferences.horizontalMeasurementUnits;
vmmu = app.activeDocument.viewPreferences.verticalMeasurementUnits;
app.activeDocument.viewPreferences.horizontalMeasurementUnits = MeasurementUnits.INCHES_DECIMAL;
app.activeDocument.viewPreferences.verticalMeasurementUnits = MeasurementUnits.INCHES_DECIMAL;
// .. and Smart Quotes is Off
sqt = app.activeDocument.textPreferences.typographersQuotes;
app.activeDocument.textPreferences.typographersQuotes = false;
// Save all of the previous settings to be able to restore them later 🙂

// fetch width and height for the numbers, left and bottom for the lines
gb = item.geometricBounds;
// gb now holds [ top, left, bottom, right ] values -- get shorthand values
top = gb[0];
left = gb[1];
bottom = gb[2];
right = gb[3];

width = Math.round(Math.abs(right - left)*1000)/1000;
height= Math.round(Math.abs(bottom - top)*1000)/1000;

// Retrieve the current page.
// Actually, in CS5 and newer, page items have a property for this (parentPage),
// but I don't have that one near, and it's also nicer to make it work in CS4
// (and possibly even in older versions).
pg = item.parent;
while (1)
{
if (pg instanceof InsertionPoint)
pg = pg.parentTextframes[0];
if (pg instanceof Document || pg instanceof Spread || pg instanceof Page)
break;
pg = pg.parent;
}
// Draw text frame #1: Height
// Put it at the left of the selection, 0.5" wide and 0.2" off the left side
frh = pg.textFrames.add(reportLayer, {geometricBounds:[ top, left - 0.7, top + height, left - 0.2 ],
textFramePreferences: {verticalJustification: VerticalJustification.CENTER_ALIGN,
ignoreWrap: true } });
// ... and put text into it.
frh.insertionPoints[0].appliedParagraphStyle = reportStyle;
frh.contents = String(height)+'"';

// Draw text frame #2: Width
// Put it at 0.2" off the bottom of the selection, 0.25" high, full width for convenience
frw = pg.textFrames.add(reportLayer, {geometricBounds:[ bottom + 0.2, left, bottom + 0.2 + 0.25, left + width ],
textFramePreferences: {verticalJustification: VerticalJustification.CENTER_ALIGN,
ignoreWrap: true } });
// ... and put text into it.
frw.insertionPoints[0].appliedParagraphStyle = reportStyle;
frw.contents = String(width)+'"';

// Add vertical (height) line
lnh = pg.graphicLines.add (reportLayer, {strokeColor:reportGreen, strokeWeight:0.5});
// It appears in a default position so move it to the right one
lnh.paths[0].entirePath = [ [left - 0.15, top ], [left - 0.15, bottom ] ];
// add top stroke; it's 0.05" wide so offset left and right with 0.025"
lnh.paths.add ({ entirePath:[ [left-0.15 - 0.025, top ], [left-0.15 + 0.025, top] ] });
// add bottom stroke
lnh.paths.add ({ entirePath:[ [left-0.15 - 0.025, bottom ], [left-0.15 + 0.025, bottom] ] });

// Add horizontal (width) line
lnw = pg.graphicLines.add (reportLayer, {strokeColor:reportGreen, strokeWeight:0.5});
// Again we move it to the right position
lnw.paths[0].entirePath = [ [left, bottom + 0.15 ], [right, bottom + 0.15 ] ];
// Add end caps as above
lnw.paths.add ({ entirePath:[ [left, bottom+0.15 - 0.025 ], [left, bottom+0.15 + 0.025] ] });
lnw.paths.add ({ entirePath:[ [right, bottom+0.15 - 0.025 ], [right, bottom+0.15 + 0.025] ] });

// At this point we added four items: 2 text frames and 2 graphic lines.
// Group them together for convenience
app.activeDocument.groups.add ( [ frh, frw, lnh, lnw ] );

// Restore old layer selection
app.activeDocument.layoutWindows[0].activeLayer = activeLayer;

// Restore previous global settings
app.activeDocument.viewPreferences.horizontalMeasurementUnits = hmmu;
app.activeDocument.viewPreferences.verticalMeasurementUnits = vmmu;
app.activeDocument.textPreferences.typographersQuotes = sqt;

}

John Mensinger
Adobe Expert
November 21, 2019

There isn't a native feature that offers dimensioning in InDesign, and if someone makes a plugin, I haven't seen it.


You'd have better luck if it was Illustrator.

mosheyfriAuthor
Participating Frequently
November 21, 2019

Thanks.

On second thought, I just came across this script:

https://www.drscripto.com/indesign-add-measurements/

I'll have to try it, but it seems that it would be a solution.