Bedazzled532
Inspiring
August 28, 2022
Answered

Resize an object as per requirement

  • August 28, 2022
  • 3 replies
  • 1527 views

Hi all


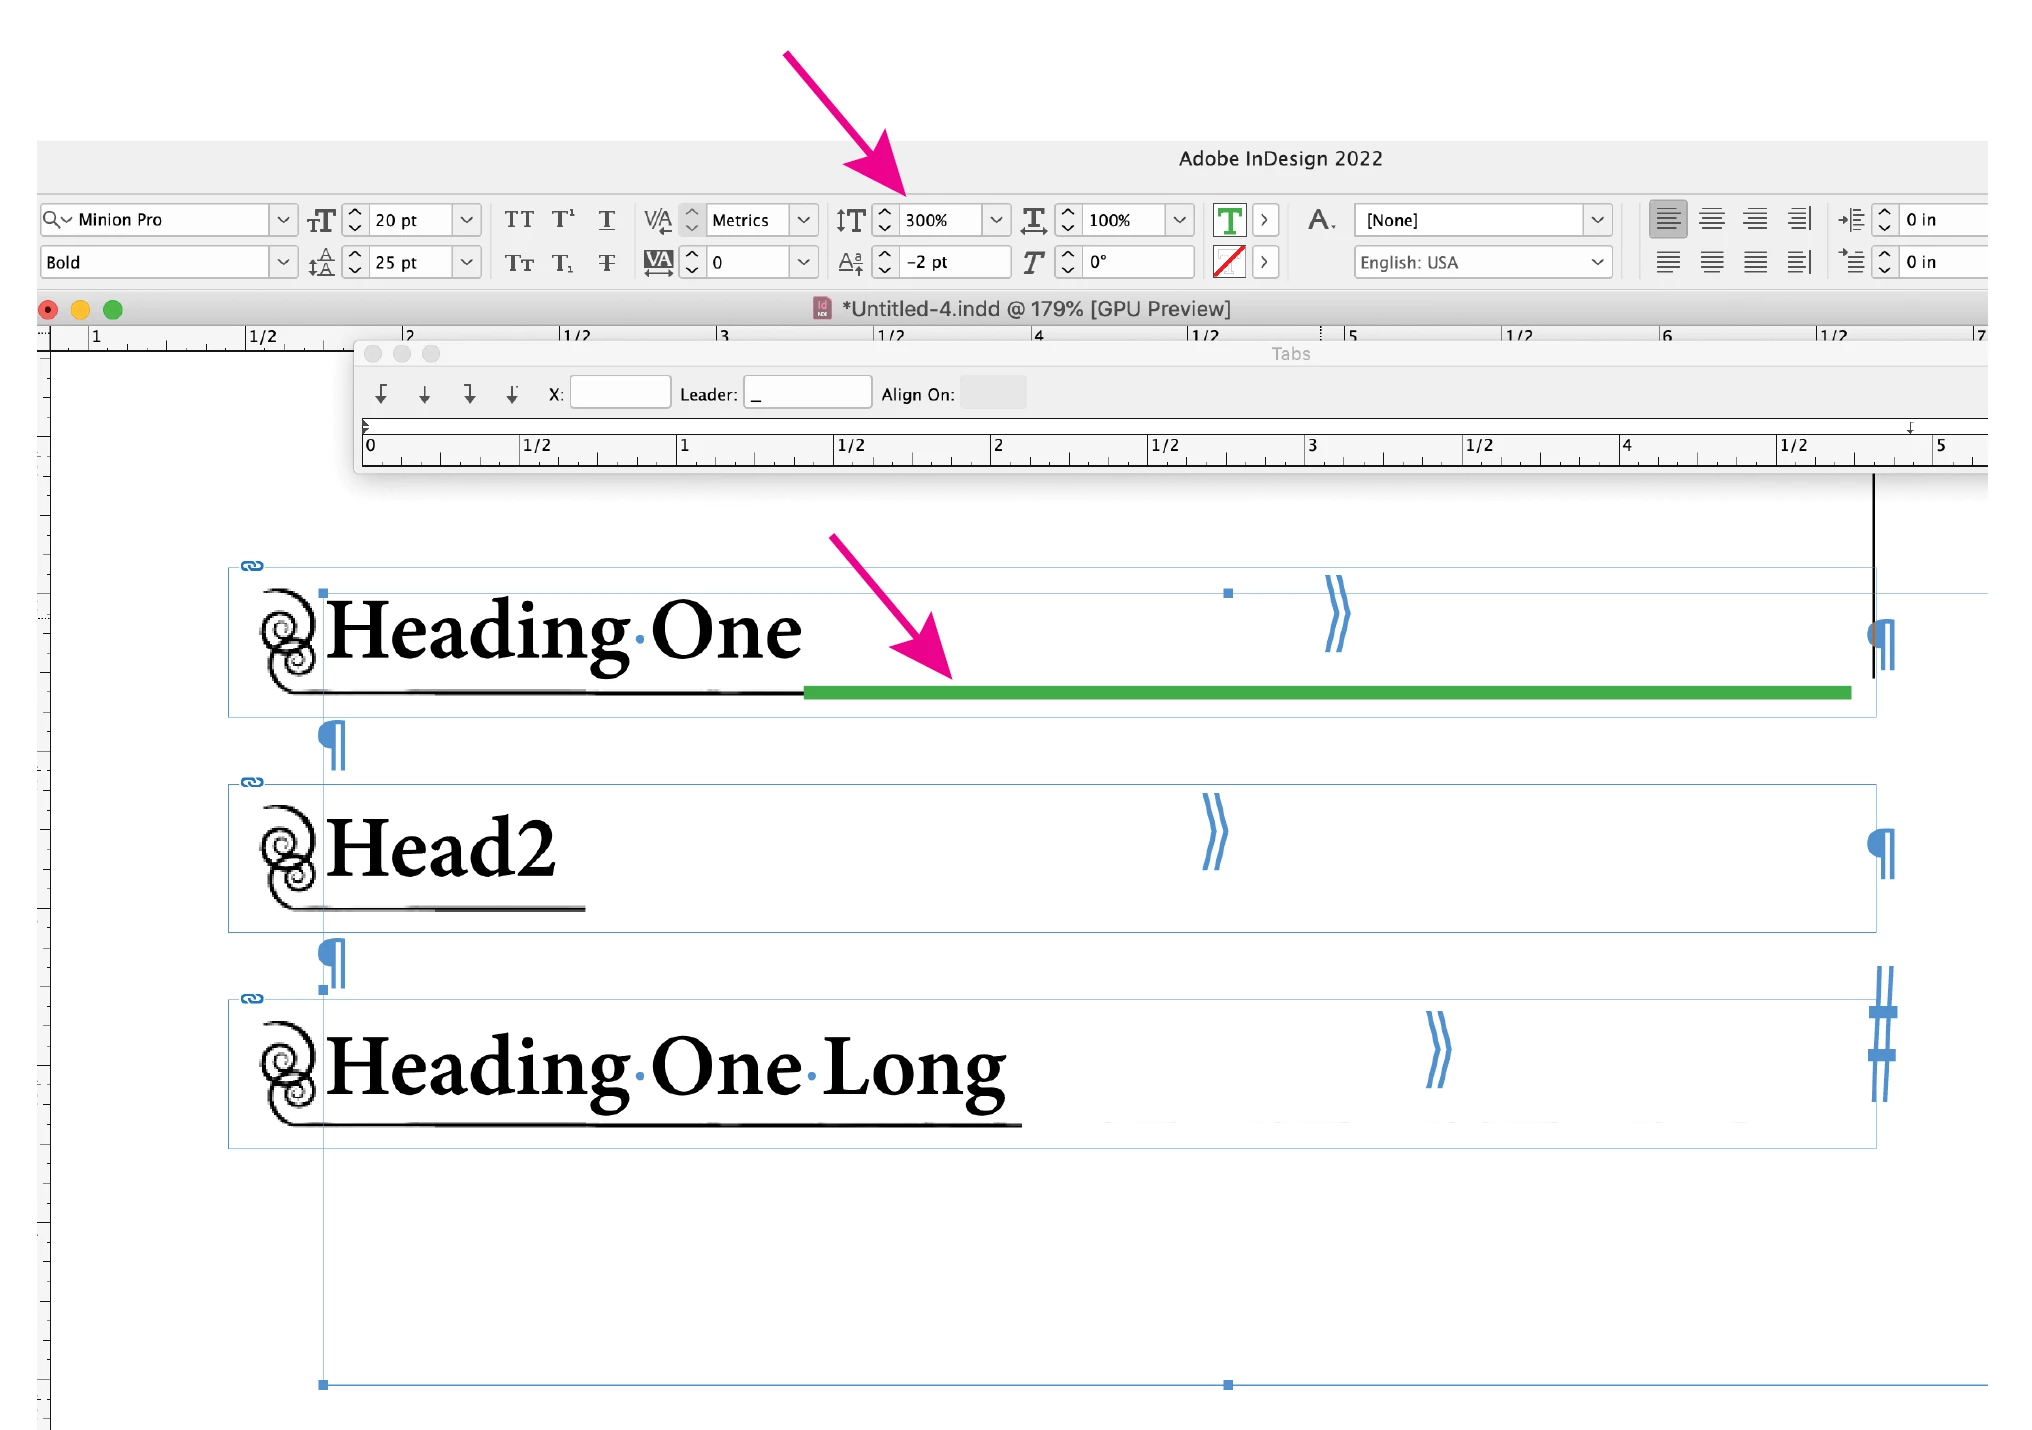
I am facing an issue in a long document. My requirement is that I have to give an Underline (which is a custom vector file) under each an every subheading. This part is easy as I can do a Find/Change with GREP and give underline.


Problem is some of the headings are Ok where the custom underline vector fits perfect. Some headings are short and some are too long.


Question is is there a way or script which will enlarge the object as per the heading size. 


I have attached a screenshot for better understanding. In the image "Heading One" is perfect. Other two headings are either short or too long. What can be done ?


I am working on a book document containing approx 30 individual files and each file has approx 30 pages.

There are 1 or 2 headings in each page.


Thanks.

This topic has been closed for replies.
Correct answer Peter Spier

You could use a tab to cover the unwanted portion of the art, in this sample, the first heading is followed by a Tab (using shift + dash for the Leader) it's colored green for clarity, in the other lines, the dash is colored white to hide the art below, it is also scaled 300% in height and positioned using baseline shift.


If the horizontal line is redrawn to be the full width of the page and the frame containing the graphic is pasted into a second frame the same size you can "crop" the length of the hoerizontal line by resizing the "container" frame you pasted the graphic into (drag the right edge to the left to match the length of the heading).

3 replies

Peter Spier
Braniac
August 28, 2022

If you are adding this object using find/change with clipboard contents, you should consider first making the wavy line the full width of the column, then cut it and Paste Into an empty rectangular frame that you can resize to use as a mask. It won't automatically size to the heading, but at least you'll be able to go back and change that frame width to suit.

Bedazzled532
Inspiring
August 28, 2022

Hello Peter

Thanks for the reply.  How do I mask it as per different size of the subheadings. Could you please throw some more light.

Thanks.

Luke Jennings3
Inspiring
August 28, 2022

You could use a tab to cover the unwanted portion of the art, in this sample, the first heading is followed by a Tab (using shift + dash for the Leader) it's colored green for clarity, in the other lines, the dash is colored white to hide the art below, it is also scaled 300% in height and positioned using baseline shift.

Scott Falkner
Braniac
August 28, 2022

I'm no help for scripting, and the help I offer here is small and will, at best, yield results months from now, you can at least vote to support a more robust Wavy option for InDesign’s strokes.


https://indesign.uservoice.com/forums/601021-adobe-indesign-feature-requests/suggestions/36890230-wavy-line-needs-customize-option


Bedazzled532
Inspiring
August 28, 2022

Thanks Scott. It looks like I have to do this. 

Thanks once again.

James Gifford—NitroPress
Braniac
August 28, 2022

I realize it's not quite what you're asking, but there is a wavy underline option —


...that might be a simpler solution, although it is not quite a match for your image underline. It would be vastly easier to apply and manage, though.


You may be able to get closer to your desired look by combining underline, paragraph rules paragraph borders. (Stacking the waves, that is.)


Bedazzled532
Inspiring
August 28, 2022

You are right. Actually the vector I am talking about is not a wavy line.


I am attaching another screenshot with exact vector image. Looks like i have to work out manually after anchoring it to the subheading. 


Anyone with a better idea ? It will be very helpful.


Thanks

James Gifford—NitroPress
Braniac
August 28, 2022

You could convert that swirl to a type glyph and use it as a bullet, then combine that with an underline. Tricky, but it would be controlled by styles and universal through the document.


I can't think of any (other) solution other than manual placement and adjustment, which would be a terrific amount of work, and likely very fragile (breaking every time text flow changes) as well.


What I'd really do is back up and find a solution that gives a similar distinction to headings but builds up from ID's style options instead of down from "let's put this graphic on every heading." 🙂