Thanks. Unfortunately, I have virually no experience in the Book module and am unable to intuit all the steps here. Here are my individual issues:
1. Your step #1: You said to save your 2 page spread layout as a Custom Page. But where is the "Custom Page" option? I found a video on youtube about Custom Pages from 2018 by 99jon Tech; he shows "Custom Pages" as an option in the drop down window on which Two-Page Spread appears, but Custom Pages is not showing in that same box today.
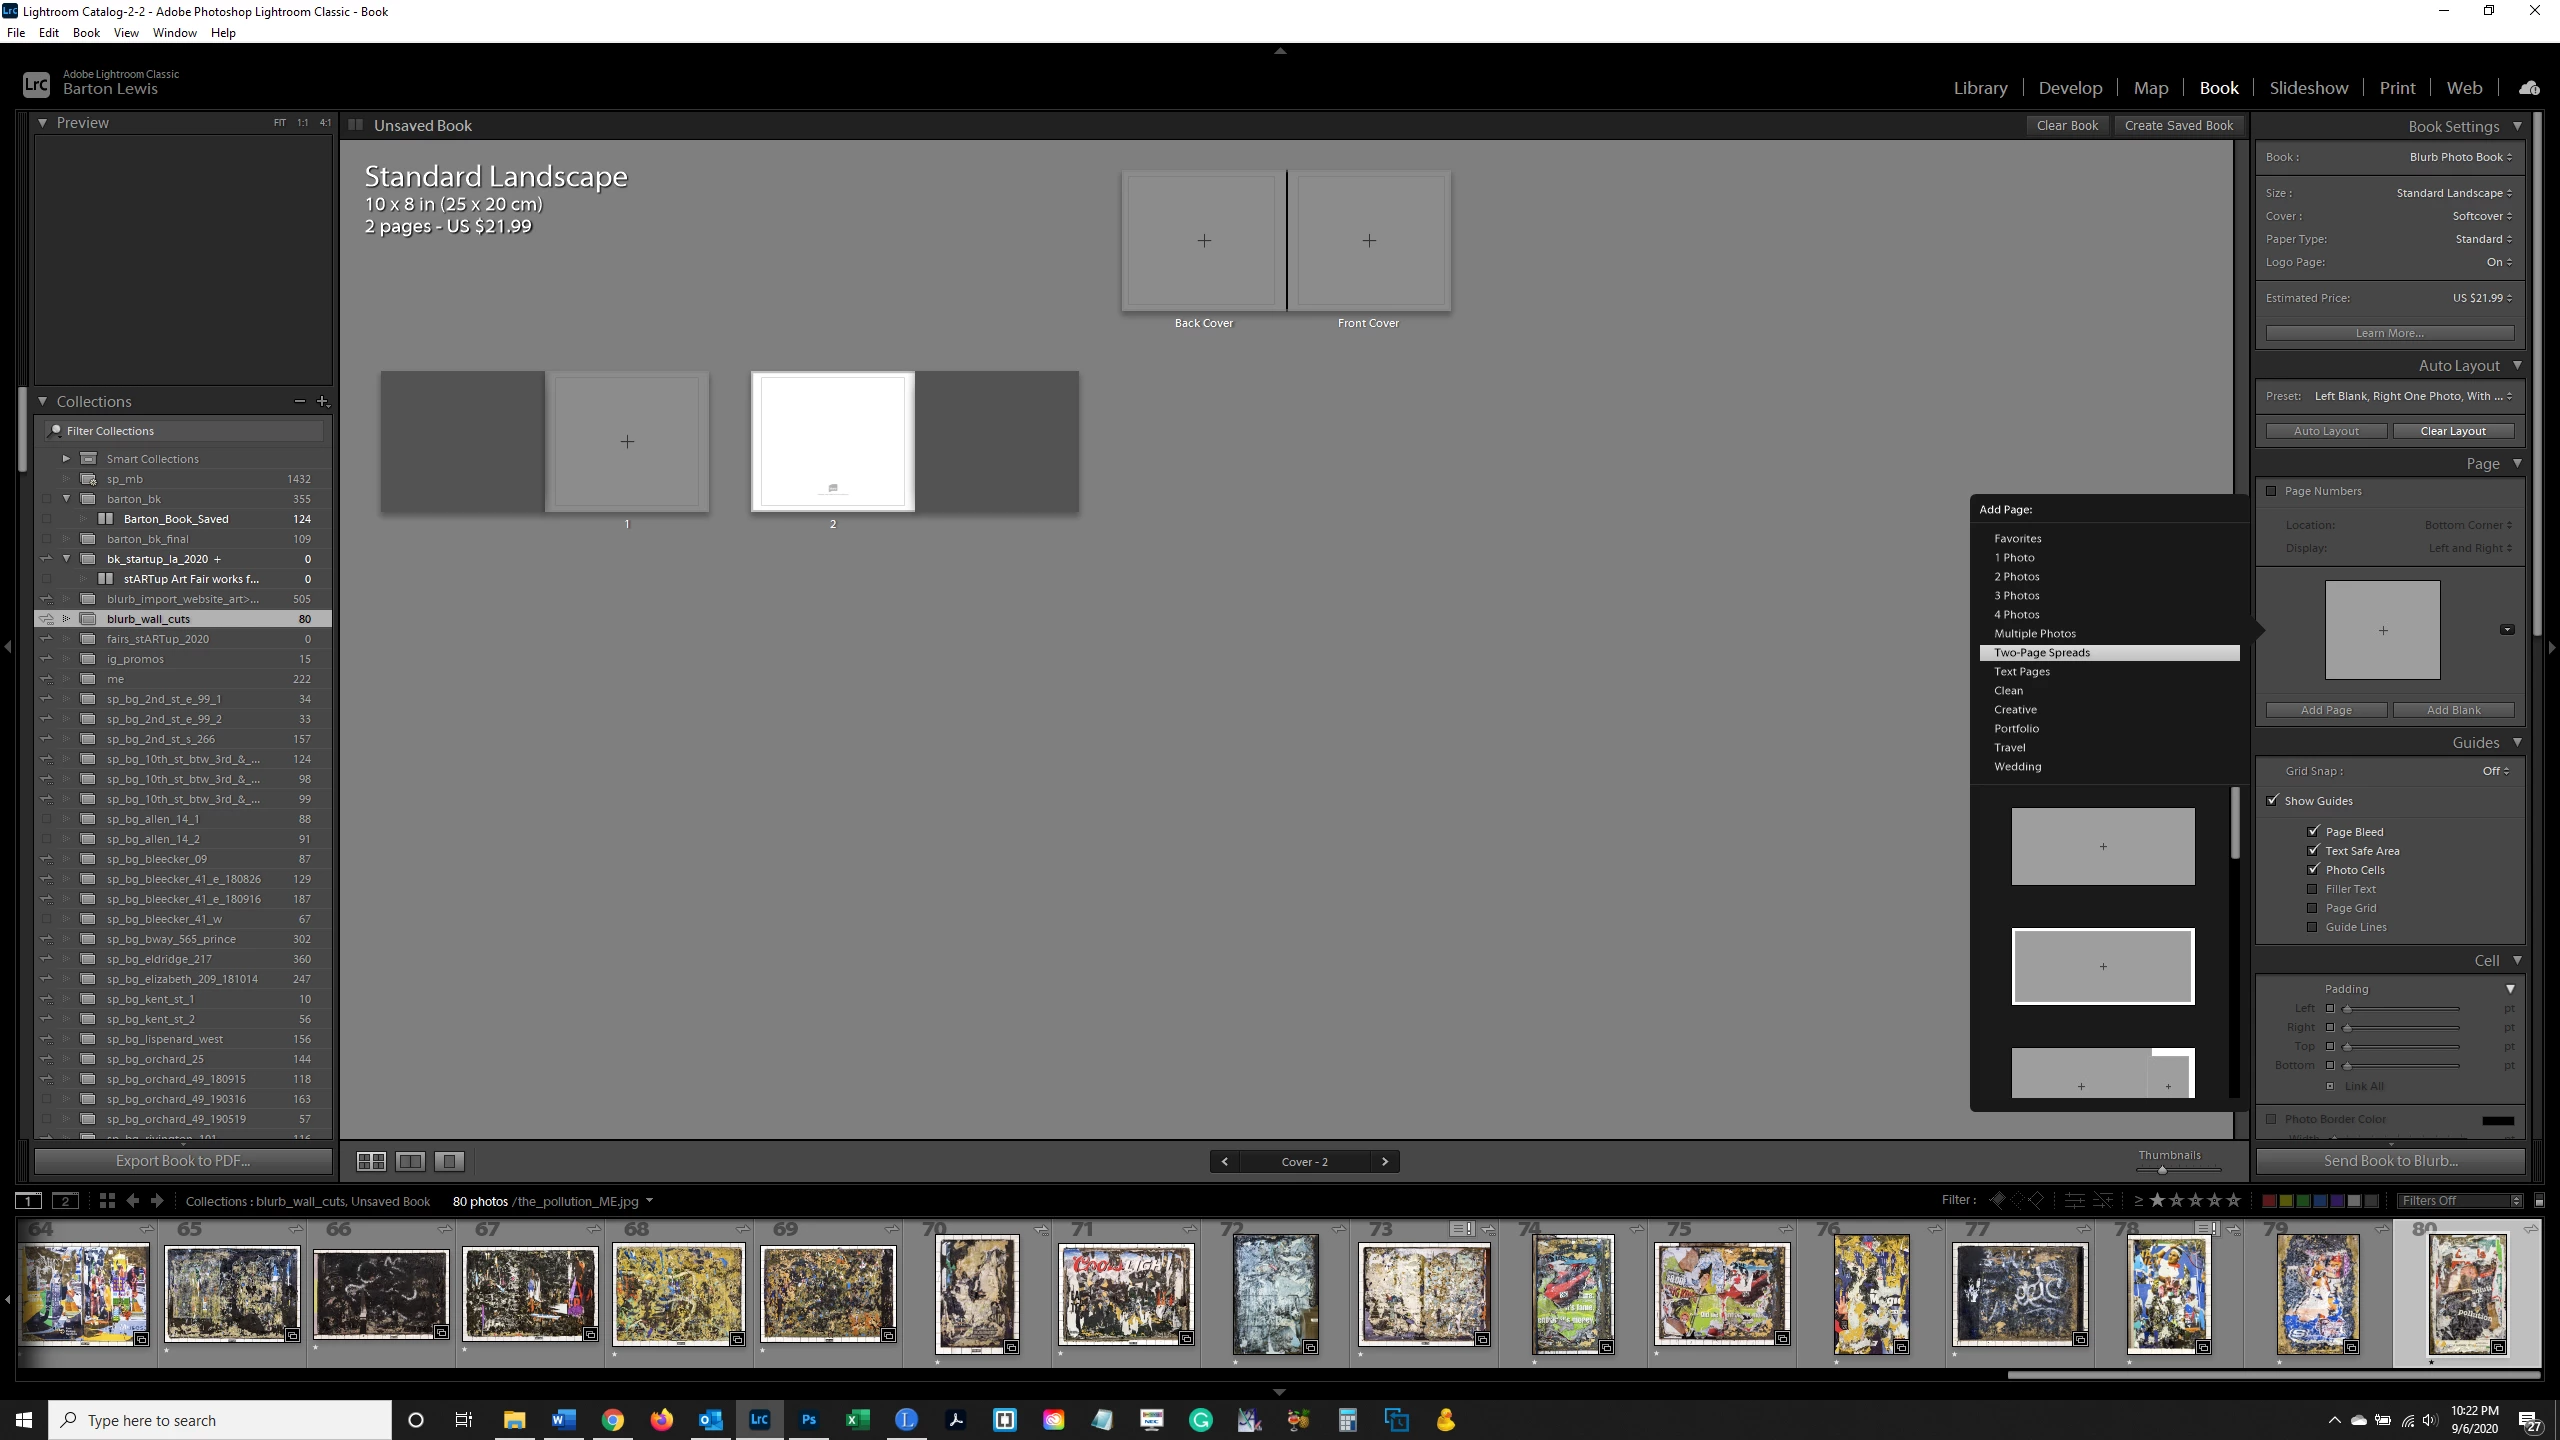
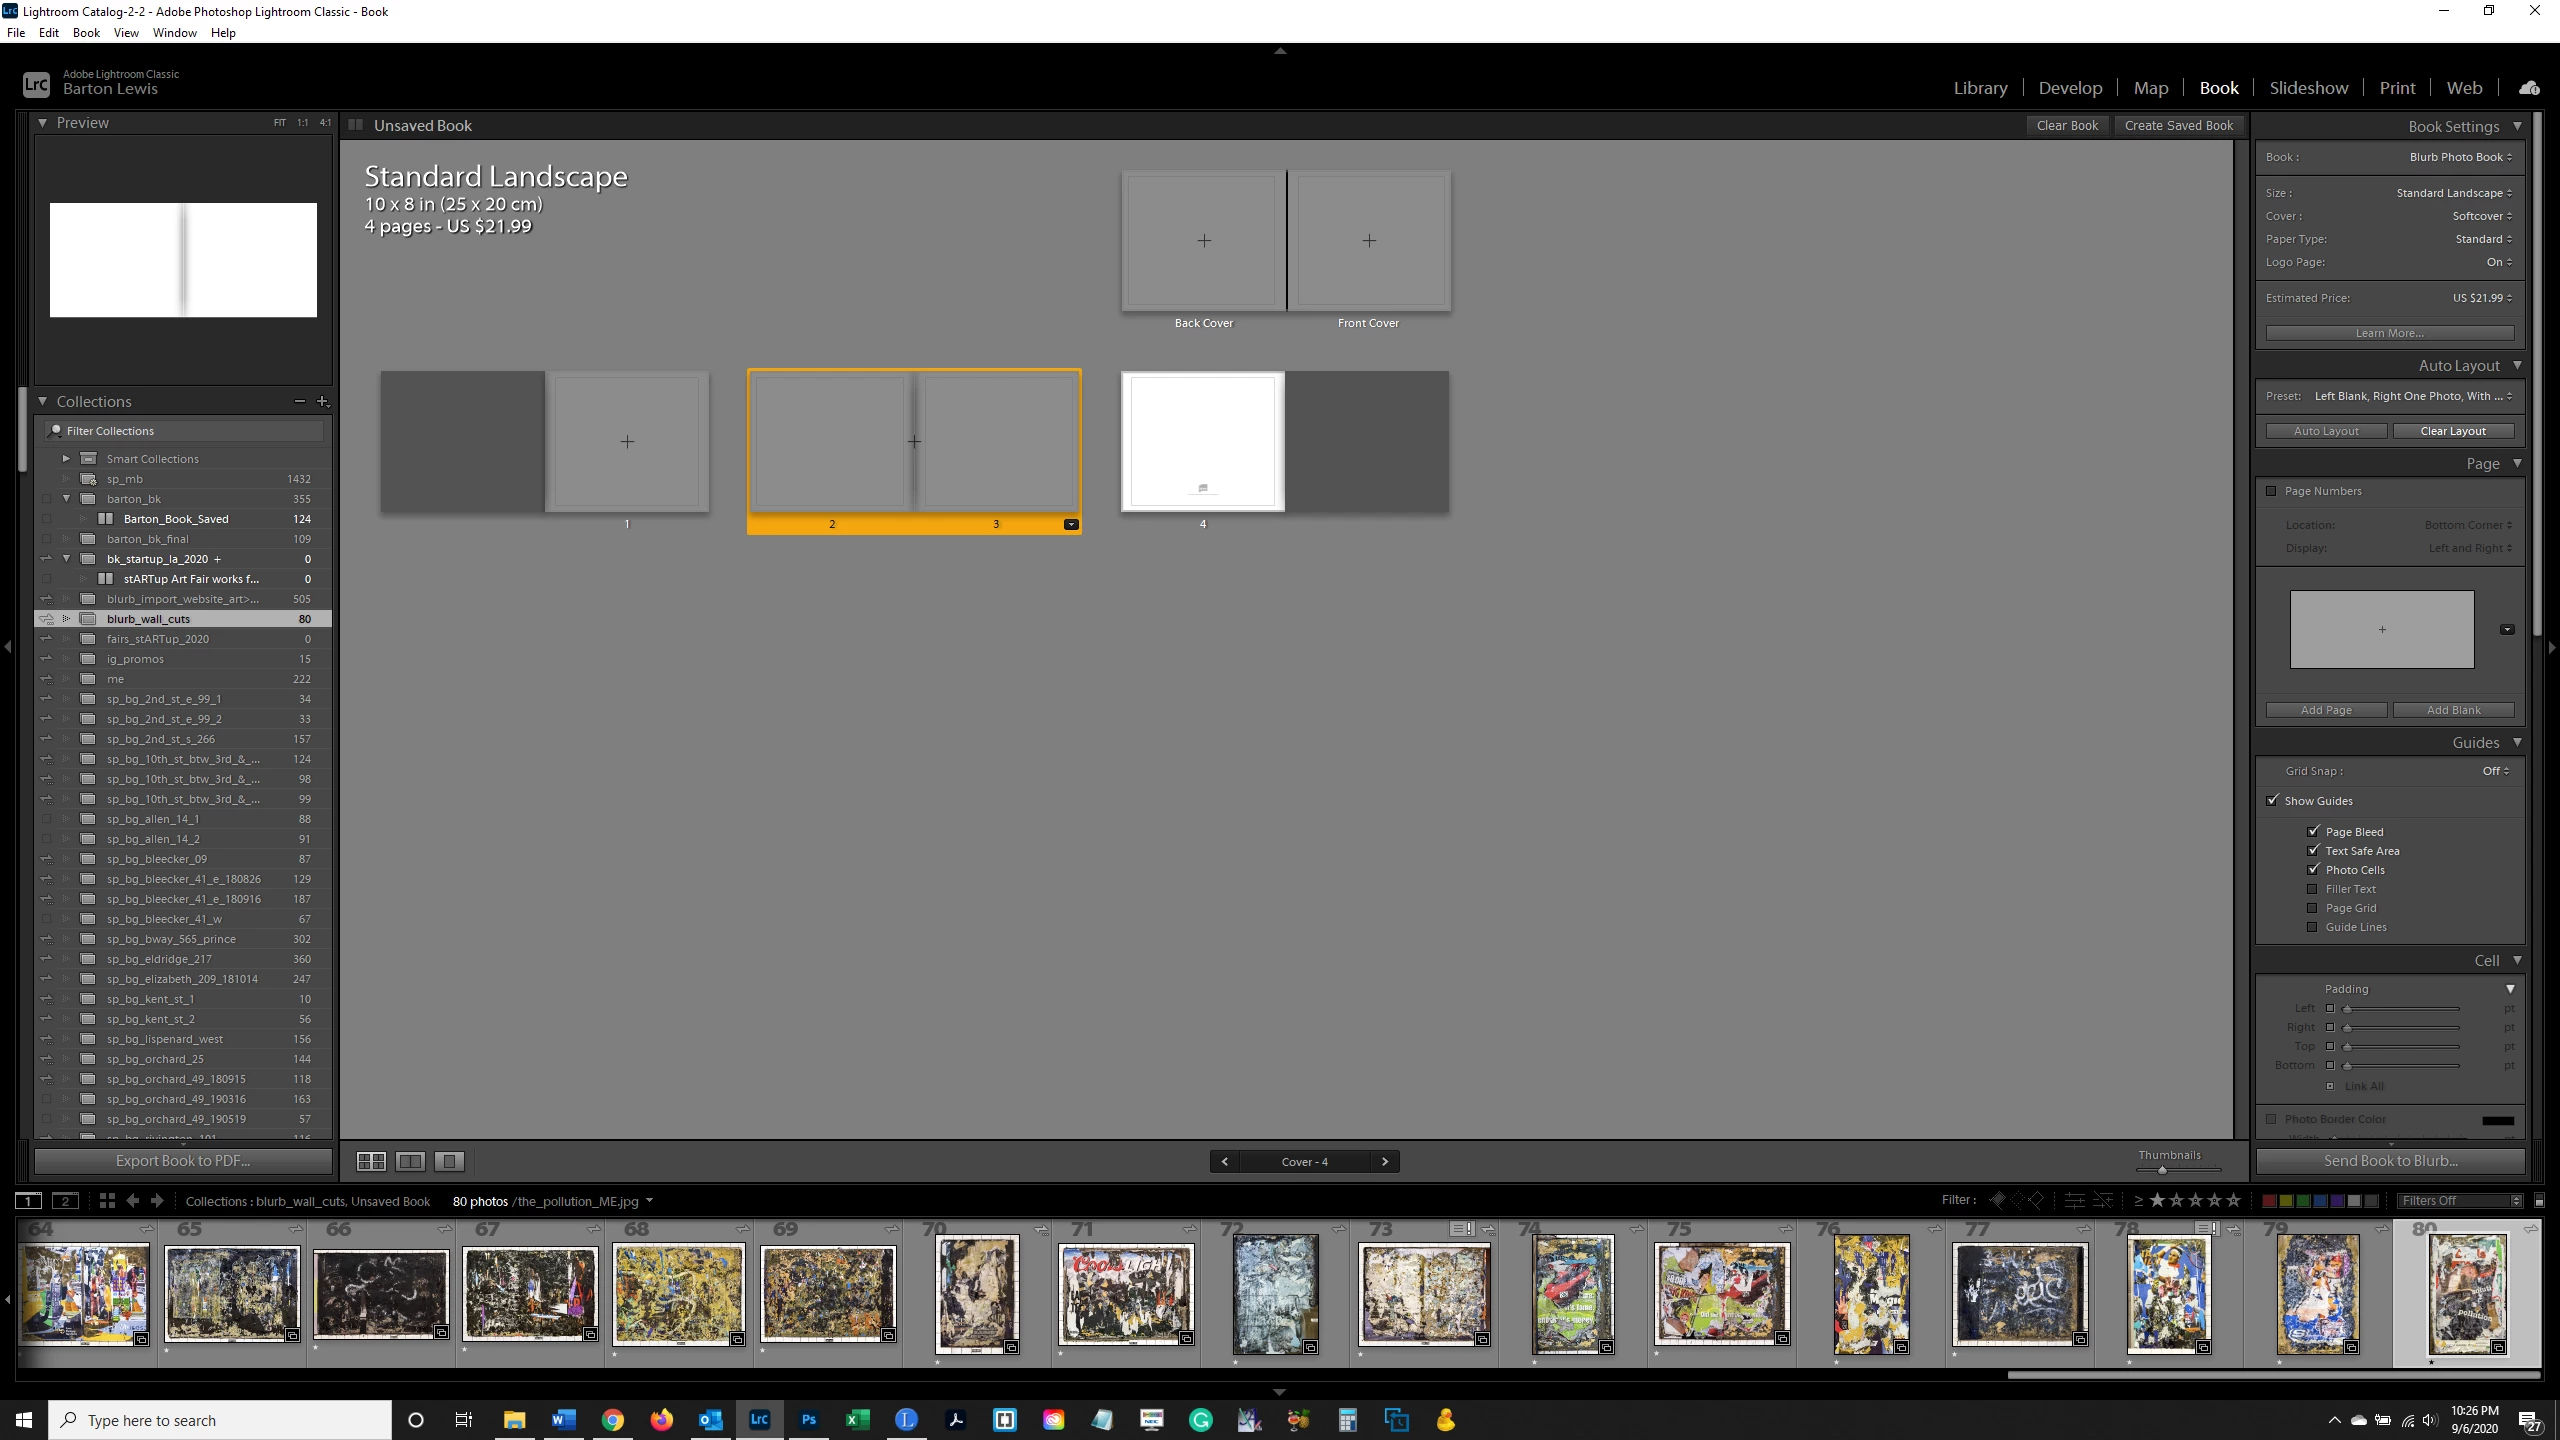
2. What I did was to click on the triangle under the "Page" pane and choose Two-Page Spreads. However, here there were further options (as shown in the drop-down box in the first screenshot below) and I did not know which one to choose. I don't see an option to have text on one page and the photo on the other such as you show in your screenshot. So I just clicked on the first option, which gave me 2 photo pages (2nd screenshot below).
So my questions are: What are the exact steps to saving my '2 Page Spread' Layout as a 'Custom Page'? And, before clicking on the 'Add Page' button to create the series of 2 Page Spread Layouts, how do I make that layout such that text is on the left and the image on the right?
Thank you and sorry for so many questions!
OK, I will walk you through it with some screen-clips. Persevere! A looooonnnng thread!
To- Design the Spread exactly as you would like to see it-
FIRST STEP- Choose the Two-Page Spread: AND IT MUST BE A TWO-PAGE SPREAD! (NOT 2-Photos)
1) Select one page (any page) and Click on the YELLOW border [Drop-down MENU]
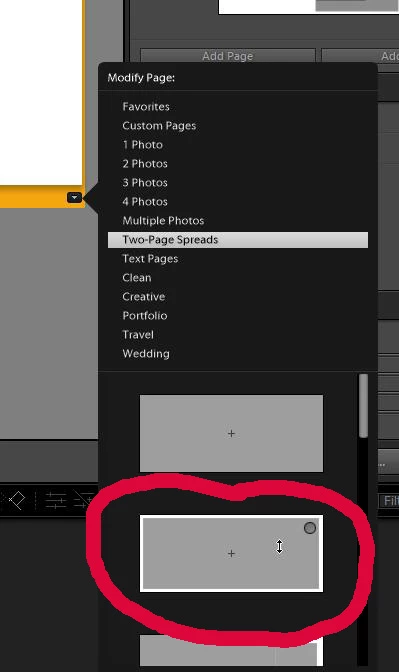
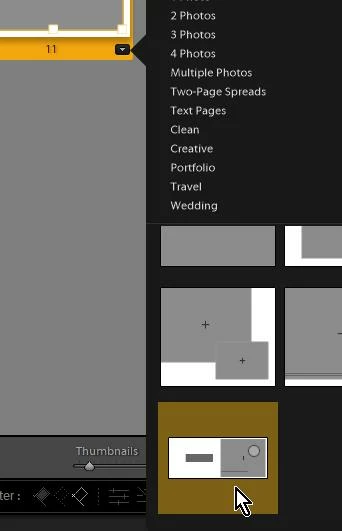
2) Scroll down and select 'TWO-PAGE SPREADS" (NOT "2 Photos" )
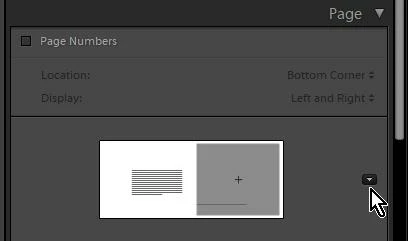
3) Scroll down and click to choose the Spread in my clip above.
Note that the Grey area extends across both Left & Right pages, and is indicated by the one central + sign.
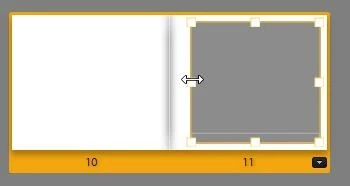
SECOND STEP - Modify the Spread as you want it

1) Click on the grey photo Cell that covers the Spread to 'select' it. (The edge and corner handles will appear)
2) Drag the LEFT EDGE handle to limit the Photo CELL only to the Right half of the Page Spread. This is where you will place your photos- (in the grey area)
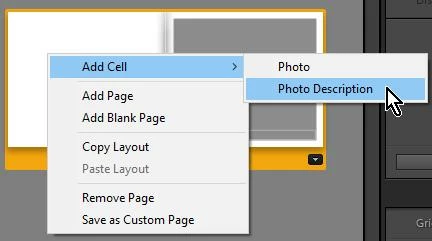
3) [Right-Click] on the blank Left half of the Spread and choose [Add Cell] > [Photo Description]
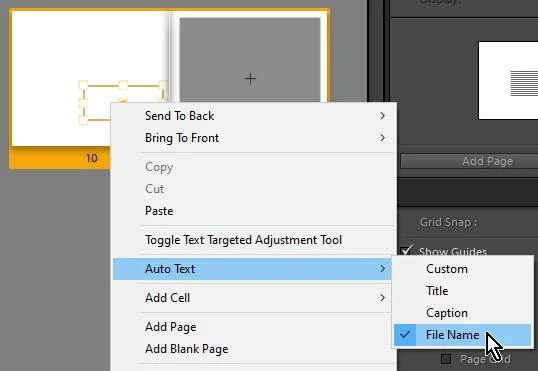
4) [Right-Click] on the new 'Photo Description' CELL and choose from the Menu [Auto Text] > [Filename]
Re-size & re-position the Cell as wanted.
THIRD STEP- Save this Spread as a 'Custom Page'
1) [Right Click] anywhere on the Spread or the Yellow page background.
2) From the Menu choose [Save as Custom Page]
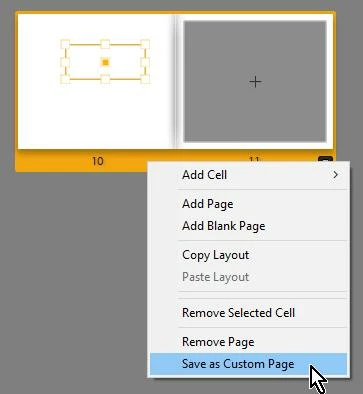
Now you have a Custom Page that you can re-use at any time.
NOTE 1: It will be at the very bottom of the 'Custom Page' template thumbnails!
NOTE 2: Custom Pages are specific to the BOOK Size Setting! A Custom Page in an 8x10" book will not appear in a 12x12" book.
You can now: Convert ONE page from the yellow Drop-Down Menu, or in the Page Panel choose the Custom Page so it is set to apply with the [Add Page] button
The Page PANEL is now where you can repeatedly click the [Add Page] button for adding multiple spreads that will be empty until you place photos from the Filmstrip.
The Limitations of using 'auto linked' Photo Text from metadata (Filenames, etc) is that it only appears on the 'page' where the Photo is placed. The only way to have the Photo Text CELL linked over the two pages (as you want) is to use a 'Spread' template where the Photo Cell believes it to be on a two-page spread, but you have tricked the design by reducing the Photo CELL size.

