Tutorial: How to Store Proxies in Alternate Location in Lightroom CC Desktop
The following instructions are intended only for advanced users who are comfortable editing text-based configuration files. You should not expect help from Adobe if you choose to enable this undocumented feature; the developers are probably still testing it before enabling it for normal users. Proceed at your own risk.
Scenario: I am using Lightroom CC Desktop on a Windows 10 laptop (Surface Book). This laptop has a 256 GB O/S SSD, a 500 GB USB external SSD, and a 6 TB USB external HDD.
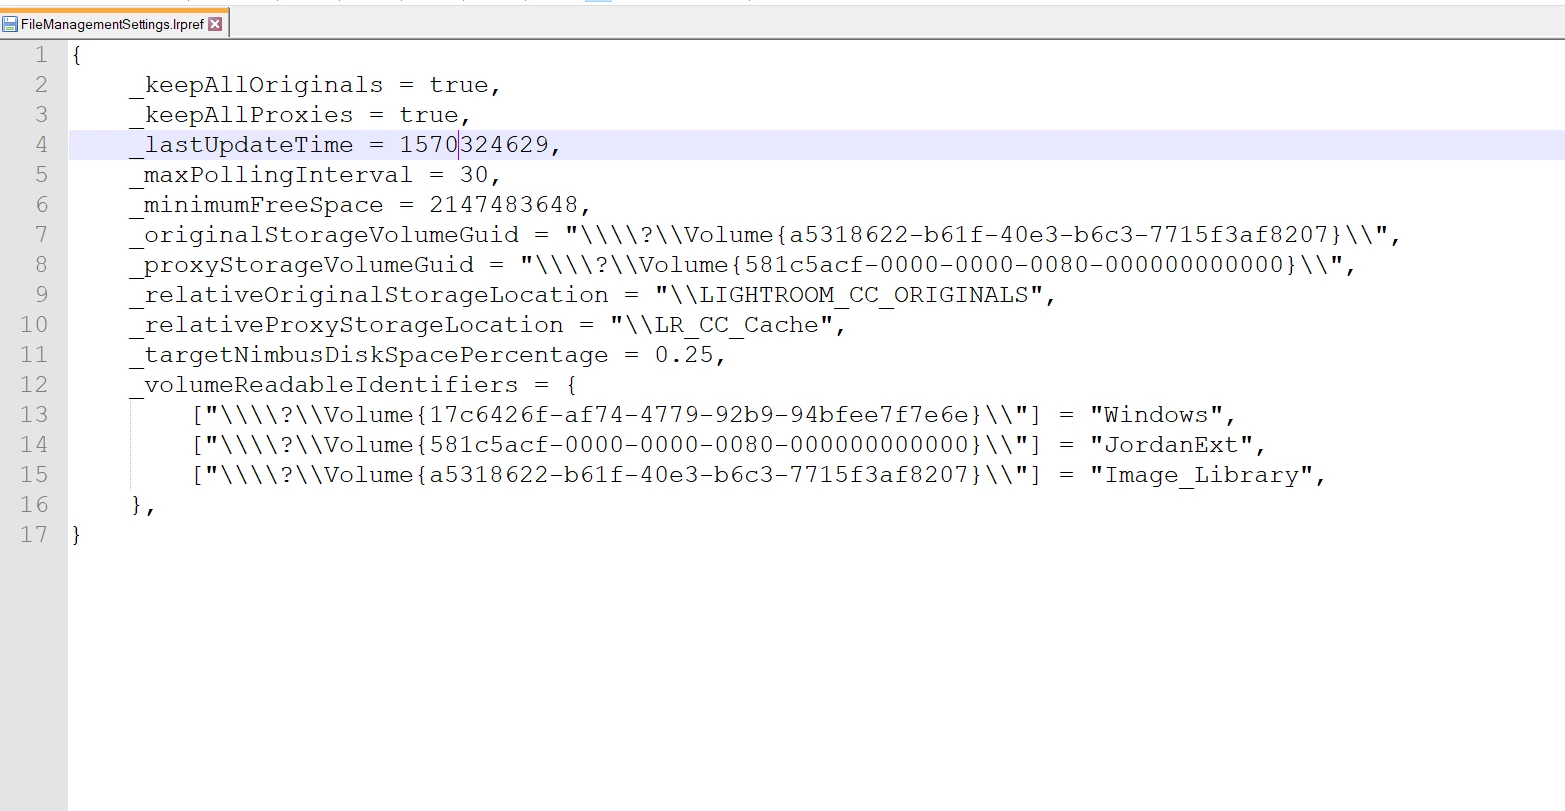
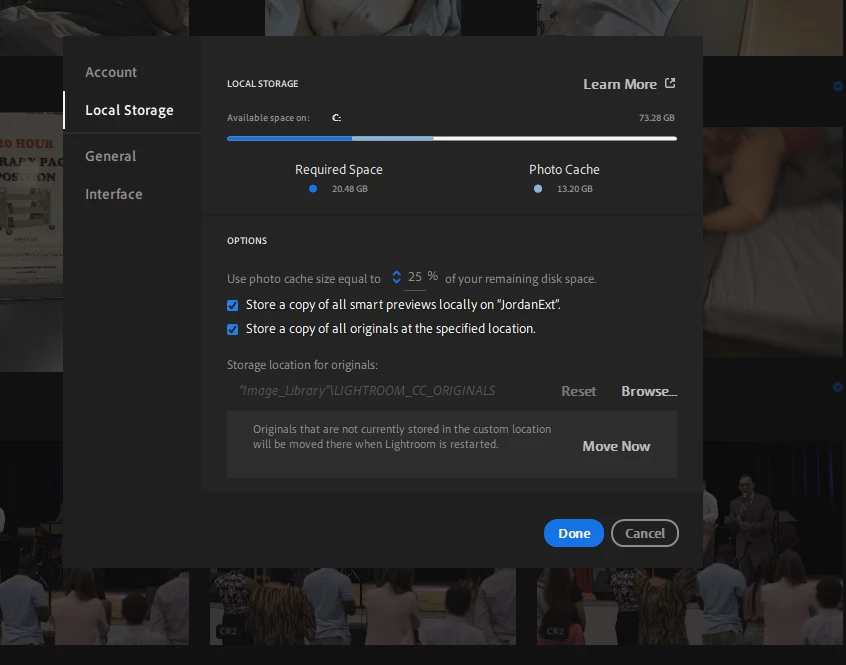
By default, Lightroom only offers to save smart preview files to my C: partition ("Store a copy of all smart previews locally on "C:". I wanted to move the previews to an alternate location. Today, while trying to fix a sync issue, I stumbled upon FileManagementSettings.lrpref. In this file, I discovered that the developers have helpfully created an undocumented feature to specify an alternate location for the previews.
Steps
- Close Lightroom CC if it is running.
- In Explorer, go to your intended proxy destination and create a folder.
- In Explorer, go to C:\Users\[USERNAME]\AppData\Local\Adobe\Lightroom CC\Data\user
- Copy FileManagementSettings.lrpref to FileManagementSettings.lrpref.bak
- Open FileManagementSettings.lrpref in your favorite text editor.
- Note the format of the variables with "Original" in the name.
- Observe the helpful list of local drives at the bottom of the file under "_volumeReadableIdentifiers".
- Change _keepAllProxies to true.
- Copy the GUID of your new proxy location from the list at the bottom into _proxyStorageVolumeGuid
- Set _relativeProxyStorageLocation to the relative path from the root of drive your referenced as _proxyStorageVolumeGuid, noting the two backslashes at the beginning of the path "\\".
- Save your new preference file.
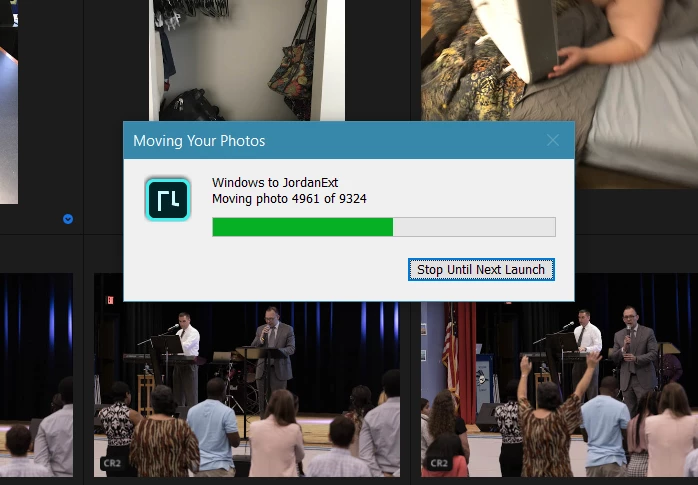
- Start Lightroom CC.
- Observe the moving file dialog with the upside-down Lr symbol (probably intentional to designate that the feature is unpublished).