

- Inicio
- Photoshop ecosystem
- Hilos de conversación
- Re: PHOTOSHOP 2019 CC CLASSROOM/TOOLS NOT WORKING ...
- Re: PHOTOSHOP 2019 CC CLASSROOM/TOOLS NOT WORKING ...
Tools Not Working for Photo Restoration

Copiar vínculo al Portapapeles
Copiado
Title edited for brevity by moderator. Was "PHOTOSHOP 2019 CC CLASSROOM/TOOLS NOT WORKING FOR PHOTO RESTORATION/CROSS HAIRS/LACK OF CONTENT-AWARE ABILITY, ETC."
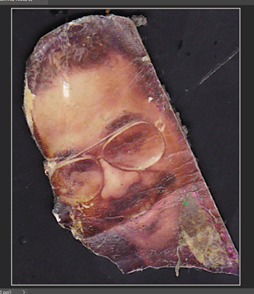
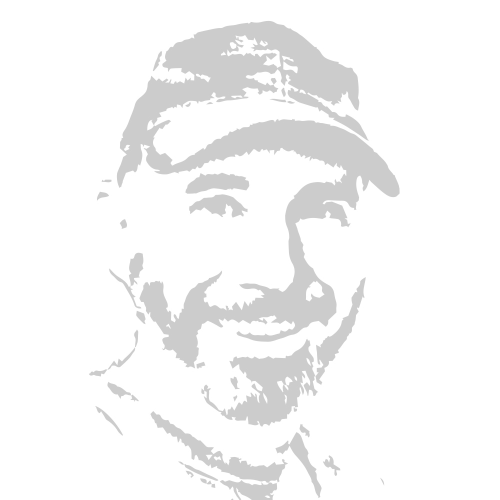
I am having challenges trying to restore this photograph, with my photoshop 2019 CC software. Originally the photo was approximately 2 inches long by 1inch wide. I then performed the following:
EDIT>PREFERENCES>TECHNOLOGIES PREVIEWS >

I THEN CHECK ENABLED PRESERVE DETAILS 2.0 UPSCALE, AND UNCHECKED MODIFIER KEYS PALLETTE
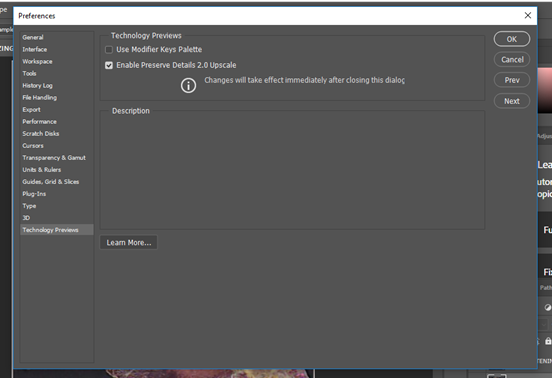
Ø ENTERED OK
Ø I THEN PERFORMED IMAGE> IMAGE SIZE>
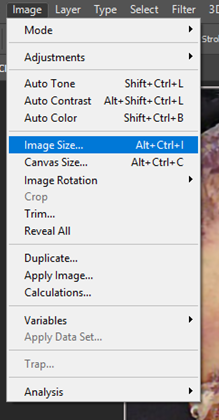
AT THE IMAGE SIZE MENU I DID THE FOLLOWING
4000 PIXELS WIDTH>RESAMPLE: PRESERVE DETAILS 2.0>MAGNIFY IMAGE TO 100% >>REDUCE NOISE TO 88%>OK

THIS RESULTED IN AN IMAGE THAT BECAME 13.333INCHES X 16.11 INCHES (300PPi) ACCORDING TO THE DOCUMENT DIMENSIONS INFORMATION


I thought that by increasing the pixels in the original image would yield a higher resolution of the image, thus providing a technically more efficient photo to work with. Am I misunderstanding the whole premise of EDIT>PREFERENCES>TECHNOLOGIES PREVIEWS > as well as the function of image size improvements?
After making the above changes, I tried restoring the photo using the tools I have learned to use thus far in the photos shop classroom book 2019. I am up to chapter 4.
When using the lasso tool this is what occurred:
I drag a selection around the face

The marching ants appear. I press shift-backspace to fill in
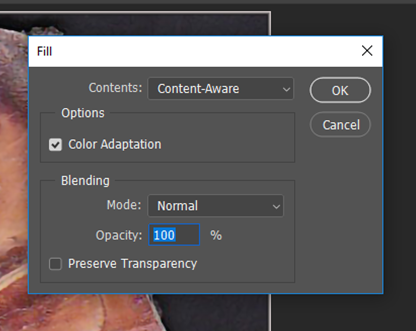
The process for filling in occurs

But the area remains unfilled, with the marching ants still active.

I press select/deselect and the damaged image remains intact

I used the patch tool and this was the result:

When I move the patch to the left, it doesn’t even pick up the damaged area. After clicking select/deselect

The undamaged area remains
When using the spot healing brush, (I have double check to make sure it is not the healing brush) I set everything up as follows:

But when I try to apply the tool, my cursor only appears with a cross hair circle , and nothing happens when I drag that image over the area to be healed, the black line that appeared in the Photoshop 2019classroom book, Chapter 2,page 44, is not present.
For all these tools, I have done the following to repair the problem:
Right clicked to reset the tool,
Used command D”
I’ve checked my caps on caps off setting on my key board
I’ve gone into brush settings, but everything is grayed out, and won’t allow me to make any changes,

I’ve researched the on-line forums for answers, and they all say to check if the caps lock is on, and my caps lock is not on.
I’ve tried Edit --> Preferences --> Cursors.

I selected Normal Brush Tip > Brush Leash Color Black > and still the healing brush tool appears with the cross hairs.
I stumbled on to this

And made the adjustments found in the below image

And, still, the SPOT healing brush tool does not appear with a black line or achieve a healing result of the image. I thank you in advance for taking the time out of your busy schedule to assist me on this matter.
Kevin


Examinar y buscar tutoriales y artículos relacionados
 19
réplicas
19
19
réplicas
19

Copiar vínculo al Portapapeles
Copiado
Okay.. so let me address a few things one at a time.
1. you cannot simply take a 300px x 600px image and upscale it to 4000px x 4833 and expect that the results will look like anything usable at all. You are enlarging by more than 1000 percent of the original size. there is just not enough information in that small partial image to resize it as much as you are expecting.
2. Regarding your content aware fill not showing up, I can only guess that you are on the wrong layer. We would need to see a full screenshot of your workspace to identify anything more than a guess.
3. I know it can be frustrating, but keep at it. Most of the time when things don't work, it is a small thing we are missing.
-Dax

Copiar vínculo al Portapapeles
Copiado
I was wondering if he's accidentally on a wrong layer as well
Copiar vínculo al Portapapeles
Copiado
If his image was 1x2@300dpi it would be 300x600. I figured that would have been the most likely case.
-dax
Copiar vínculo al Portapapeles
Copiado
Then yeah, its going to cause all kinds of issues with the quality of the image if he blew it up that much
Copiar vínculo al Portapapeles
Copiado
Thanks so much.
k
Copiar vínculo al Portapapeles
Copiado
Thanks for the encouragement and feedback, Maxwithdax.
k
Copiar vínculo al Portapapeles
Copiado
What was the DPI when the image was 2 x1? Was that how it originally was in Photoshop? Because increasing pixels and size to an already existing photograph is not going to increase the quality of the image. Because the image already had a set of pixels in it to begin with and increasing those drastically is not going to increase the quality. If anything, its going to make things blurry and cause issues.
I wish I could be of more help. You kind of lost me with the technology previews in preferences. I've never used that for an image
Copiar vínculo al Portapapeles
Copiado
Thanks for clearing that up for me in regards to the pixel stuff. I understand it much better now. Yeah, i kinda confused myself on that technology tour. I won't use that again!
k

Copiar vínculo al Portapapeles
Copiado
Hi Kevin,
Where in the Classroom in a Book does it tell you to use technology previews and scale the image to 1000%? The photo that you are showing is not an image from the CIB. Does it work when you use the exercises in the book?
Please show a screen shot of your layers panel for your photo. Layers are covered in Chapter 4 of the CIB.
Copiar vínculo al Portapapeles
Copiado
Hi Jane-e
You are correct. The book does not recommend the enlargements and stuff i did for my photo. I got this idea from another "newbie" student, who recommended i try this to work on my photo. So that was my error. Thanks for the feedback.
k
Copiar vínculo al Portapapeles
Copiado
kevinm47334143 wrote
Hi jane-e
You are correct. The book does not recommend the enlargements and stuff i did for my photo. ... So that was my error. Thanks for the feedback.
k
Kevin, experimenting is one of the best ways to learn, even when things don’t work as expected! The author of the Photoshop Classroom in a Book is here on the forums answering questions, as are at least four instructors who teach from it, so if you stumble on something in the book, you can ask here in the forums.
Jane
Copiar vínculo al Portapapeles
Copiado
Thanks Jane-e. Will do. It is a process i i welcome. I love this photoshop
stuff!
Copiar vínculo al Portapapeles
Copiado
HI jane-3
Yeah that was on me to use that technology stuff. I got the idea from another "newbie" on photoshop He thought it would help me repair that old photo of mine. As far as the book, i completed the exercises for layers completely and without issues. So, again, operator error.
Thanks for your feedback
kevin

Copiar vínculo al Portapapeles
Copiado
Have you by any chance duplicated the layer and have the lower layer selected in the layers panel?
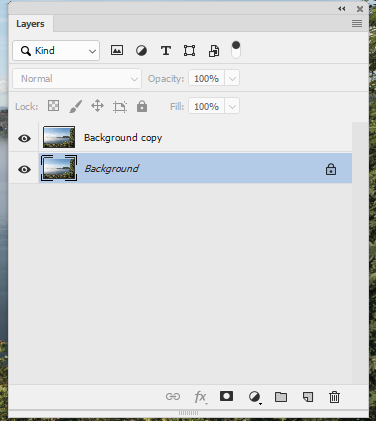
That would give the effects you describe, with the changes (clone/heal fill) happening on the lower layer whilst hidden behind the upper layer
Dave
Copiar vínculo al Portapapeles
Copiado
Thank you for your help. I will try this
k
Copiar vínculo al Portapapeles
Copiado
Thanks, Dave
I will execute your guidance.
K
Copiar vínculo al Portapapeles
Copiado
Hi Kevin,
When using different retouching tools keep an eye out for options involving the source of the sampling. One of your problems could be that you are retouching on a blank layer but are not sampling from the layers with the content. For example…
Spot Healing Brush
Look out for the Sample All Layers checkbox

Healing Brush
Look out for the drop down menu for Sample

Copiar vínculo al Portapapeles
Copiado
Thanks Michael. I will use this as a learning curve.
k
Copiar vínculo al Portapapeles
Copiado
Will do!
k

Encuentra más inspiración, eventos y recursos en la nueva comunidad de Adobe
Explorar ahora
 AdChoices