Exit
  • Global community
    • Language:
      • Deutsch
      • English
      • Español
      • Français
      • Português
  • 日本語コミュニティ
  • 한국 커뮤니티
0

Cross Dissolve only applying to one clip

New Here ,
Sep 10, 2020 Sep 10, 2020

Hi all

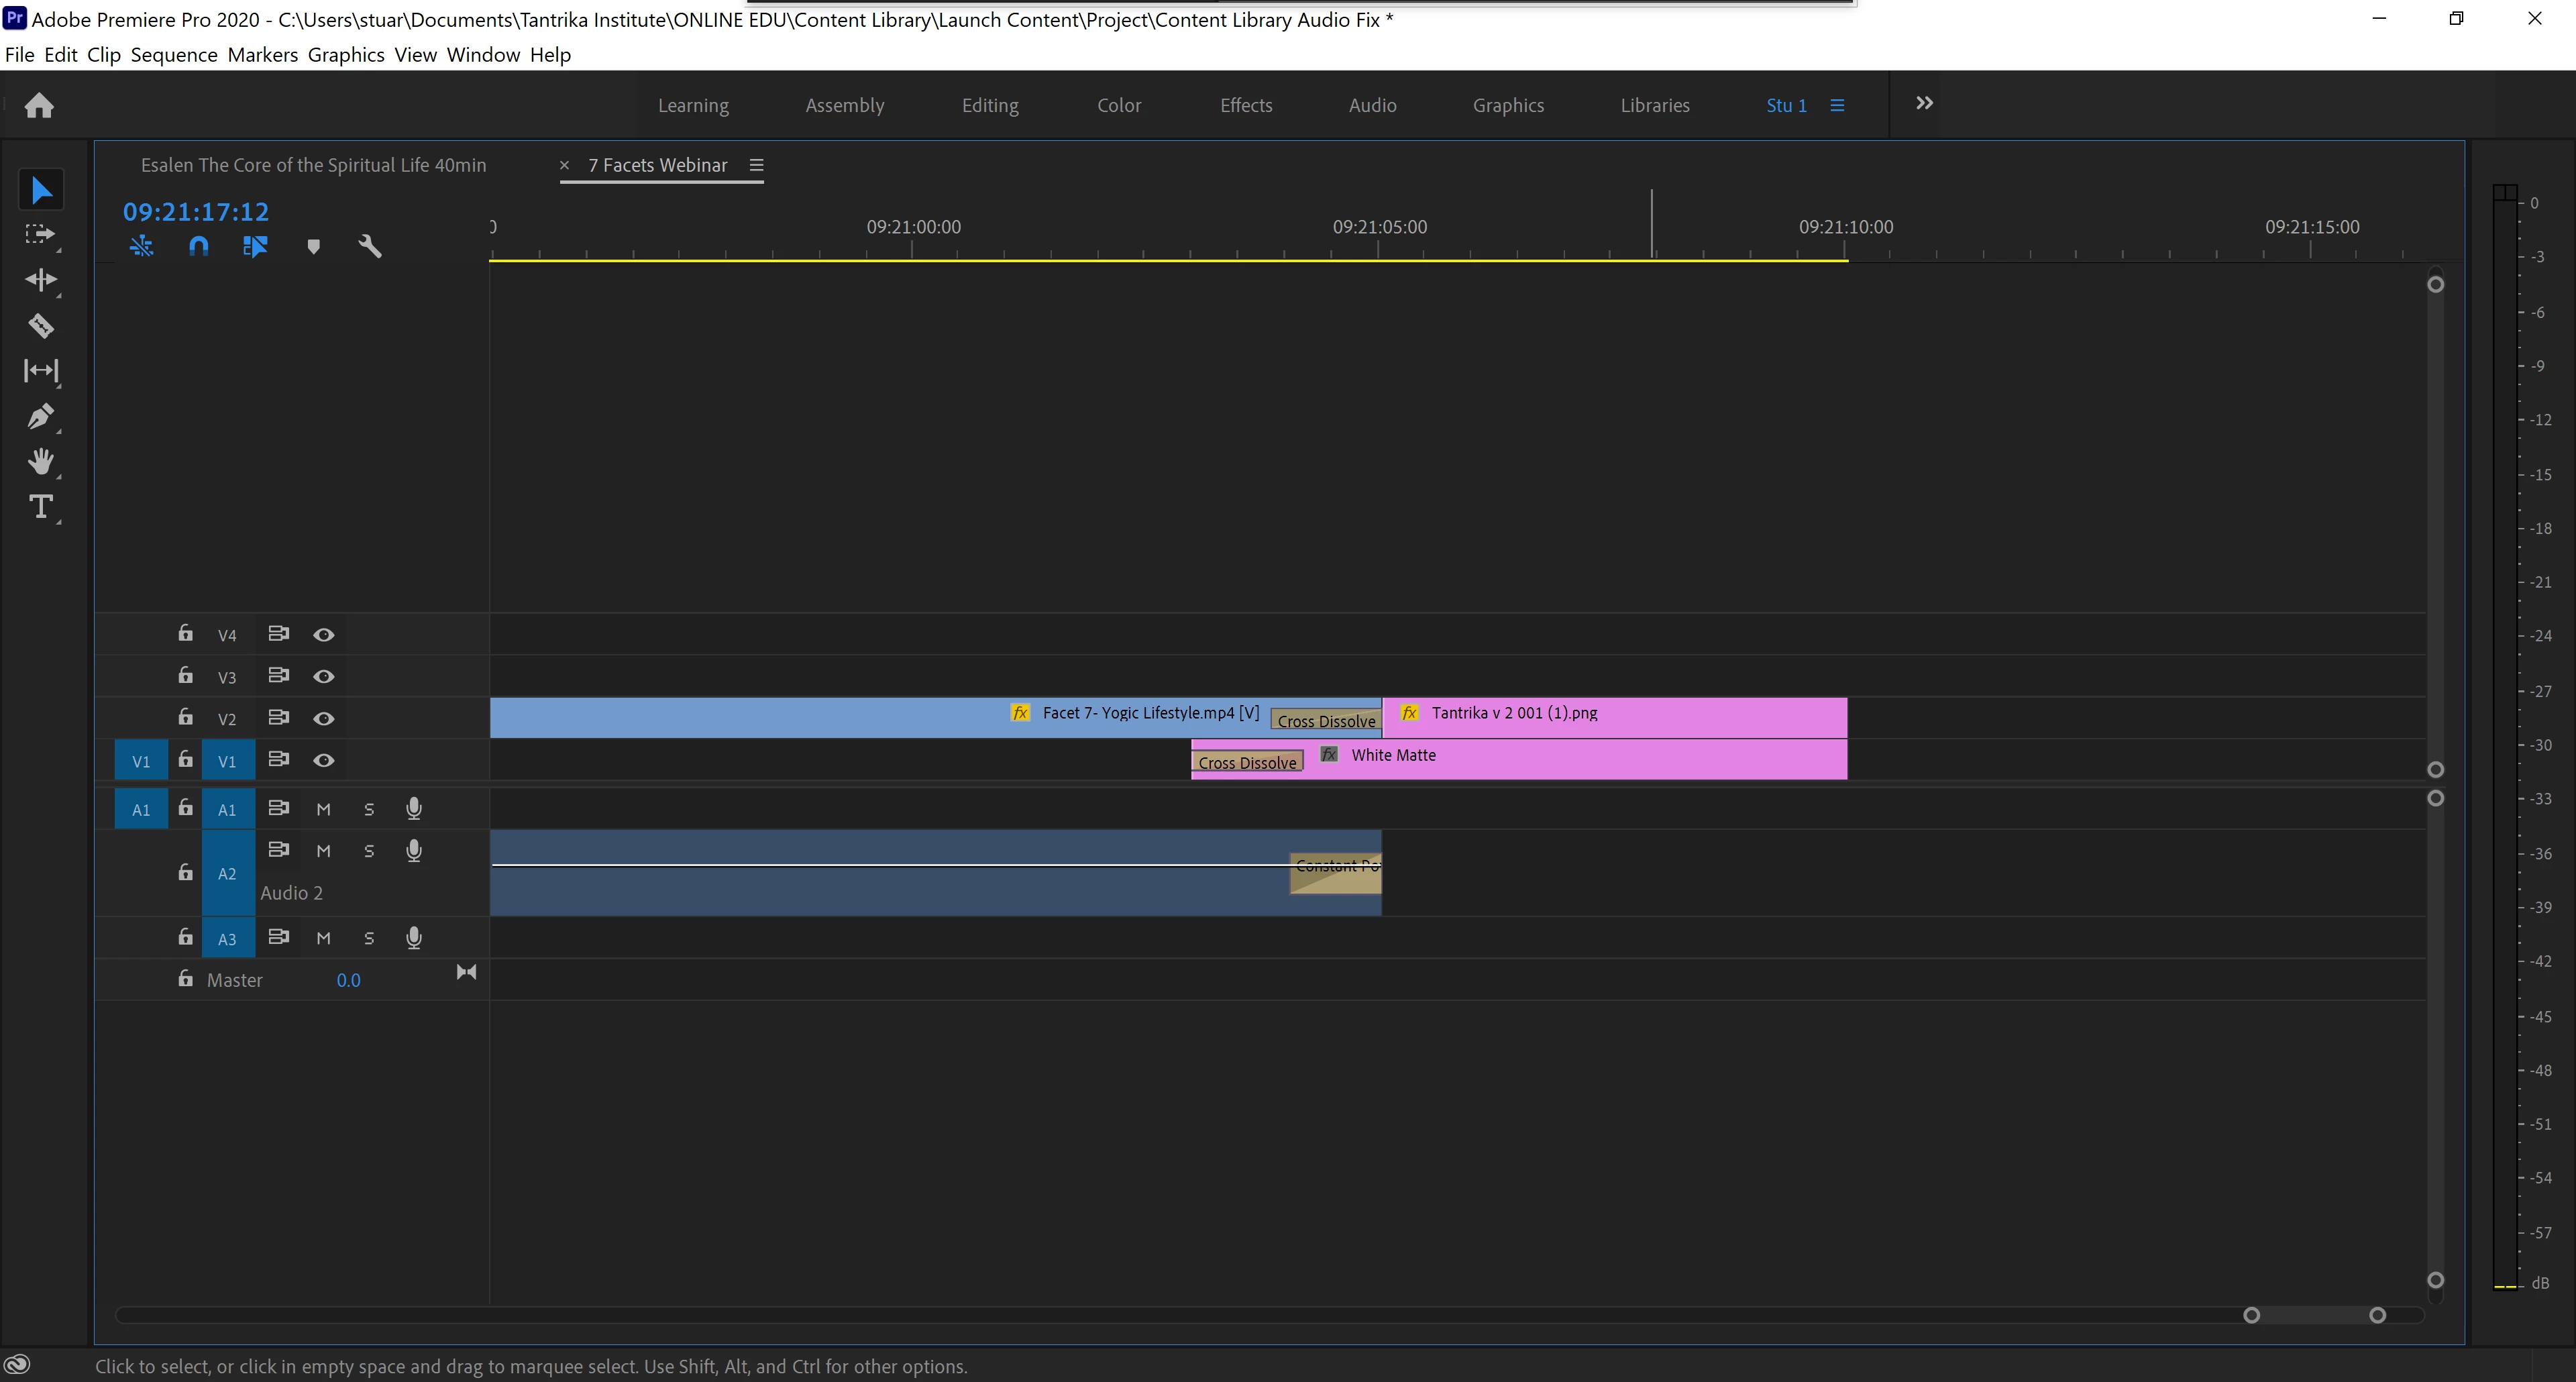
I'm assuming I'm missing something pretty simple but my timeline's suddenly started applying the cross dissolve to the first clip only. What am I missing? See the image below in the V2 track.


Stuart5FCD_0-1599758234196.png


TOPICS
Editing , How to
15.6K
Translate
Report
Community guidelines
Be kind and respectful, give credit to the original source of content, and search for duplicates before posting. Learn more
community guidelines
Community Expert ,
Sep 10, 2020 Sep 10, 2020

You are probably using the video clip (Facet 7 - Yogic Lifetyle.mp4) to the media end.  That is, you're using that clip to the last frame.  Assuming that this is the case, you need to set the Out Mark before the clip ends so that that transition has frames to work with.  Try selecting the Ripple Edit Tool, hover over the right edge of the video clip boundary and then click and drag to the left for 12 to 15 frames (more frames allows for a longer transition while fewer allows for a shorter one).


You can also select the Transition and adjust this in the Effect Controls.


This will shorten your edit and you may want to add time back to the tail of the PNG.  An audio adjustment may also be needed.

Translate
Report
Community guidelines
Be kind and respectful, give credit to the original source of content, and search for duplicates before posting. Learn more
community guidelines
New Here ,
Sep 10, 2020 Sep 10, 2020

This is not the case. It is applying this irrespective of what two clips I place it on. As an example, here is the same clip shortened by a minute with an audio stinger on the end. 

It's been working without issue for the last month and a half. I'm also now expericing an inability to export a file as Premier crashes each time I do, which leads me to believe that there may be a corrupt file nestled in this project...

SkipperW_0-1599764983555.png


Translate
Report
Community guidelines
Be kind and respectful, give credit to the original source of content, and search for duplicates before posting. Learn more
community guidelines
Community Expert ,
Sep 10, 2020 Sep 10, 2020

Clips need handles:

clip handles.png

Translate
Report
Community guidelines
Be kind and respectful, give credit to the original source of content, and search for duplicates before posting. Learn more
community guidelines
Community Expert ,
Sep 10, 2020 Sep 10, 2020
Translate
Report
Community guidelines
Be kind and respectful, give credit to the original source of content, and search for duplicates before posting. Learn more
community guidelines
Community Expert ,
Sep 10, 2020 Sep 10, 2020

Delete the Media Cache and Media Cache files:
https://community.adobe.com/t5/premiere-pro/faq-how-to-clean-delete-or-trash-media-cache-files/td-p/....

If that doesn't work,try resetting the preferences:
https://community.adobe.com/t5/premiere-pro/faq-how-to-reset-trash-preferences-in-premiere-pro/td-p/...

If that doesn't work, try resetting the Workspaces:
Reset a workspace
Reset the current workspace to return to its original, saved layout of panels.
1. Do one of the following:
• Click the Workspace menu icon and select Reset to Saved Layout.
• Choose Window > Workspace > Reset to Saved Layout.
from here:
https://helpx.adobe.com/premiere-pro/using/workspaces.html

If that doesn't work, try Preferences > Audio Hardware and set Input to None.

If that doesn’t work, try updating or rolling back your graphics driver directly from the video card manufacturer’s site.

If that doesn't work, try creating a new project and import the old one into it.

Translate
Report
Community guidelines
Be kind and respectful, give credit to the original source of content, and search for duplicates before posting. Learn more
community guidelines
New Here ,
Dec 27, 2021 Dec 27, 2021

Double click the cross disolve marker on V2. 
Close the duration popup window.
Then, in the Effect Control panel under Alignement, chose "Center at cut". 
Voila. 

Translate
Report
Community guidelines
Be kind and respectful, give credit to the original source of content, and search for duplicates before posting. Learn more
community guidelines
New Here ,
Mar 21, 2024 Mar 21, 2024
LATEST

Awesome quick tip! Never knew about this. Thanks!

Translate
Report
Community guidelines
Be kind and respectful, give credit to the original source of content, and search for duplicates before posting. Learn more
community guidelines
Community Expert ,
Dec 28, 2021 Dec 28, 2021

I have seen weird things happen to lossy format images before in PPro.


Consider running the PNG through Photoshop and create a PSD file out of it (RGB color space, 72 pixels per inch at the preferred resolution), before importing in PPro.


Please let me know if this solves your issue.

Translate
Report
Community guidelines
Be kind and respectful, give credit to the original source of content, and search for duplicates before posting. Learn more
community guidelines
Community Expert ,
Oct 29, 2022 Oct 29, 2022

@Richard van den Boogaard 

PPI does not mean anything in video that is for printing.: it's the height and width in pixels that counts.

Translate
Report
Community guidelines
Be kind and respectful, give credit to the original source of content, and search for duplicates before posting. Learn more
community guidelines
Community Expert ,
Oct 29, 2022 Oct 29, 2022

@Ann Bens 


Very true, but I find it to be worth mentioning as Photoshop requires that a dpi value be specified with no option for skipping it because the intended use of the PNG is for video editing.

Translate
Report
Community guidelines
Be kind and respectful, give credit to the original source of content, and search for duplicates before posting. Learn more
community guidelines
Community Expert ,
Oct 29, 2022 Oct 29, 2022

It does not matter at which PPI the document is set at the start.

But as soon as you change the PPI when document has been made so will the height and width change.

Translate
Report
Community guidelines
Be kind and respectful, give credit to the original source of content, and search for duplicates before posting. Learn more
community guidelines
Community Expert ,
Oct 29, 2022 Oct 29, 2022

Yes, but Photoshop does not have a "ignore this setting as this file is meant for video" option.


So, it's worth letting others know that a dpi value of 72 is fine ir the setting if already established can be left as is.


Also, Photoshop allows users to not resample the image.


Translate
Report
Community guidelines
Be kind and respectful, give credit to the original source of content, and search for duplicates before posting. Learn more
community guidelines
Community Expert ,
Oct 30, 2022 Oct 30, 2022

That may be true but size of the file does matter in PPro. Changing the PPI ftom, say 150 or 300 to 72 AND changing the resolution will create a substantially smaller file. If you then save it out as a PSD before importing it in PPRO your chances of success do increase.

Translate
Report
Community guidelines
Be kind and respectful, give credit to the original source of content, and search for duplicates before posting. Learn more
community guidelines
Community Expert ,
Oct 30, 2022 Oct 30, 2022

To clarify:  The.storage requirement of 1929-by-1080 at 72 dpi is the same as 1920-by1080 at 300 dpi.  The frame size is also the same.  The print size is different. 

Translate
Report
Community guidelines
Be kind and respectful, give credit to the original source of content, and search for duplicates before posting. Learn more
community guidelines