

Mask Free Form Tool - A Photostory of Frustration, Sadness, and Self-Loathing

Copy link to clipboard
Copied
Why is it like this?

There is probably a 1-click solution to make this tool stop behaving in the most-ridiculous, least-intuitive fashion in the history of the world. How make do?
Please and thank you.


 15
Replies
15
15
Replies
15

Copy link to clipboard
Copied
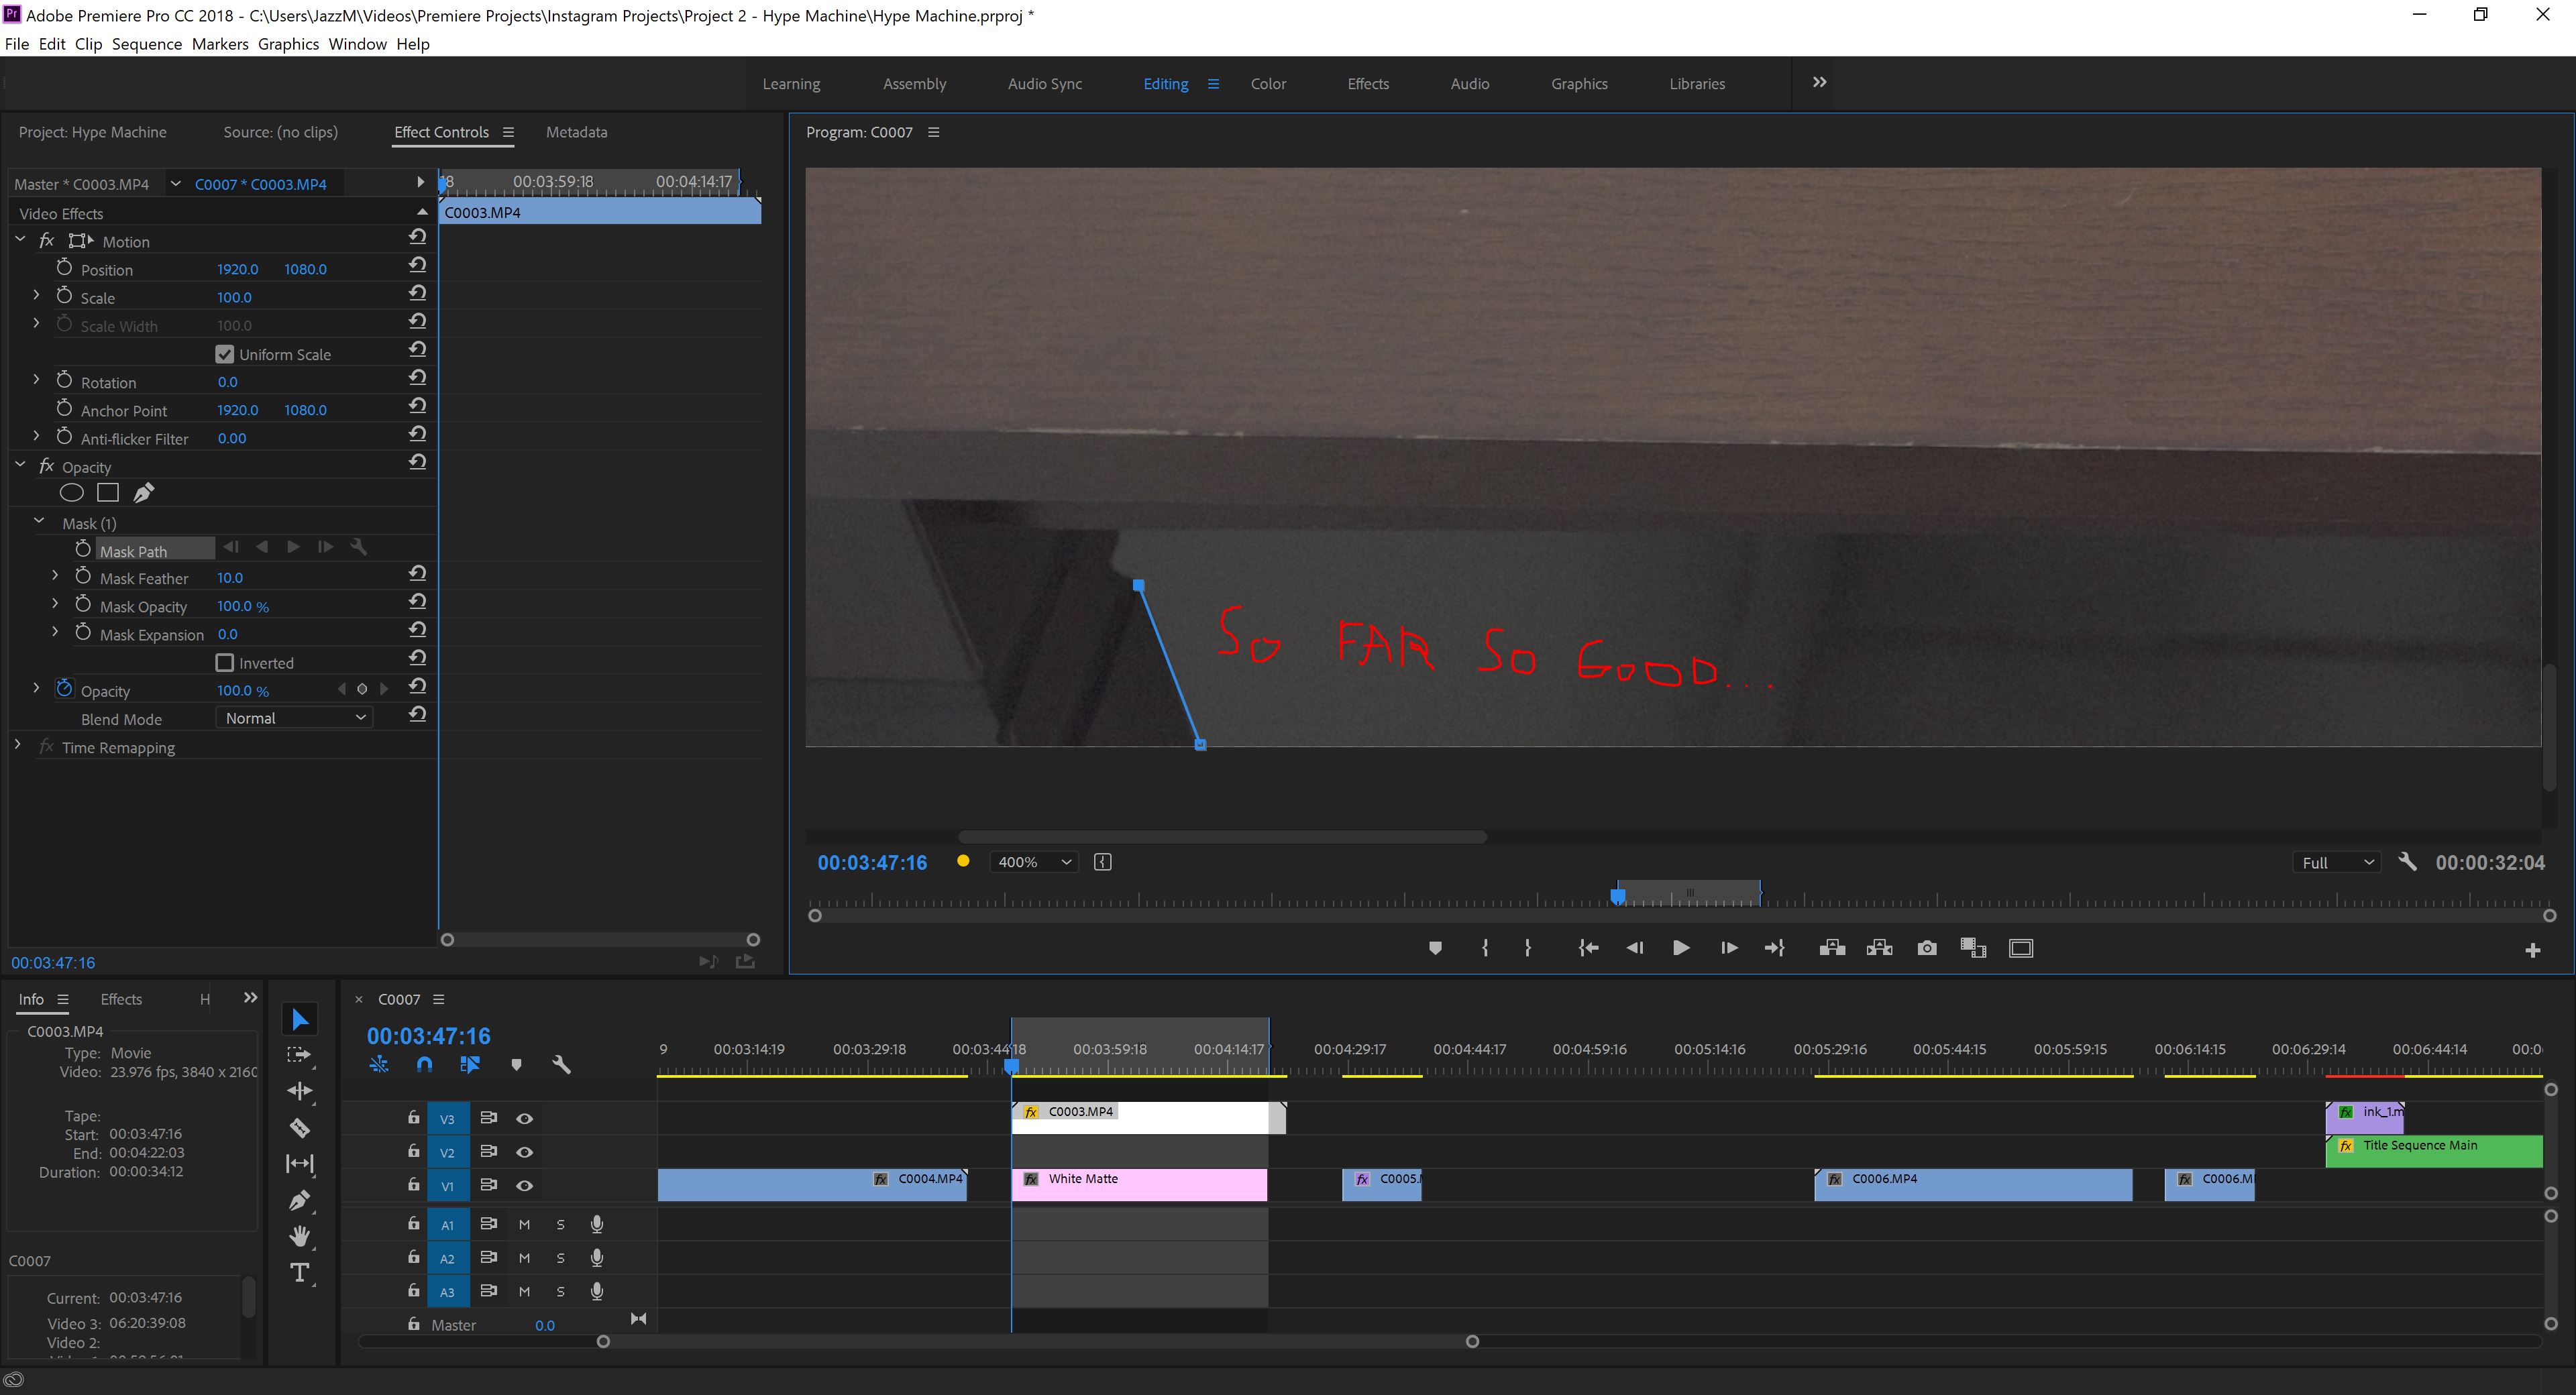
Initially click to set points, as when initially setting a point a click/drag gives you the Bezier handles you don't want.
After setting points you can click and drag them to move them as needed.
Neil

Copy link to clipboard
Copied
Add another point here:
MtD

Copy link to clipboard
Copied
meg dog and me are almost exactly in tune.
hehe, funny original post ! Made me laugh !
I recall learning paths in photoshop and having similar frustrations ...
Copy link to clipboard
Copied
Typically I make my first points for a path CLOSE to where I want them ( like as close and as fast as I can do it ). THEN I use the selection tool ( I assume that is included in PPro now ? ) to move the points and pull on the handles to FINE TUNE the path. At that point I also add or substract or covert as needed as I do this final fine tuning.
Copy link to clipboard
Copied
Glad I could provide a chuckle! 
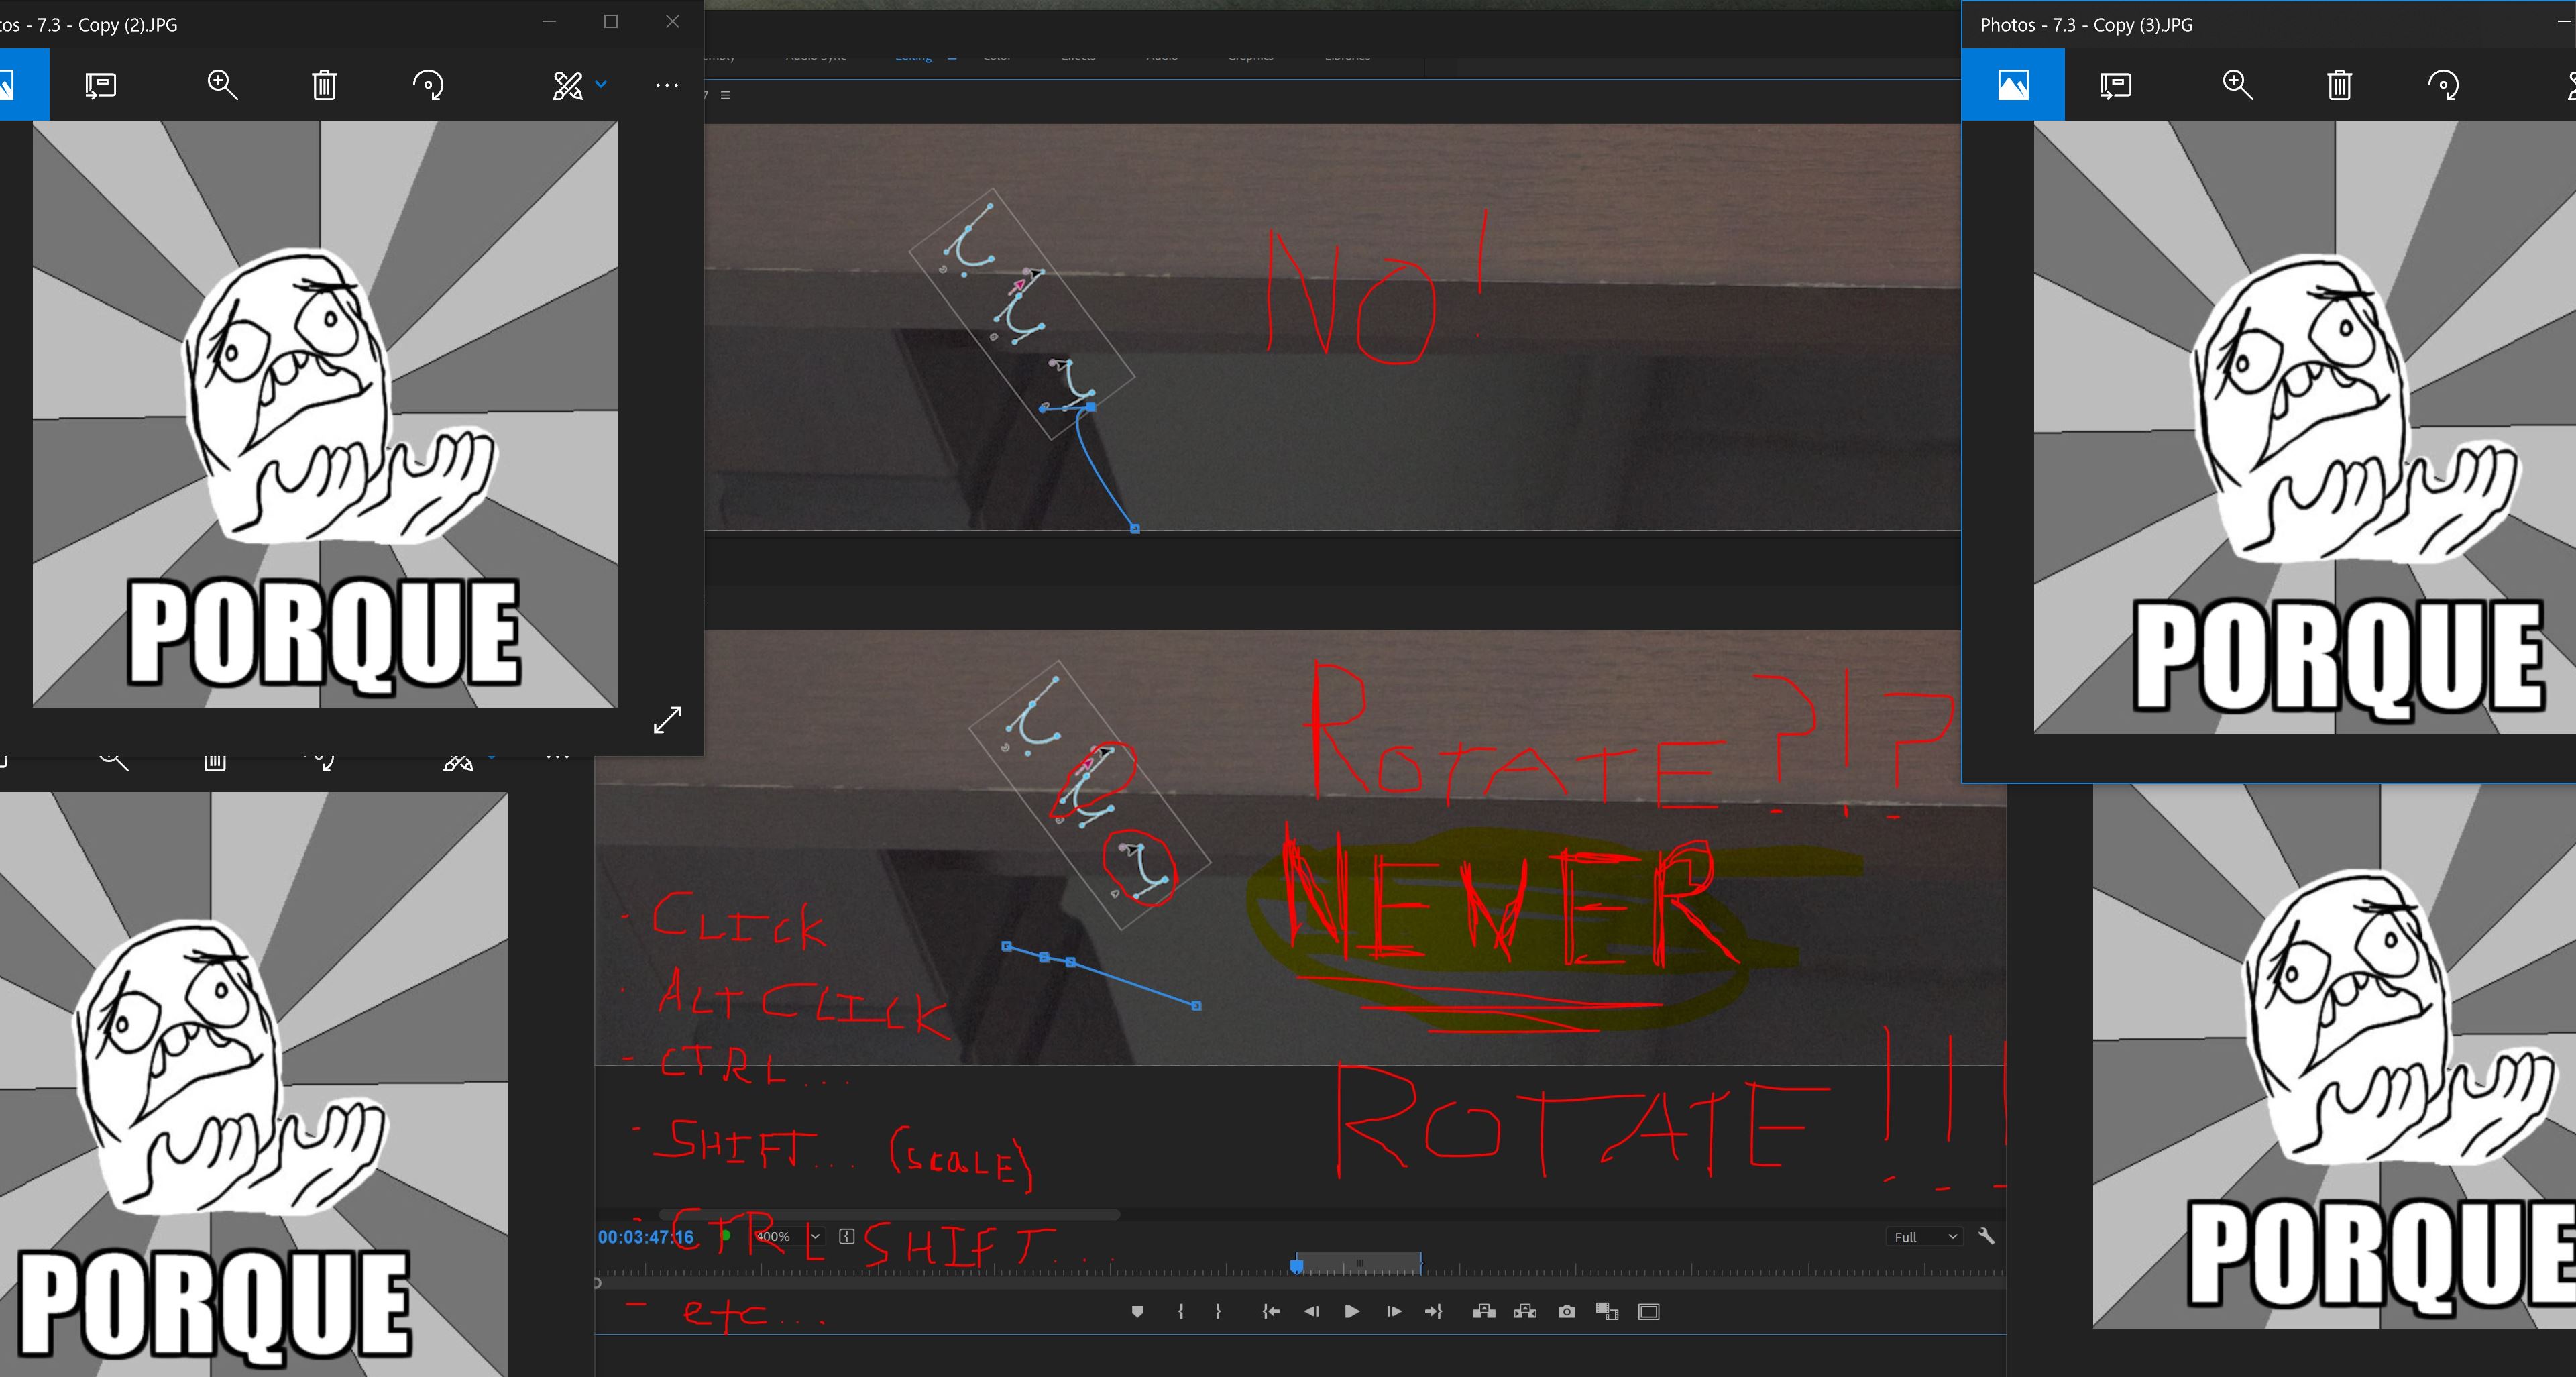
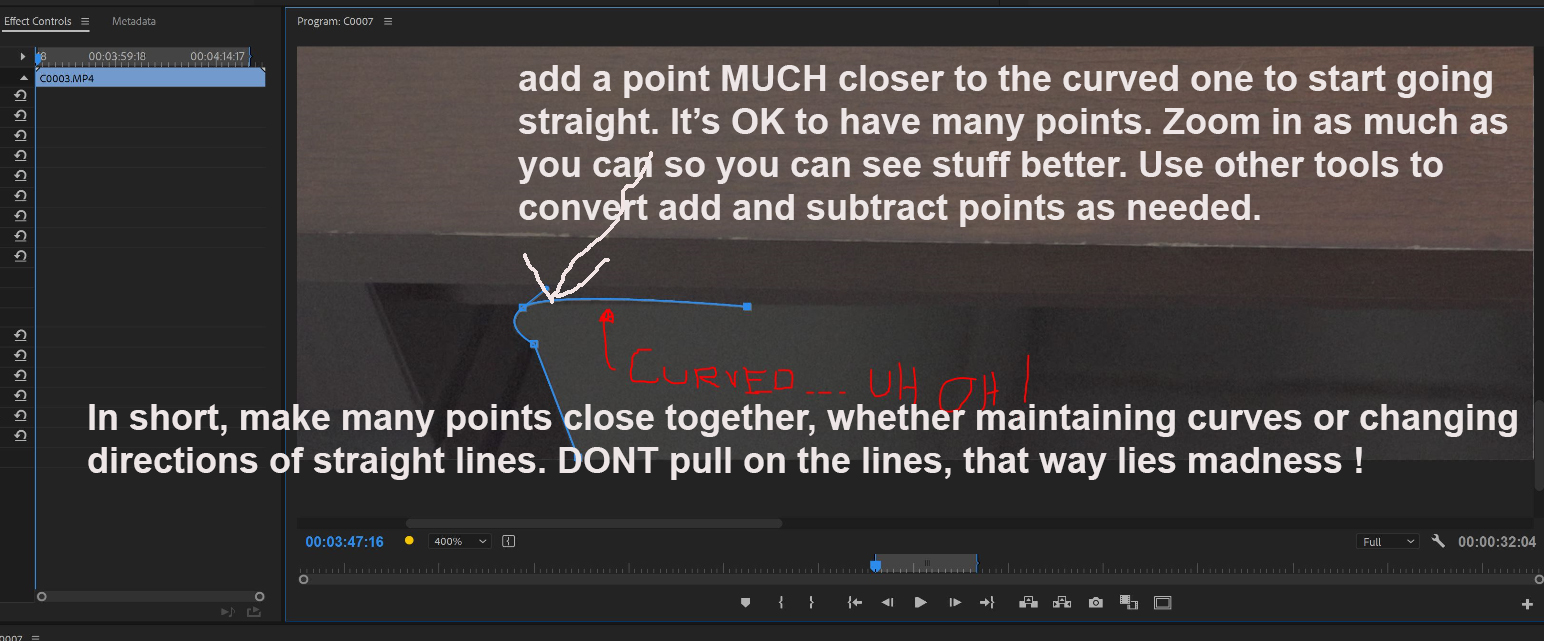
My issue is, if I attempt to add another point so close to the current one, the odds that PP will decide to rotate the mask (that I haven't actually completed yet  ) are REAL high. I'm actually already zoomed in 400%, so I can pull in any tighter, afaik. I guess the solution is to just create the next vertex out farther and pull it in closer if need be. To me, as a new user trying to create a set of mental "rules" to figure out a workflow for these tools that somewhat matches what The Creators (praise be) at Adobe intended, this workaround just seems confusing and unnecessary.
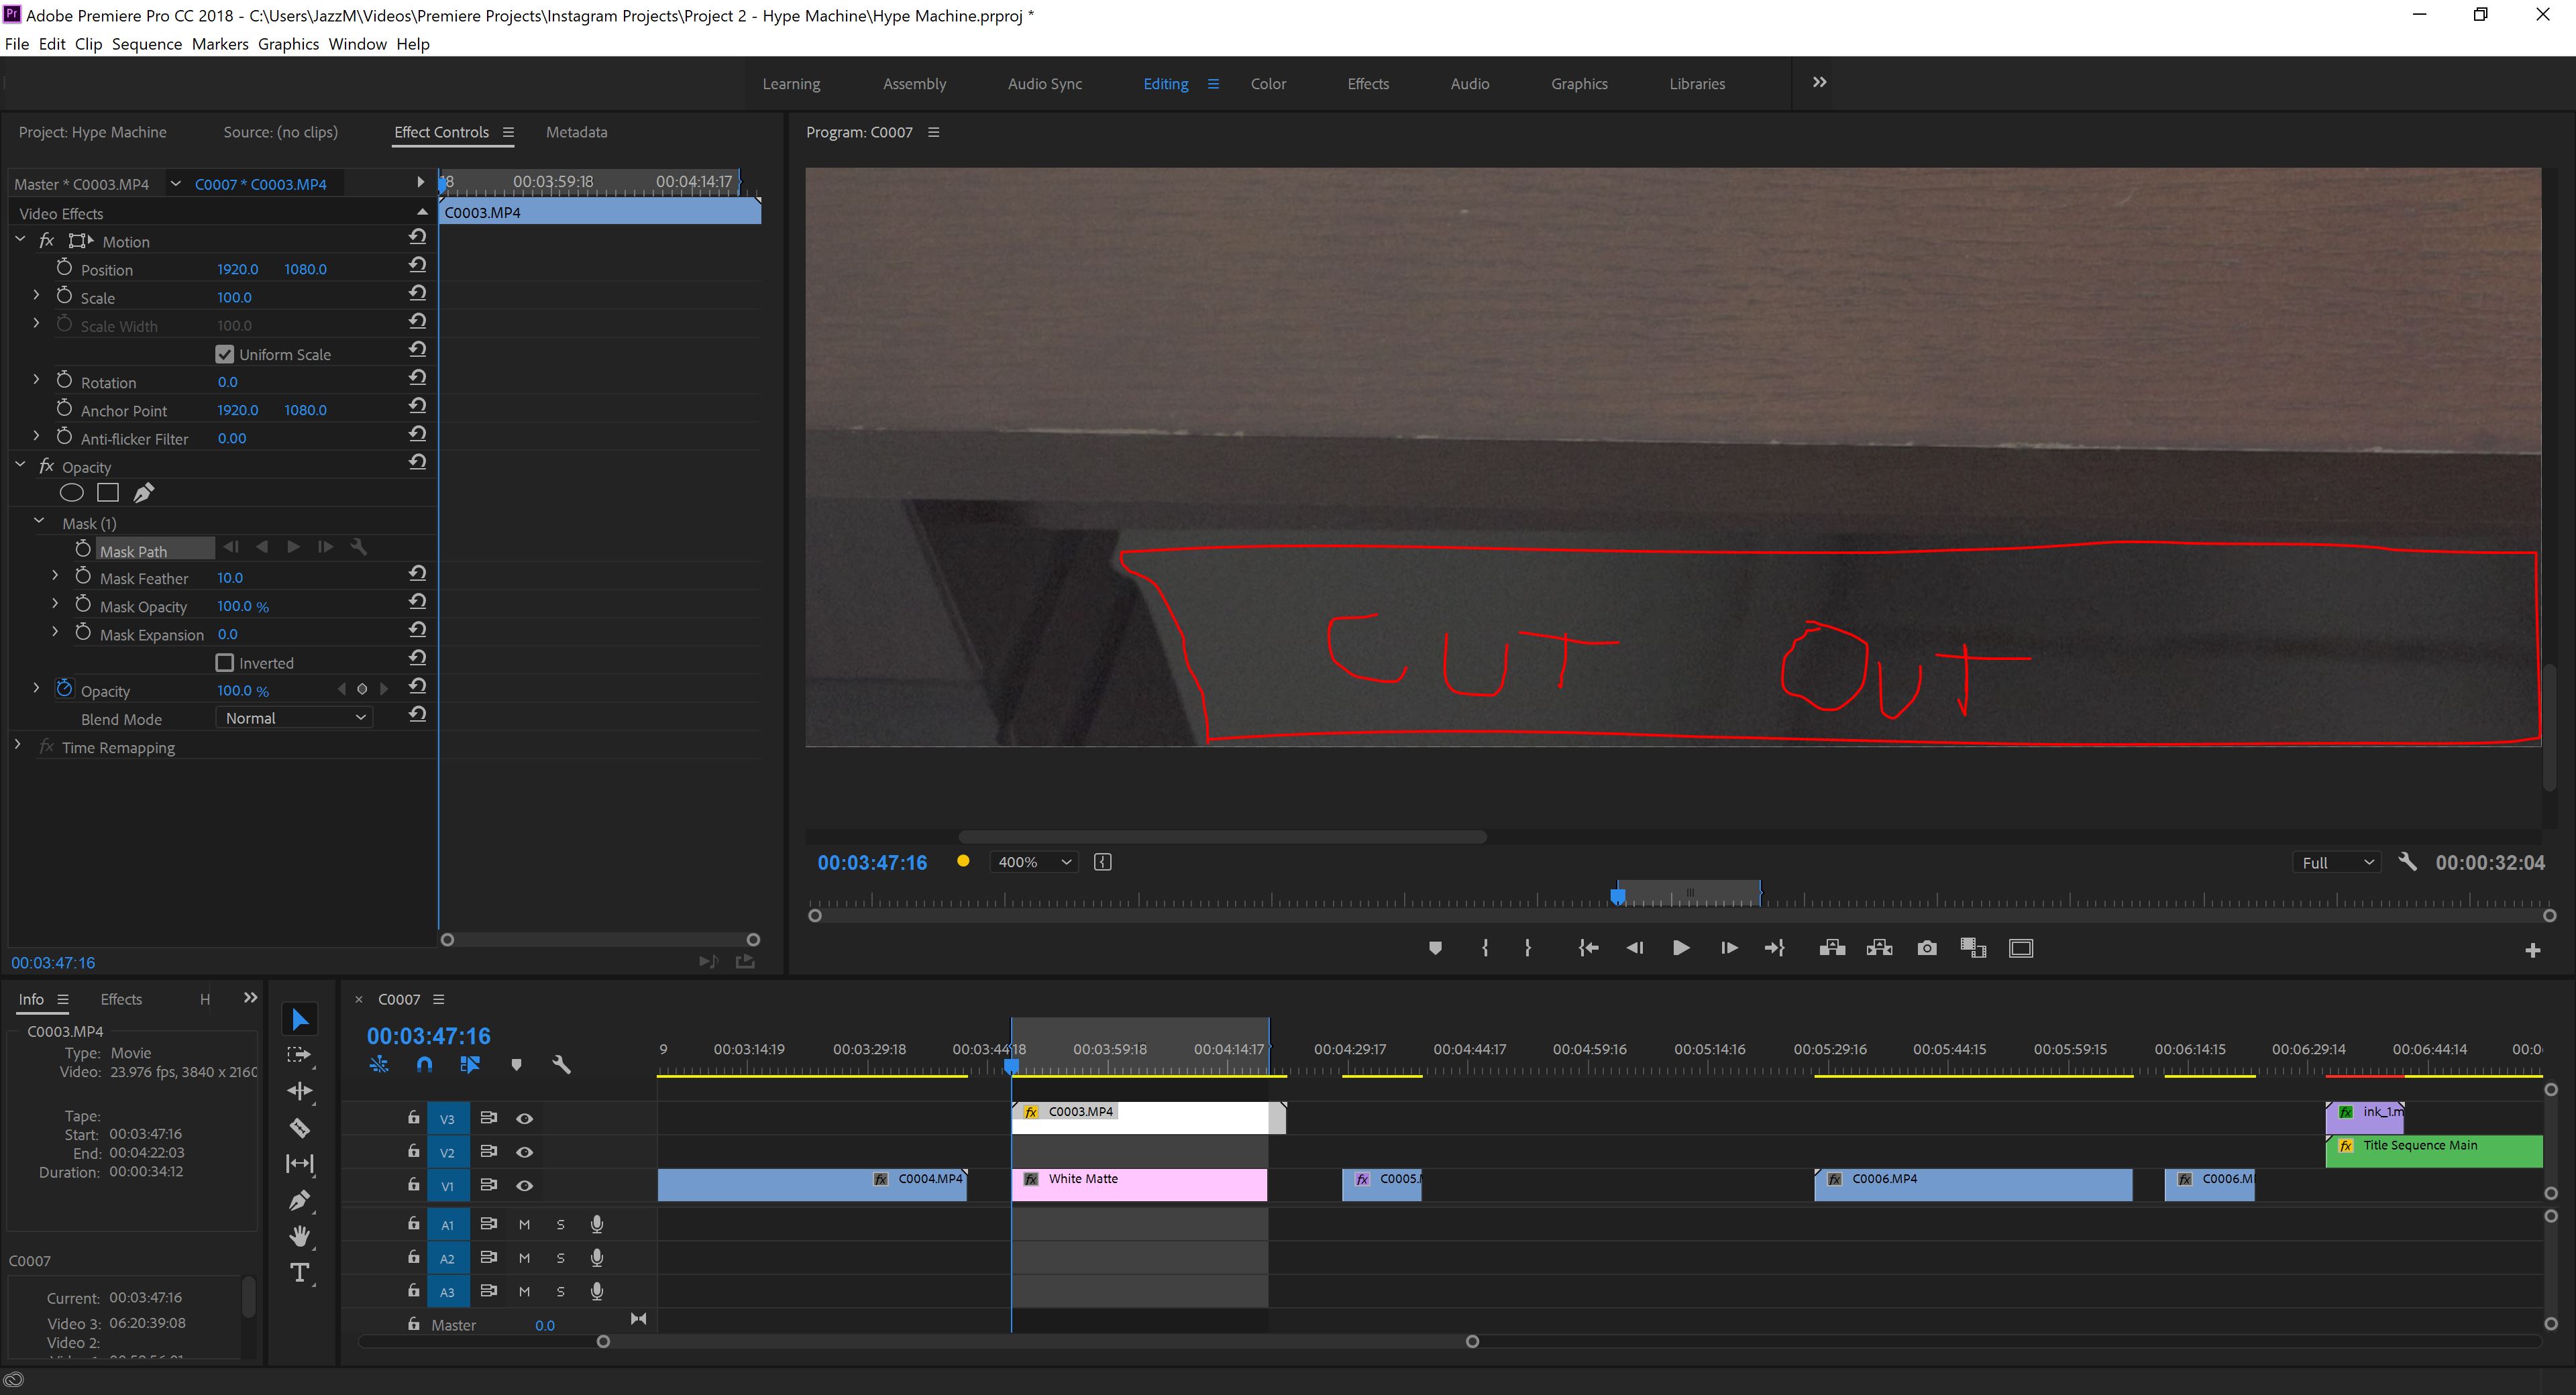
I think the main takeaway is this:
Masks in Premiere Pro are intended to be more "set-and-forget," "rough-it-in-and-feather-it-out" type of tools. The workflow centers around creating a general outline of the thing you need to mask first, then filling out the details after the fact where needed. This is why it isn't easy to zoom in tight to get fine detail (in fact, the tip of the tool is blunted compared to the one in AE), why it would rather spin your mask off-kilter 180 degrees rather than allow you to place a vertex too close to the previous one, why you cannot add or remove vertices until you close the mask, why you sometimes can't have more than one of them (e.g. inverted opacity masks), and why you cannot easily adjust the position of the first vertex of the mask without closing the mask off.
Masks in After Effects are intended to give you as much detail on the go as you need. Turn your mask into a pointillist work of art with vertices. Add or delete as many as you need on-the-fly without the need to close the mask first. Drag to select multiple vertices. Zoom in to the scale of the subatomic particle to really make sure your mask separates the up-spin quarks of the foreground from the down-spin quarks of the background - it's all good.
Being a beginner and not knowing that, I think it can be kind of confusing to wrap your head around the way Masks UI functions in PP. I think contemporary UI design language trains people to instinctually expect functionality more similar to how the tool operates in After Effects.
Long story short...uh...imma just use After Effects and dynamic link into PP.  Thanks, everybody!
Copy link to clipboard
Copied
Aftereffects is a specialist tool, highly specialized. PrPro is a generalist editing tool. They don't share code, as the basic way they deal with images and pixels are by nature and need very different.
The tools in one are rarely a copy of the capabilities and controls of the other. I can't actually think of one, but there must be.
In all respects if you need super tight control Ae will have the better toolset.
That's the way they work. I don't understand why so many assumptions are made about them being essentially duplicates of the other app. Then why have both?
And if you need to be in 400% to set very tight masking points, yea, that's getting into rotoscoping. Which is all in Ae.
Neil

Copy link to clipboard
Copied
If i need a detailed mask in Premiere I roughly set a few points and close the mask.
Set it to full screen and zoom in. Instead of fiddling in the small Program window.
Then adjust those points and add more if needed.
Yes its true the mask rotates very quickly if one is not carefull. Sometimes annoying,
Copy link to clipboard
Copied
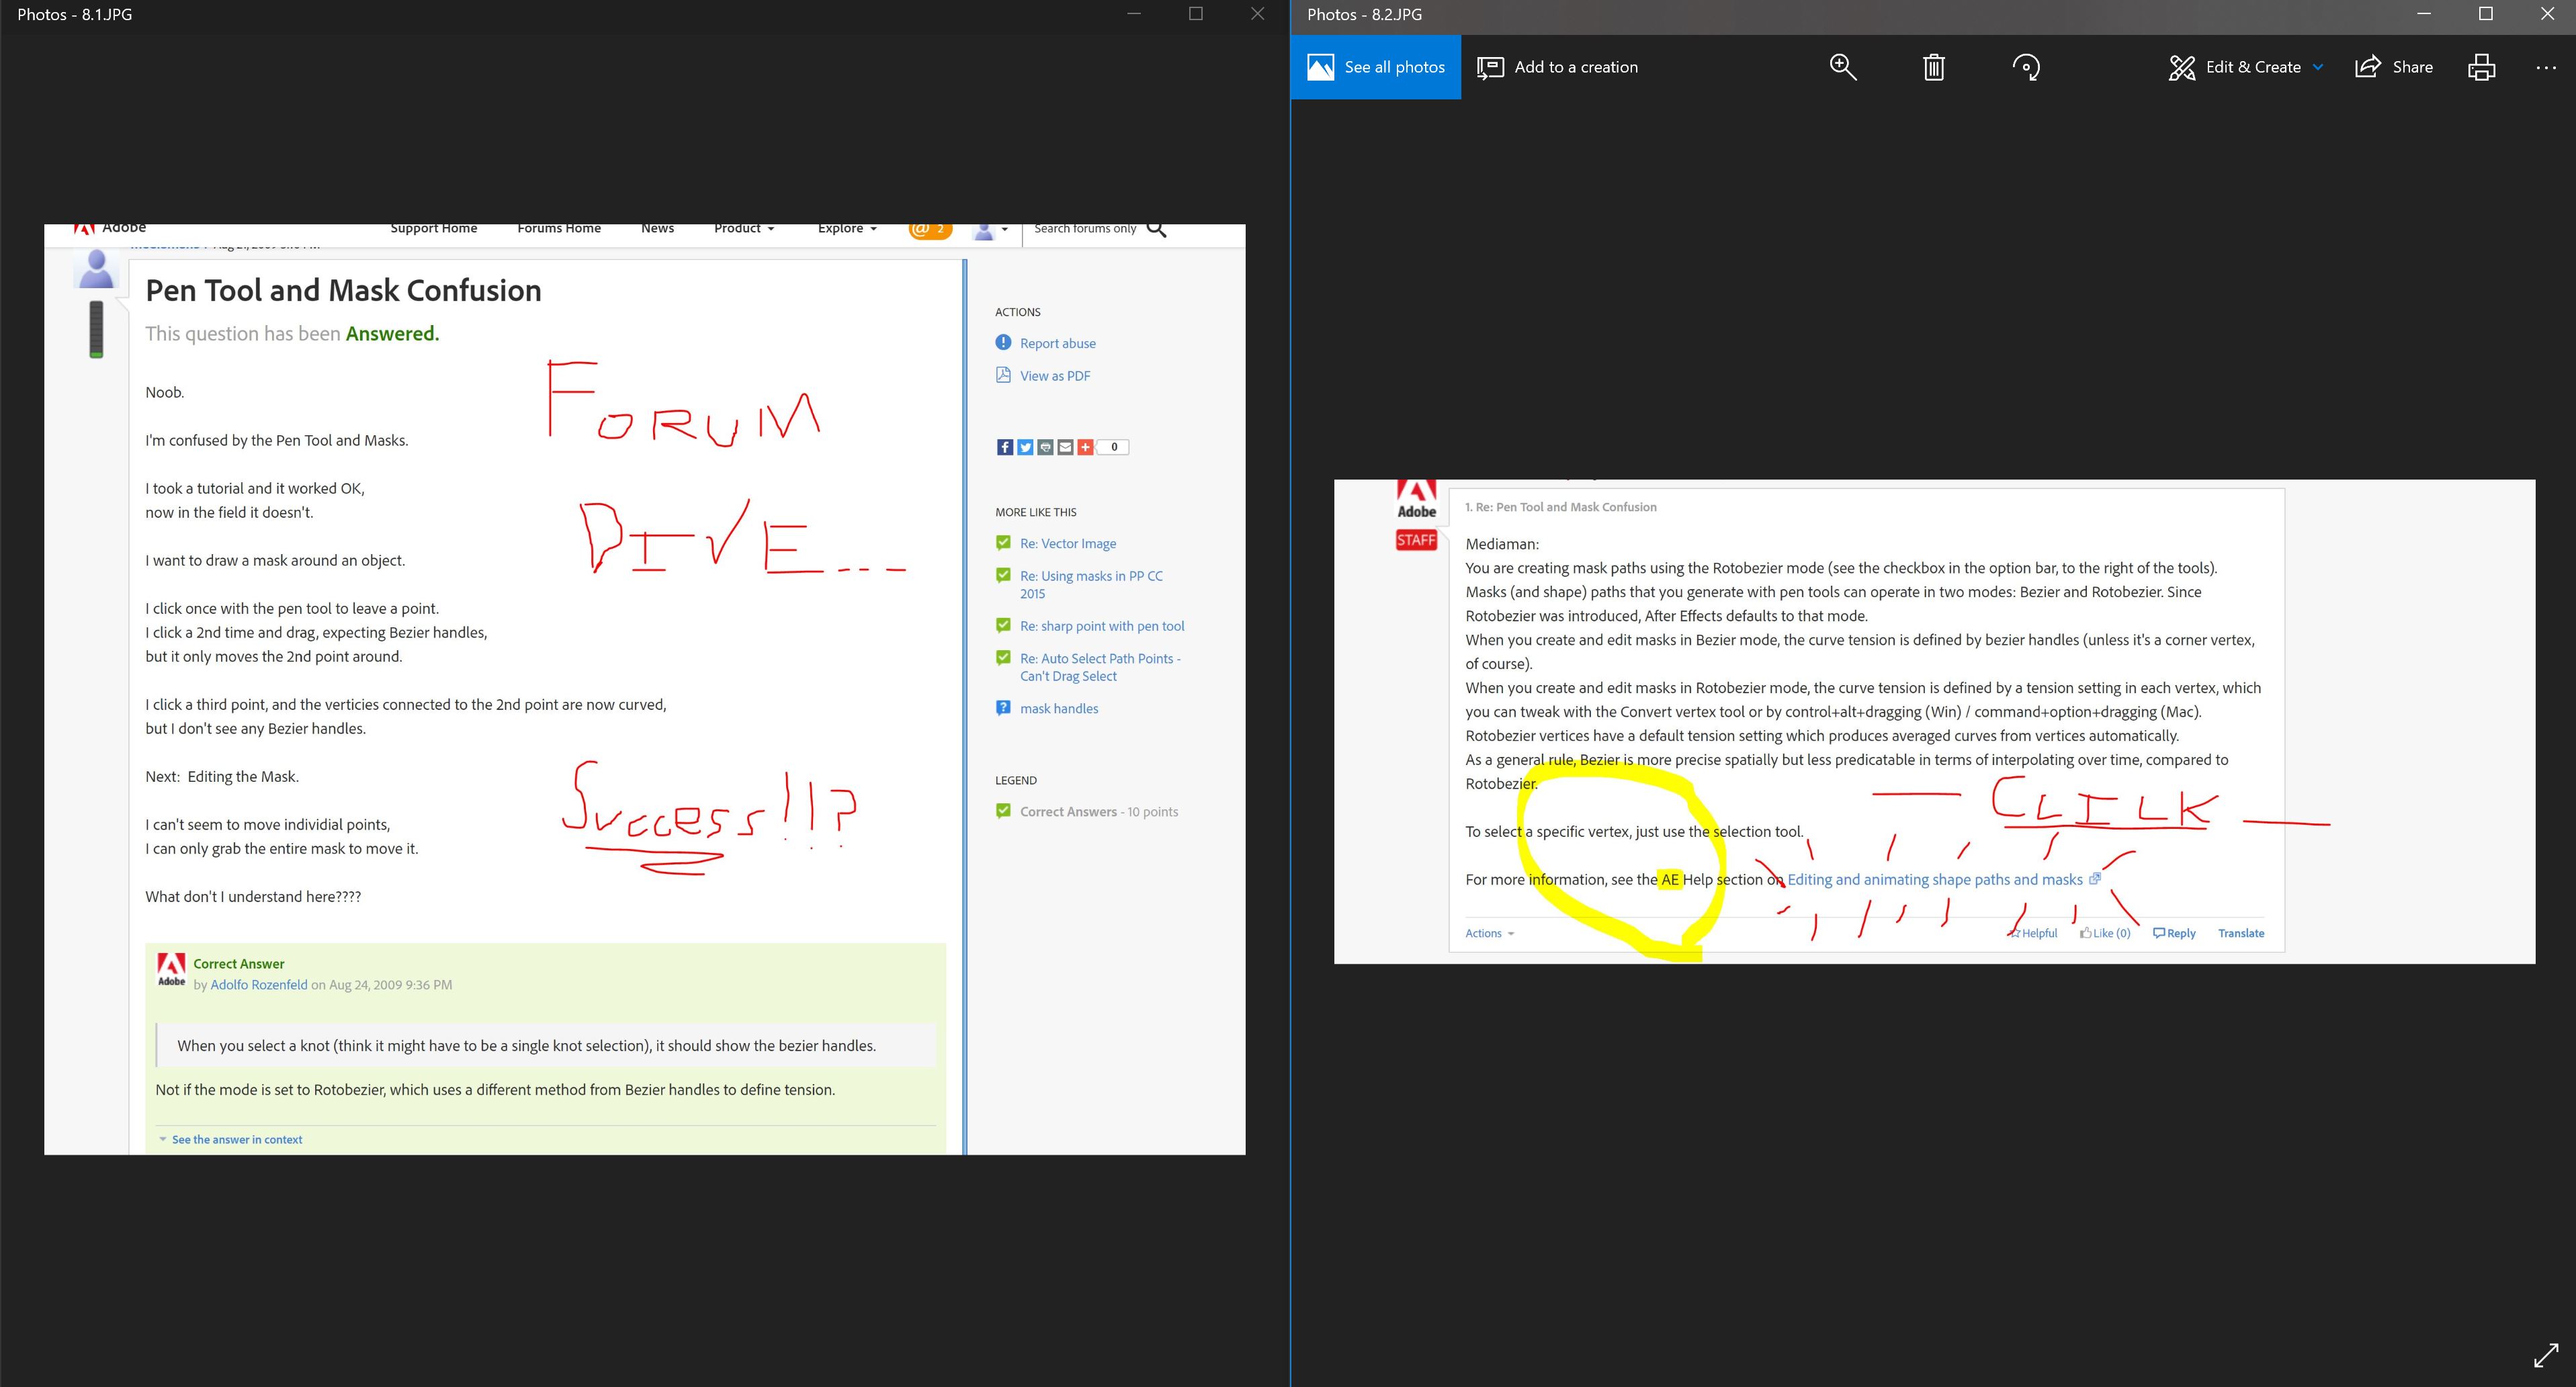
Follow up:
The Pen tool in After Effects works EXACTLY - and I do mean EXACTLY - as I expected the Premiere Pro Pen to behave in my OP.
Ouch. Same tool name. Vastly different basic data input experience. Strange.
Copy link to clipboard
Copied
Strange ... I have no difficulty using the mask tool in PrPro, and get the same behavior between PrPro & Ae.
Neil
Copy link to clipboard
Copied
I'm still laughing over the phrase, " It Mocks Me ! "
hehe...
Here's a crazy idea... but remember, I don't have the new CC stuff.
Can you export a frame, put it into photoshop or AE, do the path, save the path with nice name, make a selection from path, save the selection as nice name. Import (drag or whatever ) path or selection into PPro ?? Position as wanted … done deal ?
Copy link to clipboard
Copied
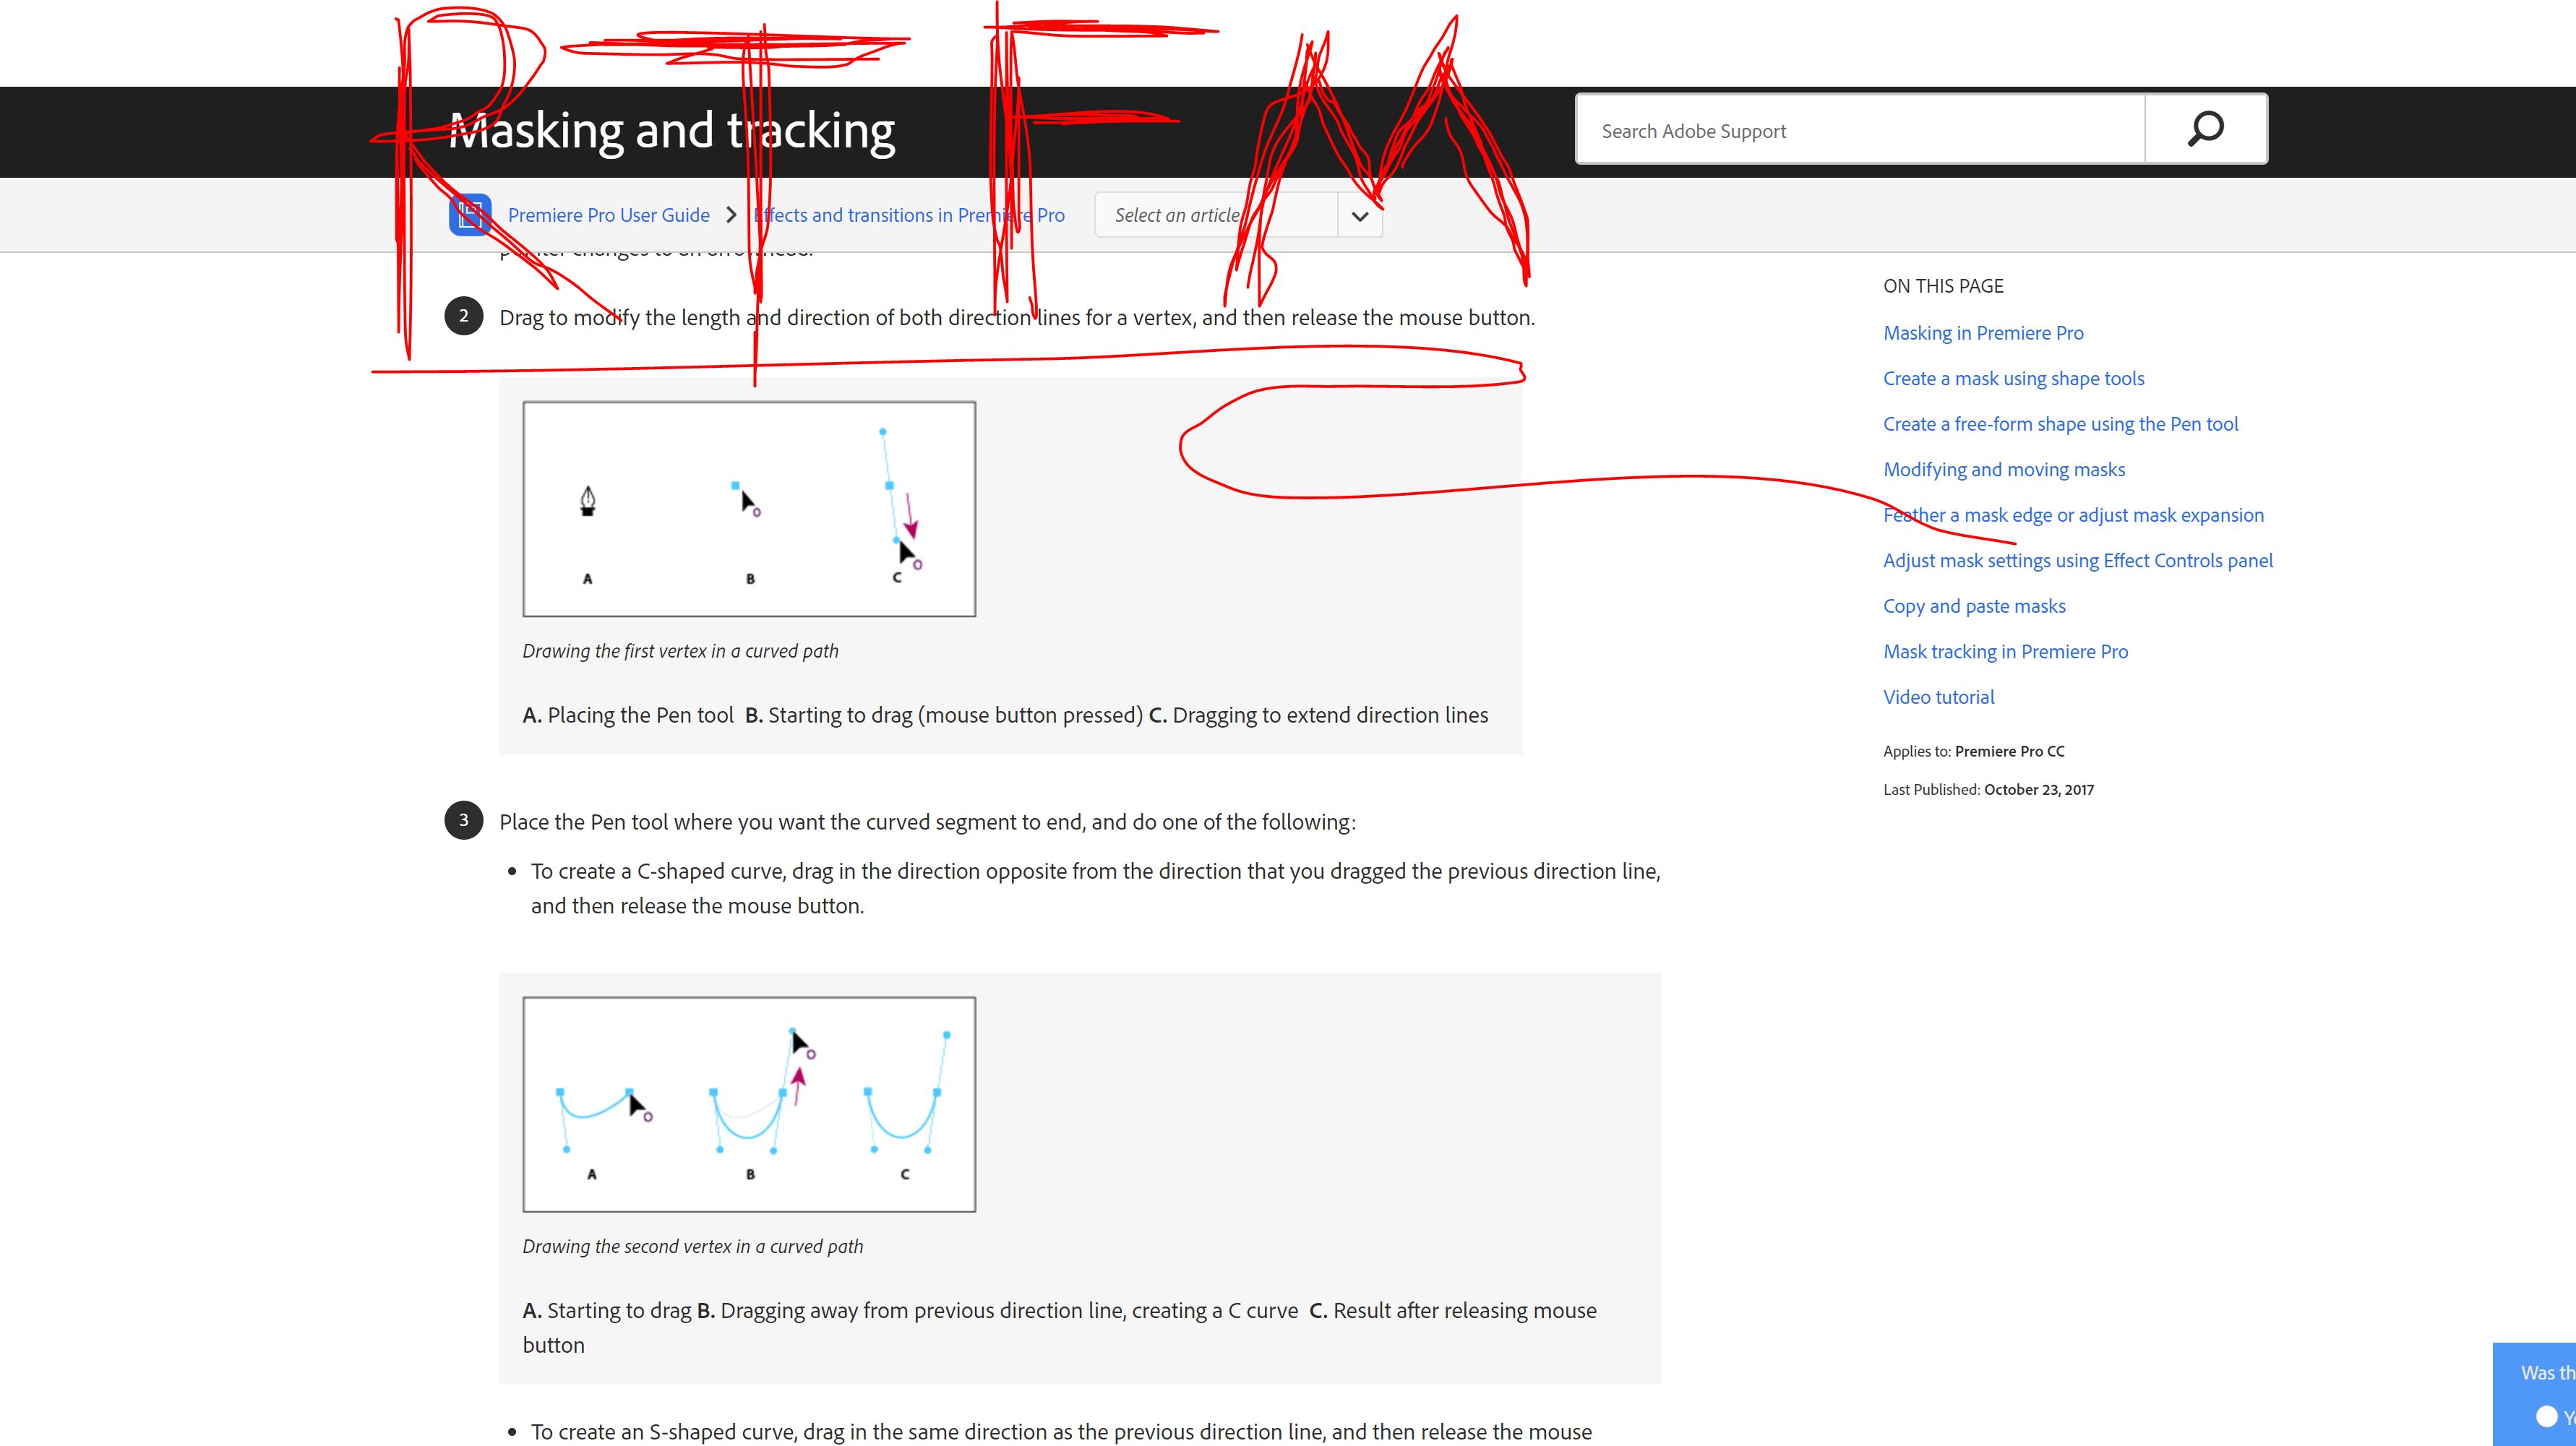
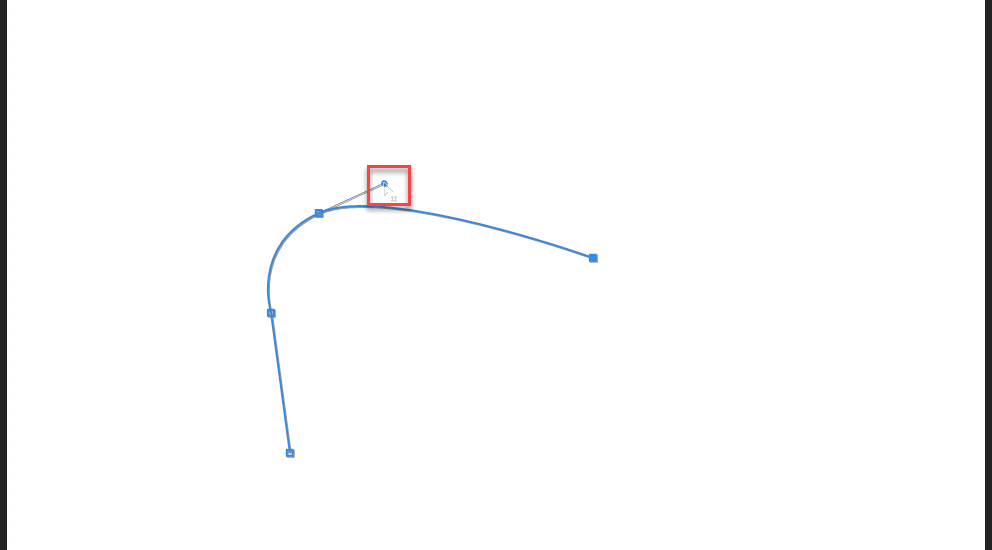
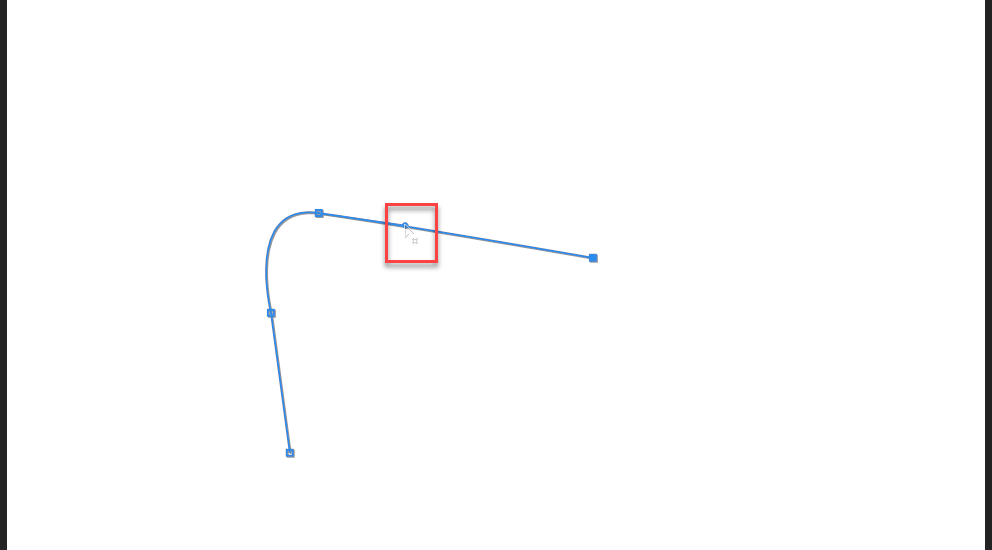
Drag the top handle onto the path: curve gone.
Copy link to clipboard
Copied
Copy link to clipboard
Copied
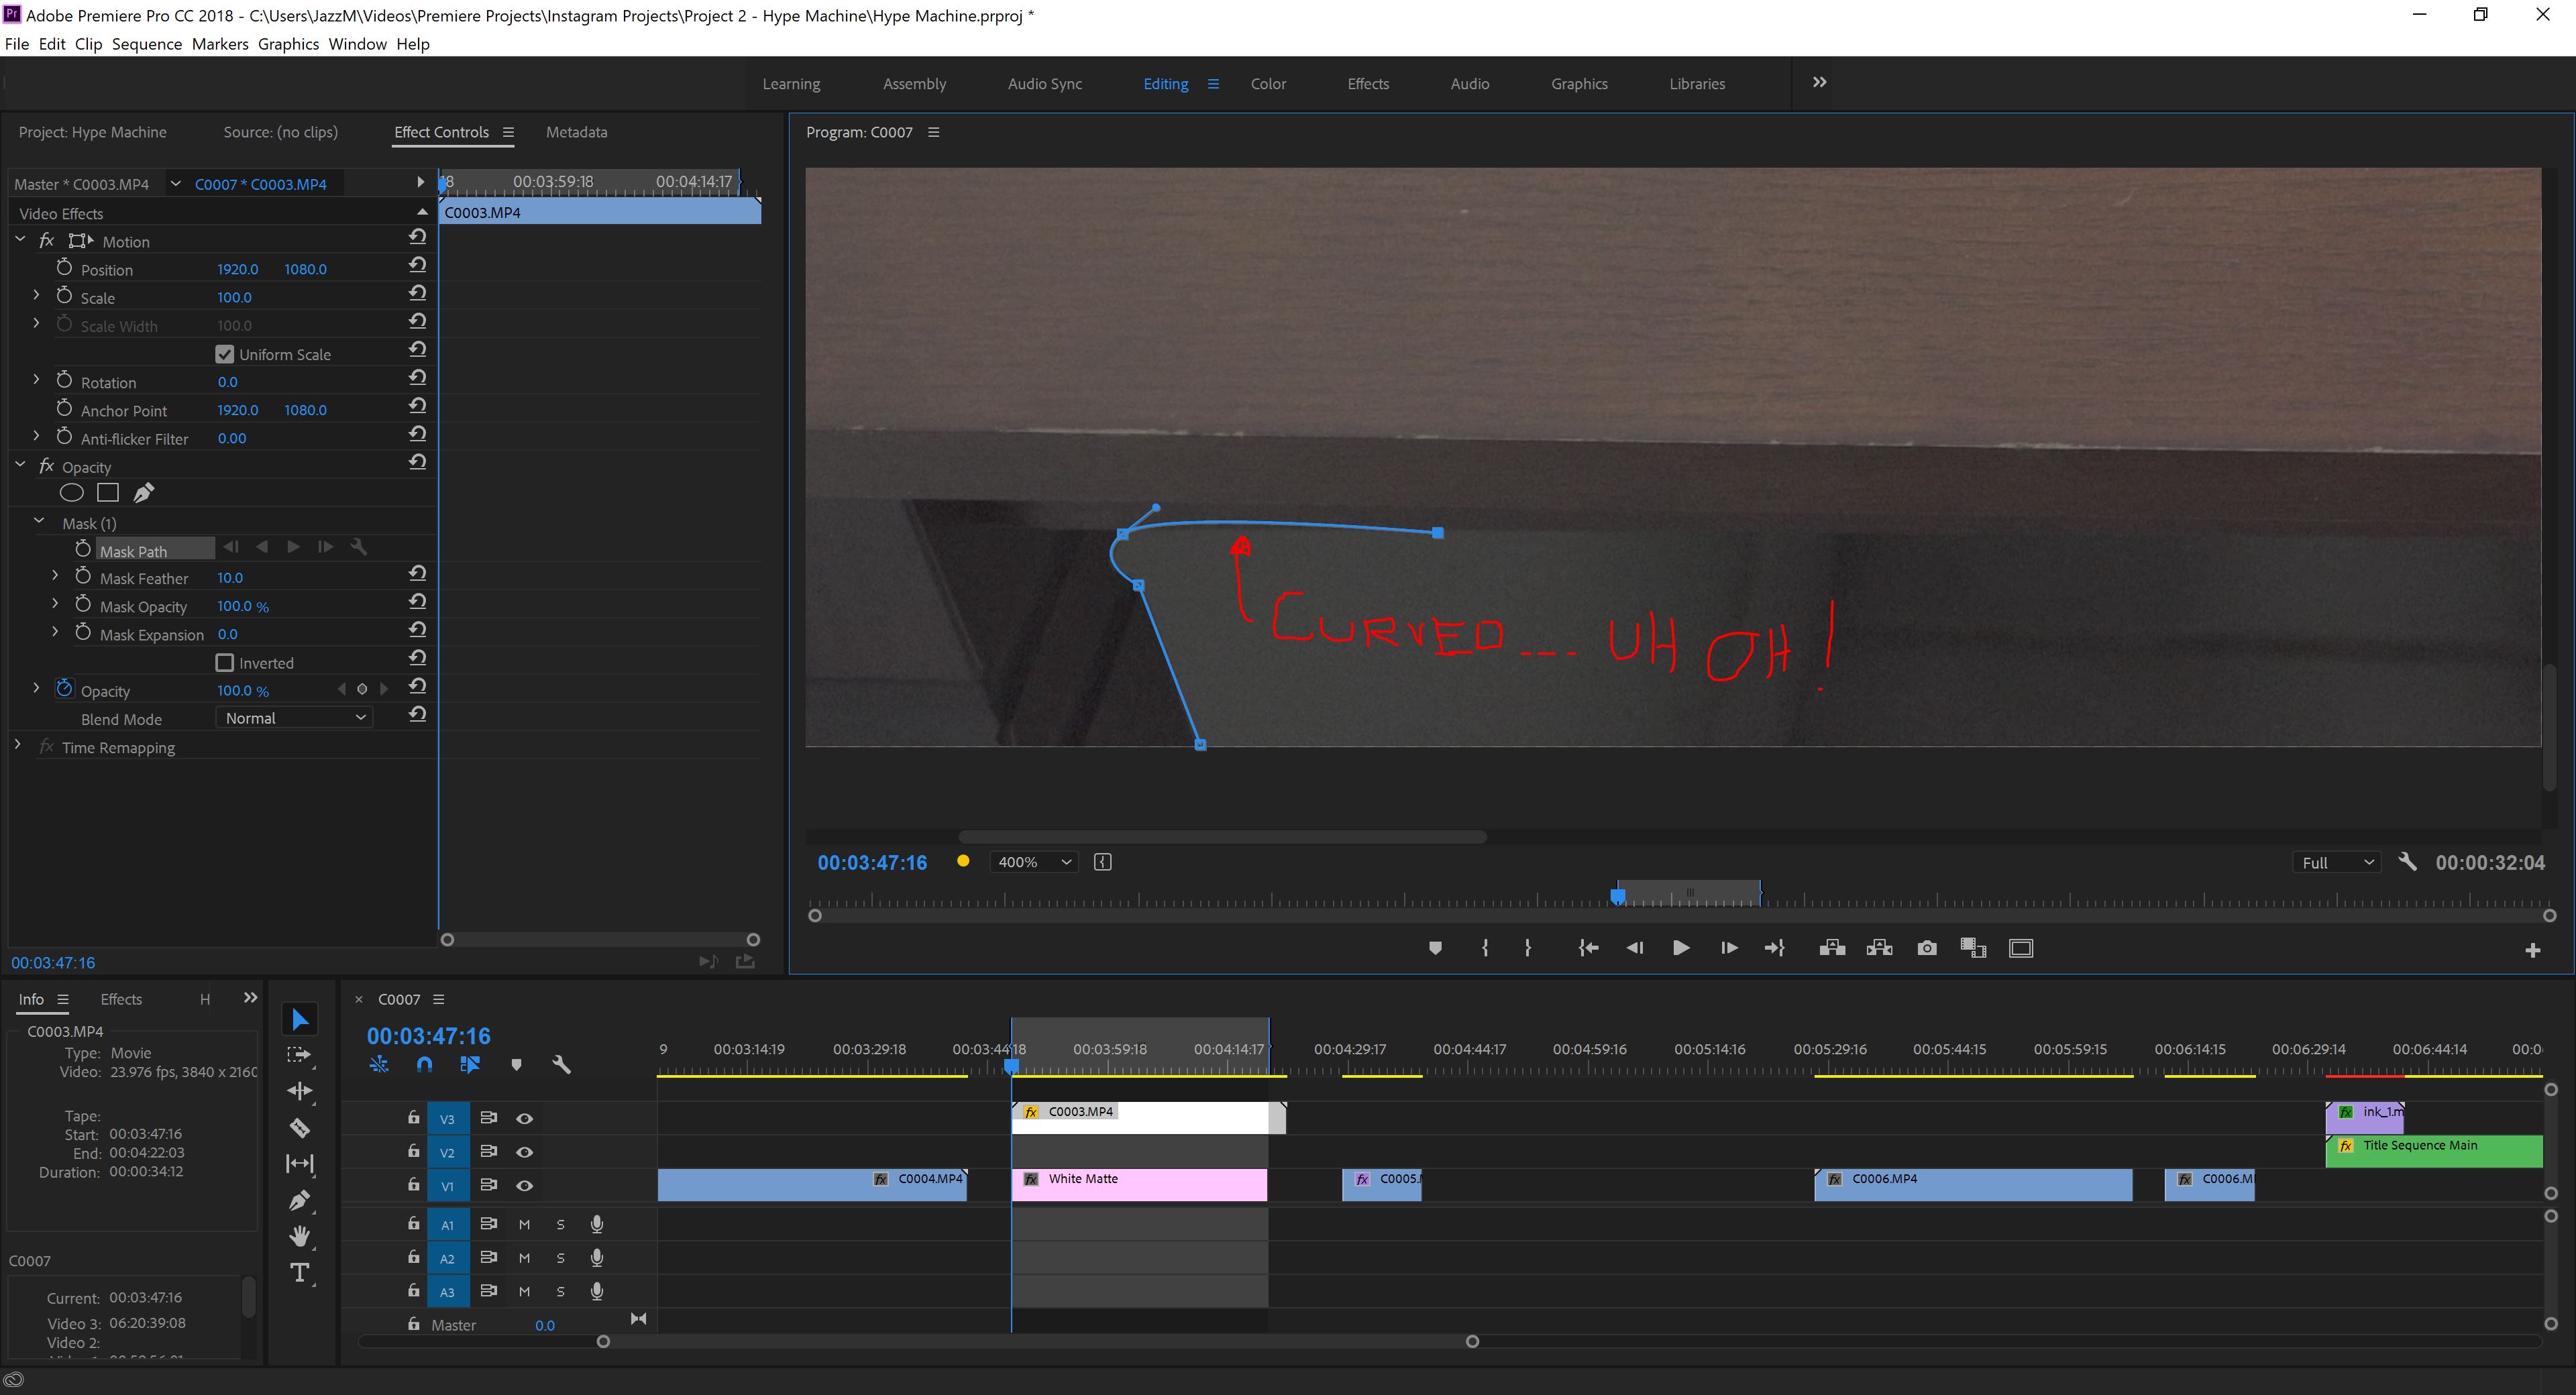
As you can see in your example, manipulating that handle in such a manner changes the angle of the curved portion that is actually meant to be curved. We don't want that. You can, however, grab that handle and push it all the way into the home vertex from whence it came. That'll straighten out the last line and knock around the main curve to the point where it merely requires minor adjustment (with the opposing handle).
The issue with that method is that it pushes more pixel-wide control points into the same area, which means you're far more likely to grab the wrong one or - heaven forbid - click in the invisible "cursed zone" wherein PP defaults to assuming that, rather than manipulating one of the many control points or adding a new vertex, you clearly intend to rotate your entire mask an unspecified number of degrees in some direction with a single click.
Copy link to clipboard
Copied
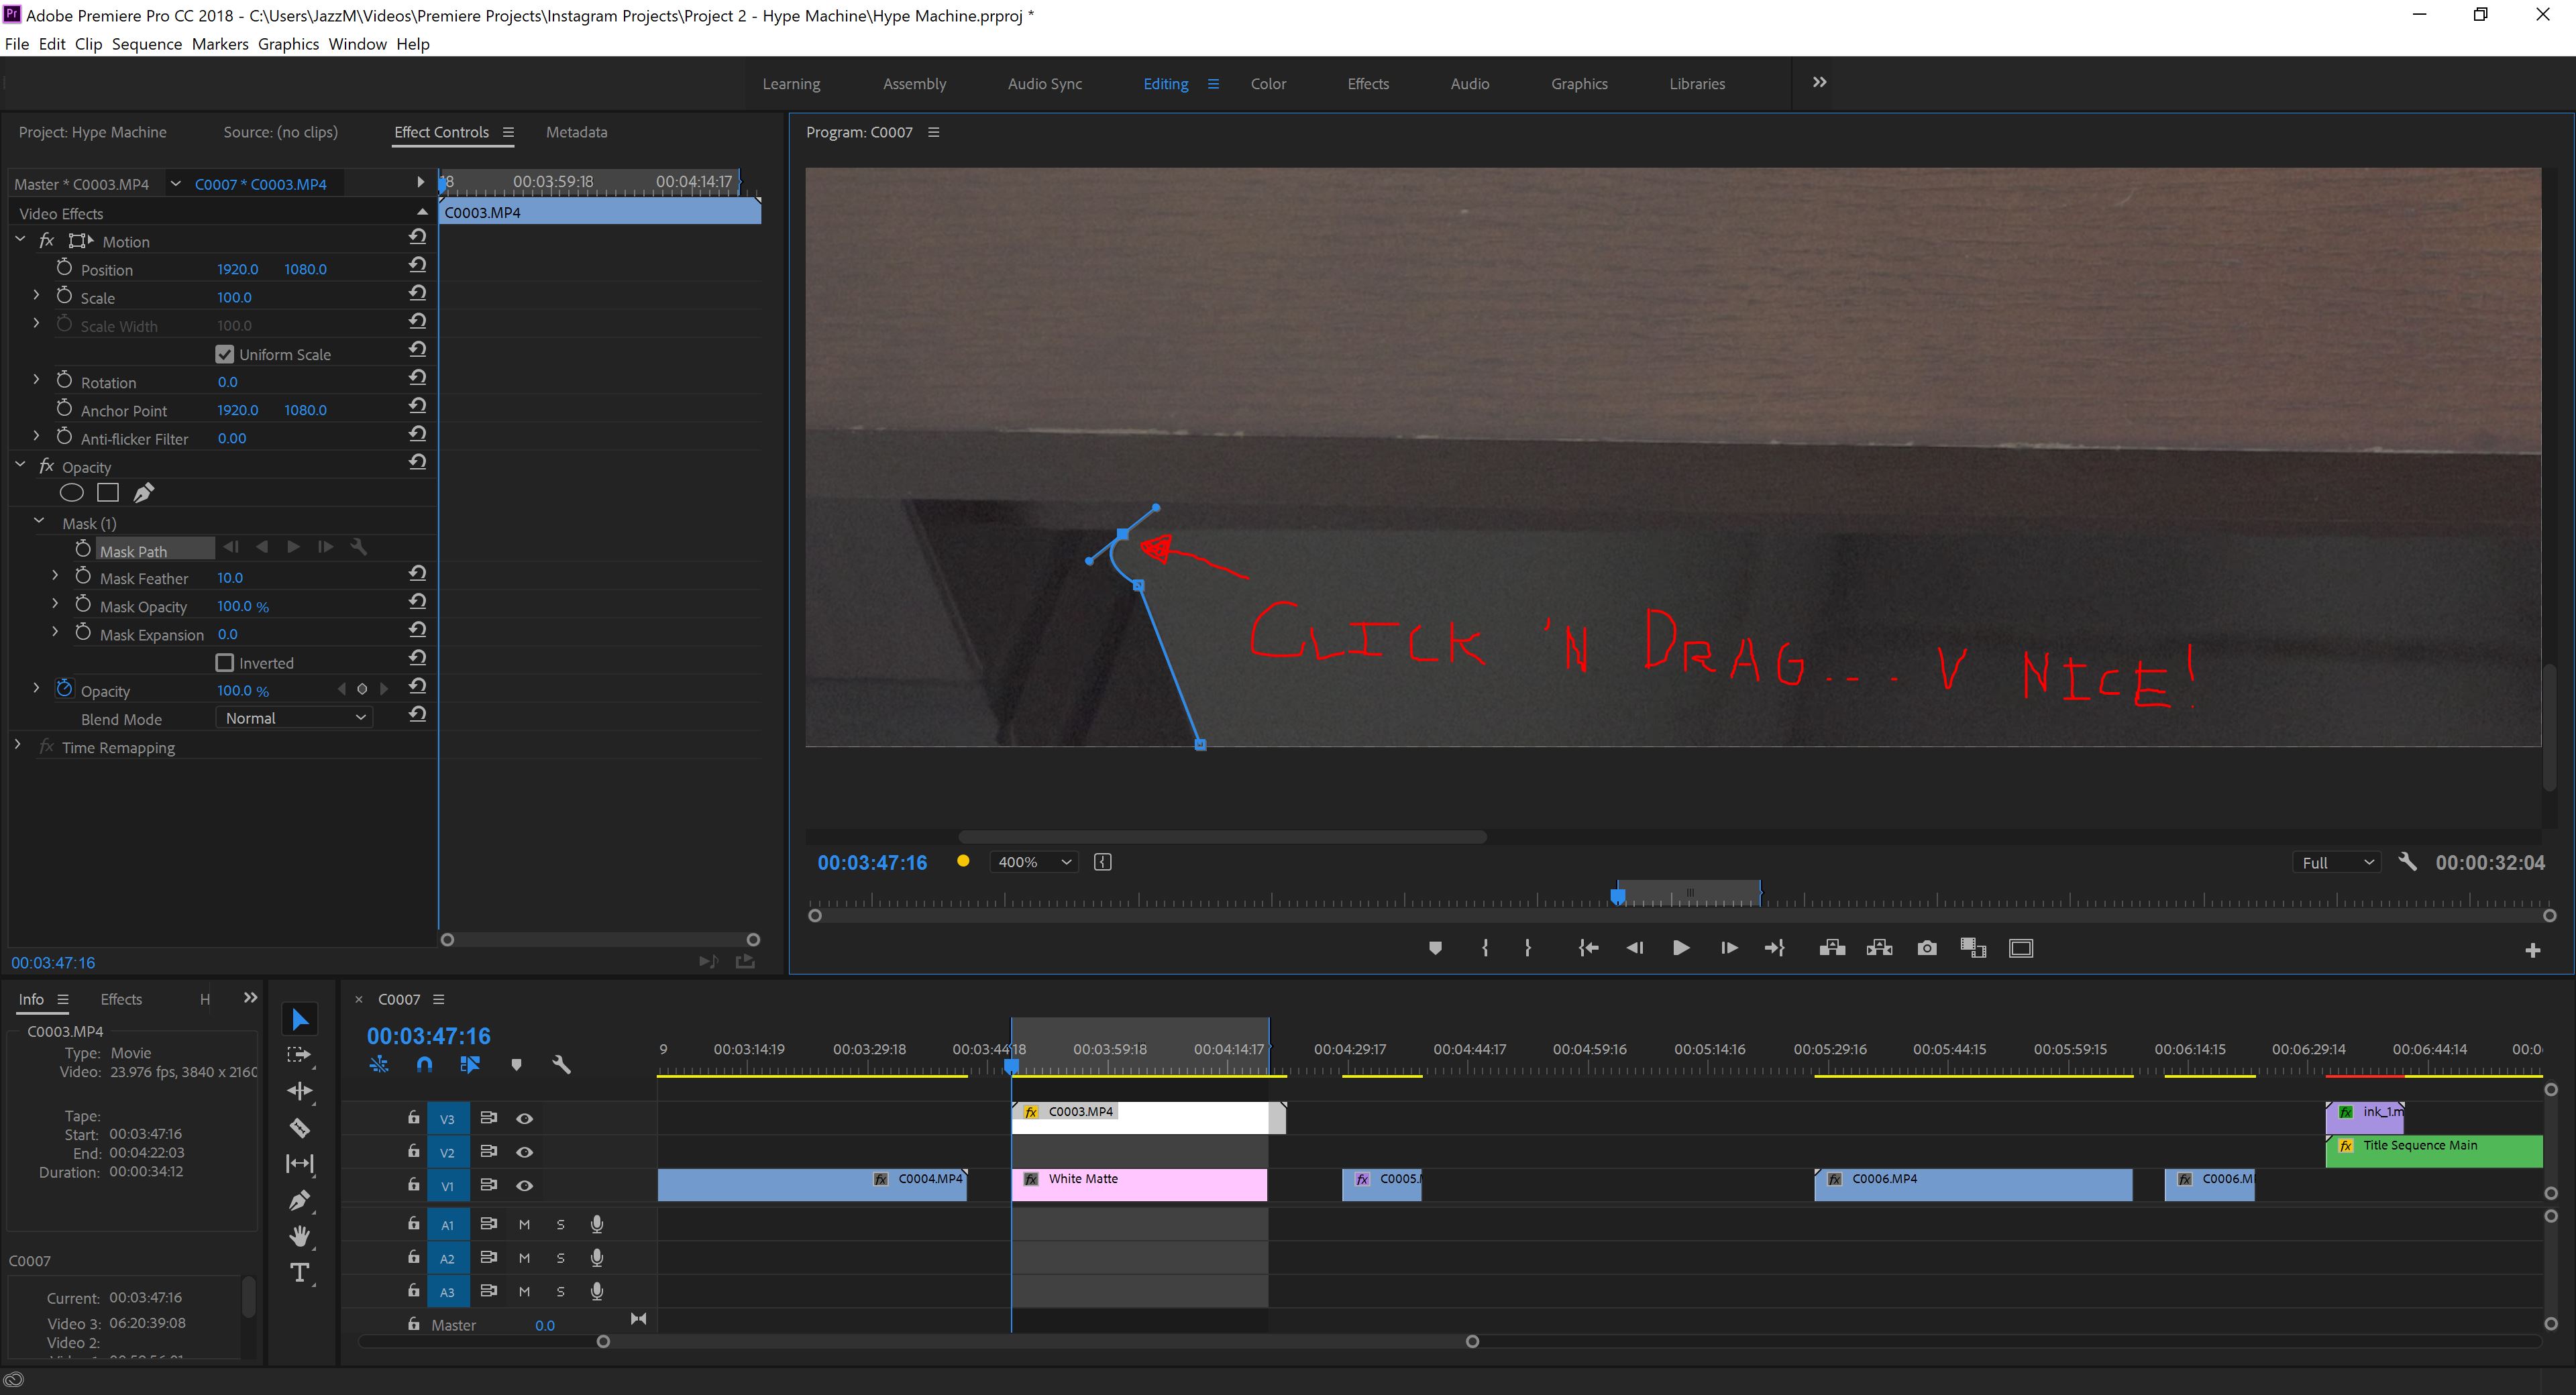
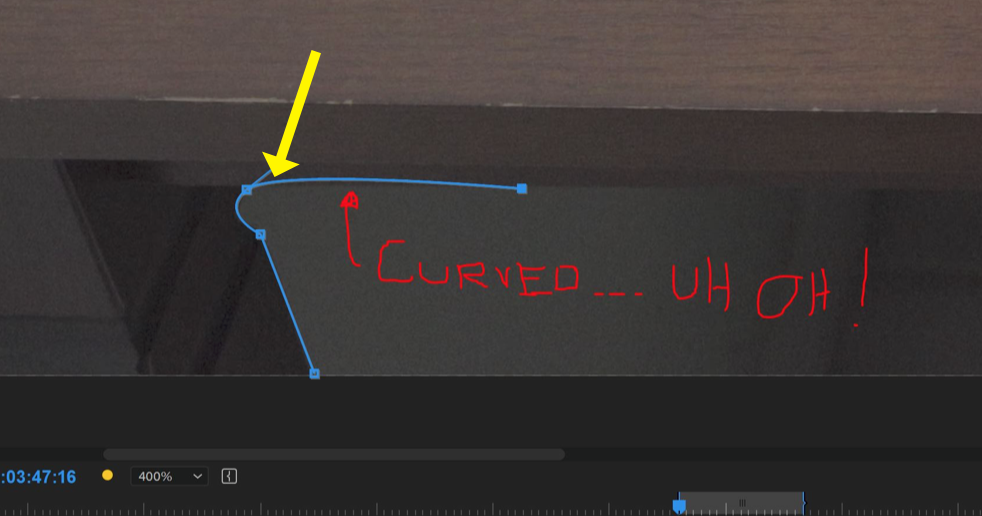
hehe, it mocks you ! Boy, you sure are picky. Wait until you ADD a point, and drag while adding so it becomes a curved point, and for some inexplicable reason it totally rotates around so that it creates a curly cue in the line ! That is one of my favorite wacky things I love about making paths !
: )
Copy link to clipboard
Copied
Set the image to full screen (~) and or use the magnifying option to create a mask.

 AdChoices