- Home
- Premiere Pro
- Discussions
- Re: Need to dynamically change the "Tint" video ef...
- Re: Need to dynamically change the "Tint" video ef...
Copy link to clipboard
Copied
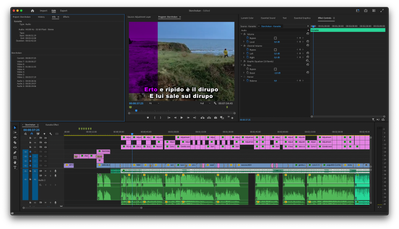
I'm using Adobe Premiere Pro 23.4.0. I have added a track with some text using the Text tool, which displays on the foreground of some footage. Then I've added an Adjustment Layer on the top of the text track, where I am using the "Tint" video effect to change the aspect of the text. The problem is that this is affecting all the tracks, changing the colors of the footage too. I want to apply the Adjustment Layer only to the text.
I cannot move the track under the footage, because then the text will not appear anymore on the footage. How can I proceed?
 1 Correct answer
Thanks guys for trying your best to help me out. Unfortunately, my Premiere Pro knowledge is too poor to try some of the working methods you suggested, but I've been fiddling around with the various settings a bit and I randomly discovered that if I group all the text and adjustment layers together and then select "Nest...", I can take the result and place it on top of the movie, and voilà it works like magic. I have no idea what it is doing, but I was very lucky, the solution was so simple and
...Copy link to clipboard
Copied
Add the "Tint" directly on the text and not on an adjustment layer.
Copy link to clipboard
Copied
Thank you for helping! This may be a workaround, but unfortunately it does not work for me. Is there no way to answer the actual question? The reason it doesn't work is that I have several karaoke projects made this way (text and music only), made with two lines of text and two adjustment layers that separately color the words in the first line and the second line, adjusting the position of the layers based on the music. If there is no way to bind the adjustment layers to a single source, how can I export them to overlay a movie?
Copy link to clipboard
Copied
Post screenshots.
Copy link to clipboard
Copied
Copy link to clipboard
Copied
Select text and adjustment layers, right click > nest.
Copy link to clipboard
Copied
I had already tried this and it doesn't work, but I found the solution myselfby accident before reading your suggestion. The key was to first group the text and the adjustment layers and then nesting them. Don't ask me why I have no idea. By the way thank you very much, this was the closest answer to the correct one.
Copy link to clipboard
Copied
Good it worked for you. Grouping before nesting should give you the same result as nesting directly, I wonder why it didn't work for you.
Copy link to clipboard
Copied
Copy link to clipboard
Copied
I see, you have to enable that button (in red square) when you drag the nested sequence, it will insert the nest as sequence or as individual clips:
Copy link to clipboard
Copied
mmm… I cannot even paste the sequence if the button is turned off 😕
Copy link to clipboard
Copied
Ok, now it's clear what you're trying to do. And there's a simpler way to achieve all that with much less layers and clutter.
Apply the tint on your text layer, and then use the mask inside the tint effect to animate it the way you want. Check this gif, it should give you an idea on how to do it.
Copy link to clipboard
Copied
How about duplicating your text layer, putting it on a higher track, batch changing the text color, and then wiping the "after" color version on as you're currently doing with the adjustment layer?
Tint,as you've discovered, is not the right tool for this.
Copy link to clipboard
Copied
Why not? I have been using it for all the karaoke tracks, and I find it very quick and straightforward. I just pause the audio where I need, insert a position keyframe and drag horizontally the adjustment layer. I can do this even faster than what it takes to select words from the text box.
Copy link to clipboard
Copied
Past Ali Jaber's idea, perhaps separate your text within the graphic to two text layers, and you can then tint each separately. Done within one graphic.
Neil
Copy link to clipboard
Copied
Thanks guys for trying your best to help me out. Unfortunately, my Premiere Pro knowledge is too poor to try some of the working methods you suggested, but I've been fiddling around with the various settings a bit and I randomly discovered that if I group all the text and adjustment layers together and then select "Nest...", I can take the result and place it on top of the movie, and voilà it works like magic. I have no idea what it is doing, but I was very lucky, the solution was so simple and is exactly what I needed.
Get ready! An upgraded Adobe Community experience is coming in January.
Learn more


