

- Home
- Premiere Pro
- Discussions
- Re: select multiple keyframes and changing all val...
- Re: select multiple keyframes and changing all val...
select multiple keyframes and changing all values doesn't work anmore!

Copy link to clipboard
Copied
in premeire cc2017 I could select like 10 keyframes of let say AUDIO LEVEL and then have my marker on one keyframe, whilst selecting the rest, chance the value and then it would change the value of all other kexframes too. NOW in CC2018 THIS DOESN't work anmore?!?!?!?
As I do a LOT of audio editing in premiere this is a MASSIVE MESS!!! because I have to change each value seperatly for every keyframe now?!?!?!?
Come on Adobe... this is only one of all the issues I am having with 2018!


 18
Replies
18
18
Replies
18

Copy link to clipboard
Copied
This is a really weird thing ... I can select say three, and it may affect say between the first one and the beginning ... or everything BUT the ones I've selected.
I found that the only way to get this working as expected is when I select a group, then instead of using the controls, I manually 'grab' the line for audio level in the keyframe area, and drag it up or down ... and that will move the entire selection.
Needs a bug report ...
Neil
https://www.adobe.com/cfusion/mmform/index.cfm?name=wishform
Copy link to clipboard
Copied
ALSO the ZOOM IN function on the effect panel of AUDIO, like the one mentioned above IS TOTALLY CRAPPY!!! what happened there? I can't even zoom in properly... sometimes it works sometime it doesn't.
Copy link to clipboard
Copied
I'll test that out on my studio rig later.
Neil
Copy link to clipboard
Copied
and? any issues?
Copy link to clipboard
Copied
I was able to confirm this, and filed my own bug report on it.
I recommend anyone reading this do also. It's bizarre, and although you 'can' work around it by dragging the selected lines in the keyframe area of the ECP with a mouse/pen, you should be able to control very accurately by changing the amount.
Neil
https://www.adobe.com/cfusion/mmform/index.cfm?name=wishform
Copy link to clipboard
Copied
what about the zooming in the effects panel?
Copy link to clipboard
Copied
Haven't tried that ... might be able to try that today at the shop.
Neil

Copy link to clipboard
Copied
Using the pen tool on the clip in the sequence, I'm able to select and change several keyframes in unison.
Copy link to clipboard
Copied
Huh ... using the pen tool in the ECP panel ... ? Hadn't thought of that ...
Neil
Copy link to clipboard
Copied
ECP or timeline, both seem to work.
Copy link to clipboard
Copied
I can drag in both ECP and timeline and move, but ... if I select say a pair of keyframes in the ECP, and try and move them by the controls in the ECP, it doesn't work that way ... the place you have the CTI rules the roost, it will add another keyframe there and bump that up between the outer two selected if the CTI is in the middle, or if the CTI is outside the selected pair of keyframes, it will move the area under the CTI instead of the area between the selected keyframes.
So ... lesson is, in any way I can try this, selecting keyframes is useless to move the audio level. You need to just drag with the mouse.
The option that allows setting a level in a control, it to put your keyframes on using the ECP, then go to the area you want to move and use the Audio workspace Clip Mixer control ... then you can move by dB level.
Neil

Copy link to clipboard
Copied
I tried this suggestion in my project but observed no difference to using the selection tool on the keyframes. Did I misunderstand how to use the pen tool in the ECP?
Thanks,
- dW
Copy link to clipboard
Copied
I just use the general selection too, the arrow-like icon.
Neil
Copy link to clipboard
Copied
I hope they fix it soon though. I have a couple of projects coming up that are going to have a lot of keyframing and I do not want to be resetting the same parameter in each copied sequence. I know, do it in AE instead, right? LOL

Copy link to clipboard
Copied
I am still having the same problem. I can't seem to get Premiere to select and adjust keyframes on various tracks at the same time.
Also, in the ECP, why can't I see track beyond the keyframe I'm parked on in the timeline? Is there still no way to zoom in / out as mentioned?
Thank you.
Copy link to clipboard
Copied
Changing the area shown in the ECP panel's timeline monitor is the same as on the main timeline itself as far as using a mouse or keyboard shortcuts ... if your 'focus' is the ECP panel.
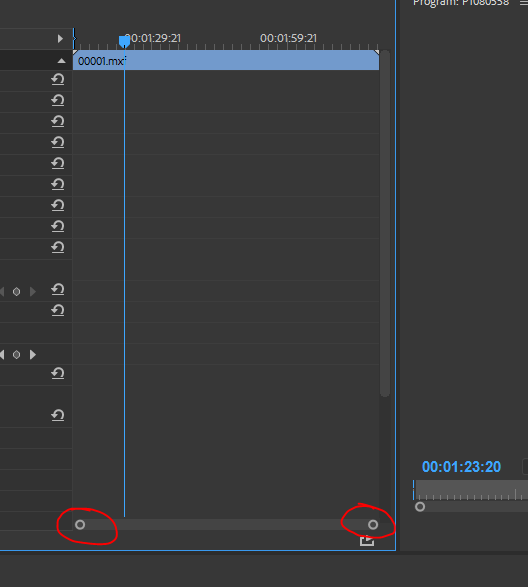
So, using the + and - keys on your keyboard expand or contract the timeline area visible. If your mouse cursor is over the scroll-bar at the bottom of the ECP timeline, the scroll-wheel manually expands or shortens the area visible. And grabbing either light circle at the ends of the scroll bar with the mouse allows you to drag the visible area 'in' or 'out' (shown below). And of course, clicking on the scroll bar when it is shorter than the width of the visible timeline allows you to drag the timeline earlier or later.
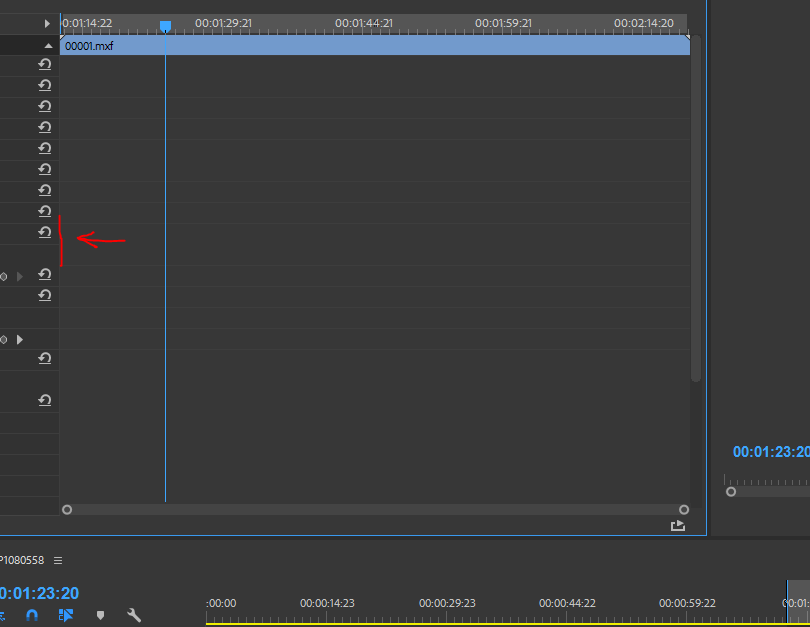
And further, if you hover over the little line at the far left of the ECP timeline area, you get the double-arrow, and can then drag that edge left or right to either expand or shrink the width of the timeline view in the ECP. As shown further below.
Neil
Click/drag on either circle to "zoom" in/out on the timeline.
Click/drag on the line (highlighted below) to widen/narrow the ECP timeline.
Copy link to clipboard
Copied
Thanks. I actually figured out that the problem was there's a triangle to show/hide timeline view that I had to click at the top right to be able to see the keyframes in the ECP. Now I can expand and contract the smaller ECP timeline as I would in the actual timeline panel.
There's still no solution to adjusting multiple keyframes on various tracks at the same time in the main timeline?
Copy link to clipboard
Copied
Have you tried dragging a box to select the keyframes?

Get ready! An upgraded Adobe Community experience is coming in January.
Learn more
 AdChoices