Copy link to clipboard
Copied
I have the same question as this thread: How do I set my timeline to 60FPS only the solution posted there does not work for me.
I am trying to get the circled number to display the actual frame number. It displays 30fps, and if I scrub using the arrow keys I have to press twice for that number to change. So it is recognizing all 60 frames in my footage.
The footage I'm editing is from a Samsung Galaxy S9+, which apparently records in variable framerate. I recorded with HEVC turned off, so it is H.264.
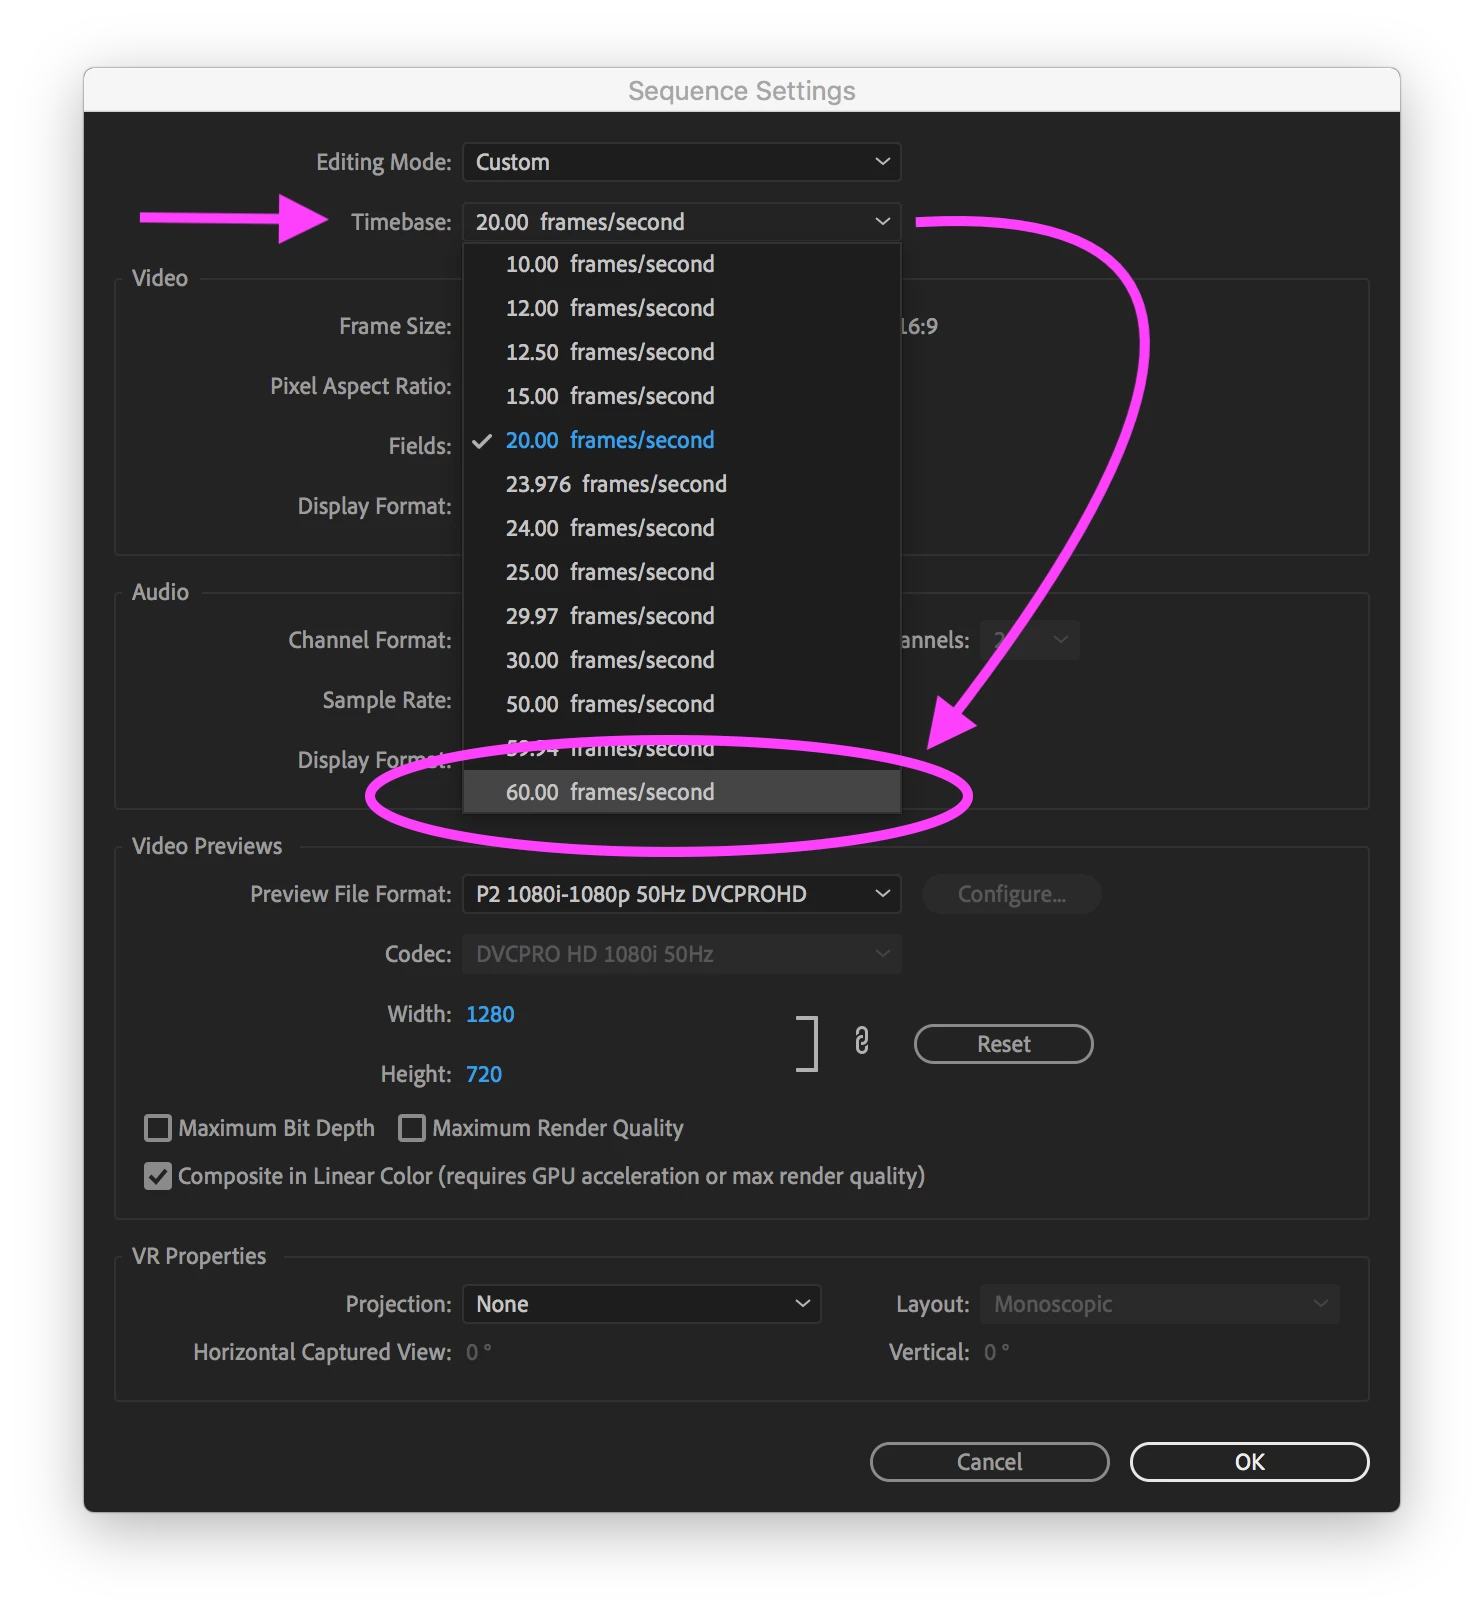
The place to do it would be in the Sequence Settings (Sequence > Sequence Settings...).
You might need to change the "Editing Mode" to "Custom" first, but you want to change the Timebase from what it is currently to "60.0 frames/second".
Having to press the arrow keys twice to advance frames is a sign that you're working at i30. While you're in the Sequence Settings dialog box, double-check that the Sequence is progressive and not interlaced [Video > Fields: No Fields (Progressive Scan)].
-Warren
Copy link to clipboard
Copied
Ok I looked in Sequence > sequence settings and I found this:
But now my timeline displays in frames. It didn't before opening sequence settings but it does now that I have opened sequence settings.
I tried it in a previous project too and the same thing happened.
However, if I select 60.00 frames/second it does set things up exactly how I wanted it to be.
Copy link to clipboard
Copied
Warren's comment said first to change the time base to 60. Starting there, the other fields change and the user would need to make sure the end results were what was wanted.
So you are learning .... there are so many steps to editing with a complex pro NLE. I do recommend a subscription to someplace like lynda.com/LinkedIn learning for at least a month or two of studying the tutorial programs of a couple different editors to learn basic operational skills in Pr.
This will save you an immense amount of time fiddling.
Neil
Copy link to clipboard
Copied
R Neil offers a great suggestion about lynda.com/LinkedIn. Your local library may provide access to it, including the lesson files.
Copy link to clipboard
Copied
roweder:
If you're referring to the Time Display when you say "my timeline displays in frames", that's controlled at the project level, not the sequence level under File > Project Settings > General > Video > Display Format: Timecode or Frames.
Copy link to clipboard
Copied
If you rightclick on timecode (playhead position) in timeline you can changed the settings per sequence.
Copy link to clipboard
Copied
One little caution about right-clicking a hot text timecode display (the blue timecode) in the Timeline panel or the Program Monitor panel: if the only option that appears is "Frames" (as opposed to Drop-frame timecode, Non-drop-frame timecode, Feet+Frames 16mm, Feet+Frames 35mm, Frames, Audio Samples and Milliseconds), then you're probably working in a Sequence that was created with footage running at a non-standard Timebase frame rate for Premiere Pro and once changed to Frames you will not be able to change it back to Timecode. For example, this happens with security camera footage running at 20 frames per second. Premiere Pro will display Timecode at 20fps until this is changed to Frames and it will get stuck in this display option.
This does not apply to any of the standard Timebase options for a Sequence (10, 12, 12.5, 15, 23,976, 24, 29.97, 30, 59.94, and 60), just non-standard ones that result from a creating a New Sequence from Clip.