- Home
- Premiere Pro
- Discussions
- Transitioning/interconnecting two shots with the s...
- Transitioning/interconnecting two shots with the s...
Copy link to clipboard
Copied
Hello there! I'm trying my best to piece together a short film, but I'm new to premiere (and editing in general), so I'm having some problems realizing my vision! I was hoping I could get some recommendations on how to transition between two shots in a way that will appear to be seamless and smooth.
I've shot this scene in a barn. I have a drone shot which starts high on the second level of the barn. It floats down and onto the first level. Then I have my camera on a gimbal and proceed to do a tracking shot, exploring the first level of the barn.

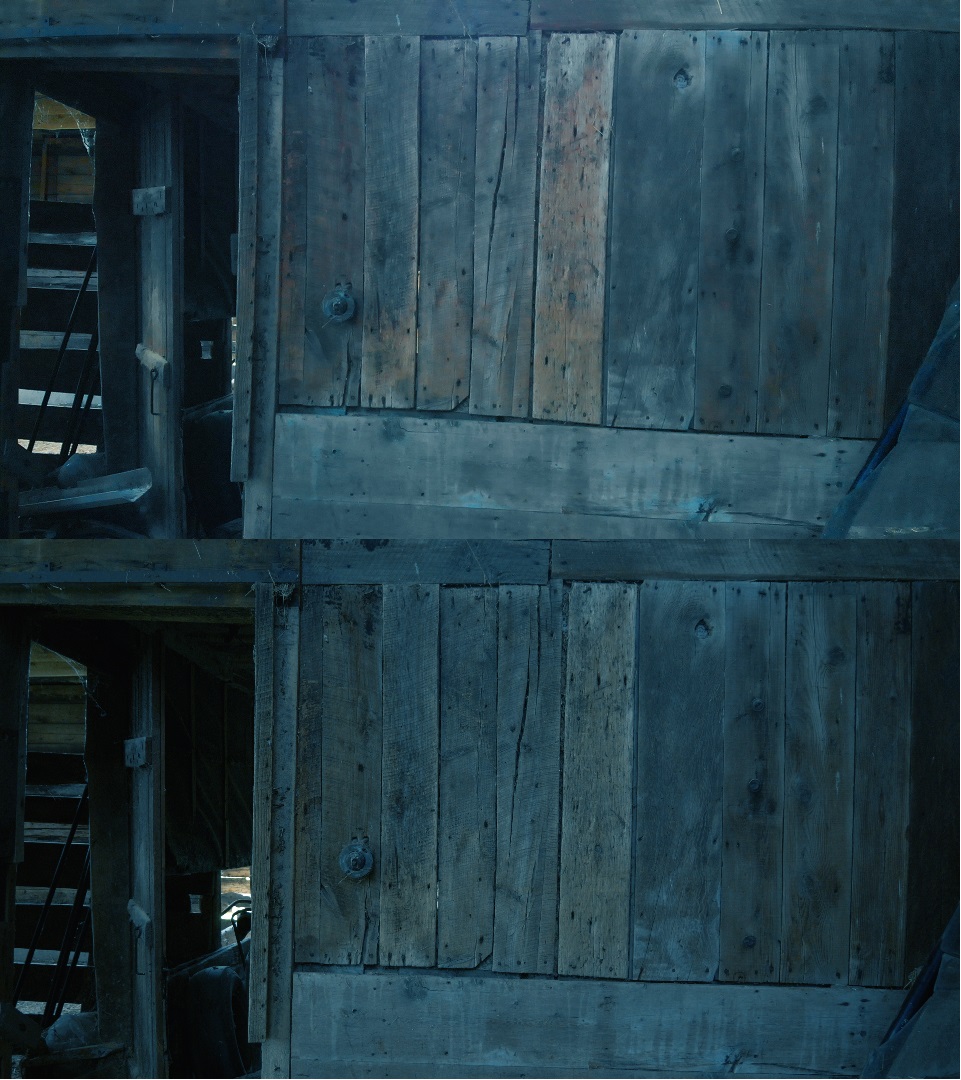
So the top shot is where the drone shot ends, and the bottom is where the gimbal shot begins. I'd like to give the impression of this all being one long seamless shot, but I'm not sure how to do so. There are clear differences between the top and bottom shots obviously, but this is what I have to work with. Any recommendations on how to go about doing this? Thanks!
 1 Correct answer
Here is a video I attached to guide you through the process, I used your images, and I also attached the project file where you can replace the photos with the actual footage but you have to readjust the adjustment layer's position in the timeline to achieve the desirable transition :
while replacing select the clip on the timeline, hold ALT and drag your video from the project panel and release it on top of the selected one to keep the attributes used...
you can also b
...Copy link to clipboard
Copied
You'd need to use scale and position from the Effects Control Panel to match. As your second shot is more cropped, as you close to the end of the first clip, use a keyframed scale up and position adjustment so you crop in to the same position the second vmclip starts.
Probably easier to start matching the last frame of first clip to first of last in Comparison view mode in the program monitor. Then set keyframes, go back a bit, set another keyframe and reset parameters to normal settings.
Neil
Copy link to clipboard
Copied
Here is a video I attached to guide you through the process, I used your images, and I also attached the project file where you can replace the photos with the actual footage but you have to readjust the adjustment layer's position in the timeline to achieve the desirable transition :
while replacing select the clip on the timeline, hold ALT and drag your video from the project panel and release it on top of the selected one to keep the attributes used...
you can also buy transitions, plugins or presets online that can achieve this if you like ...
Copy link to clipboard
Copied
wow, that was impressive Carlos. way different than cs6 !
Copy link to clipboard
Copied
Wow - you went above and beyond! Thanks Carlos
Copy link to clipboard
Copied
you are welcome anytime !
Copy link to clipboard
Copied
Yeah, pretty amazingly cool help you got.
I was thinking about it and you may find this stupid but ….there are times when you want to make a cut that is NOT NOTICEABLE.. like during what is called a WIPE sometimes.
If adjustments are made to your rotation and position to match those frames ( where drone meets gimbal ) it is pretty obvious the entire clip will be adjusted somewhat. In other words, if the adjustment is to the drone footage you may see the horizon shift a bit off horizontal. Or, you may see the barn stuff on gimbal get a little off kilter.
Probably very subtle in this case.
But if you WANT you can look for a place where there is some kind of WIPE ( like your camera goes past a column or post or something in the FOREGROUND, and you can make a cut right in the middle of that post or column etc.... and 'FIX' any discrepancy with adjustments that were made to match your two frames...cause it would be so fast nobody would notice it.