

- Home
- Premiere Pro
- Discussions
- Re: Video is showing up in a completely different ...
- Re: Video is showing up in a completely different ...
Video is showing up in a completely different color when imported onto Premiere Pro timeline

Copy link to clipboard
Copied
Hi everyone, a video I'd like to edit is showing up in a completely different color when I import it into Premiere Pro. I did not change the settings of the video, or in Premiere Pro. When I play the video outside of Premiere Pro, it is the normal color I recorded it as. As soon as I drop it in the timeline, the color changes. It only happens with this particular video. Nothing has changed with my settings in Premiere Pro either. I've reinstalled it, logged out / in, etc. Can someone help? Thank you in advance!


 1 Pinned Reply

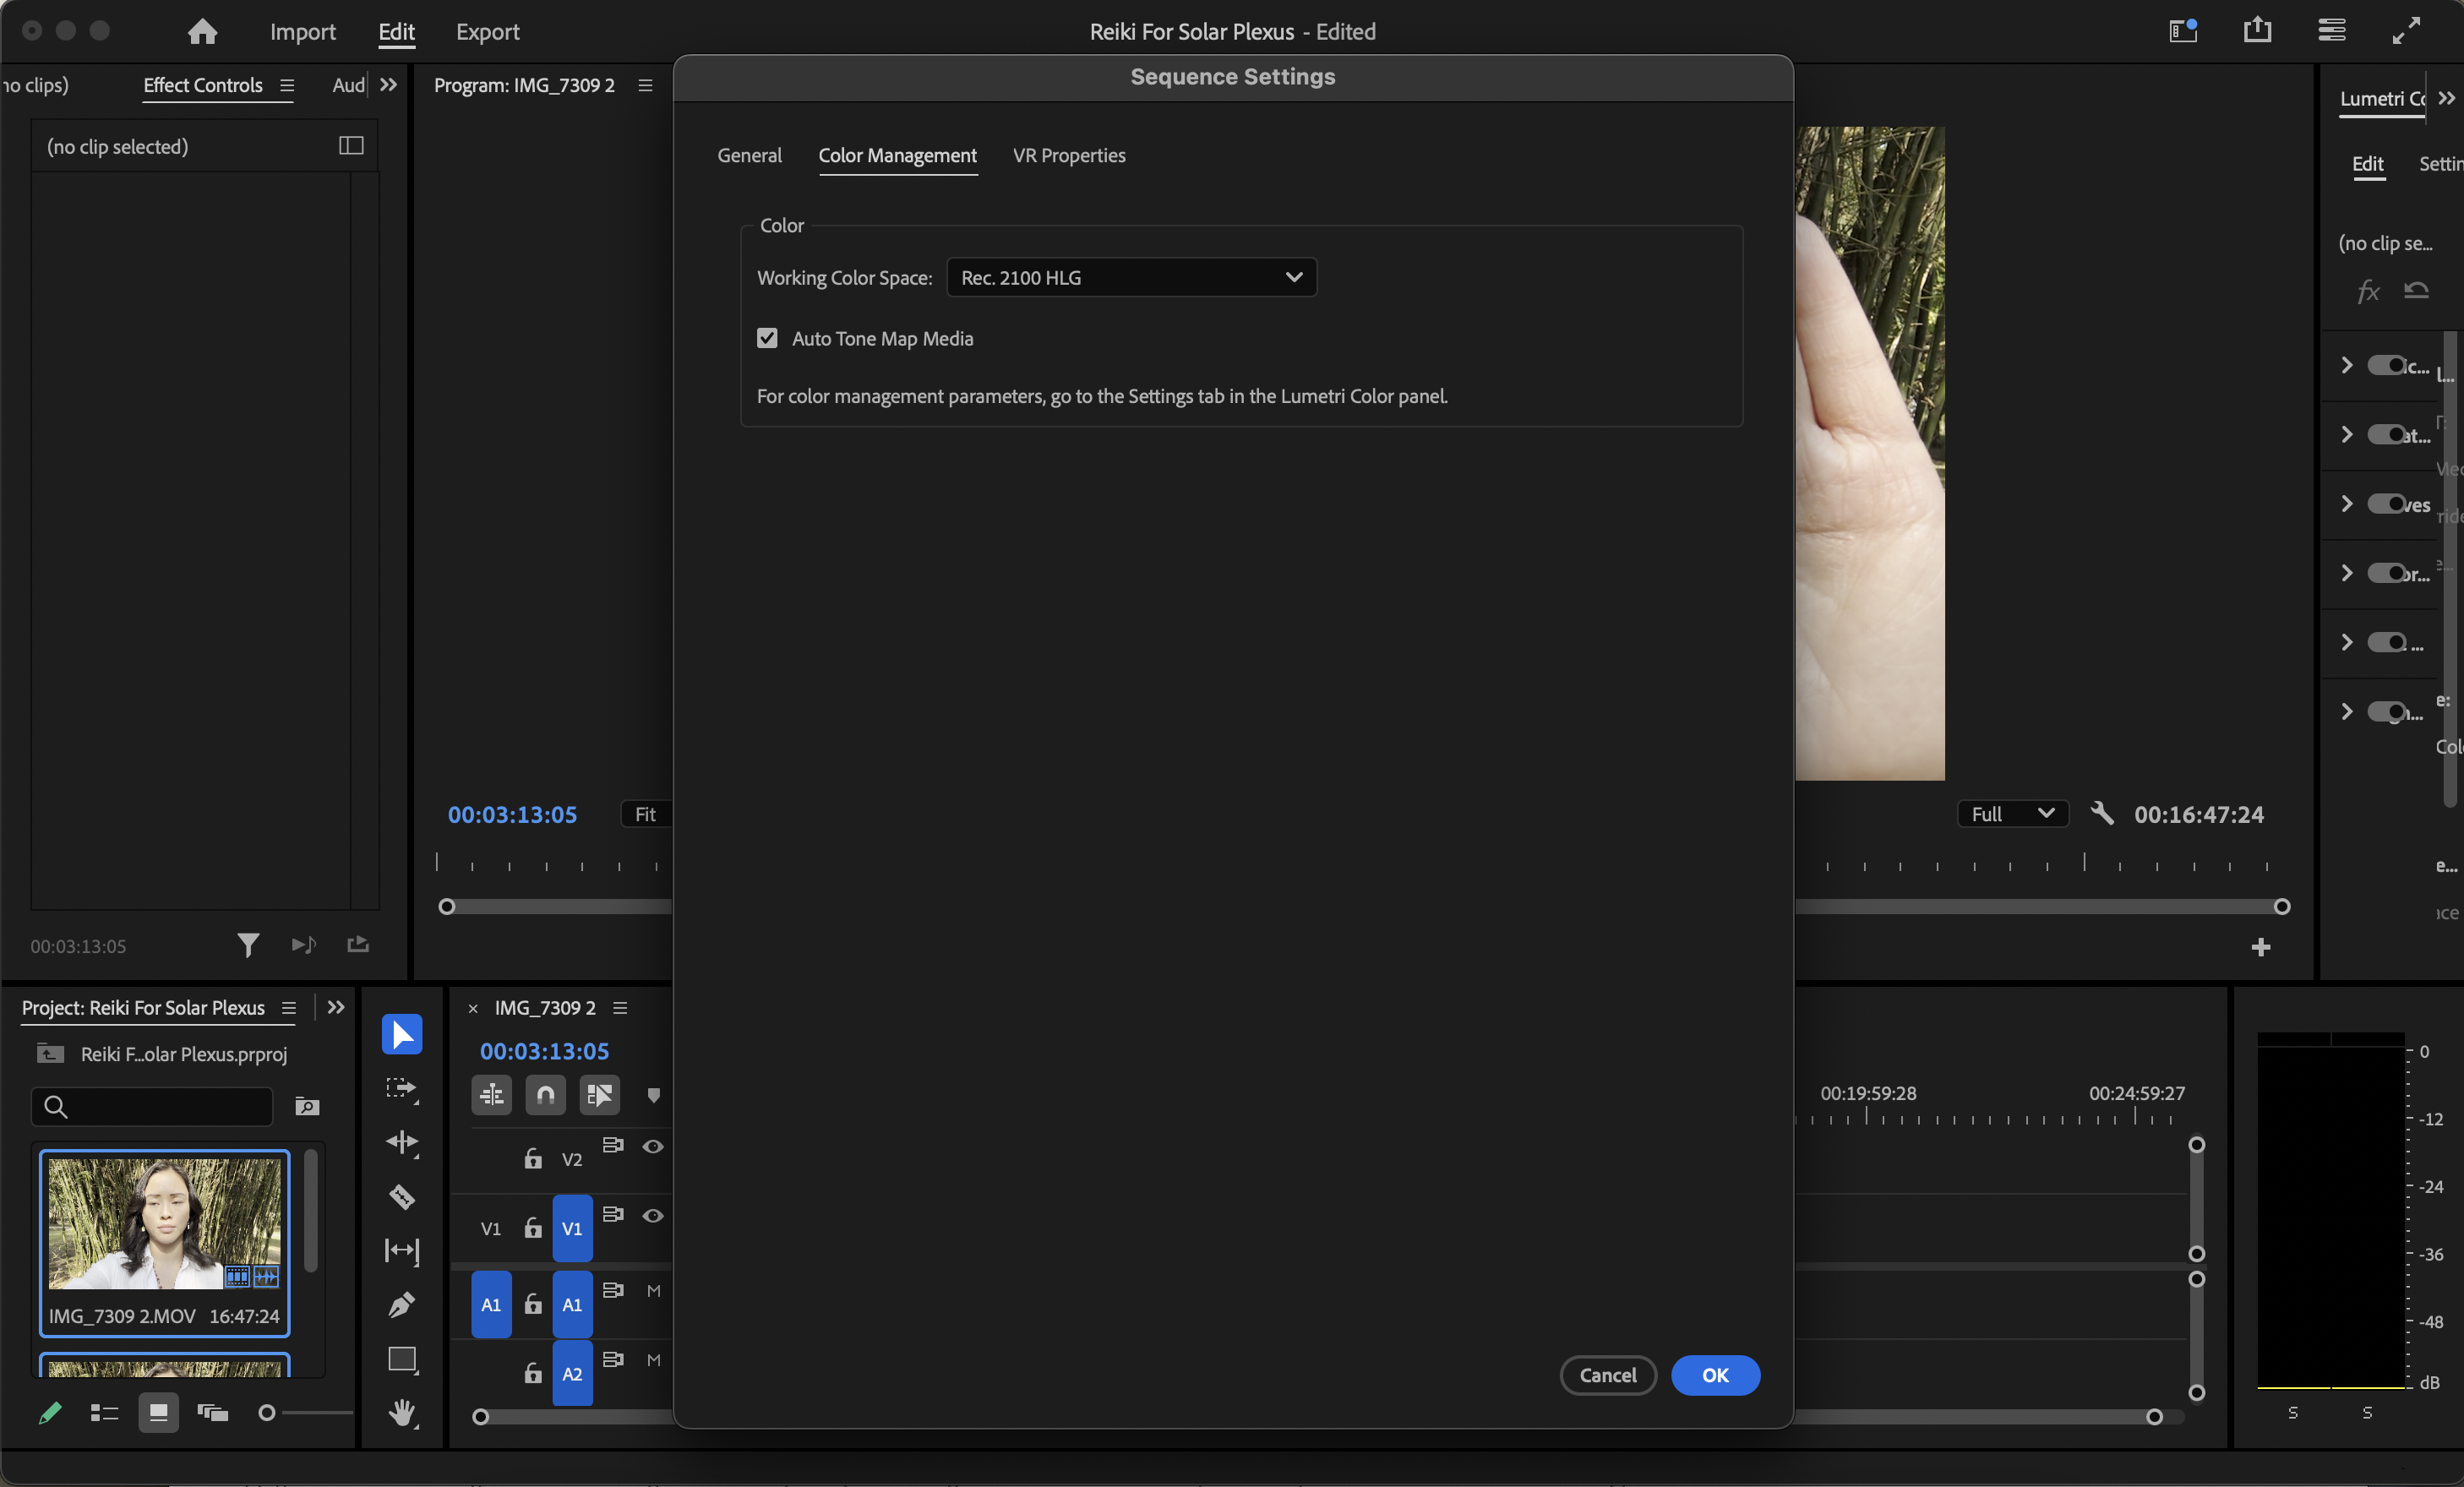
Thanks for providing the details. Could you also please confirm if you are editing on an HDR-capable display? If not, please try switching Working Color Space to Rec.709 with Auto Tone Map Media enabled (Sequence > Sequence Settings > Color Management). Let us know if it helps.
-Sumeet
 14
Replies
14
14
Replies
14
Copy link to clipboard
Copied
Hi Elizabeth36130191z2mp,
We're sorry about the poor experience. We can get this checked. Could you please share a screenshot of the Sequence Settings (Sequence > Sequence Settings) and the Media File Properties (right-click on the media > Media File Properties)? Also, please share a screenshot showing the difference in the video previews.
Thanks,
Sumeet
Copy link to clipboard
Copied
Hi Sumeet! Yes, here are the screenshots for what you've asked me to provide. The screenshot that isn't shown in the timeline is the original video color. Let me know if you need anything else! Thank you.
Thank you!
Copy link to clipboard
Copied
Thanks for providing the details. Could you also please confirm if you are editing on an HDR-capable display? If not, please try switching Working Color Space to Rec.709 with Auto Tone Map Media enabled (Sequence > Sequence Settings > Color Management). Let us know if it helps.
-Sumeet
Copy link to clipboard
Copied

Copy link to clipboard
Copied
Ok ... I work for/with/teach pro colorists. The majority of pro colorists have never delivered a single paid HDR file yet. That will probably tip this year, but even so, the vast majoriity of paid colorist work will still be Rec.709 deliverables.
Why? HDR is still very much the Wild Wild West of video production. Most screens still cannot do it at all. Those that can, especially in consumer priced gear, do only one or two of the numerous possible HDR formats. And probably don't do the ones they do correctly.
Which is frustrating because when done well, it can be wondrous. My first view of anything of mine in HDR was at NAB 2019, doing a presentation on Premiere Pro's color management of the time, in the Flanders FSI/MixingLight booth. To a crowd of pretty high-end colorists ... speaking between Alexis Van Hurkman and the Dolby Labs rep presenting on DolbyVision for professional colorists.
I remember being a bit intimidated by the speakers bookending me ... and the packed crowd! ... but blown away by walking around in front of the something like 50" Grade 1 HDR Reference monitor that Flanders provided for that. Just ... wow.
That said, due to the problems still with screens not doing well with HDR, I don't actually recommend folks work in HDR unless they have a specific reason yet.
In Premiere, the Source monitor shows the 'original' image, straight outta the cam, and if log, that's what you see ... not the after-transform to linear space image of the timeline and Program monitor. That confuses people at times.
Next ... you haven't told which specific build of Premiere you are working in ... and the changes during the 24.x series were major build to build, but massive between the last 24.x and the first 25.x build. So which build is crucial.
For whatever build you are using, please do a screengrab of the Lumetri panel's Settings tab ... the one named Settings. As that is the home for all color management in Premiere now.
I would recommed for your workflow, if you want to risk staying in HLG/HDR, setting display color management, extended dynamic range if available. auto detect log, and auto tonemapping to on. Set your sequence to HLG. Use only export presets that include HLG in the preset name.
Not that I actually recommend working in HLG, but ... if you must ... and let's see your screengrab. Of the entire Lumetri Settings tab, with all sections twirled down/opened.
Copy link to clipboard
Copied
Appreciate your insights! I am using version 25.1
I have attached the Lumetri Settings tab screenshots, of all the sections. None have been touched, all default. If I drag an drop a different video into the timeline, it stays the same original color.
Copy link to clipboard
Copied
I'm not interested in any of those.
I asked for the SETTINGS tab ... not the Edit tab, of Lumetri. The Settings tab shows all the color management stuff.
Copy link to clipboard
Copied
Copy link to clipboard
Copied
As there are so many possible things one might need to do these days, there have to be many options. AND ... the user has to take control. Set those for what you need for each project.
Display color management and (on Macs) extended dynamic range should be on for nearly all workers. Unless you know solidly why you turn them off. (I doubt more than 1% would qualify for that ... ahem ... )
Auto detect log pretty much should be on for everyone ... and as all HDR is log-encoded, even for HDR workflows.
Now ... you have a Rec.709 sequence CM there, and I would recommend leaving it there, and allowing DCM, auto log and auto tonemap to do the transform to Rec.709. Personally. And then use export presets that do not have either HLG or PQ in the preset name for solid Rec.709 exports.
If you want to export HLG, a form of HDR, then set all as above except set the Sequence space to HLG. And use export presets with HLG in the preset name.
The issue of Apple using incorrect diplay transforms for Rec.709 video in QuickTime Player, Chrome, and Safari ... but only on Macs without Reference modes! ... is separate. It's a pick-you-poison thing we can cover if needed.
Copy link to clipboard
Copied
Hi everyone, I found a quick solution that worked for me if you don't want to read through all the comments!
I went to Lumetri Color -> Settings -> checked box for Display Color Management and Extended Dynamic Range Monitoring, and my color went back to normal. 🙂 Easy peasy.
Shout out to Neil for guiding me in the right direction, but ultimately I had to do some clicking around and this worked.

Copy link to clipboard
Copied
Thanks, but where do you find Lumetri Color?
Copy link to clipboard
Copied
It's the Color Workspace, and of course in the list of Panels in the main menu system .
Copy link to clipboard
Copied
Thanks, I found it and tried. It didn't work. Nothing I'm doing is working. Uh.
Copy link to clipboard
Copied
Start a NEW thread here, with full data ... your machine (CPU, RAM, GPU), your OS, the media in use .... what format/codec and created by what camera or device ... and specifically what you're seeing versus what you expect.
Your full Lumetri Settings tab color management settings top to bottom, every tab twirld open, in typicically 2-3 screengrabs drag/dropped onto the reply box, so we can see them ... not to the 'add files' thing.
MediaInfo is a free utility .... download and install, and you can drag any clip from finder/explorer onto the MediaInfo icon, and it opens with the data of that clip. In MediaInfo, go to the Tree "view", then screengrab the top and video section also.

Find more inspiration, events, and resources on the new Adobe Community
Explore Now
 AdChoices