OK. The printing seems to be working correctly now. I have detailed instructions to follow about what I did that works. Just to be clear, I'm running MacOS 13.1 Ventura on an M1 Mac Mini, printing from Lightroom Classic 12.1 w/ Camera Raw 15.1 to an Epson Stylus Pro 3880 with the Epson SP3880_1262_AM print driver installed.
Step #1 - Page Setup
In the Lightroom Print Module, at the bottom of the lefthand drawer are two buttons. One is labelled "Page Setup…"
• Click on the Page Setup button to bring up the Page Setup dialog.
• Choose the paper size from the Page Size pop-up menu.
It is important to choose the correct paper size and the paper feed option when available. Some papers cannot use the Sheet Feeder option, and the paper choice may be limited in the Print Settings, if you do not choose the paper path based on the paper you are using. For example, if you want to print to Epson Hot Press Bright, it cannot go through the Sheet Feeder. If you choose that in the Page Setup, the Fine Art selection of papers won't be available to select in the Print Settings dialog.
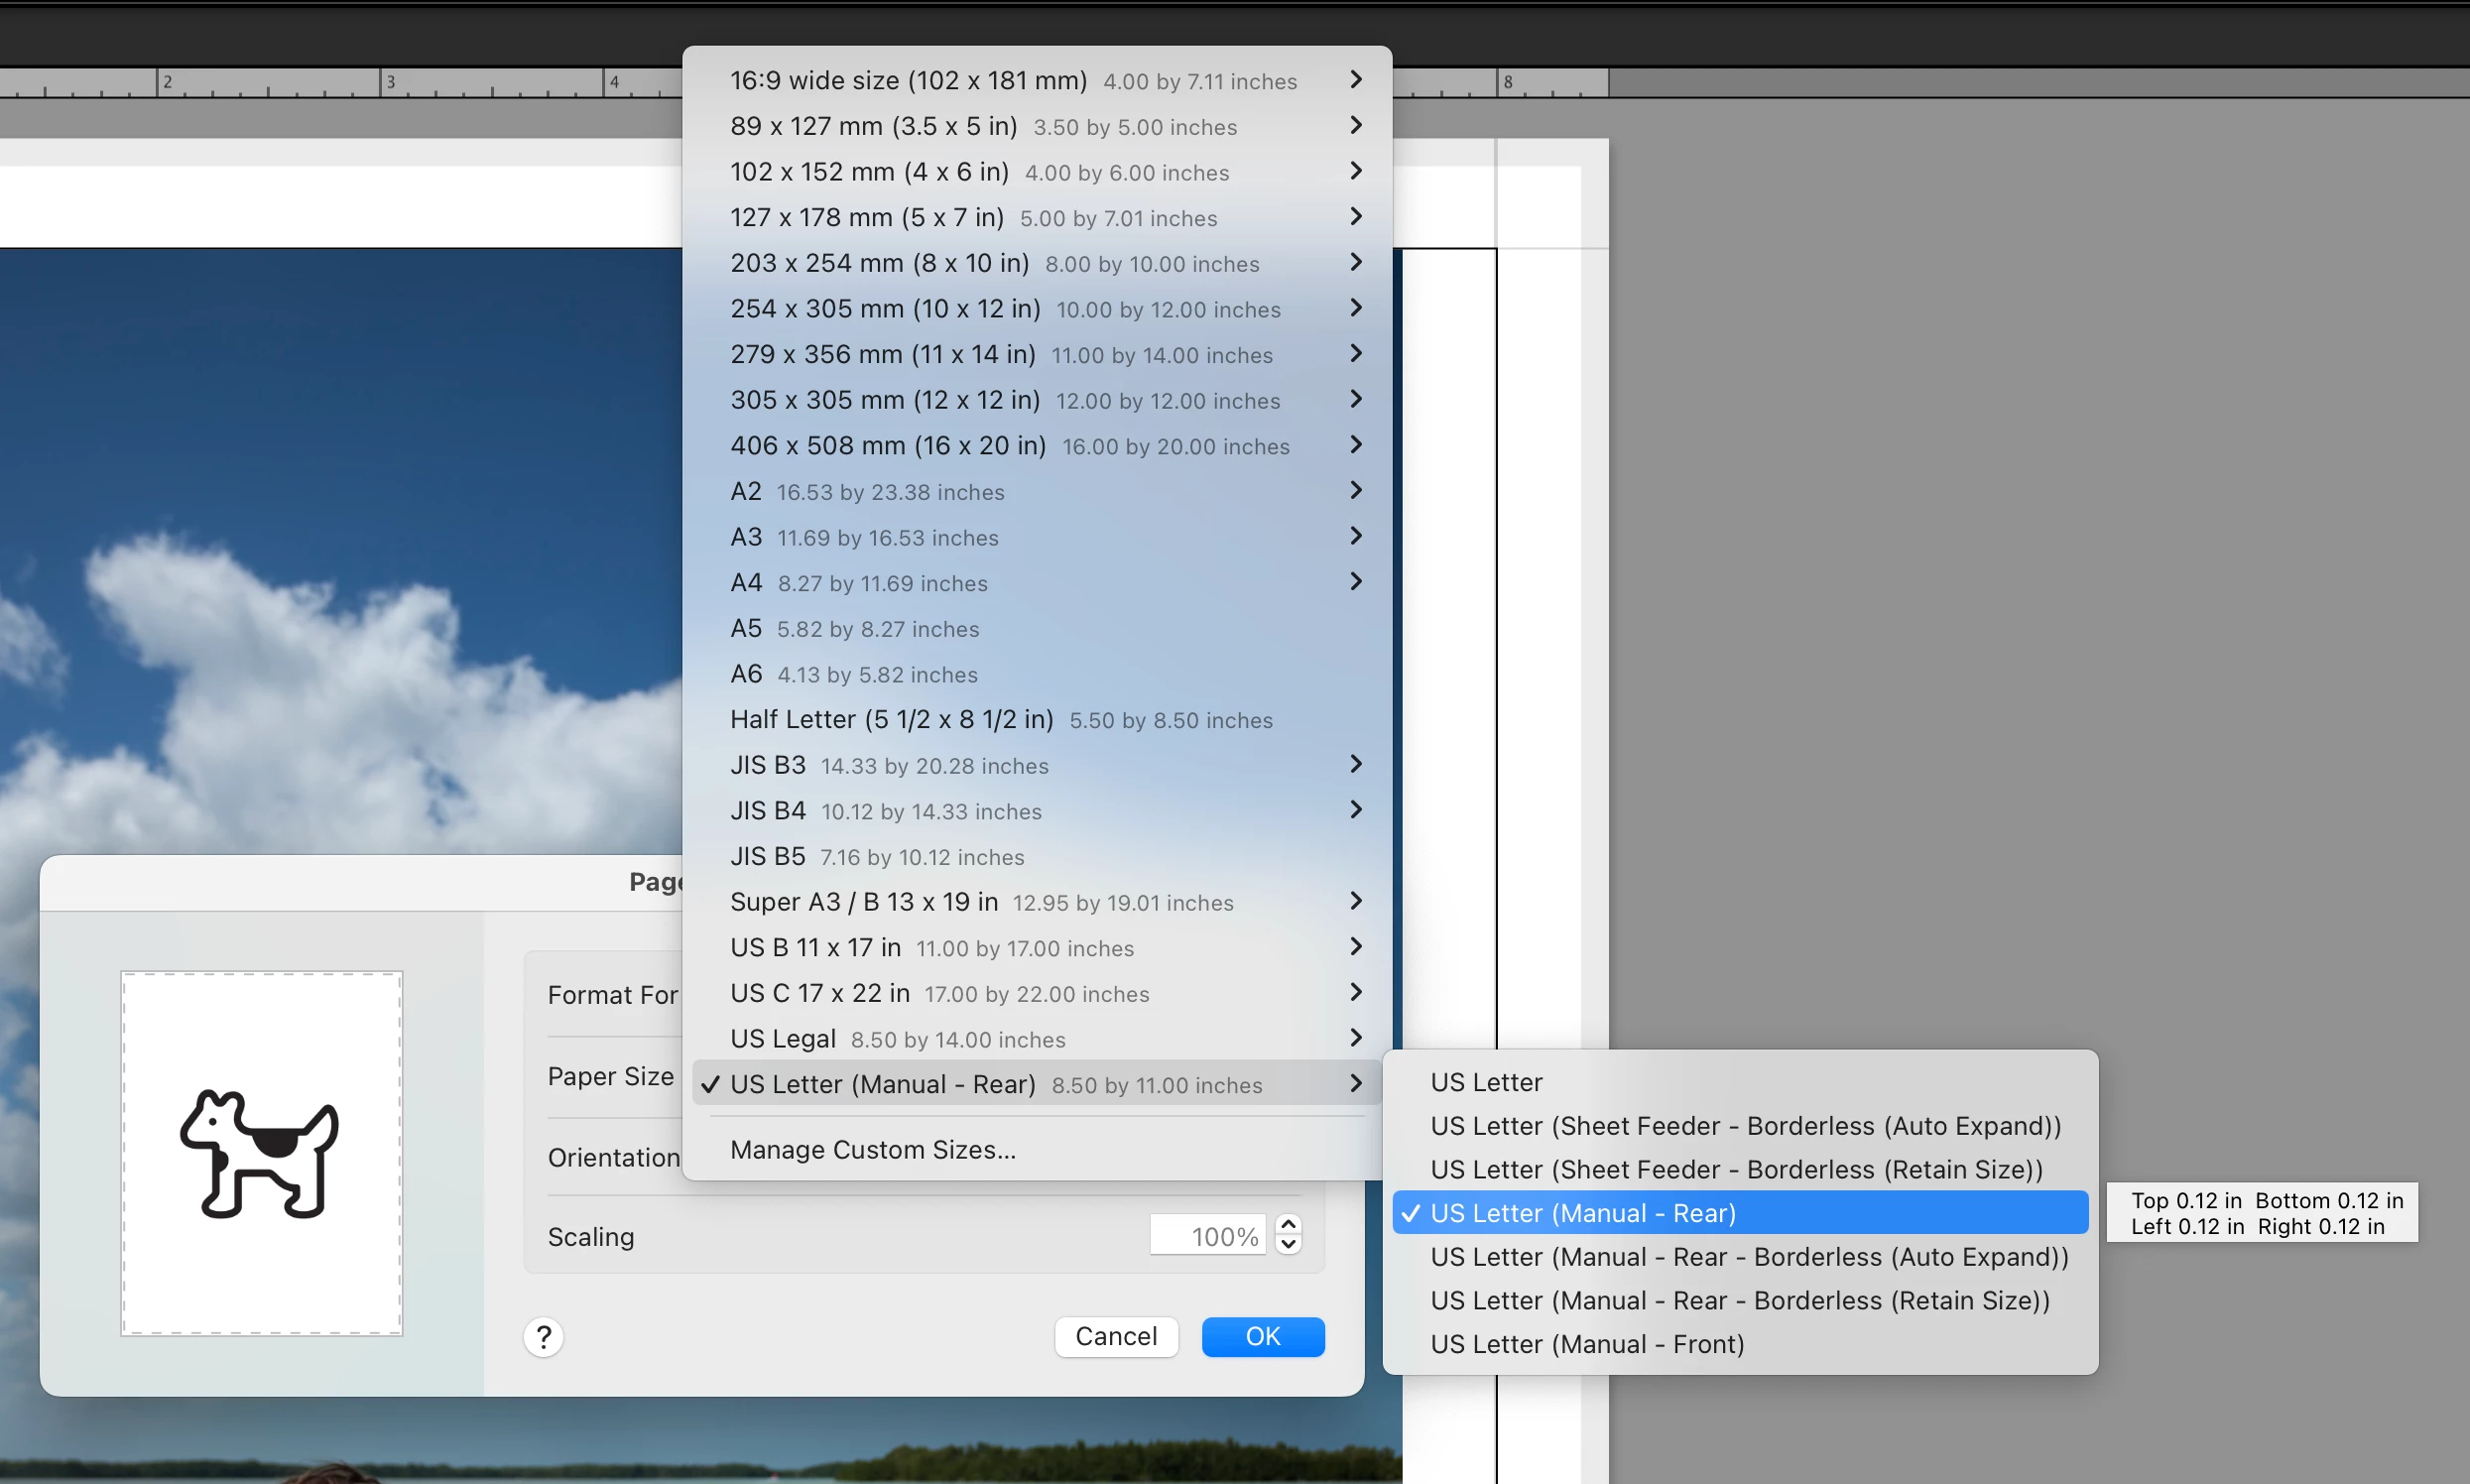
• When done click the OK button to close the Page Setup dialog.
Step #2 - Print Settings
The other button at the bottom of the lefthand drawer is labelled "Print Settings…"
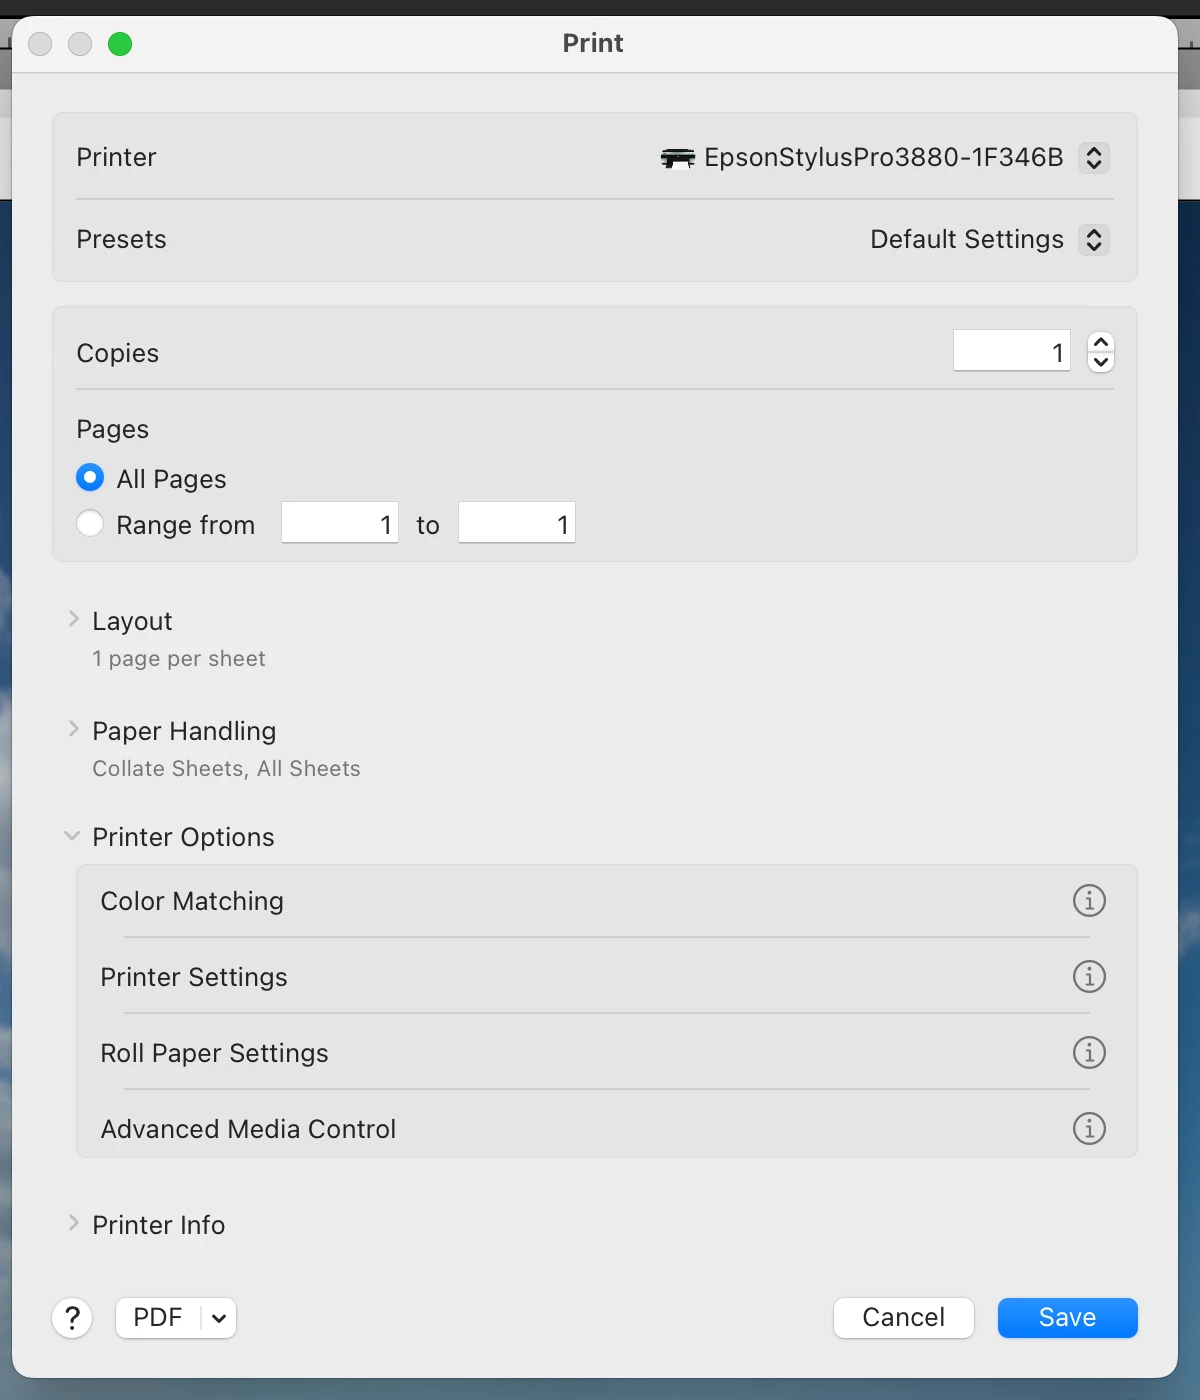
• Press the Print Settings button to bring up that dialog.
• Choose the Default Settings option from the Presets menu.
Step #3 - Color Matching
• If not already open, press the > next to the Printer Options to open the list of further options.
• Click on the word Color Matching to open up its dialog.
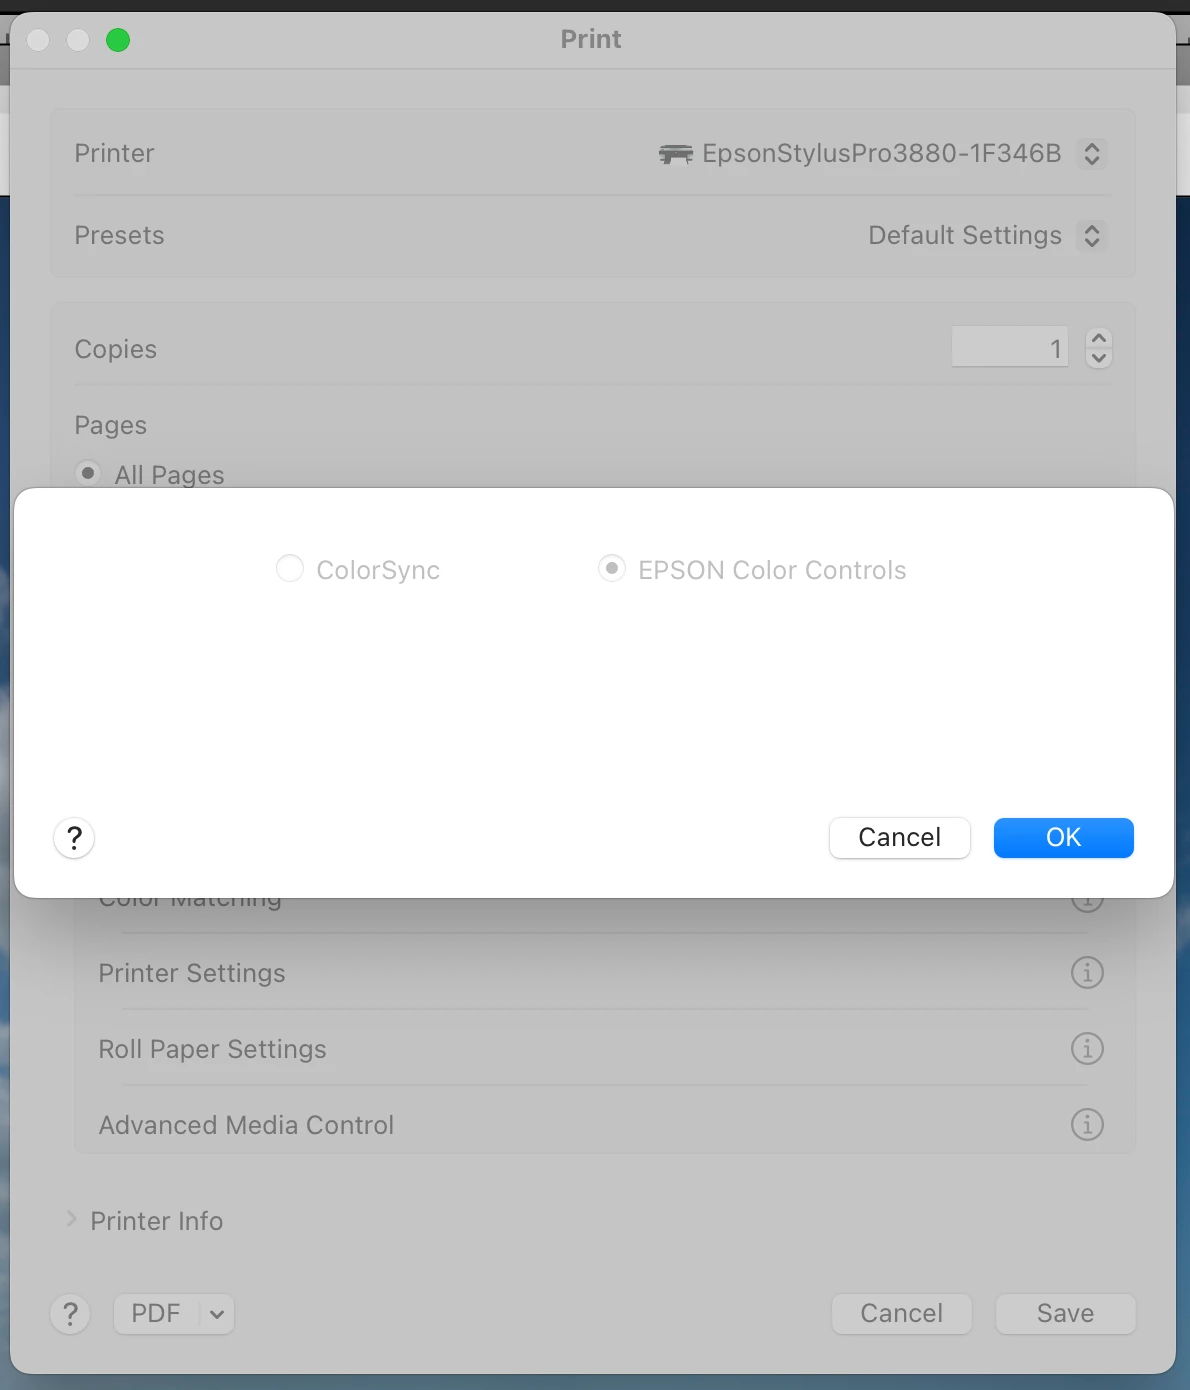
The color matching options should both be greyed out and nonchangeable. It doesn't matter which of them are selected; they are not used. I tested with both and it made no difference.
• Press the Save button to close the dialog. Don't press the Cancel button (more on this next).
Step #4 - Printer Settings
• Press the word Printer Settings to bring up that dialog.
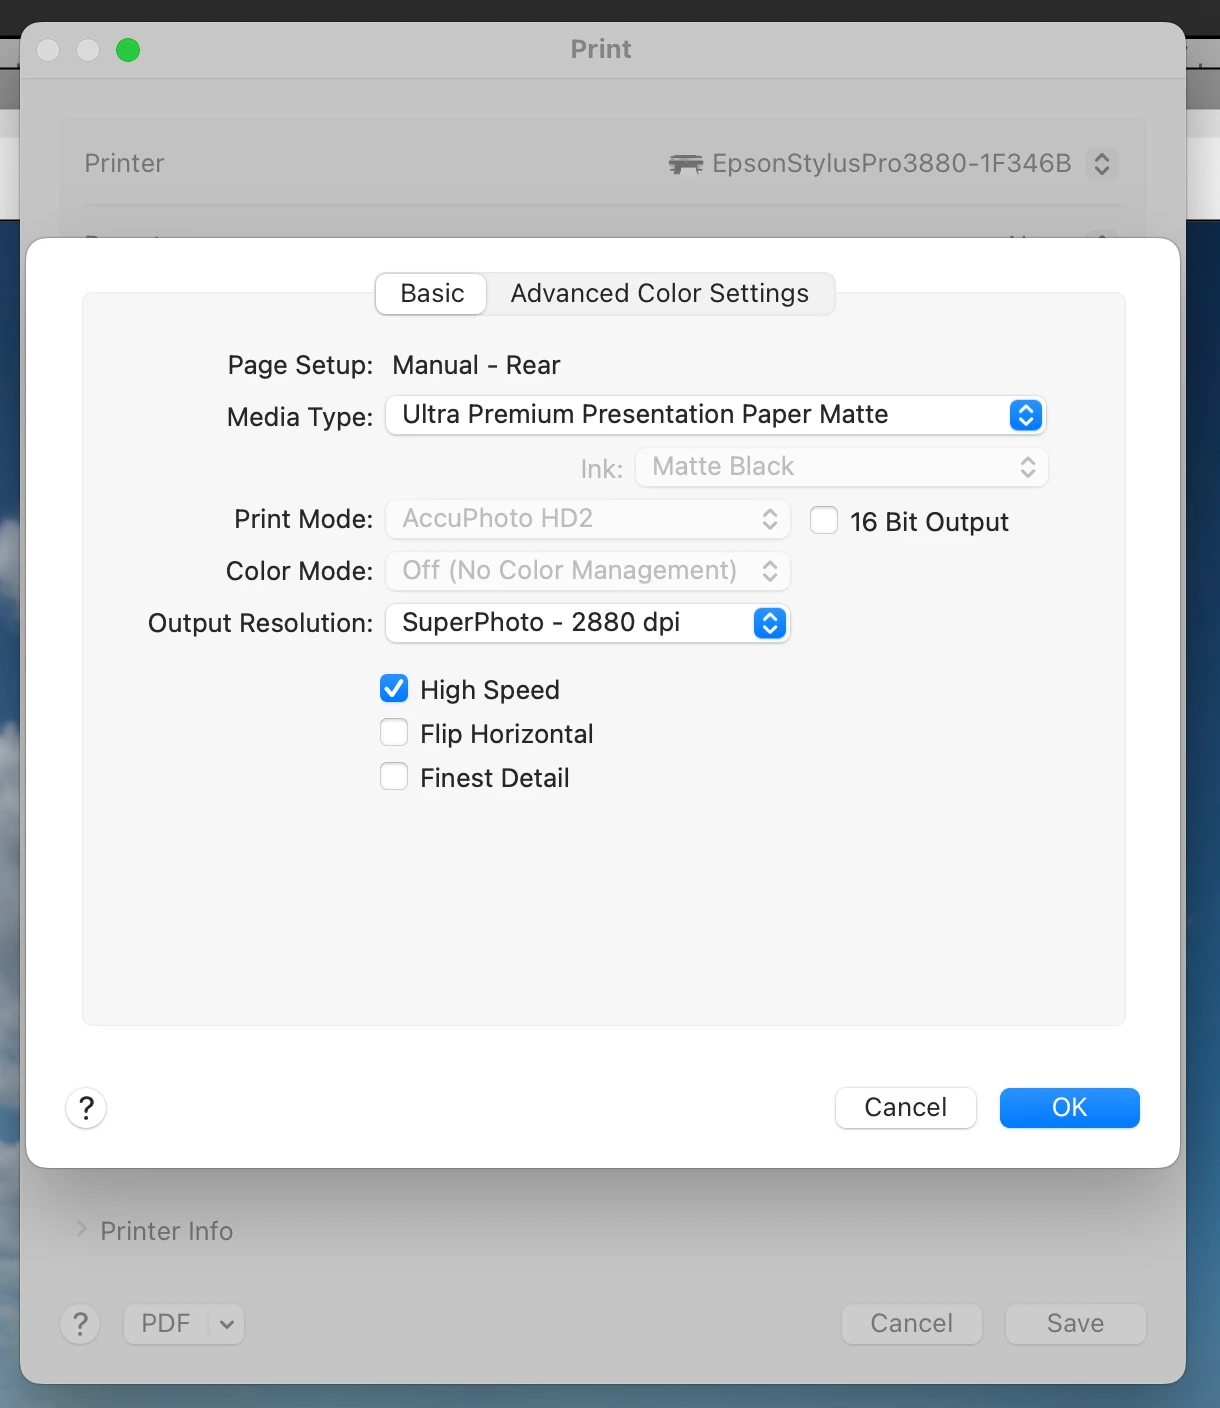
• Be certain that the Page Setup shows the paper path you chose in Page Setup. In my case, I needed the Manual - Rear. This is not changeable here, so if it wrong, close this dialog and then the Print Settings dialog, and go back to Step #1.
• Choose the Media Type you are using. This is the Epson paper closest to what you are printing to. If you are using paper from a different brand, use the setting the manufacturer recommends. When you downloaded the ICC profile from the paper manufacturer's website, it most likely showed this detail on the webpage and/or included a PDF file detailing what to use. For example, I'm printing using Moab Lasal Matte paper. The website suggested choosing Ultra Premium Presentation Matte for this setting.
• Notice other options that are greyed out & not changeable. In this case, the Ink is set to Matte Black, which is correct. The Print Mode is set to AccuPhoto HD2. Color Mode is set to Off (No Color Management). All these are correct for the case of having Lightroom use an ICC profile when printing, instead of having it all Managed by Printer.
• Set other options you prefer, like Output Resolution and High Speed printing.
• Press the OK button to close the dialog and save your choices. NEVER use the Cancel button if you are checking that the options are what you want. Cancel does not leave the settings unchanged. Cancel RESETS the options to the default values, which in this case is not what I wanted. This seems to be an Epson print driver problem, but whatever. Just don't press the Cancel button.
• Back in the Print Settings dialog, press the Save button to save your changes and close the dialog.
Step #5 - Lightroom Print Job Settings
In Lightroom, at the bottom of the righthand drawer is a Print Job panel.
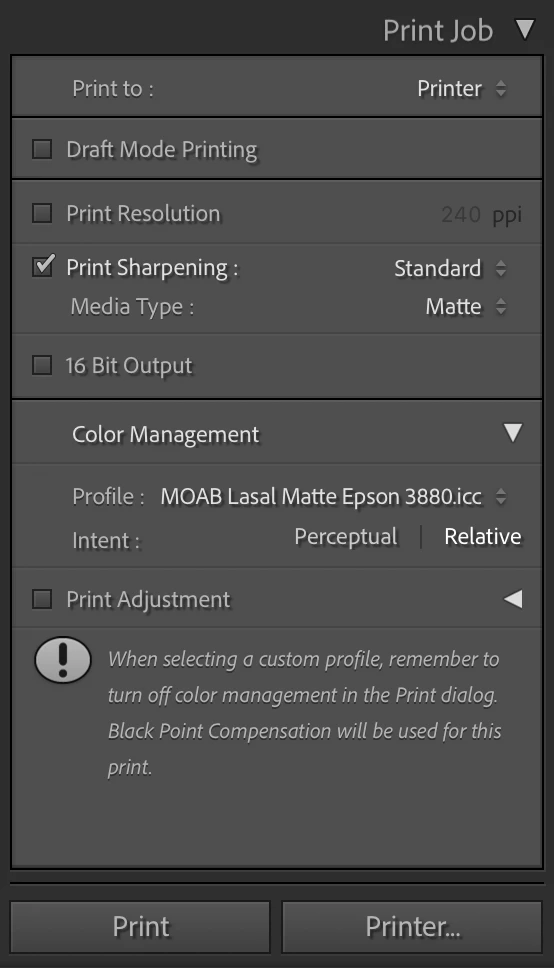
• Check that the top settings make sense to you.
• In the Color Management section, change the Profile to the ICC profile matching the paper you are printing to. In my case, I'm using the generic profile from Moab for the Lasal Matte paper for the Epson 3880 printer.
• When you choose a profile, you may also choose the Intent. In my case, I'm using the Relative rendering intent.
Step #6 - Create a New Lighroom Printing Preset
• In the lefthand drawer of the Print Module is a Template Browser panel. In the title bar of that panel are - and + button. Press the + button to bring up the New Template dialog.
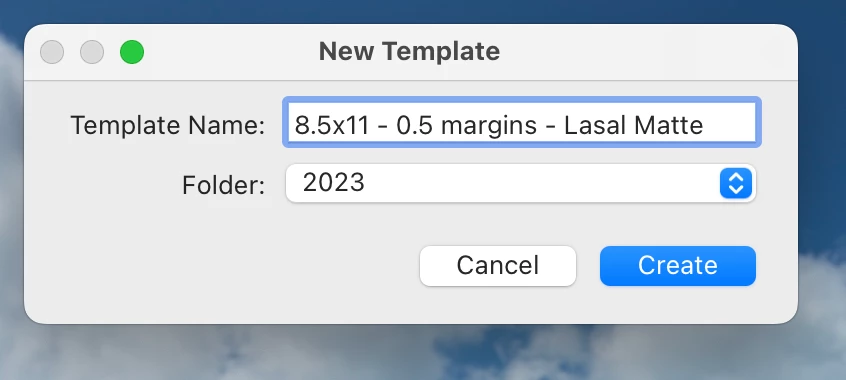
• Give the preset a good, descriptive name and choose the folder for it to be shown in.
• Press the Create button to create the preset and close the dialog.
At this point, you now have an easy way to avoid redoing steps #1 to #5 each time you want to print from Lightroon. You can just use the Template Browser to choose the correct settings and go to Step #7.
Step #7 - Printing
• At the bottom of the righthand drawer is the Printer… button. Press that button to bring up the Printer dialog.
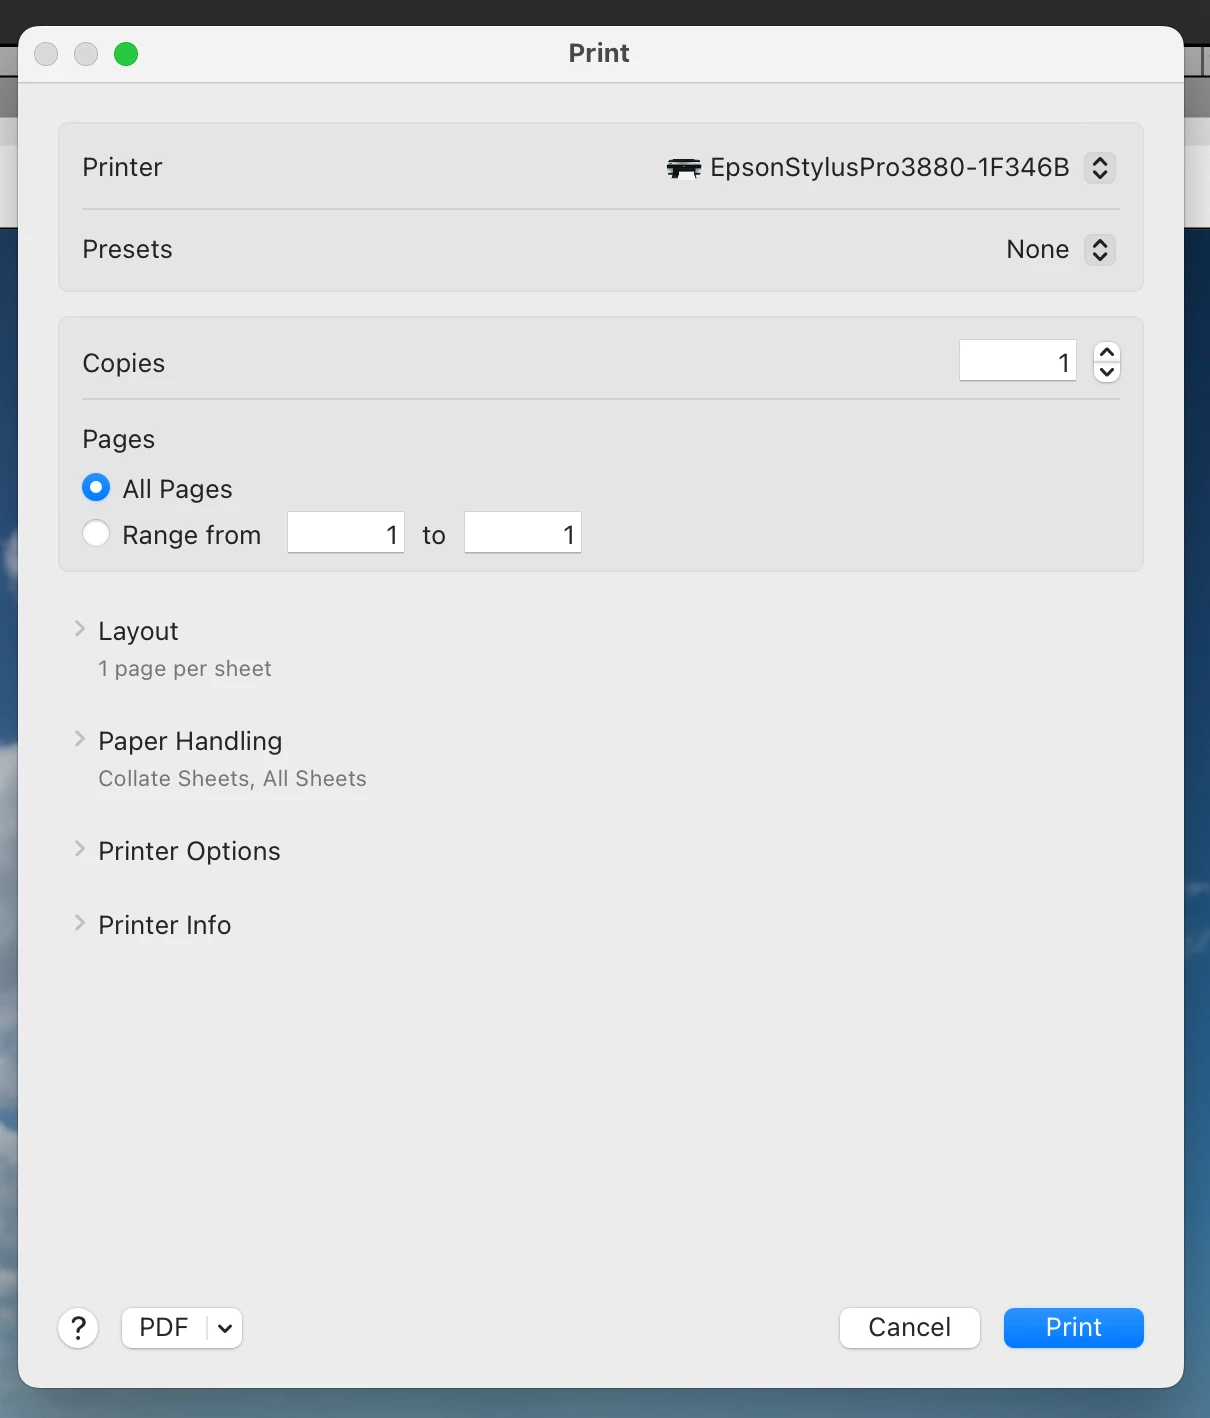
• Notice that the Preset is set to None. DO NOT change this. DO NOT use the Default Settings. If you change this all the settings you previously saved will be reset. For example, the default paper is a luster paper, which uses Photo Black ink. I was printing to a matte paper, which uses Matte Black ink. Choosing Default settings switches the ink, which causes the printer to switch the black inks, which is a waste of ink and not correct.
• Simply press the Print button. Do not check any of the settings, don't do anything except press the Print button.
• If the printer is ready and the paper is loaded, the result will be a print using the ICC profile you selected.
Results: This set of steps has worked consistently for me today. I tested using the Moab Lasal Matte, the Moab Entrada Bright, and the Epson Exhibition Fiber papers. That's two matte black papers and one photo black paper. In each case, the prints look good. And I compared the new print to a previous print that used Managed by Printer. The prints are slightly different, which tells me that the new print used the ICC profile and rendering intent that I had specified.
So, I'm considering the problem solved. I have other papers to try and some custom profiles to create and try. But I am confident that I have a good printing workflow.
Thank you to everyone who particpated and gave suggestions on this thread. Without you I would've continued to be angry and frustrated about a printing system that had been so reliable and consistent in the past. Now I can print to my satisfaction and hopefully have created a resource here that others can use.
If you have questions or comments, please post them and I'll answer what I can.

