

- Startseite
- After Effects
- Diskussionen
- Re: Using After Effects Lower Third Logo in Premie...
- Re: Using After Effects Lower Third Logo in Premie...
Using After Effects Lower Third Logo in Premiere

Link in Zwischenablage kopieren
Kopiert
So I have been learning how to use After Effects and wanted to create a lower third logo to brand our videos. I made it and imported it into After Effects. I tried putting it above and below my main video track, but on top it only shows the logo instead of the video with logo over it, and under it doesnt show it all. Is there something I am missing to make it show correctly? How can make the text only show up over the video like I would with the presets in Premiere. I am just sick of the pre-sets and want to make something that is standard for every video. Thanks!


 7
Antworten
7
7
Antworten
7

Link in Zwischenablage kopieren
Kopiert
Hi RachelF!
My first thought is that your lower third does not have a transparent background enabled! Try exporting from After Effects using these guidelines: Exporting a video with a transparent background.
Let me know if that's the answer you're needing!
-Caroline
Link in Zwischenablage kopieren
Kopiert
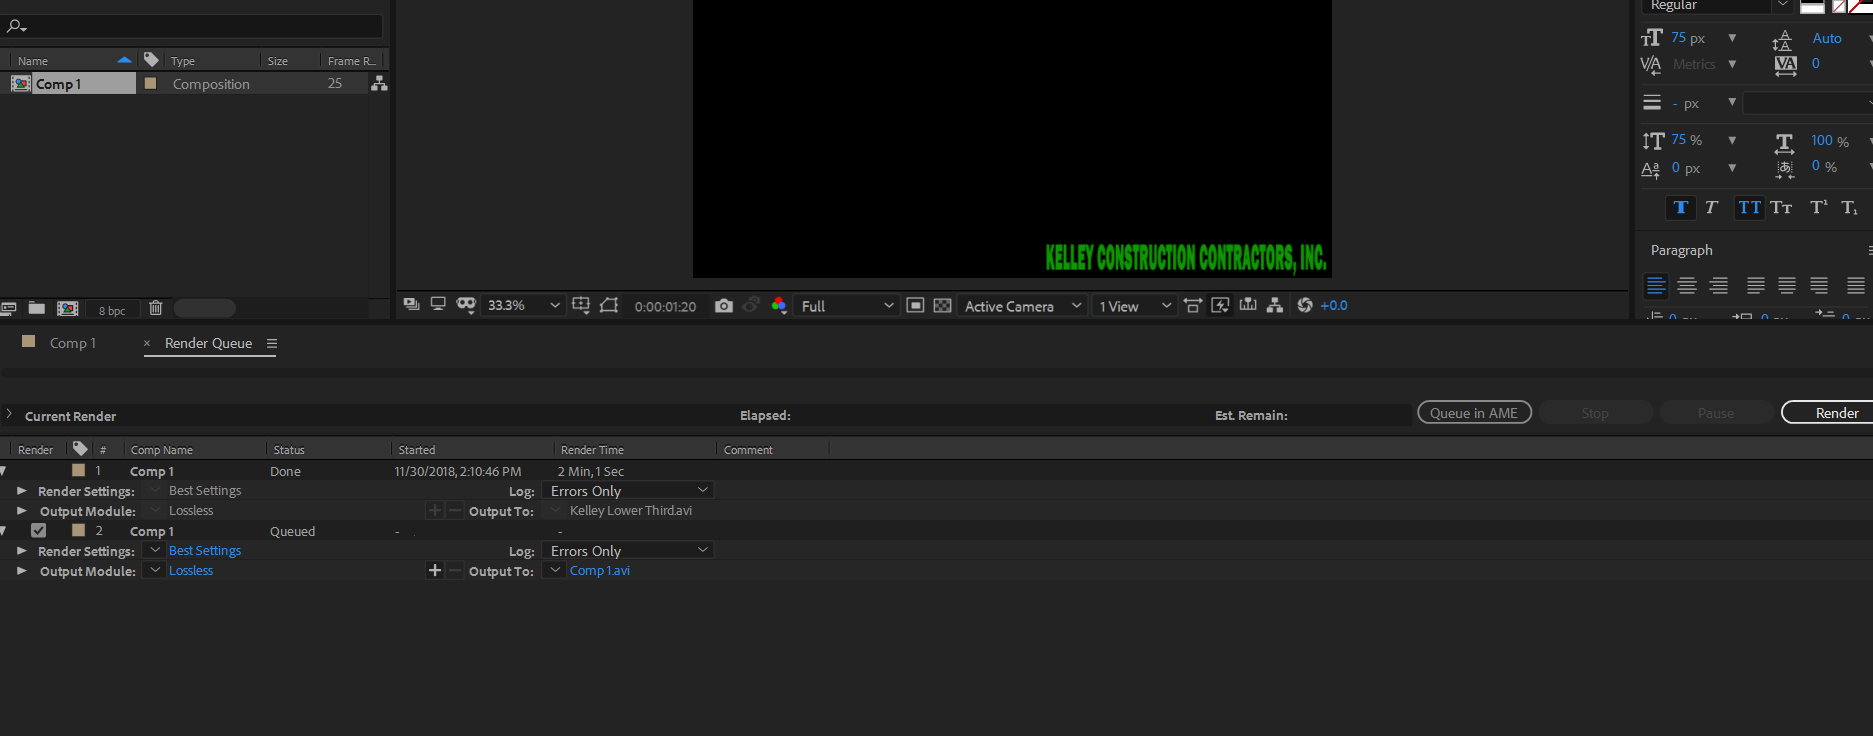
Thanks for the detailed response! One thing I am struggling to find is getting to that settings screen. I am in my render que what do i click on to bring those preferences in first picture on the post you sent?
Link in Zwischenablage kopieren
Kopiert
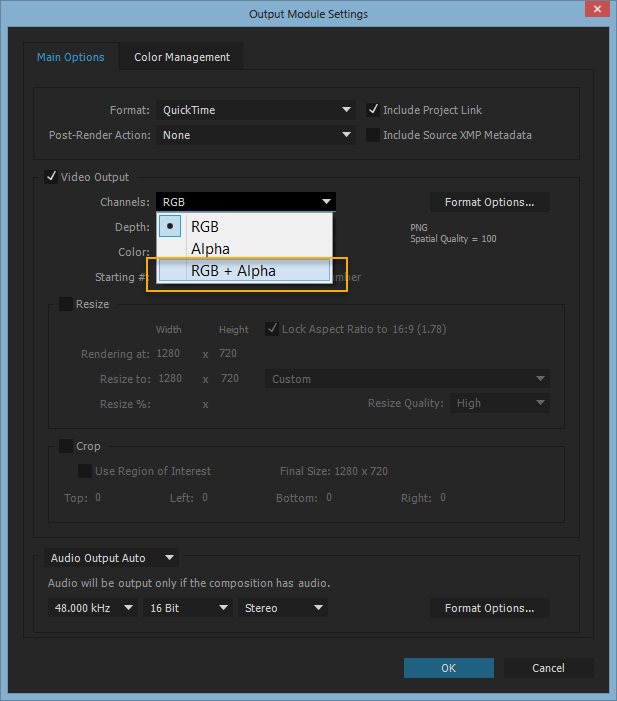
Click "Lossless" where the text is blue and it'll open up that window! The most important image in that link I sent you is the last one, so if you have apprehensions about exporting in the format & codec listed in that tutorial I linked, just export in the formats you want and make sure "RGB + Alpha" is selected. I'm 99% sure it'll still be transparent.
Let me know if that works! Happy to keep playing with it if you need.
-Caroline

Link in Zwischenablage kopieren
Kopiert
...or click the drop down arrow next to lossless in your screen grab and choose "lossless with alpha channel"

Link in Zwischenablage kopieren
Kopiert
Another approach, if using CC 2018 or later, is to export the AE project as a Motion Graphic Template and import it into PPro Essential Graphics panel where it will remain available for any & all new projects going forward..
IMO the CC 2018 .MOGRT capability is the greatest thing since sliced bread... 😉
Link in Zwischenablage kopieren
Kopiert
For anyone interested in the mechanics of this, it is super well covered by Jason Levine in these two videos:

Link in Zwischenablage kopieren
Kopiert
If the logo you want to use is static, as it seems to be in the screen dump, i would have just saved it as a .psd file. It saves HDD space, exports with alpha by default. Select the Comp and go to Composition > Save Frame As > File and name and save the file. Import the .psd in Premiere Pro and click OK and just place the .psd file above the video. Done. 


Weitere Inspirationen, Events und Ressourcen finden Sie in der neuen Adobe Community
Jetzt ansehen
 AdChoices