Exit
  • Global community
    • Language:
      • Deutsch
      • English
      • Español
      • Français
      • Português
  • 日本語コミュニティ
  • 한국 커뮤니티
0

Adobe Premiere Pro Increasing Brightness and Contrast Upon Import

Community Beginner ,
May 07, 2024 May 07, 2024

Hello,


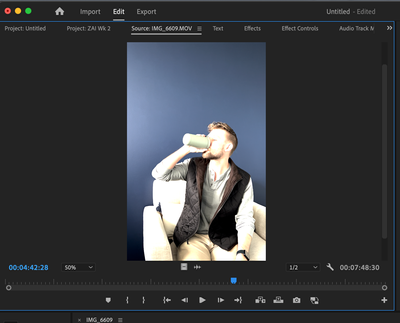
I am trying to edit a video in Premire Pro. However, something is cuasing the video ti display with increased brightness and contrast when I import the file into my project. I have tried doing File > Import as well as dragging the video into the project and both import methods are seeing this issue. Anyone have any ideas of what's causing this? My app is up to date and. Attached is how the footag elooks in QuickTime vs. immediately importing into Premiere.

Thanks in advance!


Screenshot 2024-05-07 at 10.53.56 AM.pngScreen Shot 2024-05-07 at 10.52.24 AM.png

Bug Unresolved
TOPICS
Color , Import and ingest
1.9K
Translate
Report
Community guidelines
Be kind and respectful, give credit to the original source of content, and search for duplicates before posting. Learn more
community guidelines
1 Comment
LEGEND ,
May 07, 2024 May 07, 2024
LATEST

Basic Color Management 101 .... which, due to the coming of HDR formats, we all need to learn and deal with now.


Go to the Color Workspace, Lumtri panel, the SETTINGS tab. The one named Settings.


For your setup, Display color management should be set to on, and as you're on a Mac, Extended Dynamic range also.


Auto Detect Log and Auto tonemapping should both be on.


Decide whether you want normal video ... SDR these days, the Rec.709 we've used for years, or an HDR form. Your clip is undoubtedly HLG, a form of HDR. 


Then set your sequence CM to the desired final outcome, typically Rec.709 but you could choose HLG or PQ. HLG is the more common "deliverable" format for HDR workflows, to like YouTube.


Then make sure the export preset CM matches the sequence CM, Don't use a preset with HLG or PQ in the preset name unless that is the HDR format your sequence uses.


The final thing is viewer gamma. A mostly pick your poison thing.


Apple set their ColorSync utility to use the camera transform function of essentially gamma 1.96 as the display transform. Which for broadcast/professional use, Rec.709 display transform is always gamma 2.4.


Except ...that on Macs with "Reference Modes" for their monitors, if set to HDTV ... those Macs will use 'proper' gamma 2.4 for all Rec.709 video.


So some Macs use display gamma of 1.96 for Rec.709 video, some use gamma 2.4 for Rec.709 video, and all everything else uses gamma 2.4.


What a mess, right? Well, all pro video is graded in "semi-darkened" rooms with neutral (gray) surrounds and behind the monitor. Pretty dark rooms, actually. And they use gamma 2.4 for the monitors, period. But those are being 'fed' by a BlackMagic or AJA device, not by the GPU. Anyway.


Viewer Gamma sets the in-Premiere Program monitor gamma. 


Some Mac users will feel more comfortable with gamma 1.96/QuickTime. As this, outside of Premiere in QuickTime player, matches what they see in Premiere. All Macs with HDTV settings, and every other device, will see a much darker image, but do you care about non-Mac folks anyway?


IF you do your color work in that not-quite-black room, and want "general" proper relative results for all screens, then the gamma 2.4/broadcast would be the correct choice. Non-reference node Macs will see the lighter image, but they do on all pro produced media anyway and don't realize it.


Many people don't have that darkened room, and viewer gamma 2.2/web would be the correct choice ... as for colorists, you set the viewing gamma according room brightness.


So it's a pick your poison thing.

Translate
Report