Answered
A step-by-step to re-learn Picture in Picture with white circle
I used to use Circle and Paint bucket to do a Picture in Picture with a border. Since it was made obsolete I spent two hours trying to figure out how to do it from the internet.
I won’t tell you how I managed it in the end, but Adobe help Desk was very patient and finally got it through MY THICK HEAD.
This is for people my level.
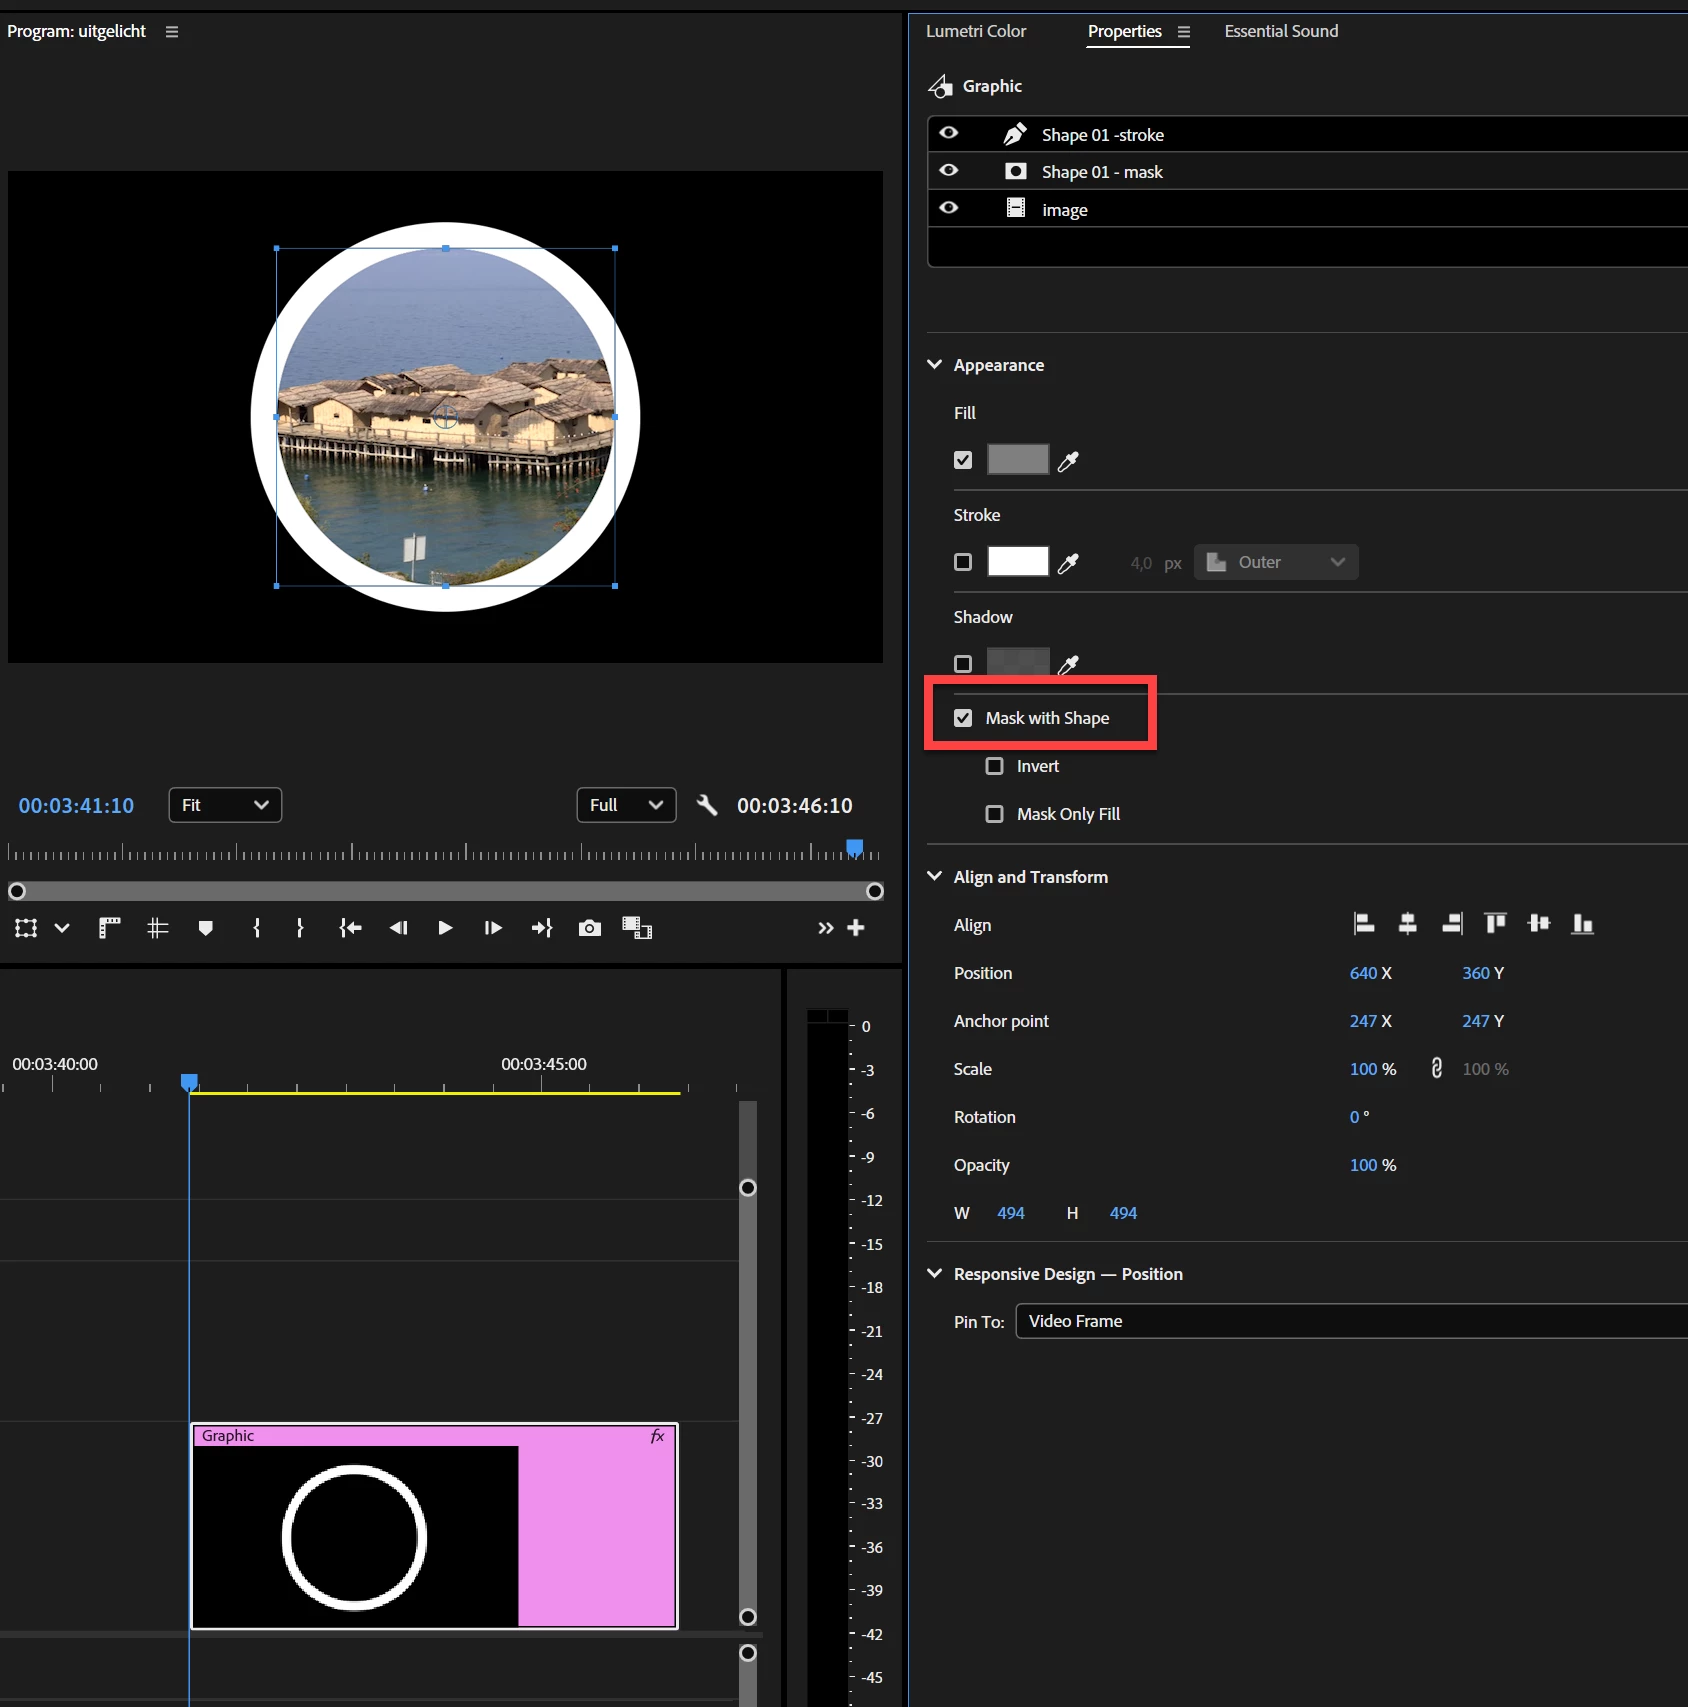
- Put the image to be PiP’d on V4 of your timeline
- The Task is now to put a black circle behind that image. So go to the Ellipse tool in the Timeline panel (the one with the arrowhead select tool at the top - it’s 7 down under the pen tool. Click on it and draw directly onto the big picture panel above (in the Program Panel). This will create an image on your timeline above the PiP image, on V5.
- While drawing the ellipse, if you hold down the shift key, the ellipse will become circular. I draw it so that it fits behind the image.
- Now click on the V4 PiP image.
- Go to the Effects Control panel on the upper left of the interface (if it’s not there, try Shift-5 to bring it up). On the Opacity control there are three symbols - Ellipse, Rectangle, Pen. Click on Ellipse It will create a blue outliner with handles on the image. Fit the blue outline to the inside of the black shape.
- Now move V5 to V3 – ie under the PiP image.
- And the magic happens. You can't believe it, but there the PiP is with a white circle round it. That is – if you’re on the same version as me, and you’re on a Mac, and your keyboard’s like mine, and you’re not reading this in five years time, or any of the other reasons that internet solutions don’t transfer from one user to another.
- Nest the two images on V3 and V4 by shift-clicking on both (or that other way of connecting them) then Control-Click to bring up that long menu that appears with NEST conveniently close to your cursor.
- Now you have a PiP with a white border (no idea where that came from but there must be a way top change the colour). And you can move it around the screen and make it grow in size and fade away as you wish – via the Effects panel controls.
- NB, Once nested, you can shorten the PiP but you can’t make it longer (unless you duplicate it (Option-click and drag) but that may not work easily if you are making the PiP bigger/smaller/rotational.
- And finally, join a hate group pouring antipathy towards the decision-makers who change the app for the sake of it and disrupt the lives – or at least the entire afternoons – of people who thought they were getting on top of the basics.