

- Home
- Premiere Pro
- Discussions
- Re: Beginner with Adobe Premiere Pro CC, introduct...
- Re: Beginner with Adobe Premiere Pro CC, introduct...
Beginner with Adobe Premiere Pro CC, introduction and the start of some questions

Copy link to clipboard
Copied
I purchased Adobe Premiere Elements 2018, and encounter problems with the software running.
There were many pointed fingers as to the cause, machine not big enough, video board not right, etc. After many calls to different support groups (Adobe, Dell Pro Support, Nvidia, a paid consultant) turns out the machine is considered a "beast", lots of HP.
Posted in the Elements forum the problems encountered and was finally contacted by Adobe again.
Their input was essentially and paraphrasing, the machine was fine, the problem was the video board was too smart for Elements, they wanted me to get Nvidia to supply a downgraded driver, which Nvidia would not do.
After Adobe looked at some of the projects I had been doing in Elements they said I should use Adobe Premiere Pro CC. It made no sense to me that I should put a more complicated piece of software on a machine that was having problems with Elements. On top of that the guy recommending the change to Pro had no experience with Pro. Any specific question asked about Pro the response was he supported Elements but could forward me to the Pro Support team. He stated that 20% of the knowledge would transfer from Elements to Pro
I agreed to try the trail version of Pro.
I would say 0% of the knowledge transfers. I spent 30 minutes try to figure out how to import files, and an hour working on how to export in what I think is the correct form for You Tube.
Navigating and finding files is not straight forward.
I am not a fan of the presentation of data in the time line in particular the separation of the video from the audio with the video 2 being on top of video 1 and the audio for video 2 being under the audio for video 1.
After playing around for 4-5 hours I have not had one glitch in the software operation and would have had to reboot the Elements several times in the same time frame.
CPU usage and memory usage is less with Pro than Elements.
I have just made the yearly prepaid purchase of Pro.
Question;
I imported files from the camcorder I am using
My camcorder is set to 1080MP4 50M what ever that is, could not find fps, under AVCHD I have a choice of 60P or 60i. I am not using AVCHD but MP4/iframe which produces separate clips / not encoded clips. Those files seem to imported correctly.
In the tutorials it is stressed that you use the same data characteristics in the files imported, edited and exported.
for import I can only find 30FPS in adobe,
under the properties for the imported file I find
2018_132304.mp4
Type: MPEG Movie
File Size: 3.61 GB
Image Size: 1920 x 1080
Frame Rate: 59.94
Source Audio Format: 48000 Hz - compressed - Stereo
Project Audio Format: 48000 Hz - 32 bit floating point - Stereo
Total Duration: 00:11:25:00
Pixel Aspect Ratio: 1.0
VR Projection: None
How do I tel adobe that is the file properties I will be using?
If I select use source in the export it picks up the same properties.
becoming proficient in editing is next. That promises to be challenging. At lest there appear to be tutorials on the net on how to do that.
Glenn Lever
By the way, how do I get my avatar to appear. I got the message that it had been approved.


 50
Replies
50
50
Replies
50

Copy link to clipboard
Copied
https://forums.adobe.com/people/R+Neil+Haugen wrote
There's a new pdf file out that has a good depth on many things ...
.... but not all.
Copy link to clipboard
Copied
I have copied it and put it on my desk top for reference.
I have watched the Adobe learning tutorials and many tutorials on You Tube including some excerpts from premiere pro 2018 - Lynda
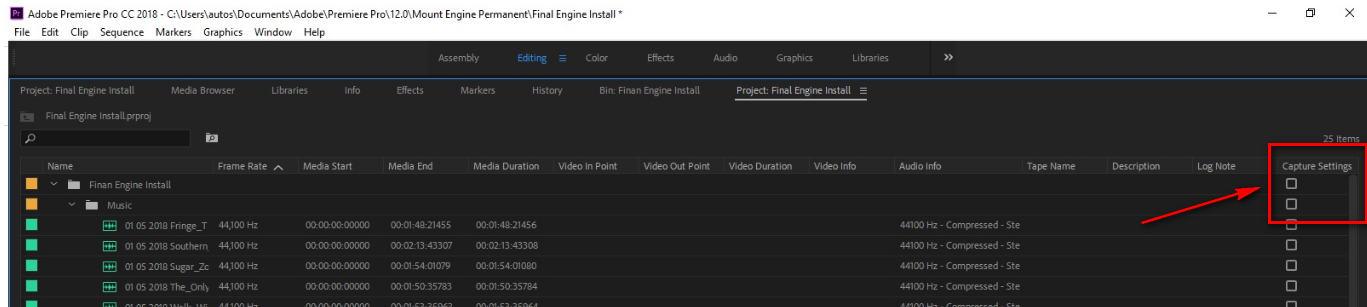
I have seen no references to the box on the left "capture settings". Should it be checked, I would assume it means it saves the values of the files in the bin.

Copy link to clipboard
Copied
I'm missing where the 'capture settings' box you're talking about is ... ?
The only 'capture' I know about is for setting for inputting video tape in the File/project settings dialog.
Neil

Copy link to clipboard
Copied
https://forums.adobe.com/people/R+Neil+Haugen wrote
I'm missing where the 'capture settings' box you're talking about is ... ?
Copy link to clipboard
Copied
Ah, yes, I was looking for something on the left ... it's the other left! 
Neil
Copy link to clipboard
Copied
Leave it unchecked.
Copy link to clipboard
Copied
Capture settings is for tape media.
[edited]
Copy link to clipboard
Copied
Ok, good deal , sorry about the left - right mix up. I'm dyslexic and it bits me every now and then. Tape as in VHS tape?
I truly do try to look stuff up before asking.
Thanks
Copy link to clipboard
Copied
Not vhs but dv. Just forget about this.
Copy link to clipboard
Copied
If you have to ask about tape, then leave it unchecked. It refers to DV and HDV tape.
As Ann said, "Just forget about this."
Copy link to clipboard
Copied
Got it. Thanks

Copy link to clipboard
Copied
Here's a great starting point for all of your work as you learn the ins and outs of Premiere Pro:
Adobe Premiere Pro Help | Adobe Premiere Pro User Guide
I know there is no printed manual in a box, but this documentation is very well-done. It's clearly organized with navigation on the left and you can jump around as needed. A lot of people on the forum will ask you first if you've read the documentation as you move forward, and then (as Ann did above) they'll refer you to Lynda.com or other online tutorials. Between those two sources, you should find everything you need to dive headfirst into a professional-level program.
Buck
Copy link to clipboard
Copied
Moving forward, I have put two different camera shots of the same project (two different angles of the project).
I have synchronized the tracks by linking the audio to the video in each clip and using the synchronize option.
I have two question I cannot fin the answers to.
1) I can find the way to change the color for audio (edit>preferences>labels) what I would like to do is change the audio on the video to green leaving the video track in violet.
2) I do not understand what the blue boxes represent on the left side of the time line.

Copy link to clipboard
Copied
I can answer #2: those blue boxes are used for track targeting and source patching...helping Premiere understand your intent when you drag something to the timeline. Here's a great page about that; be sure to watch the Jeff Sengstack video on this page:
Copy link to clipboard
Copied
Thanks you , got it. track to indicate what is selected in the time line to be acted on, source to indicate where to put media.
Copy link to clipboard
Copied

Copy link to clipboard
Copied
Thank yo very much.
Watched the suggested Jeff Sengstack video on this page:
Patching source sequences in Premiere Pro
Working on color corrections now. Big topic. Need to play with it a bit. currently looking for presets (not a question yet) sliders seem to have little impact. Understand clip verses master
In my wanderings, I have not seen any information on narration, can I be pointed in a direction of tutorial videos there.
Not sure I will be able to spend time on this today.
My avatar has been sitting "pending" any idea how long it takes to get approved?
Glenn Lever
Copy link to clipboard
Copied
I've some basic working in Lumetri posts on my blog.
rNeilphotog – Home for Neil's video post-processing and portrait work.
You might start with this one, it shows what the Basic tab controls do ...
Lumetri Basic Tab: What do the tonal controls really do? – rNeilphotog
There's many other sources of info, some great, some ... not so great.
Neil
Copy link to clipboard
Copied
New question, new thread....
Copy link to clipboard
Copied
That is a pain as that spreads all the information all over the place.
Copy link to clipboard
Copied
But for others searching threads for help, it keeps the clarity of the problems being dealt with up. Very useful to the larger group.
Neil
Copy link to clipboard
Copied
I will comply
Copy link to clipboard
Copied
You can bookmark your threads.
If many questions and answers end up in one thread it becomes very unclear.
Copy link to clipboard
Copied
I have worked with Pro now for 14 days.
It is way more complicated than a product I want to work with.
I am not saying it is not an excellent product, just that for what I am doing it is more then I need.
I have called an canceled my trail period and received a full refund.
I have received several calls from the engineers at adobe on the Elements problem, must be I am not the only one. I have provide my system configuration, brand name and shooting format of the cameras, and a sample video.
Supposedly they are trying to work with nvidia an come up with a driver that will work, no promises they will find a solution and not sure I would be notified if they did.
For now I will continue to use the buggy performance issues I have with elements. I did add three more 4 GB memory sticks (ordered four but they sent one wrong board) which now has my memory at 28 GB which does seem to have helped some (way more then what adobe says is needed). How to install memory into a Dell Precision T8510 - YouTube
So for now signing off. Thanks for your help and guidance.

Copy link to clipboard
Copied
glennl52077132 wrote
1) I can find the way to change the color for audio (edit>preferences>labels) what I would like to do is change the audio on the video to green leaving the video track in violet.
With the video and the audio in the same file, the label color will always match.
For the video label color and the audio label color to be different, they need to be separate files.
A quick way to create a copy of the audio and keep it in sync with the corresponding video is to send it to Adobe Audition, even if you're not going to edit it in Audition. The default label color for an audio file sent to Audition is "Carribean", but like any other source footage it can be changed to any label color.
To send an audio clip to Audition, right-click on the Clip Boundary in the Timeline and choose "Edit in Adobe Audition".
If you decide to use this workaround, simply quit Audition after it opens. The copied audio will be stored next to the original clip in Windows Explorer or macOS. In the Timeline, the audio copy will be linked to the corresponding picture just as the original audio was unless you unlink it (Clip > Unlink).
If you want to restore the original audio in the Timeline, locate and select the clip in the Project and then right-click the clip boundary in the Timeline and choose Replace Clip With > From Bin.
-Warren

Find more inspiration, events, and resources on the new Adobe Community
Explore Now
 AdChoices