 Adobe Community
- Home
- Premiere Pro
- Discussions
- Re: Color Correction - lighting difference and ski...
- Re: Color Correction - lighting difference and ski...

Copy link to clipboard
Copied
Hi Everyone!
I am looking for some help on a video that I am color correcting from anyone who is exceptionally good at recognizing color differences in images. The lighting changed in the room during the last take and dramatically changed the look of the footage. I am pretty familiar with most of the effects in premiere, but I cannot figure out how to get the two two to match. So far I have been playing with the Luma Corrector, Three Way CC and Lumetri Color effects. I did try the shadow/highlight as well, but not a fan of this.
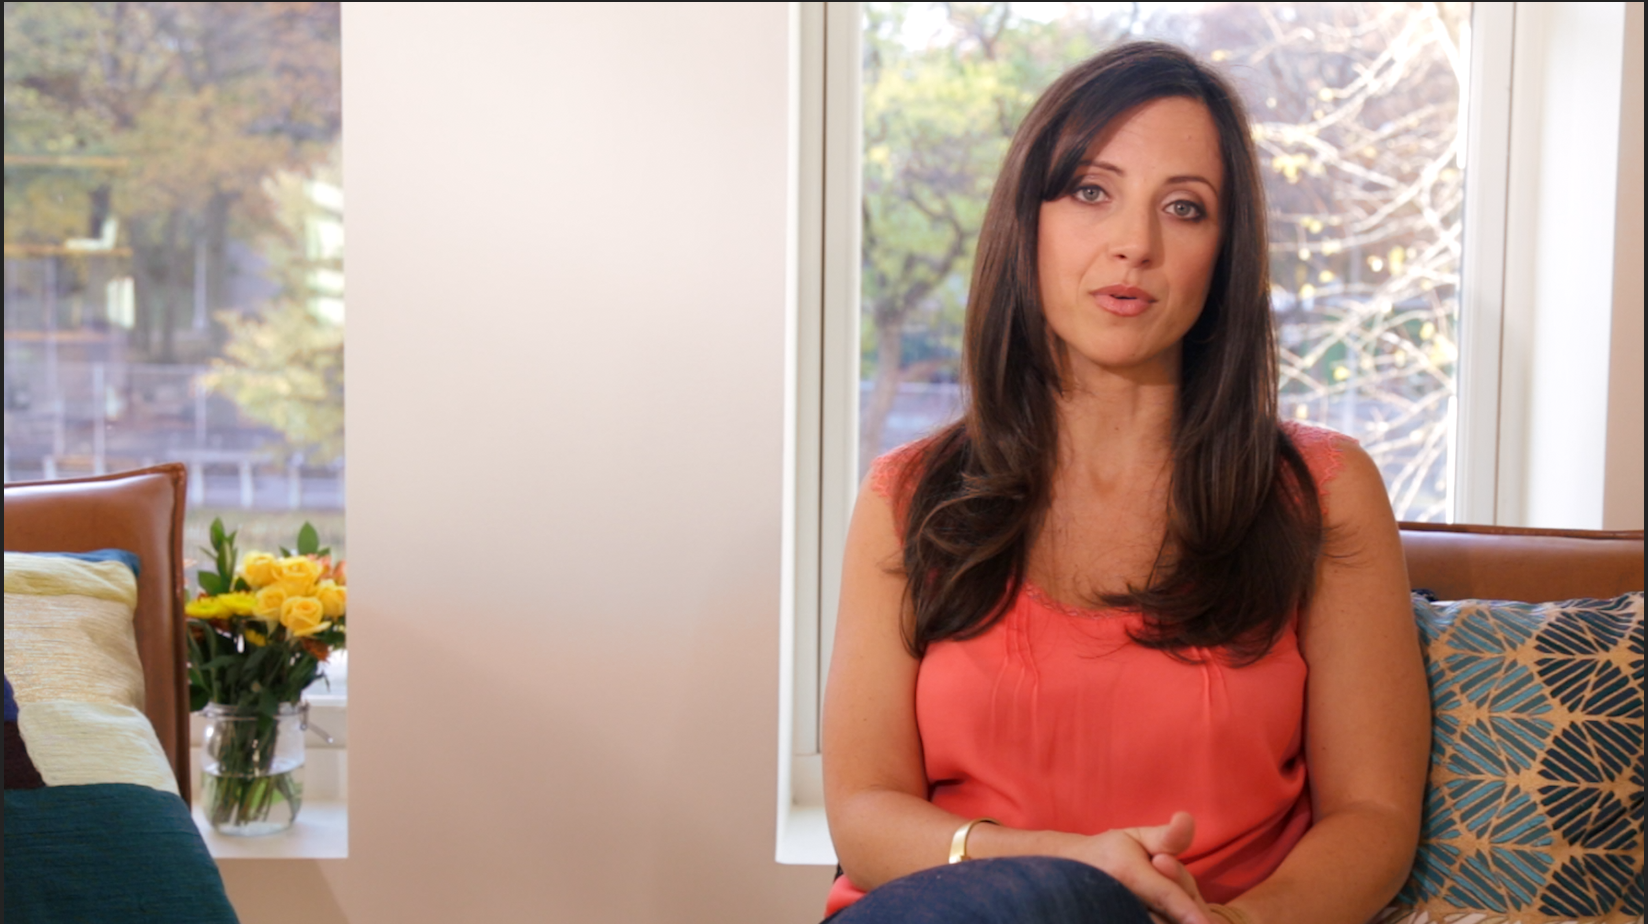
First, I would like to attempt to get the highlights of the FIRST image to match as closely as possible to the SECOND image and then,
reduce the harsh shadow on the neck of the SECOND image here:
(These two are the original raw files, no CC)

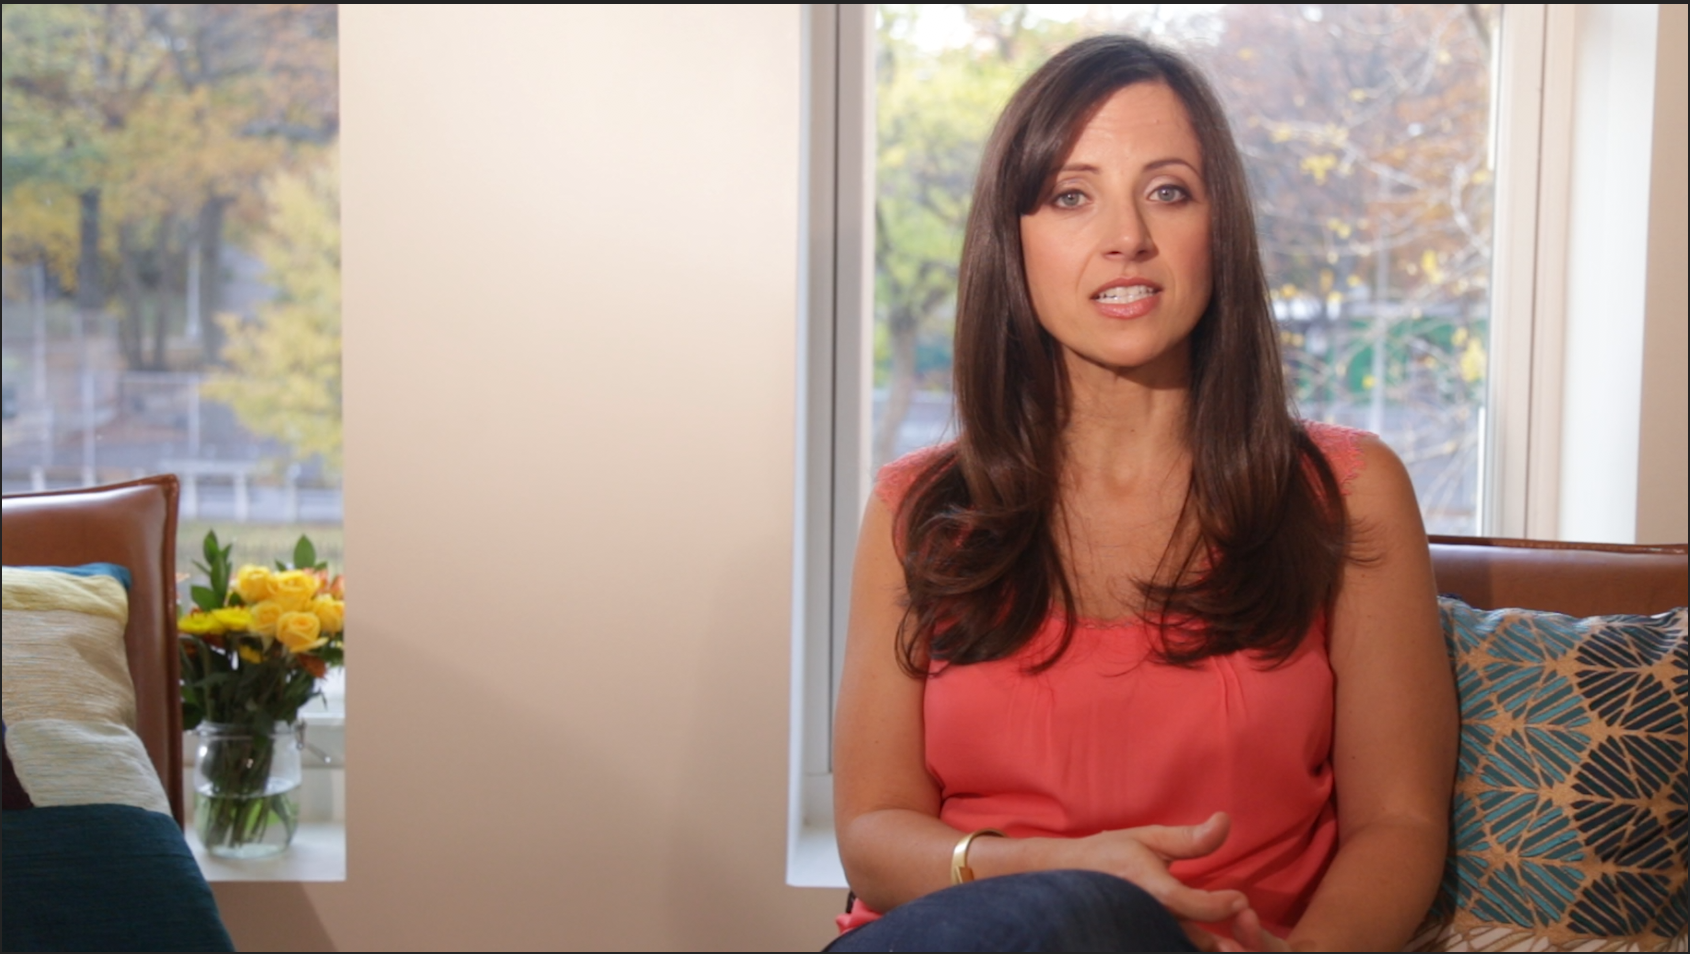
And last, I would like to match the skin tones as much as possible, however, I have not been able to figure out what the difference is between the two. Whether it's hue, saturation, rgb, etc.
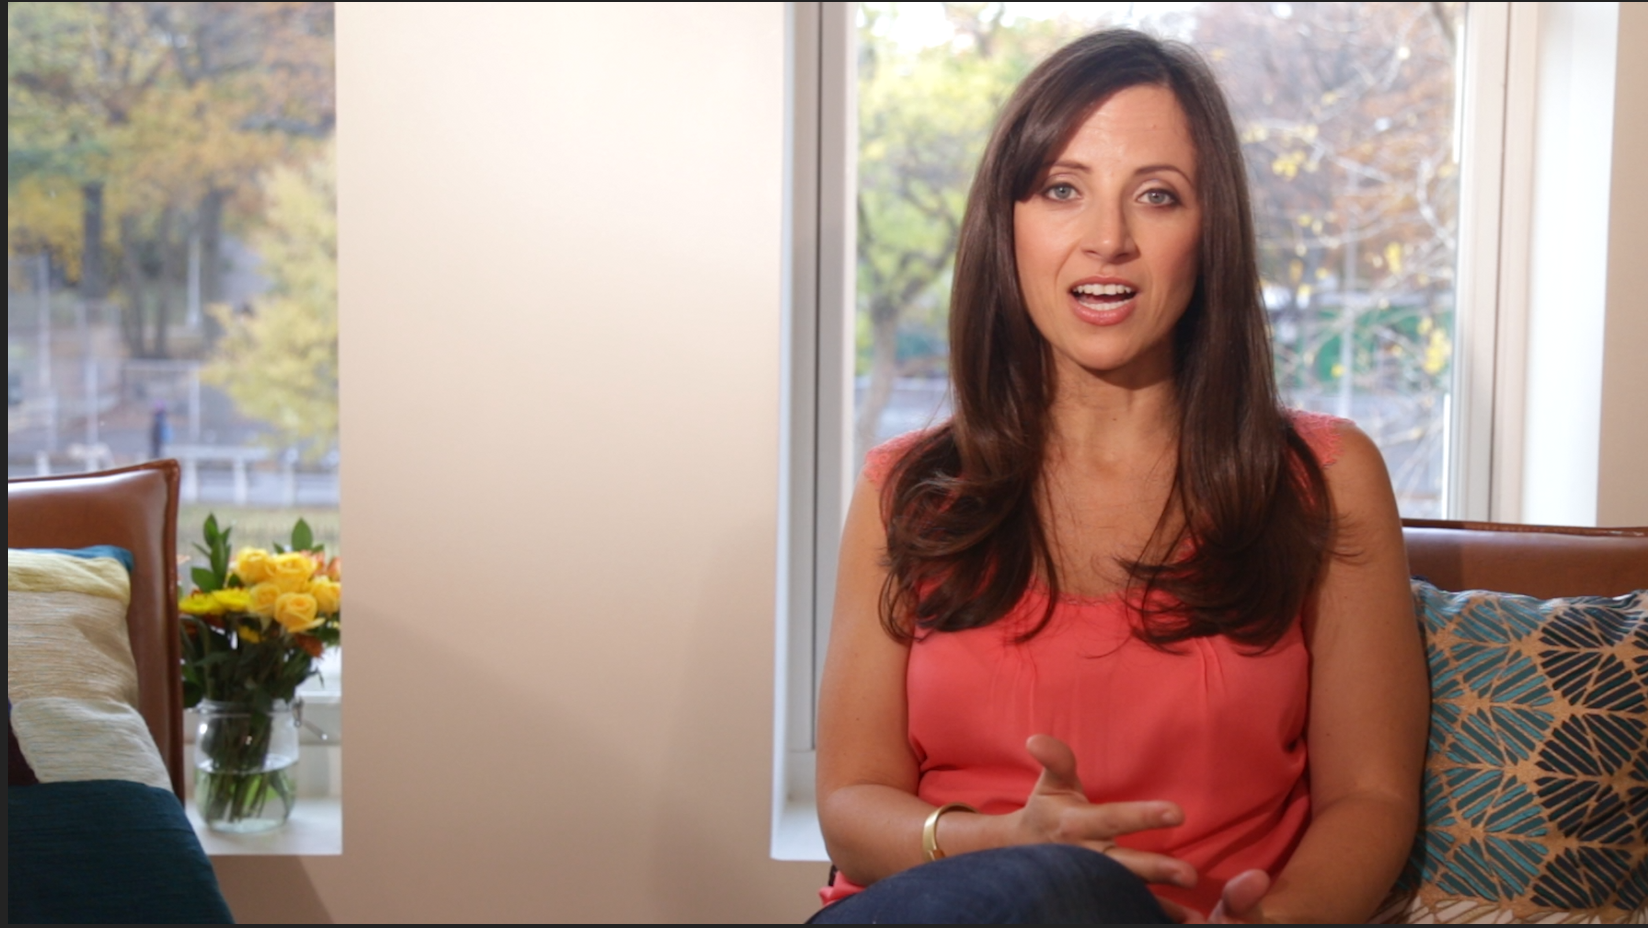
This is what I have been able to accomplish so far, but I really can't figure out what else I can change to make them more similar. There is something in the skintone that is off...orange, pink, too much red...
Thank you in advance.


 1 Correct answer

As Jim queried ... if they're RAW files, you may be able to adjust using the special controls applicable to that. He's got more experience in PrPro with those than I.
As to the differences between the two clips ... first, the biggest change is luma contrast ... which you should see real fast if you bring up the Lumetri scopes. I suggest working with the Lumetri panel, scopes open, and look at the RGB Parade and Waveform (Luma) up together first. Watch the scopes, not the image ... and match the t
... 12
Replies
12
12
Replies
12

Copy link to clipboard
Copied
What format are the RAW files?
Copy link to clipboard
Copied
This is just a MOV file, H.264 codec.
Copy link to clipboard
Copied
As Jim queried ... if they're RAW files, you may be able to adjust using the special controls applicable to that. He's got more experience in PrPro with those than I.
As to the differences between the two clips ... first, the biggest change is luma contrast ... which you should see real fast if you bring up the Lumetri scopes. I suggest working with the Lumetri panel, scopes open, and look at the RGB Parade and Waveform (Luma) up together first. Watch the scopes, not the image ... and match the trace on the scopes of the second clip to the first one. Lowering general contrast some, and especially mids and highlight brightness.
In the Basic tab, try lowering the "contrast" slider a bit, or perhaps the "exposure" slider, and then the Highlights slider, or move to the Color Wheels tab and use the Mids & Highlights luma controls (vertical sliders) to match the scope traces.
After you've matched the tonality ... then check & see what differences you still have in color via the RGB Parade and Vectorscope. The Vectorscope is a color wheel, essentially, with "no color" at the center ... whites/gray/black ... and the strength of color of various hues shown by the excursion of signal out from the center. There's a line on the scope in the yellow/red area ... going up to the left of center ... and skin tones should be fairly close to that line. You can use it to compare the skin hues between the clips, and if needed, grab especially the Mids color wheel and move the center around to more closely align the skin hues between the clips.
Neil
Copy link to clipboard
Copied
After playing with it on my old laptop a bit ... not nearly as good as my editing rig, mind you ... shooternz has a good point. You've got enough areas with contrast differences in both color & luma, and it's gonna be fun to 'match' precisely. Go for the actor in a mask, and work both images towards each other, as it would be very difficult to get the second one clear to the first.
SpeedGrade won't run on this ol' laptop, but ... I'd be tempted to see what I could get from the "match clip" function in Sg if I was at the studio.
Neil

Copy link to clipboard
Copied
i took a quick peak with crop effect on the skin and, *sigh* once again, the missing hue angle tool in lumetri, lol.
Copy link to clipboard
Copied
I know some love & live by the hue angle tool ... as noted in my other post in this thread today, I've not personally found that very useful in most of the stuff I've shot. It would sure be nice to have available, don't get me wrong! The more available tools the better, of course.
I typically will have say a pair of people in an interview, some together, and some individually of each. Hue angle is pretty much useless there ... any change to get skin tones of course changes the entire scene out of whack ... and both people will have different skin tones anyway ... what "fixes" one tight to the line makes the other person look hot or sick.
Neil
Copy link to clipboard
Copied
A wealth of knowledge. Thank you so much. I will certainly refer back to this post in the future for any inspiration I need!
Copy link to clipboard
Copied
Okay I've been working with your suggestions and you were SPOT ON. I did exactly what you said and now there is a minimal difference! I just need to keep playing with the tones now to match them a little closer. I don't even think I'll have to mask the background with this.
Amazing advice from both of you. Thank you so much!
Copy link to clipboard
Copied
Glad to have helped. These things can be such a puzzle. I've had shots that looked way off from each other, but was able to get a pretty good 'match' easily ... enough that no one but me and other incredibly picky sots would pay any attention to the difference between 'similar' clips.
And others ... that looked pretty close ... but took going over to SpeedGrade to 'auto-match' to get in the ball-park, then multiple secondaries to adjust various luma & hue issues ... one in particular, two interview clips where I was sitting down for one, Miriam just stopped the camera, and we reversed places ... and I shot a minute or two of her talking.
I knew her skin tone doth come across yellow/green with magenta peaks and is VERY difficult to grade, but ... the background for some reason was also showing differently both in contrast & hue. The lights were just "on" the entire time, nothing adjusted ... and matching those two clips were a right bast***. Just to get the backgrounds to look like a 'similar' studio background was used.
We've done several forth & back interviews, never had any issue but her skin tones to deal with.
And ... this is why I don't find the 'hue' wheel tool of the old color corrector much useful. If I'm swapping out people in the same set, any work to slide the hue ring around makes the entire shot, background & all, out of whack. With multiple people, when you have as disparate of skin-tones as I often work with, sliding to get one 'on the line' will make the others really ... odd. That "skin line" is actually a target area ... and exact placement will vary depending on the genetic background of the subject (skin type ... say Mediterranean "olive" tones are very different from my Norsk background), whether they're hot or cold, tanned or not ... hair color ...
So it's getting "comfortable" skin that matters mostly. And of course, one person sitting in the same seat in the same room pretty much needs to be spot-on similar ... and if you can't ... edit tricks apply!
Throw in a bit of b-roll ... a still or something else applicable ... between the two clips. Just a couple seconds 'away' from the scene will make the thing 'seem' the same coming back if it's just pretty close.
Neil
Copy link to clipboard
Copied
Wow, amazing R Neil Haugen...thank you so much for your generous response. I'm going to start working with these suggestions and will let you know what I get and if I have any trouble. Thank you so much!
Copy link to clipboard
Copied
Your first friend will be a mask around the actor.
The shot does not look as if it has a camera pan or movement so you can use the bg ( window bg space) as a constant by using a mask around the "actor". The mask allows you to use bg from one shot on the other shot with the issue.
'
To a degree that gives some continuity of lighting and geography.
Now you have to deal with the actor inside the mask..
Assume that the hard shadow is not entirely fixable and it will be accepted by a viewer if you get most of the rest sorted.
It will be a matter of playing with chroma and luma controls.
Dont just try to adjust the clip with the issue. Bring the other clips some way towards the match as well. ie a compromise.
Lightly de-saturising your clips is another friend
Copy link to clipboard
Copied
Thanks Shooternz. Just to make sure I am on the same page as you, you are suggesting that I take the background from the first clip and put on the second correct? Then take both of the images of the actor and bring them slowly toward each other.
I was attempting this as well. The harsh shadow was extremely difficult to work with. What tool would you precisely work with, to fix that?
Also, are you or @R Neil Haugen able to tell what the main color difference in the skintone is?
And lastly, what tools would you recommend to work with the chroma and luma controls? I usually use the three way, luma corrector and the lumetri color. Would you go another route?
Thank you!

 AdChoices