- Home
- Premiere Pro
- Discussions
- Disable Auto Keyframing in Track Effects
- Disable Auto Keyframing in Track Effects
Copy link to clipboard
Copied
I have a audio tracks pointing to a audio sub track which I've applied an EQ effect. When I'm tweaking this effect it auto generates keyframes in the track properties when Im playing back trying to correctly EQ the whole track. How do I disable the effect fro keyframing at all?
-Thanks
 1 Correct answer
What you are describing is the audio automation system, specifically that it appears to be in Touch mode. In Prmeiere, you can record paramter actions while playing and they will be written as keyframes and played back.
For Clip Effects: Look in the Audio Clip Mixer, and the keyframe button to the right of the Mute and Solo buttons. If it is highlighted blue, any parameter changes made during playback will be written as keyframes.
For Track Effects: In the Audio track Mixer, look for the dr
...Copy link to clipboard
Copied
Hi openskies2009,
Could you please elaborate this more?
You can also attach screenshots to explain.
Thanks,
Kulpreet Singh
Copy link to clipboard
Copied
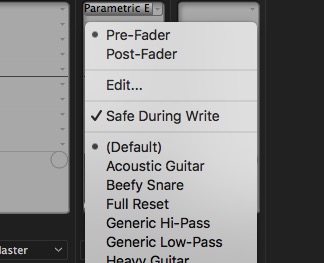
It seems that "safe during write" has something to do with it? But I have to stop playing the playhead for me to adjust any effect 
Copy link to clipboard
Copied
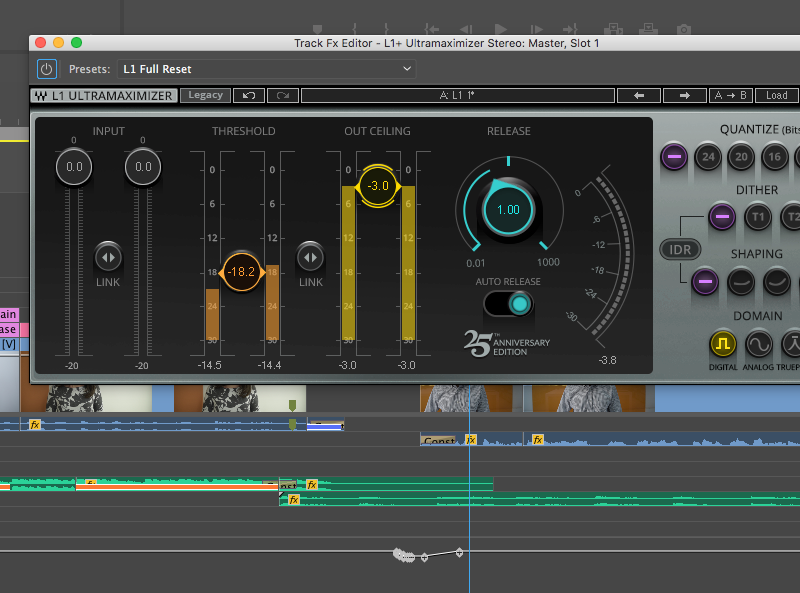
I have this too. When I add an audio plugin on the master track and I adjust the knobs to that plugin, Premiere will make keyframes and snap the dial back into position once I release the button. It's infuriating because I want to adjust levels while the sound is playing but I can't because everything I do make a damn keyframe that I have to delete later. I can't find a way to shut this action off and I feel like I've looked everywhere. It does seem like a more recent problem however. All I know is it HAS TO BE FIXED!
I've attached a screenshot but it's not that difficult to understand the problem. Premiere is auto-keyframing. Plus, it's hard to attach an image when it only happens during playback. Then the keyframes only show up when you press stop.

Copy link to clipboard
Copied
Same problem here. I cannot prevent premiere from automatically setting keyframes if i search for a frequency with the equalizer during playback. That makes it impossible to work with the equalizer.
Copy link to clipboard
Copied
What you are describing is the audio automation system, specifically that it appears to be in Touch mode. In Prmeiere, you can record paramter actions while playing and they will be written as keyframes and played back.
For Clip Effects: Look in the Audio Clip Mixer, and the keyframe button to the right of the Mute and Solo buttons. If it is highlighted blue, any parameter changes made during playback will be written as keyframes.
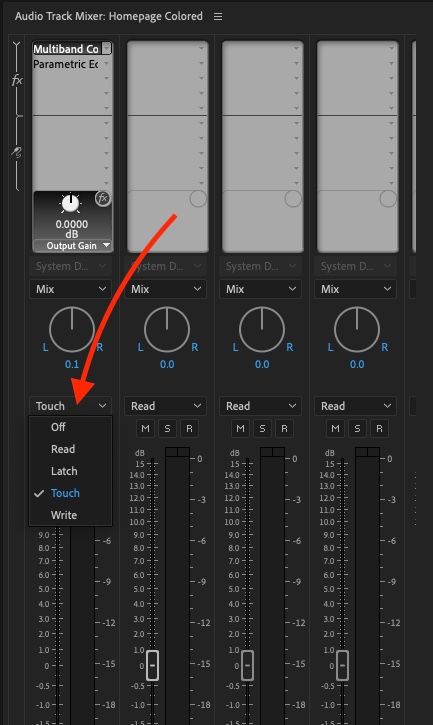
For Track Effects: In the Audio track Mixer, look for the dropdown underneath the pan knob, and make sure it is set to Read or Off, and not to Touch, Latch, or Write. If it is set to "Touch, Latch, or Write" new audio track keyframes will be written during playback.
Copy link to clipboard
Copied
thanks a lot
Copy link to clipboard
Copied
Unfortunately this does not work. It still sets unwanted keyframes in loop mode.
Copy link to clipboard
Copied
I have now found a simple solution. The problem occurs when playing a loop in the effect settings. The settings in the Clip Mixer do not change this for me. But if you play a loop from the in point to the out point in the Sequence window when working with the equalizer, no keyframes are set.
Copy link to clipboard
Copied
Your track is set to either Touch, Latch, or Write. Click the dropdown menu and change Touch, Latch, or Write to Read or Off. This will prevent your audio track from adding keyframes every time you adjust a knob or slider.
Copy link to clipboard
Copied
"The problem occurs when playing a loop in the effect settings. The settings in the Clip Mixer do not change this for me."
Yes, the recordable parameter automation system is the "Touch" system detailed above.
There is also the animation system that can be applied to effects parameters being manipulated in the Effects Controls panel.
In the Effects Controls panel, it will open the effect that is creating the keyframes, then twirl open the "Individual Parameters" sub-section. You will be presented with a long list of the effects parameters. Next to each parameter is a stopwatch icon. If it is blue it means that any parameter changes will be keyframed as the clip is played.
Copy link to clipboard
Copied
2023 and this is still more complicated than it should be. I have a track plugin set to "read". All I have to do is click out of Premiere or out of the Track FX window then click back in and it resets to "touch". Setting it to "read" does not leave it on "read", so I have to keep resetting it! Even when I turn it off, it keeps going back to touch.
Making it more seamless for users that want to live-keyframe track FX is fine, but then make it seamless for those who have absolutely no need for it and want to lock and disable it for good. With no clear or reliable way to actually full-stop disable it or (maybe my biggest problem right now) make it easier to track down which FX have been keyframed, it's a really annoying experience. Some build-in plugins have many parameters, and third party plugins are worse. A third party plugin can have over 100 different parameters. You might have a few parameters burried in this gigantic list of parameters that have keyframes and the only way you can check which ones they are is to either remember every single setting you messed with or go through them ONE BY ONE in order to find the keyframes, select and delete them. I have a pretty standard VO recording that needs to be tonally consistent from beginning to end. I do not need a single keyframe, but after a rogue "touch" setting enabling itself over and over, I have to constantly check if its on "read" or "touch" or waste time going back and deleting keyframes, or start from scratch.
We need a nuclcear option for this. How about a button with a lock icon that will fully disable "touch"? Or setting it to "read" will actually leave it on "read" until you want to change the setting? Or if you select the dropdown, there's a little dot next to only the parameters that have keyframes? Or a button that says "show only parameters with keyframes" or "delete all keyframes".
Copy link to clipboard
Copied
@Anthony5ECB
" have a track plugin set to "read". All I have to do is click out of Premiere or out of the Track FX window then click back in and it resets to "touch". Setting it to "read" does not leave it on "read", so I have to keep resetting it! Even when I turn it off, it keeps going back to touch."
What you are describing seems like it would be a bug. I'm not seeing the same issue, but I'm also not using your projects or your exact steps either. Would you be willing to get on a call with me so I have try to diagnose the issue? (And hopefully get it fixed)
I will send you a PM to follow up.
-Matt
Copy link to clipboard
Copied
The problem always occurs to me when playing a loop in the effect settings. However, when I play in the sequence window and create a loop there with in to out points, no keyframes are set during playback while I change the parameters.
Copy link to clipboard
Copied
For clarification, you are seeing this issue for clips based volume and effects? Or for Track based? They are two different systems with different UI. Most of the conversation in this thread is around Track based automation, not clip based.
Clip based, particularly when manipulating items in the Effects Control panel will drop keyframes automatically. This is how it is designed.
Copy link to clipboard
Copied
My problem is clip based. I would like to change the values of the equalizer live in the effect window in order to find disturbing frequencies without automatically setting keyframes. I can work around this problem if I don't loop in the Effect window, but in the timeline. If anyone else works like this, that's a good solution.
Copy link to clipboard
Copied
@Anthony5ECB I think we are facing the same issue. Please have a look here: Automation Mode switches to Touch each time Premiere regains focus (becomes the frontmost app again)
Get ready! An upgraded Adobe Community experience is coming in January.
Learn more


