 Adobe Community
- Home
- Premiere Pro
- Discussions
- Re: How Do You Improve Video Quality Using Effects...
- Re: How Do You Improve Video Quality Using Effects...

Copy link to clipboard
Copied
Hello, I cut out a short clip of a video I made and as you can see, the quality is poor. What effects and settings can I use to make this video look more professional and higher quality so I can export a nice looking video for youtube?
Thank you for the help


 1 Correct answer
A lot of good advice here. Thank you! I am going to work on lighting and watch all those tutorials.
Thanks again for the help!
 13
Replies
13
13
Replies
13

Copy link to clipboard
Copied
What don't you like about it? Give us something to work with please. Was this shot in front of a green screen? The face appears to have a greenish cast to it, but the video doesn't look "bad" to me
Thanks
Jeff
Copy link to clipboard
Copied
It was shot in front of a white screen. And it is not vibrant and sharp looking and doesn't look professionally done. I am going for a look like this:
What effects and settings should I use to get my video to look like this? Thank you!

Copy link to clipboard
Copied
Your talent does look a bit green (skintone)
Also I would use a plain shirt instead of a checkered one.
And make the talent fill the screen more, he looks a bit far away.
Copy link to clipboard
Copied
Great point Ann, don't use a white shirt in front of a white background. The shirt color (or lack of) is part of the "blah" factor. But I don't suppose you want to re-shoot, you just want to know how to fix what you have, right? Not something we can explain in detail, you have to use Color Correction filters...there are tons of free tutorials online for how to do this in Premiere. You will have to play with the settings until you think the image looks good.
If you reshoot, or for next time, lighting is critical as is proper white balance and exposure in the camera. Much easier to shoot it right than to try and fix it in post
Thanks
Jeff

Copy link to clipboard
Copied
Use the Lumetri Color Workspace panel ... first, "fix" the contrast the way you want, and you can work with the sliders in the basic tab or the Color Wheels section with the luma (light/darkness) sliders beside them, or the Curves tab if you want ... take your pick.
Then you can use either the color temp sliders in the Basic tab or again, the Color Wheels or Curves control to fix the greenish cast.
While working color/contrast, always have the Lumetri scopes visible, especially the RGB Parade, luma Waveform, and YUV Vectorscope. The first two for interpreting the contrast & color of the image, the Vectorscope for saturation and for hue control issues.
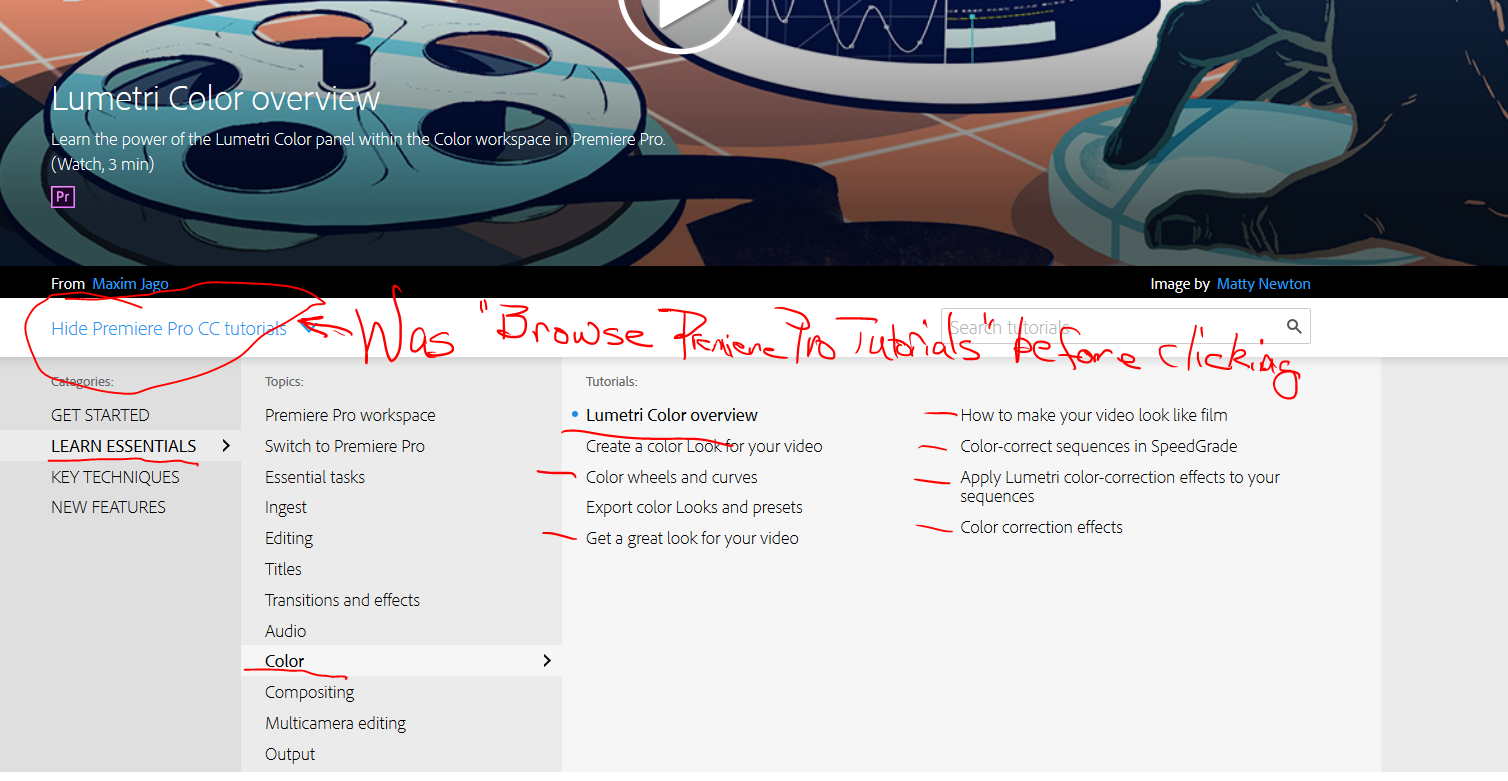
On AdobeTV, they have a number of tutorials on using the Color workspace.
Adjust color with the Lumetri Color panel in Premiere Pro CC | Adobe Premiere Pro CC tutorials
A screen shot of the above showing the tutorials by clicking on "Browse tutorials ... "
Neil

Copy link to clipboard
Copied
In addition to the great advice already given. For all the efforts involved to fix, it's best take this as a lesson learned and just re-shoot anyways. Do not get into the habit of thinking software will fix everything. Ten minutes of finesse on site will save you hours of labor in post.
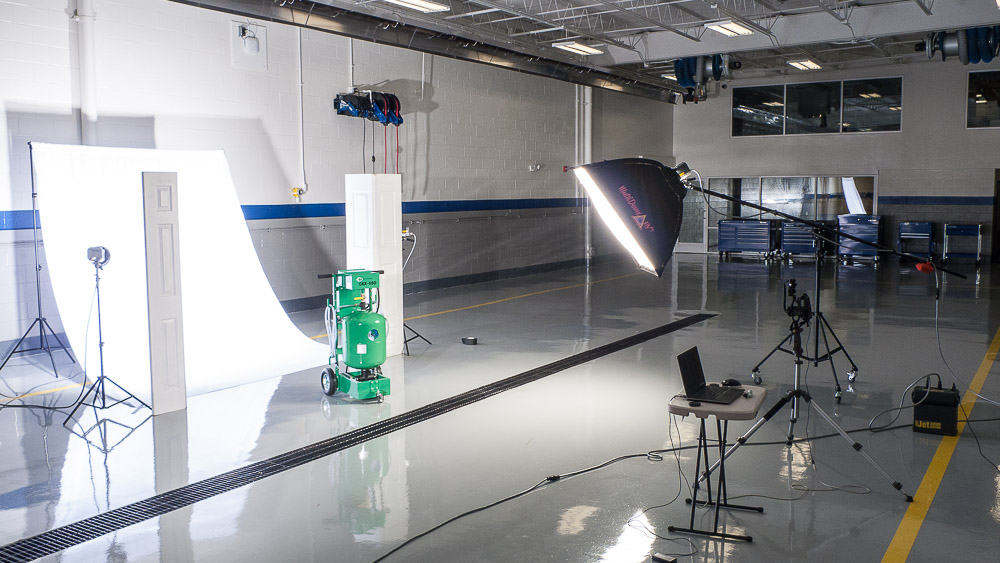
The tutorial you referenced is fine. I would add that if you follow it, to ensure that you properly block the light used in blowing out the background from bleeding onto your talent. A cheap trick solution is standing up some solid bi-fold doors, the kind used for closets, (avoid those with french louvers). Great for full body shielding over the barn doors found on some light kits.
The only example I have (on this machine) is a setup used for product shooting with strobe, but it's the same for video using continuous lighting.
Copy link to clipboard
Copied
I've taken a still from the video, played a bit in both PrPro's Color workspace & over to SpeedGrade also ... although it's not as accurate of course as having the actual clip, there's enough base green tinge to your colors that I really doubt this can be cleaned up in post.
So ... yea, a shooting lesson here. Had quite a few of these myself, don't worry about it ... we all have.
Be VERY careful about both the quality of the lighting AND the white-balance while shooting. If this had fluorescent lighting, either 1) you didn't really nail the WB in shooting, or ... they've got too much of a set of green spikes & magenta canyons in their output to work with. Fix this issue first ...
And with a white-out high-key setup like this, be VERY careful of how much blast reflected off the background gets to the lens. Lens flare is so common with this setup (which we've done in our portrait studio for 38 years now ... sort of a specialty) that you need either high-quality lenses with very low internal flare or a card held in front of the lens, with a hole just large enough for the image area to get through to the camera ... or both.
And of course ... the initial exposure balance between the light coming from the background and that illuminating your subject needs to be the 'smallest' it can be and still have the background stay white. With our scrim, and it's reflectance, with film that was 1 stop more on the background than the subject ... no more, no less. Now, with our digital cameras, it's only about 2/3rds stop more light falling on the background than the subject.
High-hey is a difficult thing to pull off really, really well. Yea, it's SO useful to give space for text insertions ... but you have to learn it cold.
Neil
Copy link to clipboard
Copied
Neil,
For the average shooter, might it almost be easier to pull off a decent green screen key, and add the white background in post?
Thanks
Jeff
Copy link to clipboard
Copied
Green screen can also be a bear to get really clean ... I know some who insist you can't do it with 8-bit cameras, only 10-bit, but I've seen righteously done green screen with rather minimalist stuff ... but again, being very careful to have the subject well out away from the background with as much scrims, go-bo's, and blocking stray light as possible.
In general, perhaps the white background might be a little easier ... but if you've got green-screen available, well ... and master it ... you can make that background anything you want, which is, in all, pretty useful ... but I've just stuck with the white, hey ... the scrim is always 'up', and we know the lights/setup 'cold'.
Neil
Copy link to clipboard
Copied
It can be done with 8-bit cameras. The trick is the ensure that the screen is drawn tight to remove wrinkles that introduce shadows, and is lit evenly. Unlike white, it does not have to be overly bright, just evenly lit.
To reduce spill effects (green edges on subjects), use an edge or back-light on the subject.
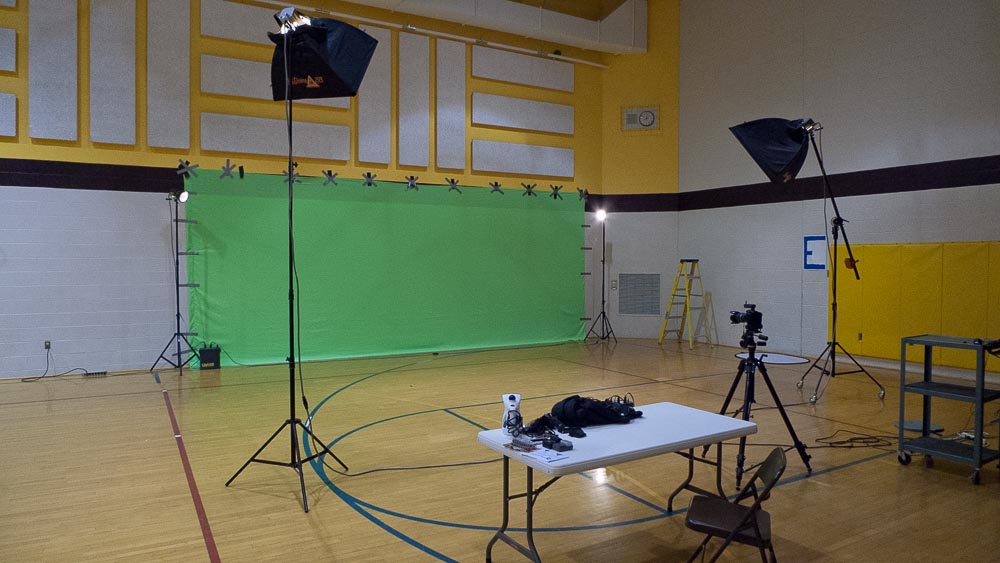
In the example below, (a photo-shoot with strobes, but is the same for continuous lighting with video), I don't have background lights for the screen. I relied on the ambient of the room. The two lights in the fore lit the subjects and there are two edge lights from the back to counter green spill. The lights are at 45 degrees to cancel out shadows.
Another tip is that it's OK to stack or use more than one instance of keys. Should you get shadows on the screen, then create another key for whatever gets through from the first key.
Copy link to clipboard
Copied
I think your comment about a green screen not having to be bright is something way too many people trying it don't "see". They put so much light on the screen they must have bounce back on the edges of their subject. Even yes ... brilliantly bright ... no.
And that should make it so much easier than the reputation of the technique sounds like.
Saw a bts of the final battle scene in Hogwarts last movie. They had 30 or 40 foot high green scrims running for 80 or 100 feet behind their set of ruined castle. .Lit evenly enough but only to a very midtone level. Seemed to work ok in the final product ...
Neil
quoting deleted by mod
Copy link to clipboard
Copied
A lot of good advice here. Thank you! I am going to work on lighting and watch all those tutorials.
Thanks again for the help!
Copy link to clipboard
Copied
Happy to help ... work must get done! 
Neil

 AdChoices