- Home
- Premiere Pro
- Discussions
- Lumetri Color not working as intended in After Eff...
- Lumetri Color not working as intended in After Eff...
Lumetri Color not working as intended in After Effect? (Dynamic Linking)
Copy link to clipboard
Copied
Hi everybody, I'm having trouble to dynamic Linking my Premiere Pro footage with color correction to After Effects.
For some reason the Lumetri Color effect react different when the footage is in After Effect and there's no way I can correct over expose footage on it since it just stops targeting the White value, and it just lower the brightness of the entire footage like a really weak Exporure property.
I've try reading multiple threads about similar issues with footage not looking the same after dynamic linking but it looks like mine still look the same, just that no coloring effect works properly on it (I've try using RM colorista V as well, still doesn't work)
The footage is from a Sony A7-IV camera
Does anyone have any idea why this happen, and is there a way to fix it?
Copy link to clipboard
Copied
Ae and Pr use different processes/areas of the UI to set color managment, and different terminology. So yea, it's confusing at times getting them to match.
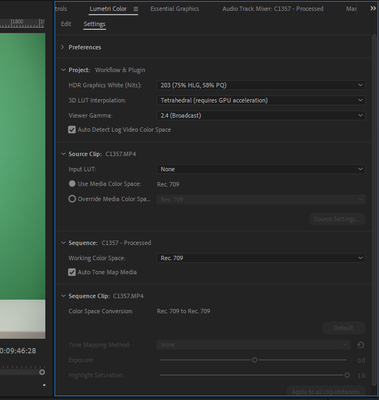
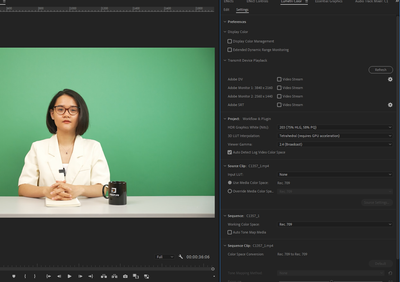
To help, we'd need to know both the complete Settings tab color management settings you're using in Pr24's Lumetri panel ... for project, display, media, all of that ...
AND what exactly you're setting the Ae color controls to.
Copy link to clipboard
Copied
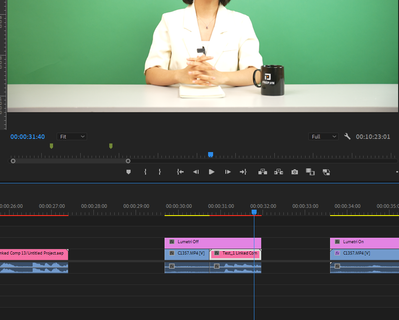
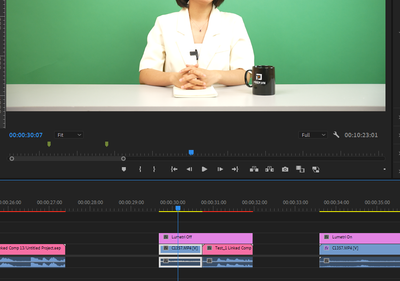
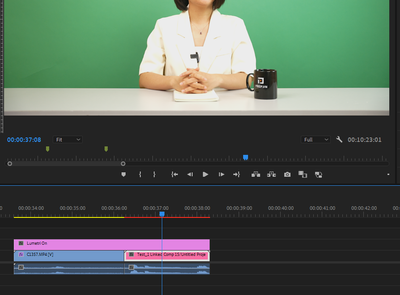
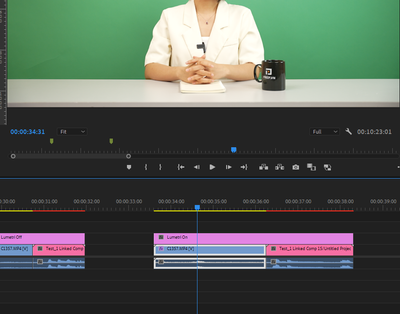
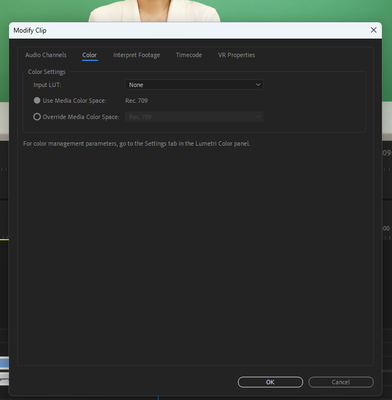
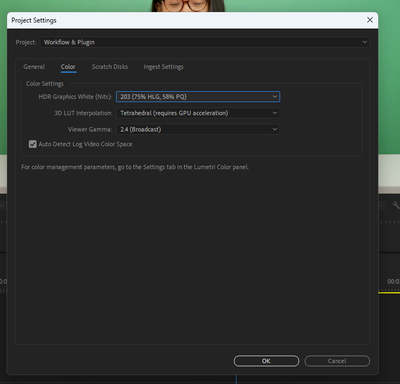
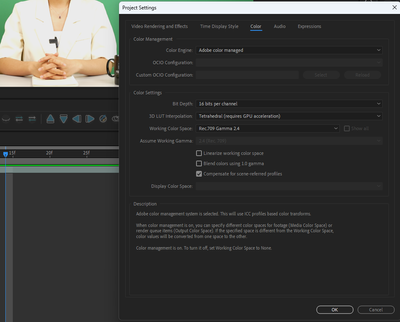
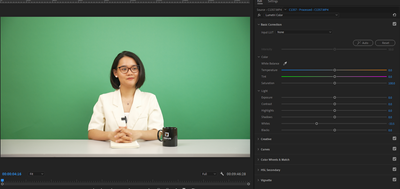
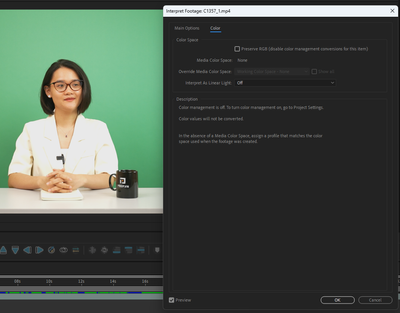
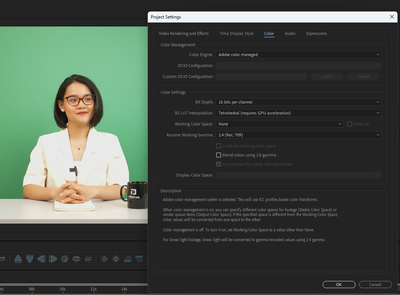
Here are my full settings for PR, AE, footage after reading couple of threads about similar topic. Can't tell if I'm missing something.
Copy link to clipboard
Copied
try changing the adobe color managed setting to media if it exists
Copy link to clipboard
Copied
unfortunately I can't find that option in any of my settings.
Copy link to clipboard
Copied
The normal solution is to match their color, but I know of at least one user that found ... oddly ... that if in Ae, they set "Working color space" to "none" ... it matched.
We speculated that maybe it was getting double-managed somehow. Well, worth a try at this point.
@David Arbor ... Mr. Ae ... any advice?
Copy link to clipboard
Copied
Color management is never fun. It looks like your media is Rec. 709, but your Premiere project is HDR. What happens if you change the "HDR Graphics White (nits)" back to 100?
If you're not intending to work in HDR and your media is SDR, then you don't need any tone mapping or conversion happening from SDR to HDR. Perhaps that's what's going on.
Copy link to clipboard
Copied
I've changing HDR Graphics White (nits) from 100, 203 or 300 all of them look the same, I can't see any discernible difference and linking them AE still has the same problem.
I've also try
1. turning AE's Working Color Space to None as Neil suggested
2. Disabling Tone mapping
Nothing changes
Since creating the thread I've try testing to see if this bug occurs on other footage online and it does.
While color of the original footage are consistant between PR and AE, it divert wildly when adjusting Lumetri Color or any 3rd Party Grading effects.
My other team members are experiencing the bug as well. This is causing quite the problem since much of the footage sent to us are over exposed and Color Correction in AE doesn't seem to target the White value properly.
We're getting by, by rendering a color corrected version from PR before working but as you can imagine rendering 500+ hours of footage is quite a task, not to mention the storage it will take.
Could this be causse of how After Effect communicate with the color effect issue instead of Color Management issue?
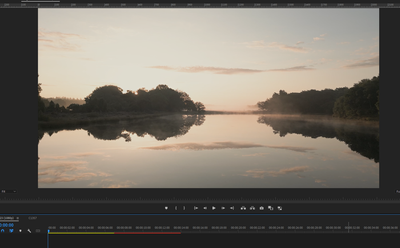
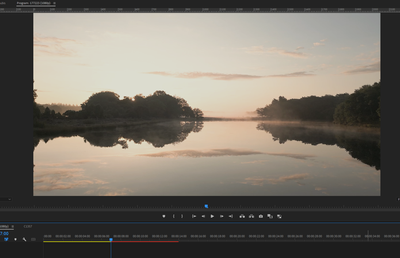
Note: Here's a test footage I got online. I only lower the White Value and every test I've done the brightest part of the video comes back after linking to AE.
Copy link to clipboard
Copied
Back to basics.
First, some cameras, and I think this is one, allow the user to set the video to full or legal/limited ... which is STOOOPID.
ALL YUV ... technically YCb/Cr ... media, should be encoded to legal/limited. It shouldn't affect the number of levels endoded, simply how they are encoded. And if you have improperly encoded YUV media in 'full', that can be a problem. And might be an issue here. Maybe.
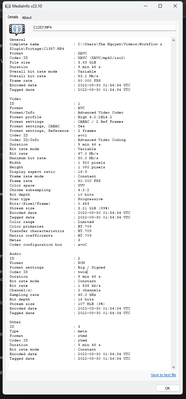
So ... please download and install the free utility app Media Info.
(MediaInfo download page.)
With that app having an icon on your desktop, drag/drop one of those video files onto the icon ... it will open, select the "Tree view" from the viewing options.
And take a screen grab of the video section showing file data, which will include range. Drag/drop that onto your reply box.
I'll be able to suggest further action if needed depending on what that shows.
Copy link to clipboard
Copied
This is the info of the file. There isn't an option for a tree view in this version so I hope is is enough.
Copy link to clipboard
Copied
Just a double check. When there are no effects applied on the clip or the Adjustment Layer, does the DynamicLink clip match the source clip exactly? Because it should with color management 'disabled' in both AE and PR. Lumetri doesn't deploy different math to different clips, it isn't aware of any image states.
Are you sure you're not applying some double effects somewhere?
Copy link to clipboard
Copied
Thanks for the screengrab, they may have changed the name but that is their old "Tree" view.
And yes, color range is shown correctly as limited.
So I'll be watching a response to Shebbe's questions.
Copy link to clipboard
Copied
I accidentally forgot to hit Post after writing a reply.
Yes, the PR and AE footage are consitant, from Rec. 709 to disabling or "None" toggled on both programs. Only difference is None make the footage slightly brighter.
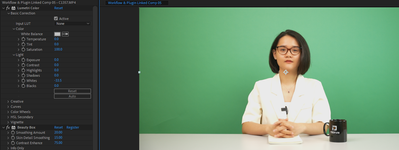
Problem only arises when the lumetri color effect in PR gets ported to AE. I only lower the White value for the sake of simplicity, but after Linking to AE, the white value no longer restore information from the brighest area as it does in PR.
There are no double effects on any of the screengrab, there's only a single lumetri color effect on clips I link to AE as you can see bellow.
Notice the details on her blazer.
Copy link to clipboard
Copied
If @mattchristensen could help, or suggest who could ...
Copy link to clipboard
Copied
If possible could you please share the sample clips with us? Also do share the Interpret footage settings of AE for the media.
Which version of AE and PPro you are using?
Thanks
Davinder Kaur
Copy link to clipboard
Copied
I've render a small clip for you guys to download.
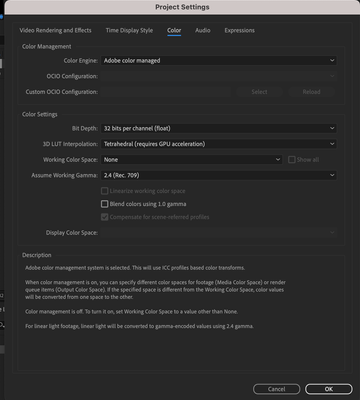
Here are all my settings.
It's not only this clip, but every clip I try, the white value in AE just doesn't seem to work properly.
https://drive.google.com/drive/folders/1hD6nNjHMEZKPNAHGiuK6XsxoxEu5CA7Q?usp=sharing
Copy link to clipboard
Copied
Could you please try clicking on checkbox "Preserve RGB" in AE and set bit depth to 32 bit in AE project settings in place of 16 bit?
Copy link to clipboard
Copied
Well I'll be damned.
Seems like all setting the Bit Depth to 32 bits was all it needed.
Thanks everyone so much for your support.
This was such a collective headache.
Copy link to clipboard
Copied
Hey @DavinderKaur,
Seems like that has solved the issue but this doesn't make any sense to me. It doesn't sound like a solution to the actual problem. When AE management is set to none, there should not be any conversion happening? And when it comes to dynamic linking, this is in fact never managed? Or is it? Even when inside AE management is set to none? And why 32bit + perserve RGB?
In all my life of dynamic linking I have never seen this behaviour. And nobody should be forced to use the sluggish 32bit float mode for simple tasks just because of some possible bug.
Copy link to clipboard
Copied
That's certainly ... an intriguing solution. Huh.
But like Shebbe, I'm ... puzzled ...
Copy link to clipboard
Copied
Hi,
Bit Depth in AE specify the working space bit depth,
16bit here mean 15bit integer + 1 signed bit. So in this case if media has values > 1.0f and < 0.0f , or any effect that results in values going above the range, will get clipped to the range of (0..1).
32bit float here is processing in float, and it will preserve the values beyond range (0..1) and no clipping happening in AfterEffects.
Thanks,
Chetan Nanda
Copy link to clipboard
Copied
@Chetan Nanda Thanks, I understand how float vs integer work, but let's take a step back here...
Looking back at the original post now.. the footage without adjustments, in Premiere seems already clipped.
However, the source is Rec.709, and so is the timeline. Thus no conversions are happening but aparently there is already data outside 0-1 range.
I overlooked this part initially but this can only mean that the footage is interpreted as video but has recorded levels in full or at least on the white side. What do they call it? 709 109%?
That explains why AE dynamic link needs to be in 32bit f (which PR is always). But this isn't the best solution I'd say.
Perhaps it's practical to implement management features for setting data vs full range interpretation for any video media for both AE and PR? This would help in this situation and allow 16 or 8bit int workflow or help with any other material where the auto data levels detection might fail.
I wouldn't be so much opposed to the fact that it now needs to be 32bit if nearly all AE effects actually supported 32bit and was much faster than it's current performance.
Copy link to clipboard
Copied
To the Adobe staffers that have participated in this thread, Shebbe has a good point. There are several pro cameras that allow setting an over-point, of maybe 103 to 109 IRE. I know from previous comments here and elsewhere that can be problematic in the workflow.
And sounds like this could be part of the problem and 'fix' ... but would be so nice if the two apps could see and adapt.
Copy link to clipboard
Copied
I understand this is an older thread but I ran into the exact same issue: dynamic linked footage with lumteri applied in PR looks different in a overexposed clip shot in Prores RAW / A7 III - ninjaV. No problem to correct in PR but in AE initially looks like there is no informationdata an overexposed sky.
The switch to 32bit did the trick though: Thank you very much for the work around!
But still - as Adobe makes us think Dynamic link and same effects are great - if it does not work exactly the same it's just a misleading marketing tool.
samples here show the same footage in AE:
1. 16bit
2. 32 bit
Finally: I am not technically inclined enough to truly understand the Pro camera setting mentioned by R Neil- but seeing how much information is in that overexposed clip in RAW is just great. Pro or not I love the possibilities left in RAW footage ( especially if you are on minimal budget/time/manpower such as documentary work: a lot of things can go wrong... at least for me!)
Cheers!
