- Home
- Premiere Pro
- Discussions
- Re: Mask Path 'sticking' on certain keyframes
- Re: Mask Path 'sticking' on certain keyframes
Copy link to clipboard
Copied
I have a mask on an adjustment layer. Keyframing is on. The problem is that the mask seems to get stuck in places and then jumps to next the keyframe. It will only do it between certain keyframes, not all of them. So, if I create a keyframe at positions A, B, C, D and E, say 6 frames apart, the mask will move between keyframes A-B, B-C, D-E, but it won't move between C-D. (I hope this makes sense.) I cannot figure out why it's locking on certain keyframes.
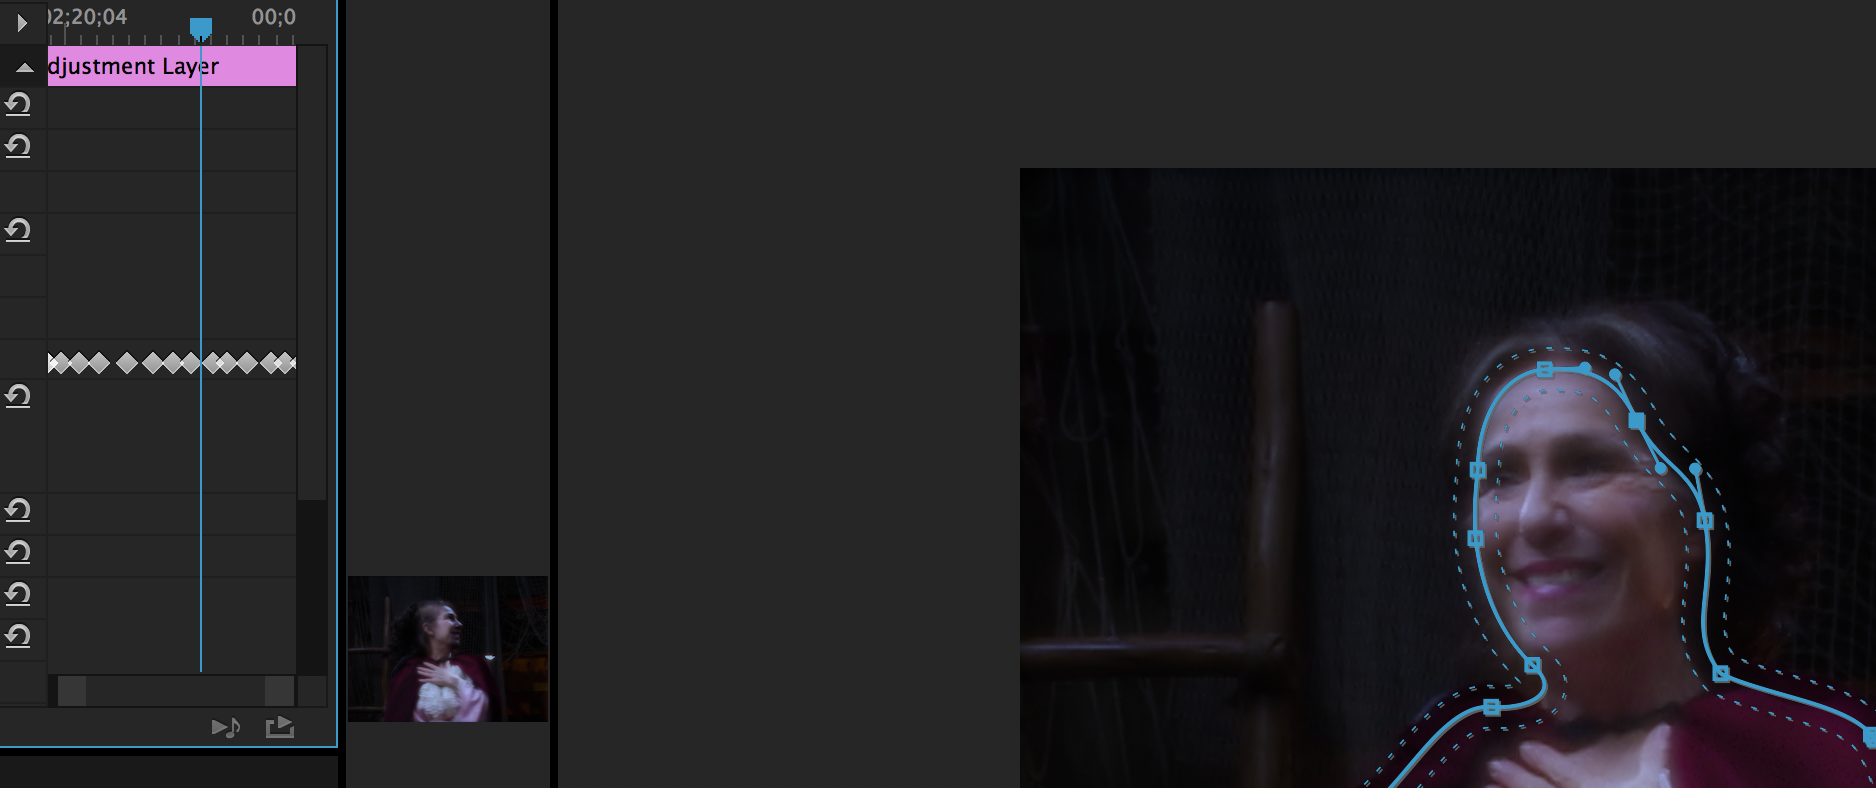
Here you can see the playhead is between keyframes, the mask is moving.

Now here, this is one frame before the keyframe and it's stuck on the previous keyframe.
next frame and it jumps to the keyframe

All the keyframes have position, scale and rotation selected for tracking method.
Rendering the sequence doesn't fix it.
This file was in Premiere Pro CC 2015.3, (the screen shots show this.) I opened it in the latest version of Premiere Pro and it's the same - still sticking on certain keyframes.
 1 Correct answer
This is a mask on an adjustment layer. The adjustment layer has no time remapping. The clip below it has no time remapping either. The effect is Lumetri Color - Basic Correction.
In the Effects Controls panel, I can jump to the next keyframe using the arrows on either side of the 'add/remove' toggle. If I arrow forward or back with my keyboard, it seems the same to me as when I do this in the timeline. I'm counting the same number of frames (29.97.) If I toggle 'track selected mask forward' I m
...Copy link to clipboard
Copied
Hard to tell from the images but on image #2 it looks like you're on the keyframe rather than 1 frame before it. Are you magnified in at 100% in the effect's control panel timeline? Otherwise you'll only get an approximation of where the keyframes are relative to the playhead.
Copy link to clipboard
Copied
Horshack,
I know it looks like it's on the keyframe, but it's not. I used the arrow (triangle) to move to the keyframe and then I stepped back one frame for the screenshot.
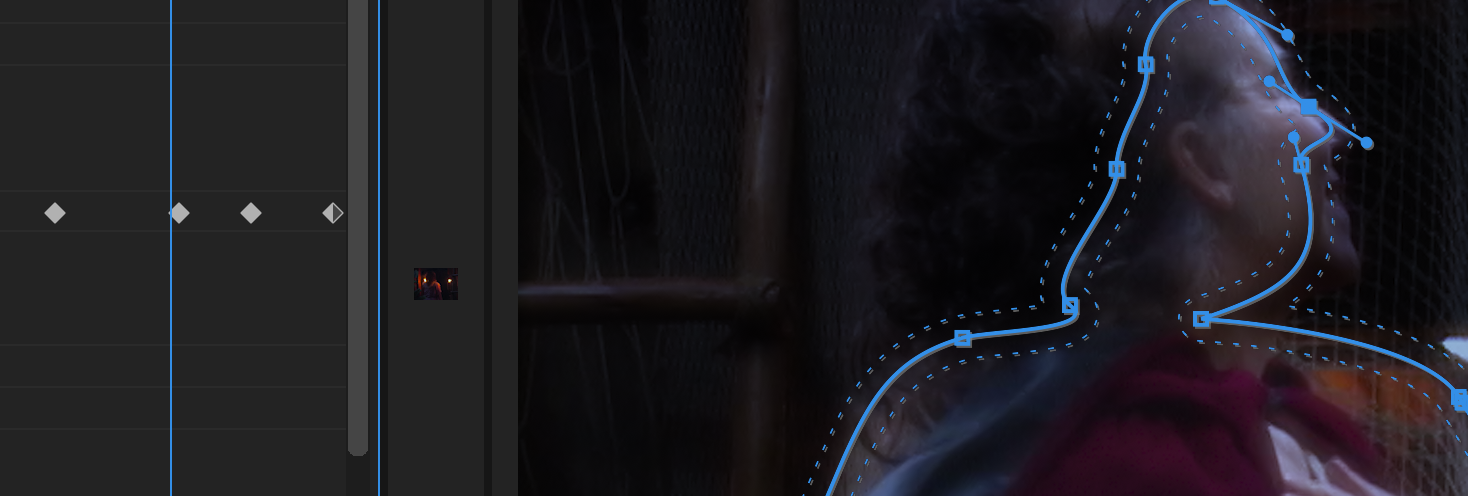
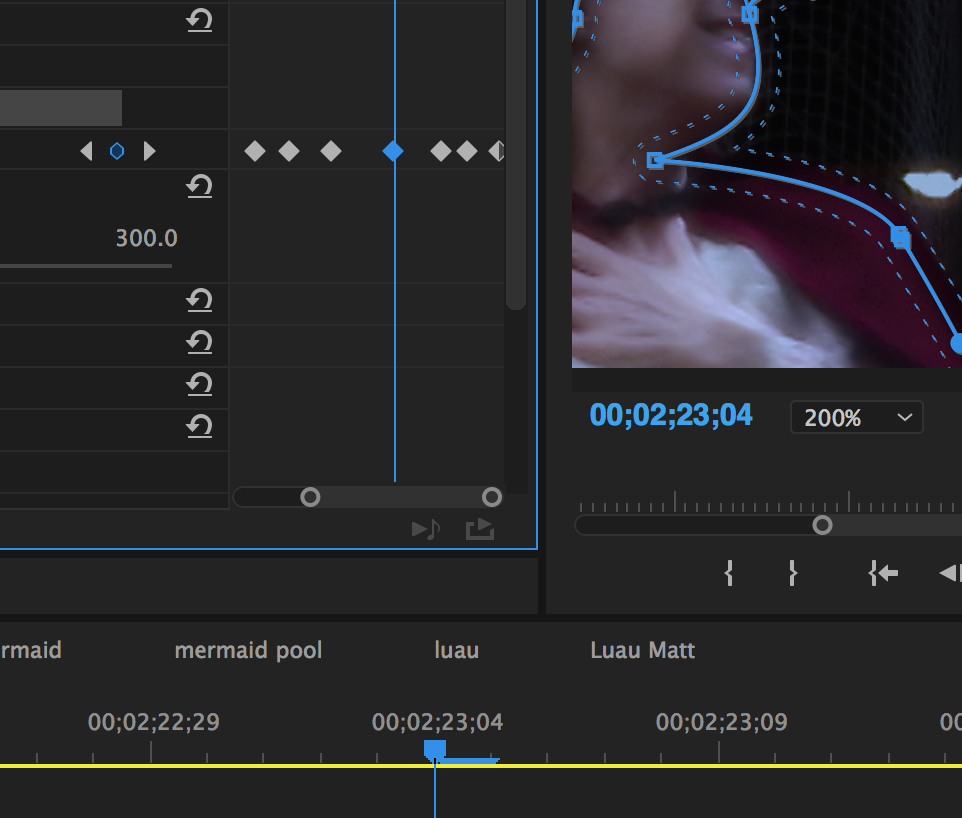
Here it is zoomed in (latest version of Premiere Pro 2017)
previous keyframe

one frame before the next keyframe

snapped to next keyframe

Copy link to clipboard
Copied
Ok, thanks. Your issue is that the keyframes aren't on actual frame boundaries - they're in between two frames. It's a quirk of Premiere I don't like. At 100% magnification in the Effects Panel timelime, drag your keyframe to the playhead to move it onto a video frame boundary.
Copy link to clipboard
Copied
I'm not sure I understand where I'm supposed to drag the keyframe. It seems to me that it's on the frame boundary.
The play head shows that it's on the frame boundary. The keyframe is lit up (blue) as well. I dragged the keyframe around and it snaps to the same point. I know the line is not directly on the diamond points, but that's true on the keyframes that work as well.
I tried dragging several keyframes but I'm not seeing a change. 
I stepped through the frames here so you can see what is happening (hopefully the link works, if not IMG 0442 MOV - YouTube )
Copy link to clipboard
Copied
Looking at the video...based on the time markers on your main timeline and the movement of the playhead you're zoomed to 100% frame level on the sequence. Based on how it takes three frames to pass each keyframe diamond in your Effects panel you're zoomed about 3-4 clicks from 100% there, which means there could be an extra keyframe hiding in between. However, if there were we should still be able to see it in the Effects panel at your current magnification.
First, just to verify once again (I know you did a variation of this), use the keyframe navigation arrow buttons within the Effects panel to make sure there's not an extra keyframe just before the 4th on what I see in the video.
It's almost acting like the 3rd keyframe is set to "hold" interpolation, which can't be since mask keyframes only support linear.
Is this footage time-remapped (speed up/down) by any chance? Premiere has a lot of quirkiness with effect keyfames on remapped footage. Also, what type of effect is that mask on?
Copy link to clipboard
Copied
This is a mask on an adjustment layer. The adjustment layer has no time remapping. The clip below it has no time remapping either. The effect is Lumetri Color - Basic Correction.
In the Effects Controls panel, I can jump to the next keyframe using the arrows on either side of the 'add/remove' toggle. If I arrow forward or back with my keyboard, it seems the same to me as when I do this in the timeline. I'm counting the same number of frames (29.97.) If I toggle 'track selected mask forward' I multiply the problem. I tried creating frames before and after each problem keyframe with "track selected mask forward 1 frame" then deleting the keyframe in between those two. Nothing seemed to change.
I tried deleting the first frozen keyframe and nothing happened, other than the previous frame was frozen until the next keyframe. I put that keyframe back. I tried manually creating a keyframe in between, to see if that did anything - just held the mask and created another 'held' keyframe. Then I deleted the middle frame (of the 3 'held' keyframes) and suddenly, the mask started behaving properly. I'm not sure what was wrong with that particular keyframe, but it seem to free everything up. I put it back, tried moving it around to see if it was not quite on the frame boundary, but it didn't seem to make a difference - it remained frozen.
I seemed to have solved the problem by deleting it, which isn't really solving it. But for now, it will do.
Thank you for trying to help solve this. I've saved versions of this file. Perhaps when I have more time I can play around and try to nail this down, but for now, I'm going to move forward.
Copy link to clipboard
Copied
I have the same problem! My mask is not on a adjustment layer, it's a normal mask by opacity.
Is there a solution to fix this bug? There's no animation between keyframe A and keyframe B. The - for example - 5 keyframes between A and B stuck like keyframe.
Please help me!
Copy link to clipboard
Copied
Same problem, it's stuck and not tracking the movements frame to frame, just stuck in the original shape I masked but not moving, any solutions?
Copy link to clipboard
Copied
Hi there, I had been running into this problem, as well. I'm not sure if this will apply to everyone, but I found what the problem was on my computer. If I accidentally created a new point on the mask, and then hit the keyboard shortcut for undo, it would somehow stop the inbetween. Simply hitting undo a second time seems to fix it for me. I hope this helps others.
Copy link to clipboard
Copied
This is happening to me too or something similar. I'm trying to create a mask so that I can walk in front of a title. I went through it once without stopping and it turned out OK. But then when I went back to edit it to make a small change towards the beginning it seems like it pushed all the keyframes off by one (or more than one). Or it could have done a thing where the mask shape is based on the shape before it so by changing the shape it messes up everything after it. Does anybody know if either of these sound likely?
Copy link to clipboard
Copied
Maybe you need to hit the timer icon just for that keyframe and then after that one track the rest. It sounds like once you made the change it tracked the whole thing from the change, rather than just the keyframe that needed changing.
Copy link to clipboard
Copied
This is indeed a problem I've been experiencing for years across multiple versions of Adobe Premiere Pro. It is not fixed by this date, and I just recently decided to google to see if anyone else is experiencing this issue of keyframes holding on masks and not blending. It has nothing to do with time remapping, but seems to be an error in Adobe's masking function. I'd love to see this issue addressed and fixed someday as I have spent many hours messing with keyframes, deleting problem keyframes, redrawing masks, undoing, and basically every other "fix" you can think of. The sad part is, the problem only worsens as you attempt to remedy the issue. More keyframes start holding their mask postion and snapping abruptly to the next value once the playhead reaches it on the timeline, and eventually, it seems that entire sections of your clip will hold their keyframes as you fight with this issue and try to fix it. No matter of restarting your program, computer, importing the sequence into another project (yes the issue persists across projects), will fix this infectious error.
It's possible there is some radically difficult and hidden way to fix this frame holding problem, especially if you've spent hours creating your mask, it might be worth trying to save.
But if you've spent less than a few hours creating your mask, I recommend to stop trying to fix it. Cut your losses, and start over by creating a new mask. You'll spend more time trying to fix the problem than it will take to just make a new mask, I promise you, from many hours of first-hand experience, I know.
As a side note, I'd try to distance yourself from the infectious issue as thoroughly as possible, delete the clip from your timeline, maybe delete that sequence and remove the video file from your project and rename it in your file browser before importing it again so premiere thinks it's a different file. You don't have to take these precautions, but you can if you're paranoid about the problem replicating.
Copy link to clipboard
Copied
Issue still ongoing for me. Not great of Adobe.
Copy link to clipboard
Copied
I figured it out. The mask jumps like that between keyframes when you add an additional point to the mask, EVEN if you CMD+Z to undo, it still ca;uses this mask tracking issue...so just have to delete that keyframe where you added a point if you did so by mistake and adjust it manually without adding any points. This way, you can manually track a mask lets say forward 10 frames and the mask won't jump, it will keep up with whatever you're tracking. Figured this out by trial and error. SO FRUSTRATING, FIX THIS ADOBE!!! Come on!!
Copy link to clipboard
Copied
Perhaps up-voting this thread will create awareness.
Copy link to clipboard
Copied
I f-ing hate this problem. Bought premiere 2020 and still the same? How come they don't solve this issue?
Took me 2 hours to precisely mask a figure and when I checked it back it was messed up because of this.
Copy link to clipboard
Copied
Same here. Adobe sucks and I'll be switching to Davinci or Final Cut just because this issue has plagued me for years and probably has taken away a month's worth of my life re-doing masks. I suggest ya'll do the same
Copy link to clipboard
Copied
Copy link to clipboard
Copied
it's been happening to me in Resolve, yes.
Copy link to clipboard
Copied
I've been dealing with this issue too and I've found the exact same thing that Grant mentioned - it appears permanent and maybe even almost infectious, the more you try to correct it the more errors accumulate. Has anyone figured out any way to salvage the work put into keying a shape, once it's already done? I haven't, but maybe someone else is more lucky.
Could the issue be tied to errors accumulating in the project itself as you work on it? Has anyone found a way to at least mitigate the frequency that this error occurs, if not to fix it?
Copy link to clipboard
Copied
Hello, I had the same problem and I managed to fix it by deleting the following keyframe, and keeping the same mask as before just by changing a few points (I think I had added a mask point which would have caused the problem).
Find more inspiration, events, and resources on the new Adobe Community
Explore Now