• Global community
    • Language:
      • Deutsch
      • English
      • Español
      • Français
      • Português
  • 日本語コミュニティ
    Dedicated community for Japanese speakers
  • 한국 커뮤니티
    Dedicated community for Korean speakers
Exit
1

overexposure after exporting PP 2024

Community Beginner ,
Aug 12, 2024 Aug 12, 2024

Copy link to clipboard

Copied

After two days of reading many posts in this community, I'm still lost and unsuccessful in exporting my videos from Premiere Pro 2024, without overexposure.

 There are some improvements, but I would very much like to fully understand why and how etc. Since speaking to Adobe I've learned about Apple 

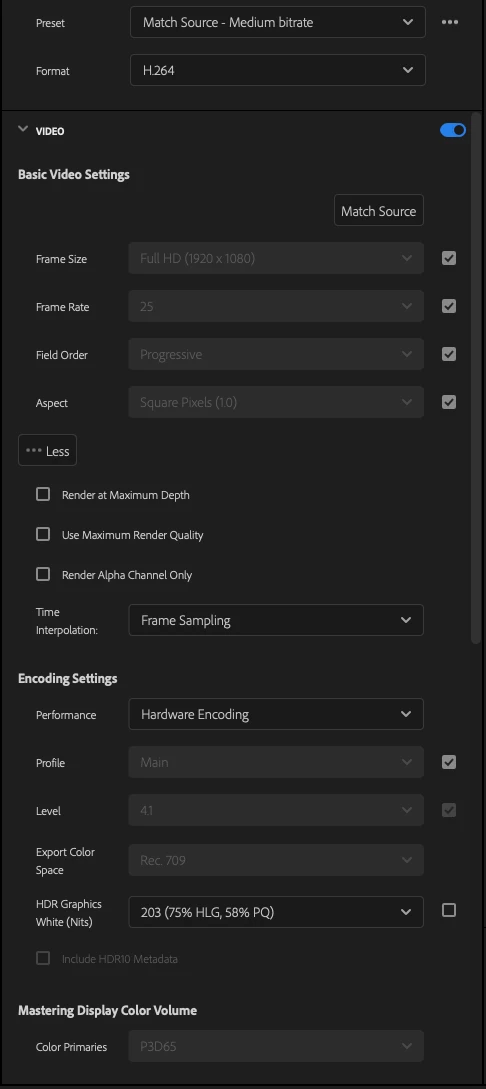
Gamma (1.96) and PP Gamma 2.4. The footage looks better when I view it with VLC, especially after I changed Viewer Gamma to Web 2.2. However, I'm still unsure about my export settings. The images attached are High bitrate (overexposed) and Medium Bitrate (kind of ok..?)


Here's some additional info, in case helpful

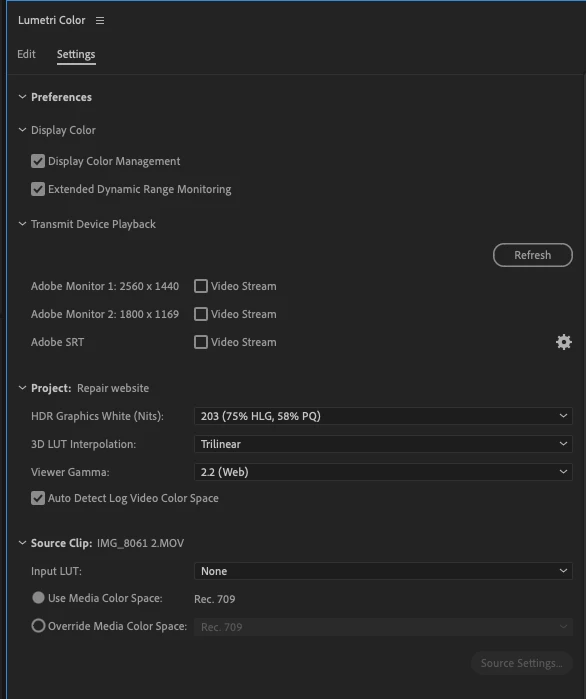
I use presets that do not have HLG or PQ in the preset name.

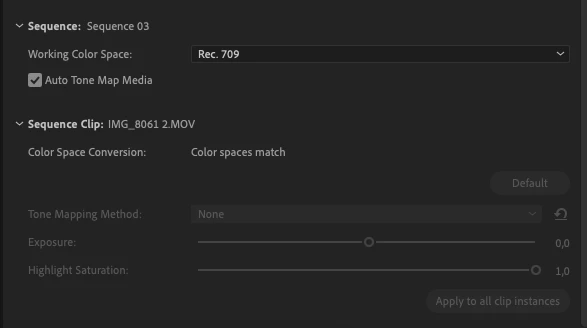
Auto Detect Log and Auto Tonemapping are interactive and are both set on

I'm colour-correcting the white balance in 8 bit, as recommended by adobe
The video will be used on a website or instagram...

Screenshot 2024-08-12 at 11.57.22.png

Screenshot 2024-08-12 at 11.57.47.png

Screenshot 2024-08-12 at 11.58.32.png

Screenshot 2024-08-12 at 11.58.42.png

Screenshot 2024-08-12 at 12.15.02.png

Screenshot 2024-08-12 at 12.15.25.png


TOPICS
Editing , Error or problem , Export

Views

95

Translate

Translate

Report

Report
Community guidelines
Be kind and respectful, give credit to the original source of content, and search for duplicates before posting. Learn more
community guidelines
LEGEND ,
Aug 12, 2024 Aug 12, 2024

Copy link to clipboard

Copied

Looked through everything, thanks for a pretty complete post!


One question ... how does it look in Premiere's program monitor on re-importing the file? That would be a major thing to know.


I'll cover a few other things here ...


Viewing Gamma Setting

This one is a puzzler for sure. And most information 'out there' isn't particularly helpful, even a few of my own comments in the past. 


There are two considerations for your decision for Viewer Gamma:


  1. Is my main consideration how the export looks on Macs without reference modes, or on every other screen? As if you are only concerned about the non-reference mode Macs, then use 1.96/Quicktime. If not, go to item 2).
  2. If you are concerned about appearance on nearly all 'normal' screens, then the choice is between gamma 2.2/web and gamma 2.4/broadcast. BUT NOT BECAUSE OF WHAT YOU PROBABLY HAVE HEARD!


You make the choice between 2.2 and 2.4 based on the brightness of your environment, the ambient light levels, as you are grading. Period.


So if in a moderately to fairly bright "office" environment, USE GAMMA 2.2.


And if in a pretty dark grading room, USE GAMMA 2.4.


Clip Color Management


There are a few clip types, especially some mxf, log, and camera-phone clips, that are troublesome. The vast majority of clips, even within those types, are pretty easy to work with when you  learn how the settings work.


But there is ONE BIG PAIN ... and that is that there are cameras and phones out there now, that will set the color range to Full for YUV (Y/Cb-Cr) media, which by the standards should always be Legal/Video levels.


This is the old 0-255/16-235 thing, which is only an encoding setting that has nothing to do with how many 'levels' or data points the file includes. So setting that to full doesn't get you one 'level' of more data, it just messes up a perfectly fine, working system. And is loved by marketing types who neither know nor care about what they put you through as long as you buy their camera.


So it would be useful to check in MediaInfo, a free utility app, as to what the range is ... full or limited.


If the clip is shown as full in MediaInfo then apply a legal to full preset by simply draging it from the Effects panel to the clip/s selected in the Project panel/bin.


Export Settings


I would change a few things ... 


Mbps ...  3 is a very, very low setting I don't think I've every used anything less than 10 and that only for 1280x720 exports. 1920 I've never been below about 25, I don't think.


Max Bit Depth is something that I also these days normally always set to On.


Max Render Quality is also probably best set on at this time.

Votes

Translate

Translate

Report

Report
Community guidelines
Be kind and respectful, give credit to the original source of content, and search for duplicates before posting. Learn more
community guidelines
Community Beginner ,
Aug 15, 2024 Aug 15, 2024

Copy link to clipboard

Copied

Thank you for all your thorough help.

I'm afraid I'm still lost, but that's probably on me. Or my PP/iPhone settings
Connected to your response below as well, am I correct in understanding that an alternative to HDR would be shooting in 4K, when filming with the iphone camera? 
I've been trying to get better filming results with the Kino app, which also allows me to film in SDR..?

To answer your question, when I re-import the over-exposed file it also looks overexposed in the program monitor. 


Maybe my main question is, what are the best settings to shoot in with my iphone camera (or Kino app) and what are the best connecting export settings in PP for that footage. I have no personal preference, as long as it looks good on social media and on a website. 


Thanks in advance again!

Votes

Translate

Translate

Report

Report
Community guidelines
Be kind and respectful, give credit to the original source of content, and search for duplicates before posting. Learn more
community guidelines
LEGEND ,
Aug 15, 2024 Aug 15, 2024

Copy link to clipboard

Copied

First, the camera settings ... if possible, I do recommend not shooting HDR at this point. Yet. Set for Rec.709/SDR if at all possible.


Second ... in Premiere, go to the Lumetri panel, the Settings tab, the one named Settings. A lot of people see "settings" and think that's where you set the color correction tools. NO! I think the naming is unfortunate and confusing, but there is a TAB named Settings. Select that tab.


Now you see all the color managment settings for Premiere in one place, from project through system through sequence and clip.


Set Display Color Management to on.

Set Auto Detect Log and Auto Tonemapping to on.


That will probably take care of most things, including iPhone in HDR mode.


Now correct on the sequence, and at export, DO NOT use any export preset with HLG or PQ in the preset name. This way, you will have SDR/Rec.709 export settings.


This sorts most people out.

Votes

Translate

Translate

Report

Report
Community guidelines
Be kind and respectful, give credit to the original source of content, and search for duplicates before posting. Learn more
community guidelines
Community Beginner ,
Aug 15, 2024 Aug 15, 2024

Copy link to clipboard

Copied

LATEST

Thank you, again and again. Very much appreciated! 

Votes

Translate

Translate

Report

Report
Community guidelines
Be kind and respectful, give credit to the original source of content, and search for duplicates before posting. Learn more
community guidelines
Community Expert ,
Aug 12, 2024 Aug 12, 2024

Copy link to clipboard

Copied

If all your footages are HDR on the timeline, try to expoert a version without using the Auto tone mapping and set your sequence color space to Rec.2100 HLG. 

Votes

Translate

Translate

Report

Report
Community guidelines
Be kind and respectful, give credit to the original source of content, and search for duplicates before posting. Learn more
community guidelines
LEGEND ,
Aug 12, 2024 Aug 12, 2024

Copy link to clipboard

Copied

HDR is still very much the Wild Wild West, and personally, I don't recommend using it for most folks.


I work for/with/teach pro colorists, including the set which was hired by Dolby to produce the video series to teach pro colorists how to work with DolbyVision in Resolve for delivery to networks/streaming services.


And what do the colorists think about HDR at this point? Easy.


1) Good HDR is awesome to watch!


2) Most of the relatively few screen out there that do say they do HDR only do one or two of the competing formats, and at that, poorly.


3) No HDR without dynamic metadata is useful at frickin' all. Ergo, basic HLG, and even HDR10, just aren't reliable across the few screens that actually do sustained output above 600 nits. HDR10+ is sort of useful by consensus, though problematic. Only DolbyVision is actually full reliable, and then, only on the screens that fully support DV.


4) The majority of the many colorists I'm around (world-wide groups) still have not delivered a single paid HDR show for network/streaming use.


I first saw my own content on a really good HDR screen back at the 2019 NAB/Vegas, when giving a presentation in the Flanders/MixingLight booth. To an audience of either colorists or color management/calibration specialists. Sandwiched between noted Colorist and teacher Alexis Van Hurkman and the lead guy from Dolby on DV.


I was talking about Premiere's then color management, and the screen was the larger Flanders like 4,000 nit HDR reference monitor, and ... um ... just wow.


Yea, I'd like everything to be shown on something like that!


But sadly, a half decade later, we still aren't getting great HDR support across screens and OS. I'm very dissapointed in that. Though the new Flanders HDR monitors are clear down to under $10G, and are freaking incredible.


Maybe we'll get more affordable screens for those viewing at lower prices soon. And yes, some iPads and iPhones do HDR pretty decently. But the vast majority of us that don't have one of those.

Votes

Translate

Translate

Report

Report
Community guidelines
Be kind and respectful, give credit to the original source of content, and search for duplicates before posting. Learn more
community guidelines