Thanks for the warning about rollovers. A different piece of text will be associated with each button; for example, let's say I am going to insert four different shapes onto the same slide: a circle, square, rectangle, and triangle. Each shape will function as a button.
Let's say when I click on the circle-shaped button, the following text displays "This is a circle". When the learner clicks on a different button (shape), such as the square, the text associated with circle needs to disappear and the text associated with the square needs to display, such as "This is a square". If I group all of the text together, then all the text displays at the same time, which I don't want to happen. Thanks again.
You always need two commands: you first hide the group, then you show the item that has to be shown.
Since a single or simple command cannot do both, you need an 'advanced' or 'shared' action. Both are created in tha Advanced Actions dialog box (under Project menu). I proposed a shared action, but you could do it with duplicates of advanced actions as well. I created a quick example. Here is the Timeline:
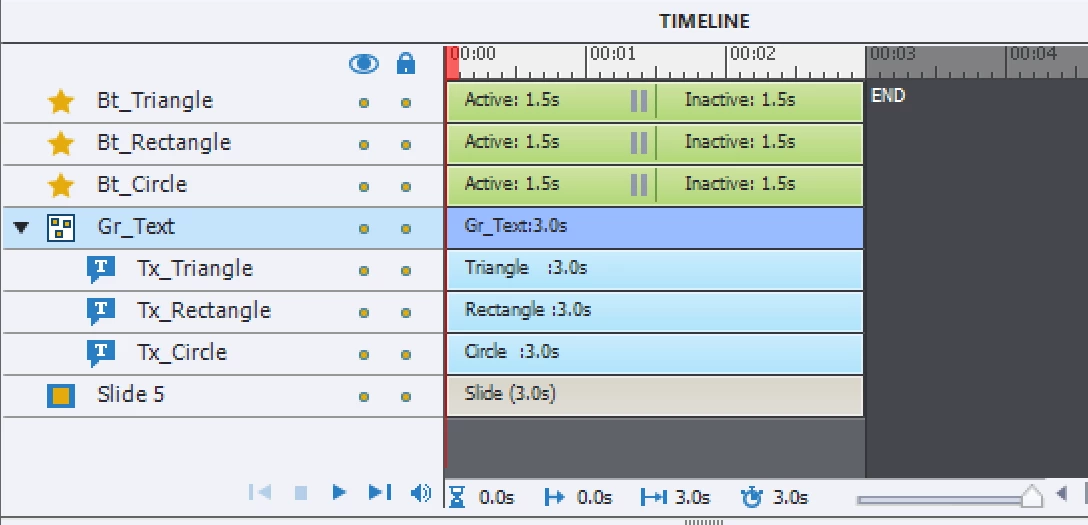
You see 3 shape buttons on top, with Pausing point at the same moment (1,5secs) above a group with 3 texts which are all hidden in Output to start with (use the Eye button in the Properties panel, it has to be barred).
Open the Advanced Actions dialog box from Project menu:
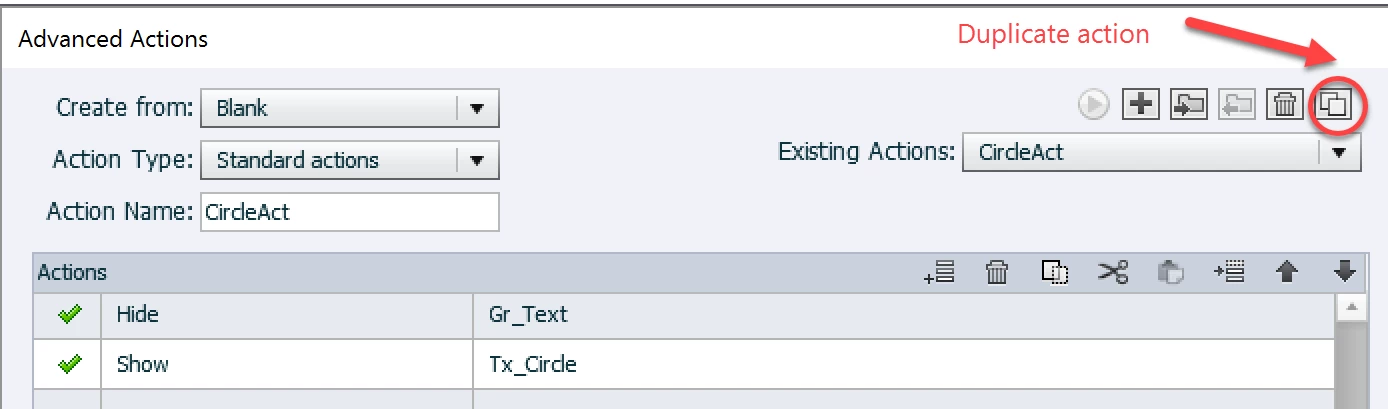
Type in Action name (CircleAct) and double click in the Second column, first line, you get a dropdown list with actions (like the simple actions in the Properties panel). Choose the command Hide. Double-click in the third column, first line and choose the Group as object. Similar for the second command line. Then save the action.
You can duplicate the action with the indicated button. Change its name, and the second command line, the first remains the same.
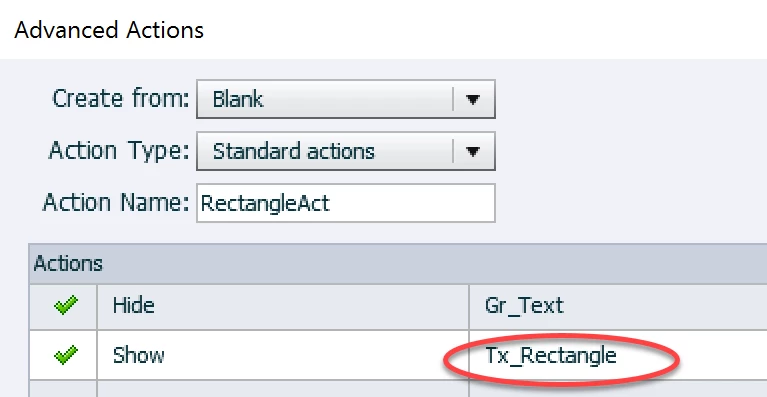
Repeat this as many times as you need the two-command action.
To attach to the shape buttons, go in their Properties panel, Actions tab, open the dropdown list and choose
Execute Advanced Action.
Choose the appropriate action.
Later on you can study the Shared actions articles, because it would be better with shared actions but this will work as well.

