• Global community
    • Language:
      • Deutsch
      • English
      • Español
      • Français
      • Português
  • 日本語コミュニティ
    Dedicated community for Japanese speakers
  • 한국 커뮤니티
    Dedicated community for Korean speakers
Exit
0

How thin hair or the opacity

New Here ,
Nov 10, 2018 Nov 10, 2018

Copy link to clipboard

Copied

I have this photo, I think it looks great, but the hair in front of the subjects face is a little distracting from the image as a whole.  I don't want to get rid of it, I just want to reduce the opacity of it and make it blend with the photo.  I'm not sure how to do this.
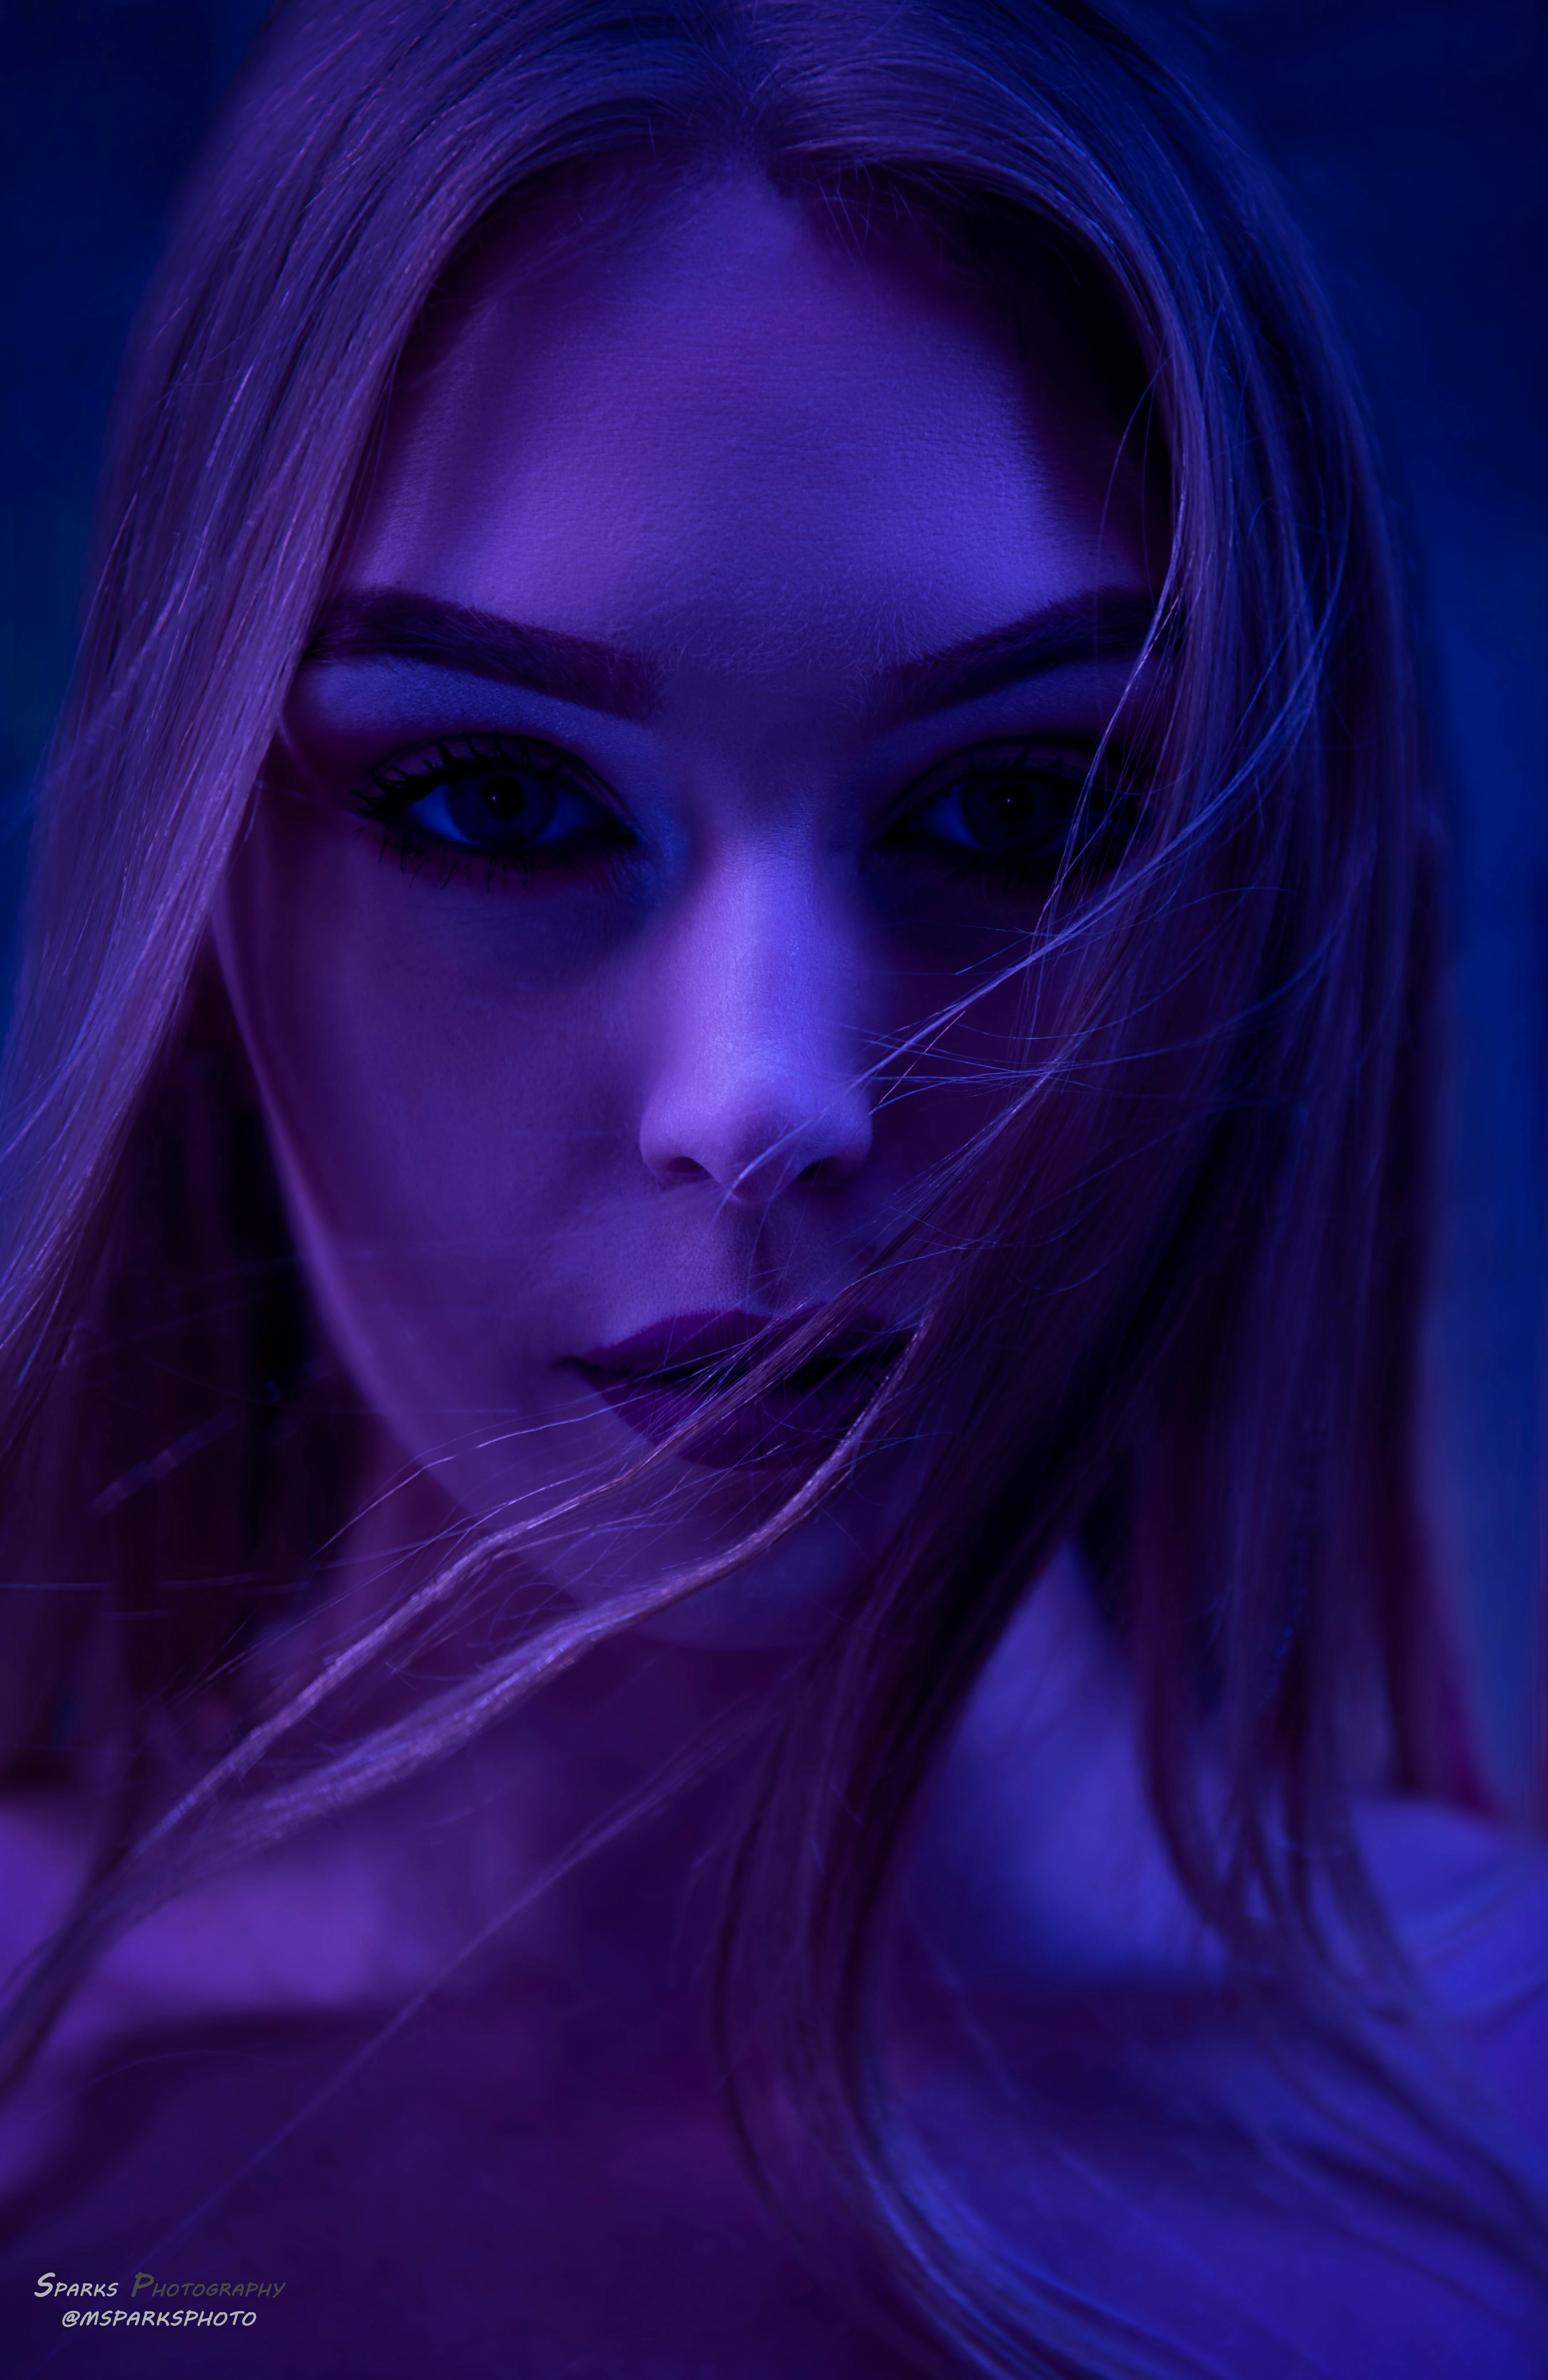
DSC_0126 B Logo E25.jpg

Views

248

Translate

Translate

Report

Report
Community guidelines
Be kind and respectful, give credit to the original source of content, and search for duplicates before posting. Learn more
community guidelines
Adobe
Community Expert ,
Nov 10, 2018 Nov 10, 2018

Copy link to clipboard

Copied

I wouldn't touch it.

Votes

Translate

Translate

Report

Report
Community guidelines
Be kind and respectful, give credit to the original source of content, and search for duplicates before posting. Learn more
community guidelines
Community Expert ,
Nov 10, 2018 Nov 10, 2018

Copy link to clipboard

Copied

Hi

You could use the healing brush (set to sample all layers) and clone tool to clone out the hair on a separate layer then turn down the opacity of that layer to allow the required amount of hair to show through

Dave

Votes

Translate

Translate

Report

Report
Community guidelines
Be kind and respectful, give credit to the original source of content, and search for duplicates before posting. Learn more
community guidelines
Community Expert ,
Nov 10, 2018 Nov 10, 2018

Copy link to clipboard

Copied

Since you do not want to eliminate the stray hair, but to reduce its intensity, consider this.

(Click to enlarge)

mask.png

1. Image > Mode > Lab Color (first image).

  Drag L cannel to become Alpha channel. Select > All.  Edit > Copy

2. Return to RGB and Paste. Add a blank layer below below it and Fill with Black/

3. Return to the top layer, double click to bring up Layer Style. Use Blend If top left slider

blend if.png\

It produces the middle image above. Use soft-edged brush to create image on the right.

4. Layer > Merge Down to combine the top two layers. It will used as a mask.

5. Return to the the bottom layer and duplicate the layer.

6. Add a mask and deposit the mask you had created in Step 4.

7. Turn off the top layer and set the layer holding the image and mask to Multiply.

Option: dupe the multiply layer if desired to darken the strands of hair even more

 72 final.png

Votes

Translate

Translate

Report

Report
Community guidelines
Be kind and respectful, give credit to the original source of content, and search for duplicates before posting. Learn more
community guidelines
Guide ,
Nov 10, 2018 Nov 10, 2018

Copy link to clipboard

Copied

LATEST

I would use the Spot healing brush and immediately use Edit > Fade and chose an appropriate percentage.

Votes

Translate

Translate

Report

Report
Community guidelines
Be kind and respectful, give credit to the original source of content, and search for duplicates before posting. Learn more
community guidelines