Copy link to clipboard
Copied
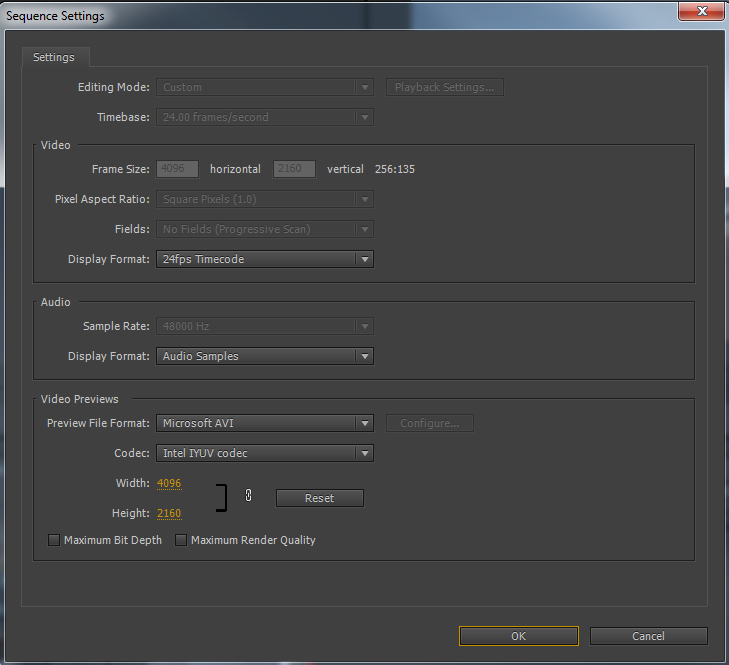
With 4k footage now possible, many users are "downscaling" their 4k footage into a 1080p timeline to produce a cleaner result for 1080p movies online. I created a sequence utilizing one of the 4k clips to carry over the settings. Then I exported to 1080p. Am I going about doing this the right way?
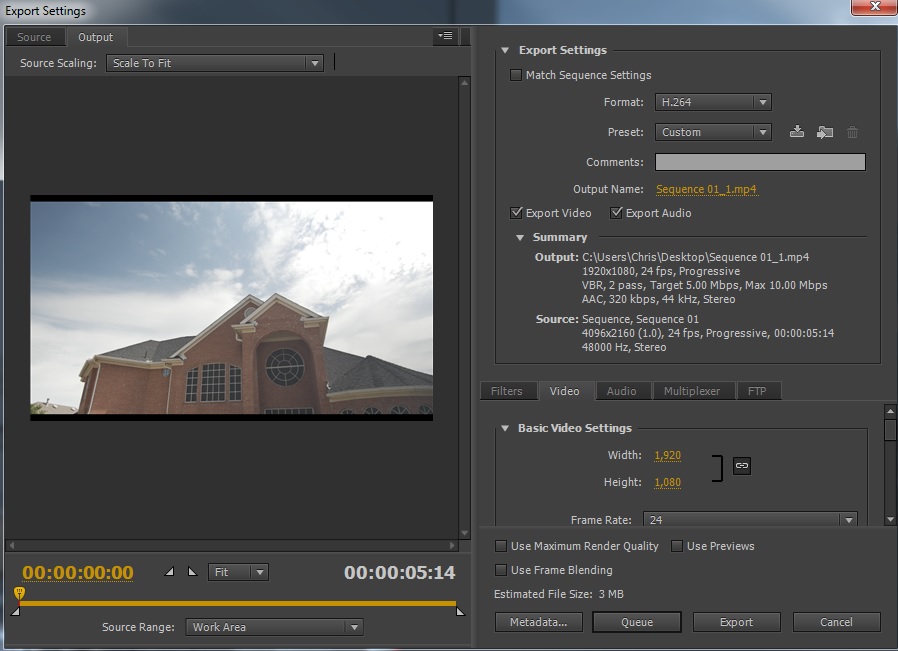
The last question I had, is I noticed when I export in this manner there are black bars on the top and bottom of the movie. Is there anyway I can get rid of this? Thanks
Here are the sequence settings
Export settings
 1 Correct answer
Try dropping your 4k into a new1080p sequence and use scale to sequence setting on all the clips instead of using a custom preview setting.
Copy link to clipboard
Copied
Scale to fill option should lose the black bars. When going from HD to SD it is usual to check the 'Use Maximum Render Quality' box, this provides better quality scaling, perhaps someone who has worked with 4k could tell us if this also applies to 4k to HD.
Copy link to clipboard
Copied
How did you arrive at those sequence settings?
Copy link to clipboard
Copied
shooternz That is just what seemed to appear by default. Is there something that I should change?
Copy link to clipboard
Copied
Not necessarily.
I just saw it was "custom" instead of a preset sequence.
I am not sure why the bars appear in your output. You can crop them out (top bottom crop X pixels in source tab) if all else fails.
Copy link to clipboard
Copied
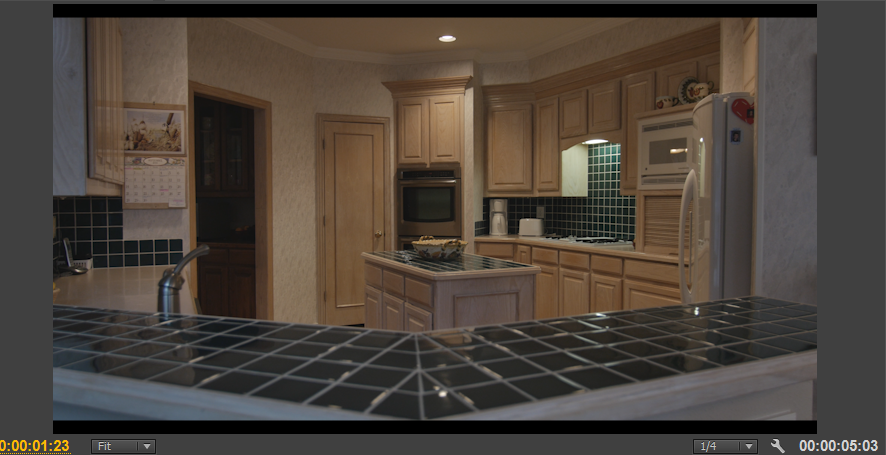
There shouldn't be any black bars. I am following the guide by Dave Dugdale where he uses premiere to down sample 4k footage onto a 1080 timeline. His end result does not have black bars, while my end result does. To see the steps he is using check out the link to the video here, its very brief https://www.youtube.com/watch?v=9oEWvBsN63U&feature=youtu.be&t=43sfrom 00:43 to 1:20
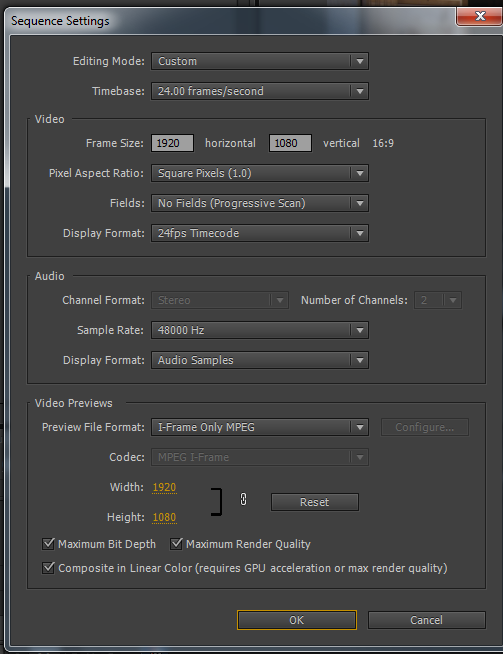
I start by pulling down a sample of 4k footage onto create new sequence button. So the timeline is now 4k. Then I open sequence settings and change the video frame size to 1920x1080 from 4096x2160.
The projects source video file is 4096 x 2160
Here are the sequence settings
Here is the result showing black bars in the preview
Copy link to clipboard
Copied
Try dropping your 4k into a new1080p sequence and use scale to sequence setting on all the clips instead of using a custom preview setting.
Copy link to clipboard
Copied
Thanks. I created a new 1080p sequence and dropped a 4k clip inside and received a warning message shown below, I selected "keep existing settings".
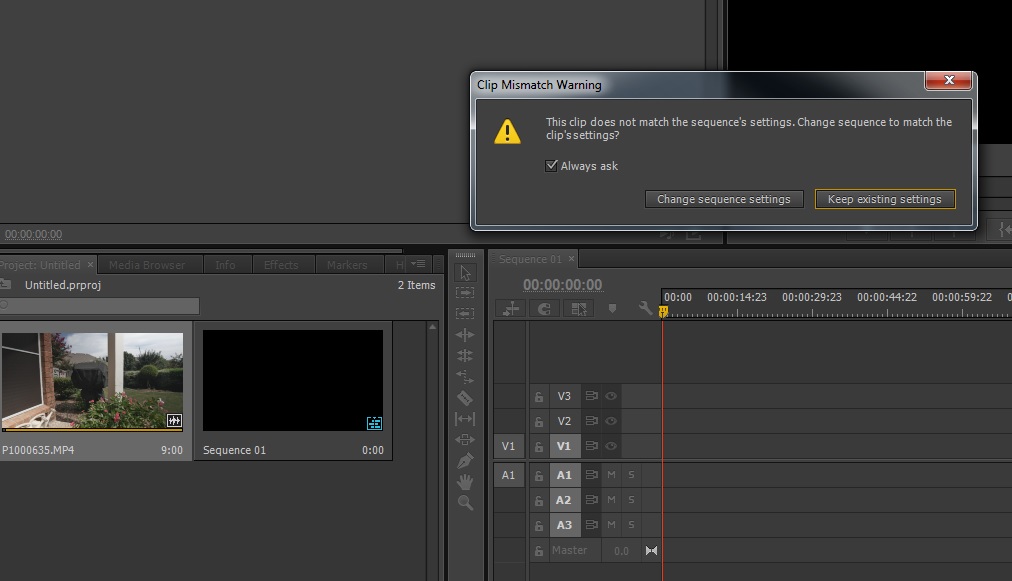
Now how do I use the scale to sequence setting you mentioned?
Thanks agian
Copy link to clipboard
Copied
Right-click the clip(s) in the Timeline and select Scale to Frame Size or, if you have CC2014, Set to Frame Size. The former rasterizes the image; the latter uses the Scale effect on the Effect Controls panel.
Copy link to clipboard
Copied
Thanks for the replies. Here are the results
Set to frame size
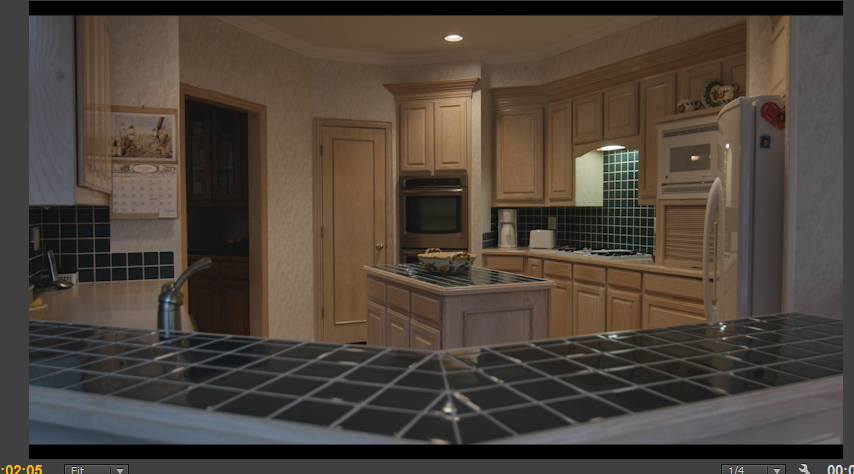
Scale to frame size- this one produces some rather strange effects as you can see.
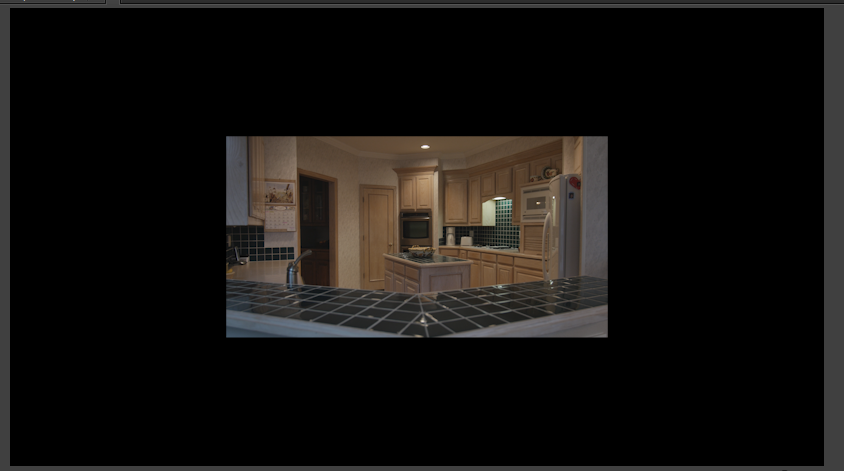
As you can see neither of these remove the black bars, unless the source footage needs to be 3840 x 2160 as cc_merchant pointed out to scale these out to take up the full screen space.
Copy link to clipboard
Copied
Right. We weren't thinking this through. Both Set to Frame Size and Scale to Frame Size adjust to fill in one dimension without cropping in the other. You want just the opposite, so you'll need to tweak the Scale setting manually. With your 4096x2160 footage, you'll want Scale set to 50%.
Copy link to clipboard
Copied
Hey Mark,
I do what you say but I still have the black bars.
I have 4k 4096X2160 footage that I drop in a 2k timeline. When I scale to 50%, set to frame size, or scale to frame size, I still get two black borders top and bottom.
What's the issue?
Thank you,
Copy link to clipboard
Copied
1920 x 1080 is 16:9 aspect ratio, or if you divide it out, 1.78 to 1. 4096 x 2160, divided out, is 1.896 or 1.9 to 1. They're NOT the same aspect ratio. As pointed out by cc_merchant, 16:9 in 4K is 3840 x 2160. Essentially, if you want to lose the black bars, you're going to have to crop in a tad and lose a tiny bit of your image on the left and right.
I would go back to your original approach and do this through media encoder. Choose an HD preset, something like h264 and Vimeo 1080p HD - or whatever is right for your intended distribution. At the top left of the media encoder export window, in the Source Scaling drop down window, choose "Scale to Fill". Also, check the "Use Maximum render quality" option for best scaling.
Personally, this is my workflow: I would output a 4K master in ProRes 422. I would then use that master to make my copies in Media Encoder (or the even easier to use Apple Compressor). If you use Media Encoder, don't forget the "Scale to Fill" and "Use Maximum Render Quality" options when copying from the 422 master.
Copy link to clipboard
Copied
There shouldn't be any black bars ...
The projects source video file is 4096 x 2160
Of course there are black bars, because to keep the same 16:9 HD dimensions (1920 x 1080), the starting point would be 3840 x 2160. Not 4096 x 2160.