 Adobe Community
- Home
- Premiere Pro
- Discussions
- Re: Video NOISE in exported H.264 file only, origi...
- Re: Video NOISE in exported H.264 file only, origi...
Video NOISE in exported H.264 file only, original footage is clean

Copy link to clipboard
Copied
Hi,
Filmed using a brand new Sony FS7, in 4k. Original footage is clean and great.
Edited for several months to find at the end that every exported file in different formats has horrible video noise that is simply not in the original footage.
How come premiere is adding noise?
We have made sure that in the the export settings for the H.264 we have ticked "Render at maximum depth" and "Use maximum render quality".
Do we pay for Adobe Premiere to make our beautiful original footage look horrible?
I came across this article:
http://nofilmschool.com/2014/09/massive-difference-export-quality-fcpx-and-premiere-pro
So is Adobe Premiere H.264 export quality meant for amateurs and home videos?
Does anybody have a clue what is going on with the bad quality H.264 export of premiere?
Thank you


 39
Replies
39
39
Replies
39
Copy link to clipboard
Copied
Complete media info extracted:
It's a 4:2:2 10 Bit. So we may have messed up somewhere else so badly that we made a 10 bit image look like that
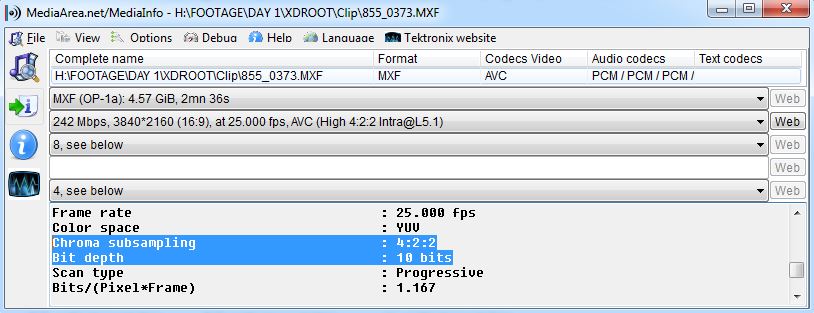
Here is more info:
ID : 2
Format : AVC
Format/Info : Advanced Video Codec
Format profile : High 4:2:2 Intra@L5.1
Format settings, CABAC : No
Format settings, GOP : N=1
Format settings, wrapping mode : Frame
Codec ID : 0D01030102106001-0401020201323001
Duration : 2mn 36s
Bit rate : 242 Mbps
Width : 3 840 pixels
Height : 2 160 pixels
Display aspect ratio : 16:9
Frame rate : 25.000 fps
Color space : YUV
Chroma subsampling : 4:2:2
Bit depth : 10 bits
Scan type : Progressive
Bits/(Pixel*Frame) : 1.167
Stream size : 4.40 GiB (96%)
Transfer characteristics : BT.709

Copy link to clipboard
Copied
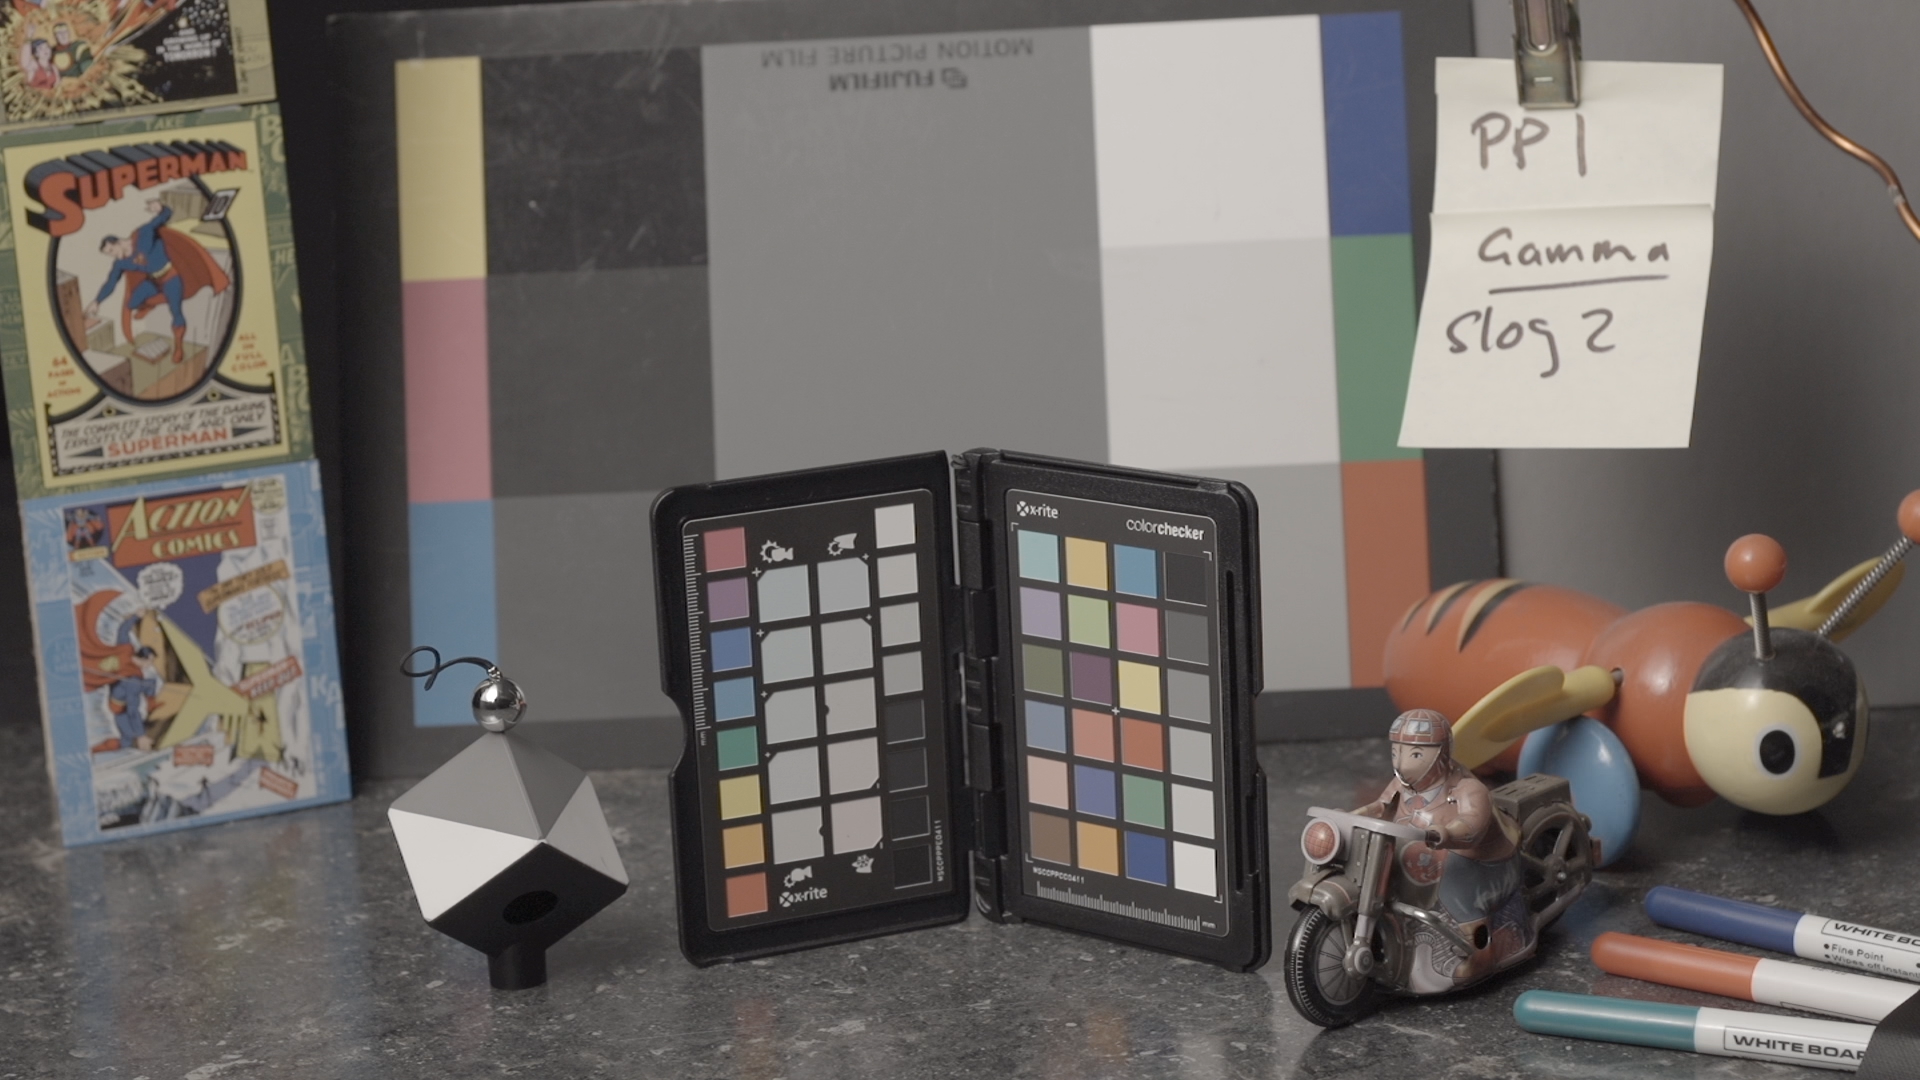
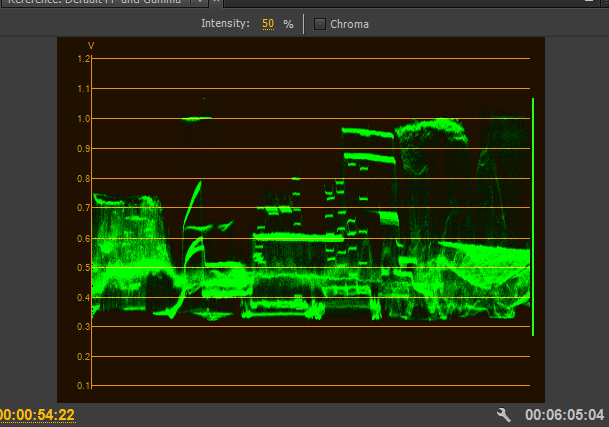
I look at the original footage (and the scopes) and wonder why it is so flat. Disturbingly so and I would not have described it as..
Do we pay for Adobe Premiere to make our beautiful original footage look horrible?
Even the graded footage has a flat un dynamic look. Is that the intention?
It appears that it was a camera profile of some sort because its not RAW footage as far as I can tell.
What was that Image setting? Maybe a custom setting? Maybe S--LOG2?
Why was an Arri LUT used for post?
I think the banding is coming from the compression of all the Chroma and Luma Info....into the centre of the Levels.
The image has not fully captured the range of levels in the scene and the export is fudging data. ( Just my theory and opinion).
I kind of saw this in the other recent post about red artifacts. In that case the OP had exposed well for a grade process but he had compressed graded his red channel until it clipped at a low level.. When it was expanded, artifacts went away.
In your case..I think its maybe more of an exposure , camera profile issue. 
Tip : Post FRAME Grabs not SCREEN Grabs of footage. (This eliminates the player aspect for evaluation). Screen grabs of screen info is fine.
Copy link to clipboard
Copied
Shooternz, it is quite possible that we have messed up somewhere in the camera set up. a brand new FS7 that wasn't yet available in most of Europe when we used it. The camera guys had 1 day to figure out how it worked. But one thing is sure we had agreed 4K 4:2:2 10bits.
I have noticed the colours were quite different compared to what we see on set, a bit late in the process. We thought it was the way the camera captured the image, high dynamic range.
Copy link to clipboard
Copied
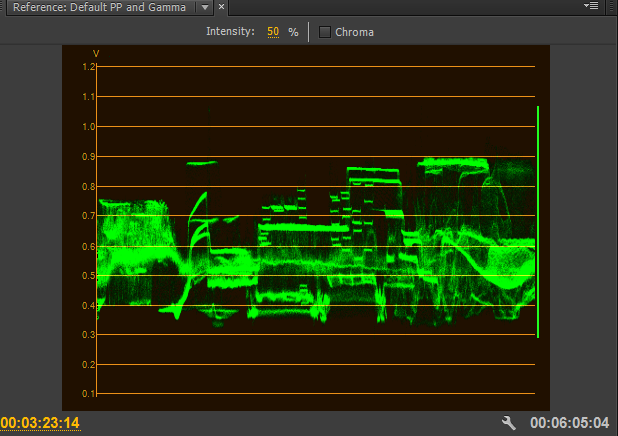
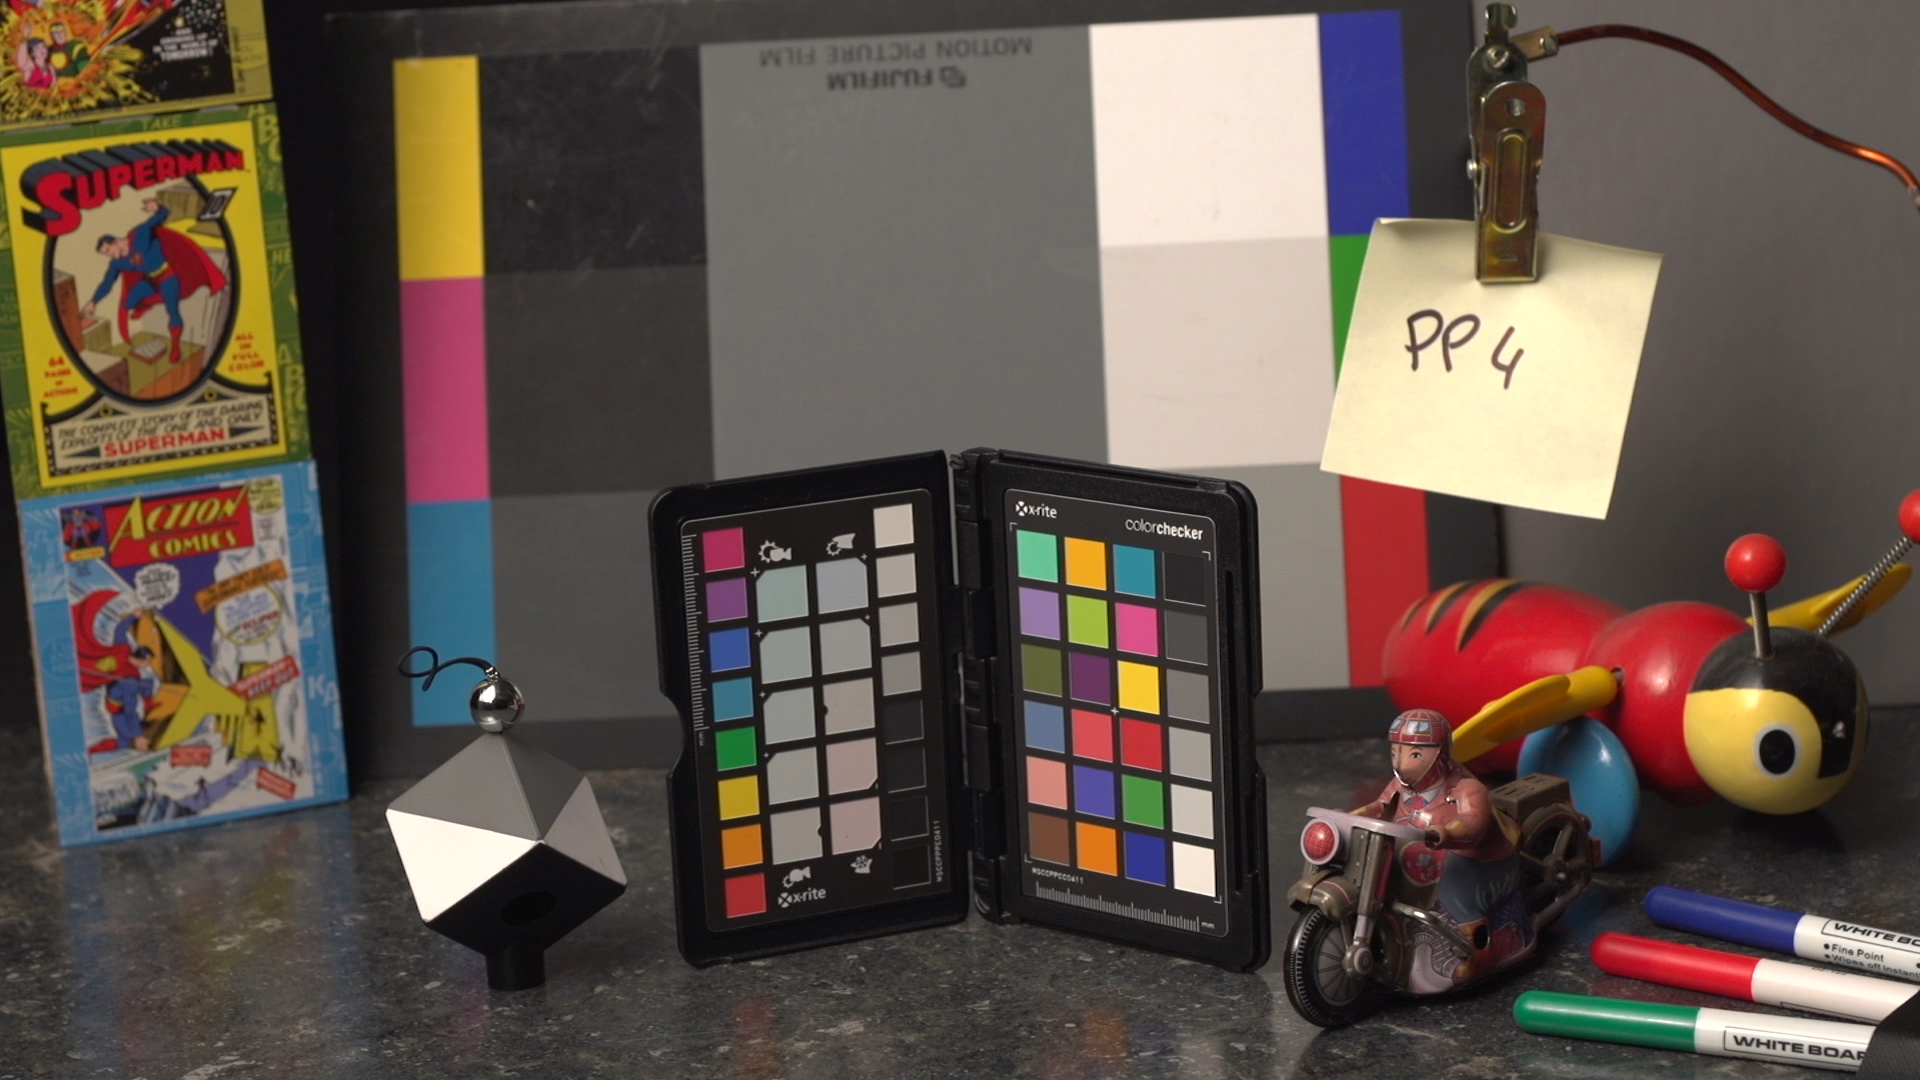
Just FYI.. From Cameraa Tests that we ran with a Sony FS700 so you can see what happens.
SLOG2 and the waveform it produces followed by a more full spectrum Image (Camera Default 4)... same lighting and exposure..
Copy link to clipboard
Copied
How would you solve it if you have the first image, using LUTs of sony camera as a preset effect?
I have tried the Jarle's presets: http://premierepro.net/customizing/jarles-premiere-pro-presets-version-3-0-2/
haven't rendered yet, but these are for the Sony F3. It changes the colors completely and brings things to life after it was flat, but I need to tweek it further (too much saturation and brightness in preset)
I will try a combination of the Sony F3 LOG to LIN preset + add grain in After effects (around 0.3) + highest bit rates, and will see.
Copy link to clipboard
Copied
Here is an article that may help

Copy link to clipboard
Copied
in one of the pictures it looks like the banding is very faint in the original and is being pronounced when graded. it may also be h264 8bit compression adding to the problem. i would agree with shooternz's approach to add grain. how much? it will be a combination of grain and higher bitrate for h264 in export. lower bitrate will compress the image more, and will attempt to remove noise/grain and will result in banding due to 8bit color limitation. you could also attempt to add grain just to trouble areas of those shots/clips, perhaps using a mask to apply the grain just to the walls. if the walls are completely flat, no texture, you could also add a slight blur or denoise to the walls before adding grain, to clean up any banding or blocks that might be in the source footage. i don't think premiere supports 10bit h264, and if it did, the festivals you are taking it to might not.
Copy link to clipboard
Copied
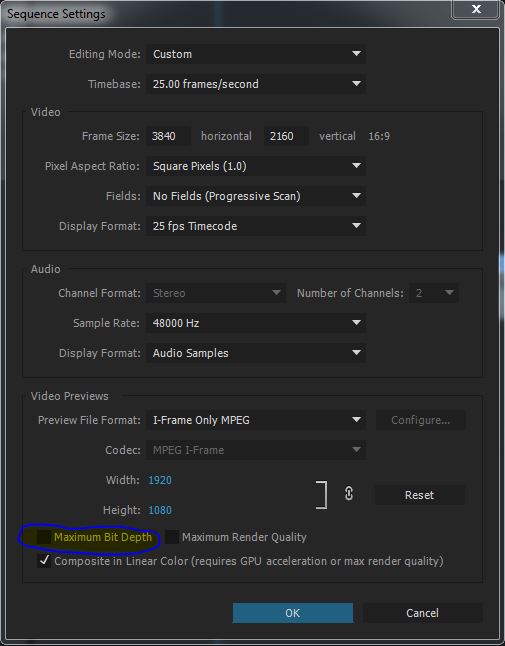
I have checked the sequence settings and see that by default the "Maximum bit depth" is not checked, would it be a reason why the original 4:2:2 10 Bit came in to the sequence as an 8bit?
by checking it does it become again a 10 bit?
I have seen elsewhere that PrPro has limitation in bit depth export while after effects allows for higher. Should I export via after effects?
Copy link to clipboard
Copied
the "Maximum bit depth" setting allows for some processing to happen at 32bit float, for better/cleaner results, which should help avoid problems like banding. im not sure what bit depth premiere uses outside of that setting. testing the original clip in speedgrade and AE (without premiere and dynamic link) could help determine if the banding is in clip itself or being introduced in premiere somehow. you could also try checking in Catalyst Browse.
i believe the "Maximum bit depth" in premiere's sequence settings should only effect the timeline playback and preview. you could turn it on and see if it makes any difference to the preview monitor. if you have previews rendered you may need to delete them. if the banding isn't present in the preview monitor, you could export from premiere with a 10bit codec or uncompressed, rather than h264. that might tell us if h264 is the cause or not. if h264 compression is causing the banding, higher bitrate is the main thing that will help. if somehow the banding is in the footage, and/or nothing seems to help avoid it, the denoise and/or grain treatments should help hide it. the only plugin i can find for debanding is genart's sapphire, and it isn't cheap.
Copy link to clipboard
Copied
I have tried all routes for exporting:
1. Directly from After Effects without dynamic link so by importing original footage straight into AE. AE is not able to export H.264 directly so I had to go through adobe media encoder.
Result is not good at all, banding is very obvious, below is an exported frame:
2. exporting an AVI instead of H.264 gives a clean image without banding (see exported frame below):
3. via speedgrade was not possible as speedgrade doesn't support the original file format (XMF). And if I try to import a PrPro sequence into Speedgrade to export it, when I want to render it tells me, go back render from PrPro.
So far it is clear there is nothing wrong with the original footage except the fact that it was shot with a Sony image format that requires a preset to get the colours back. This is fine, I have the presets. But the banding is still there and is created by Adobe Premiere in H.264 export. confirmed.
Is there a way Adobe can get me an export in H.264 of similar quality as the AVI rendered by After effects. By the way, to complicate things Adobe decided no longer to have H.264 option in after effects. So it is not possible to export H.264 from after effects, otherwise we would be done.
Copy link to clipboard
Copied
please click on image to see the real quality, for some reason the avi shows banding only in the small paste image, if you click on it you get the real image.
Copy link to clipboard
Copied
in your AE test did the sony presets make any difference, with or without? your AE test suggests h264 compression is creating the banding. you could increase h264 bitrate and/or add grain/noise to see if you can get an acceptable export to h264.
back to premiere, did you try exporting to the same avi format that worked in AE? if you get acceptable exports from premiere with avi or uncompressed, you could try using another program to encode those to h264. if you don't have any other programs that do this, you could try handbrake, its free.
Copy link to clipboard
Copied
Have you done a full grade and tried an export?

Copy link to clipboard
Copied
I don't know if this ever got solved, but I was having the same problem with banding in my exports and tried many of the same steps as the original poster. I'll leave this solution here for anyone it might help:
I had FS7 footage that had been graded using a LUT and then some light curves and basic adjustments applied on top. Looked fine in my preview window, but when I exported in AME it had horrific banding.
***After tearing my hair out, the simple solution was to export directly from Premiere (with maximum depth checked). ***
Clearly there's some bug in AME at the time of posting (CC 2018 version 12.0).

Copy link to clipboard
Copied
There's a couple things that can go blitzy between PrPro & ME ... for some things, you need to go into ME's preferences and uncheck "Import sequences natively", then all is well. For others, sometimes ME doesn't seem to pick up on the settings properly in PrPro, so going through and seeing that the options in Preferences and in the presets in ME are doing what you expect them to do, same as in PrPro becomes necessary.
Neil
-
- 1
- 2

 AdChoices