  • 1345 Product updates
3D file support is now live in Frame.io
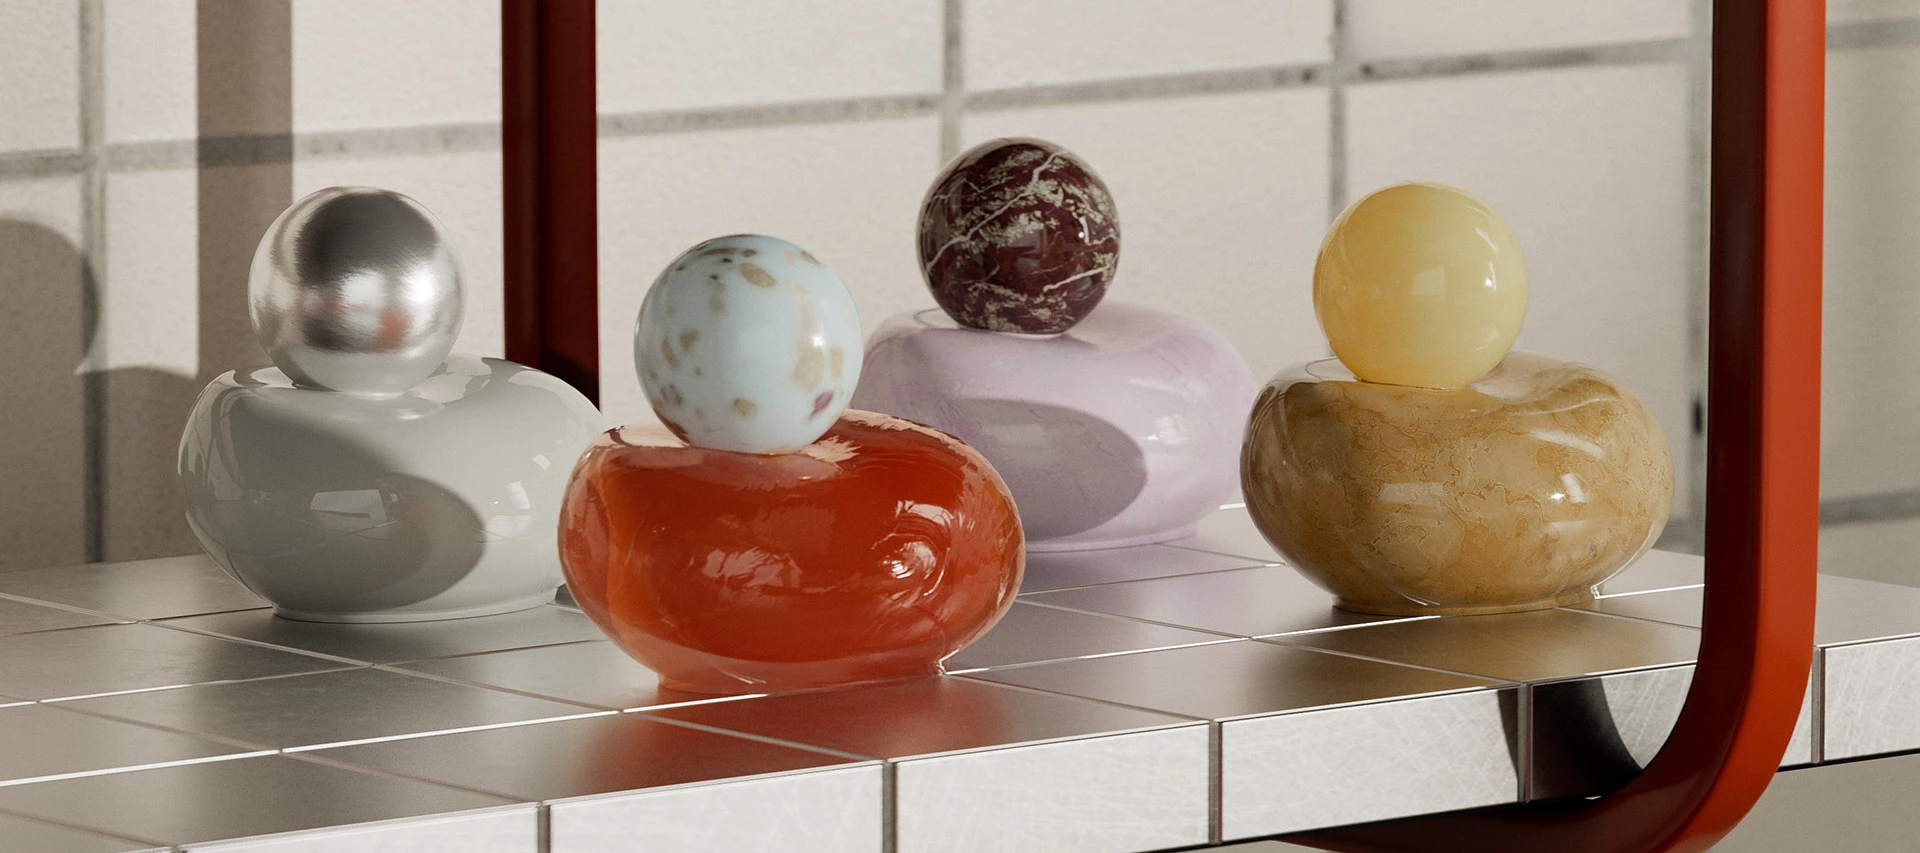
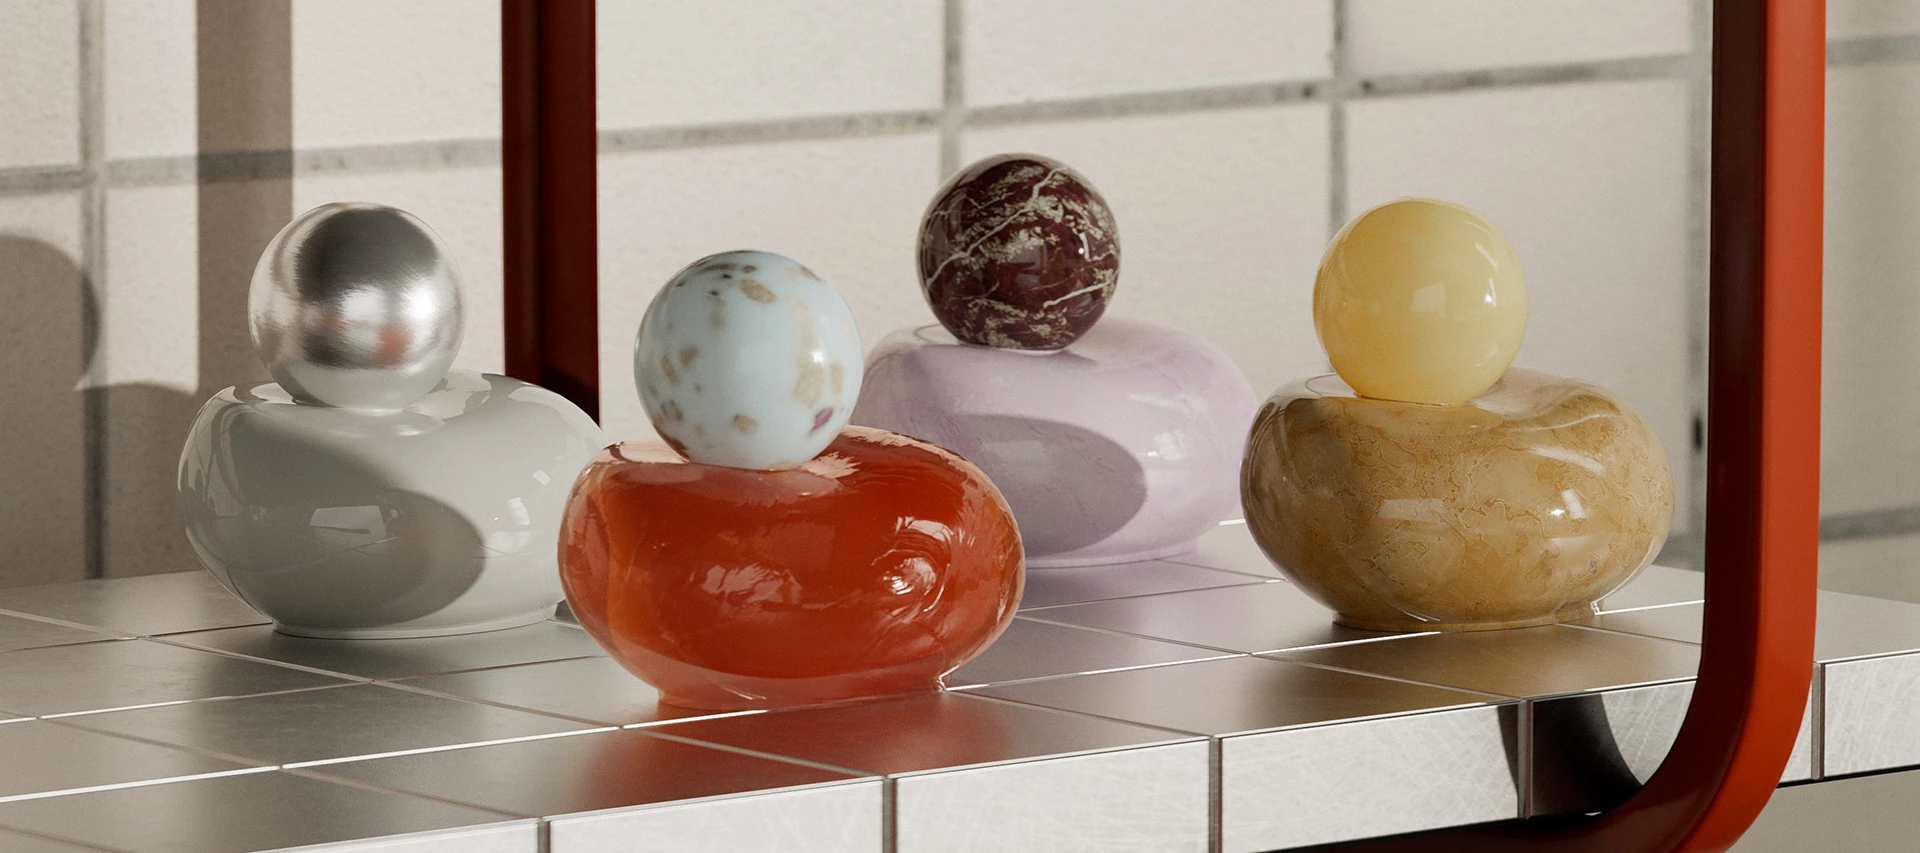
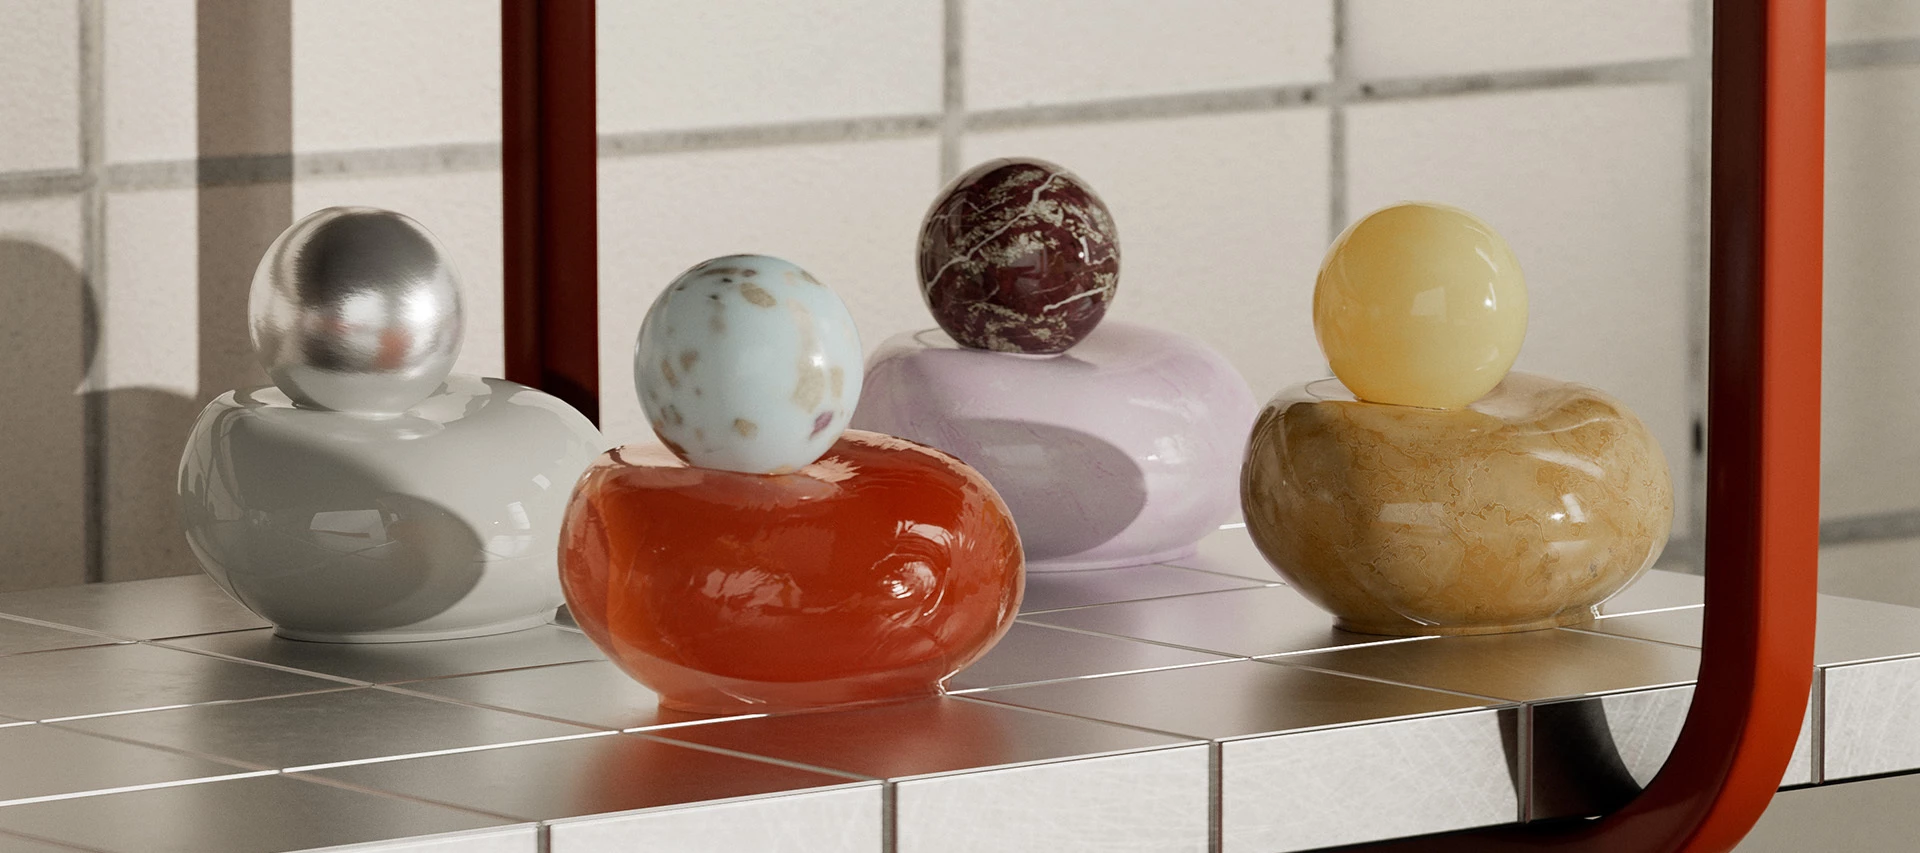
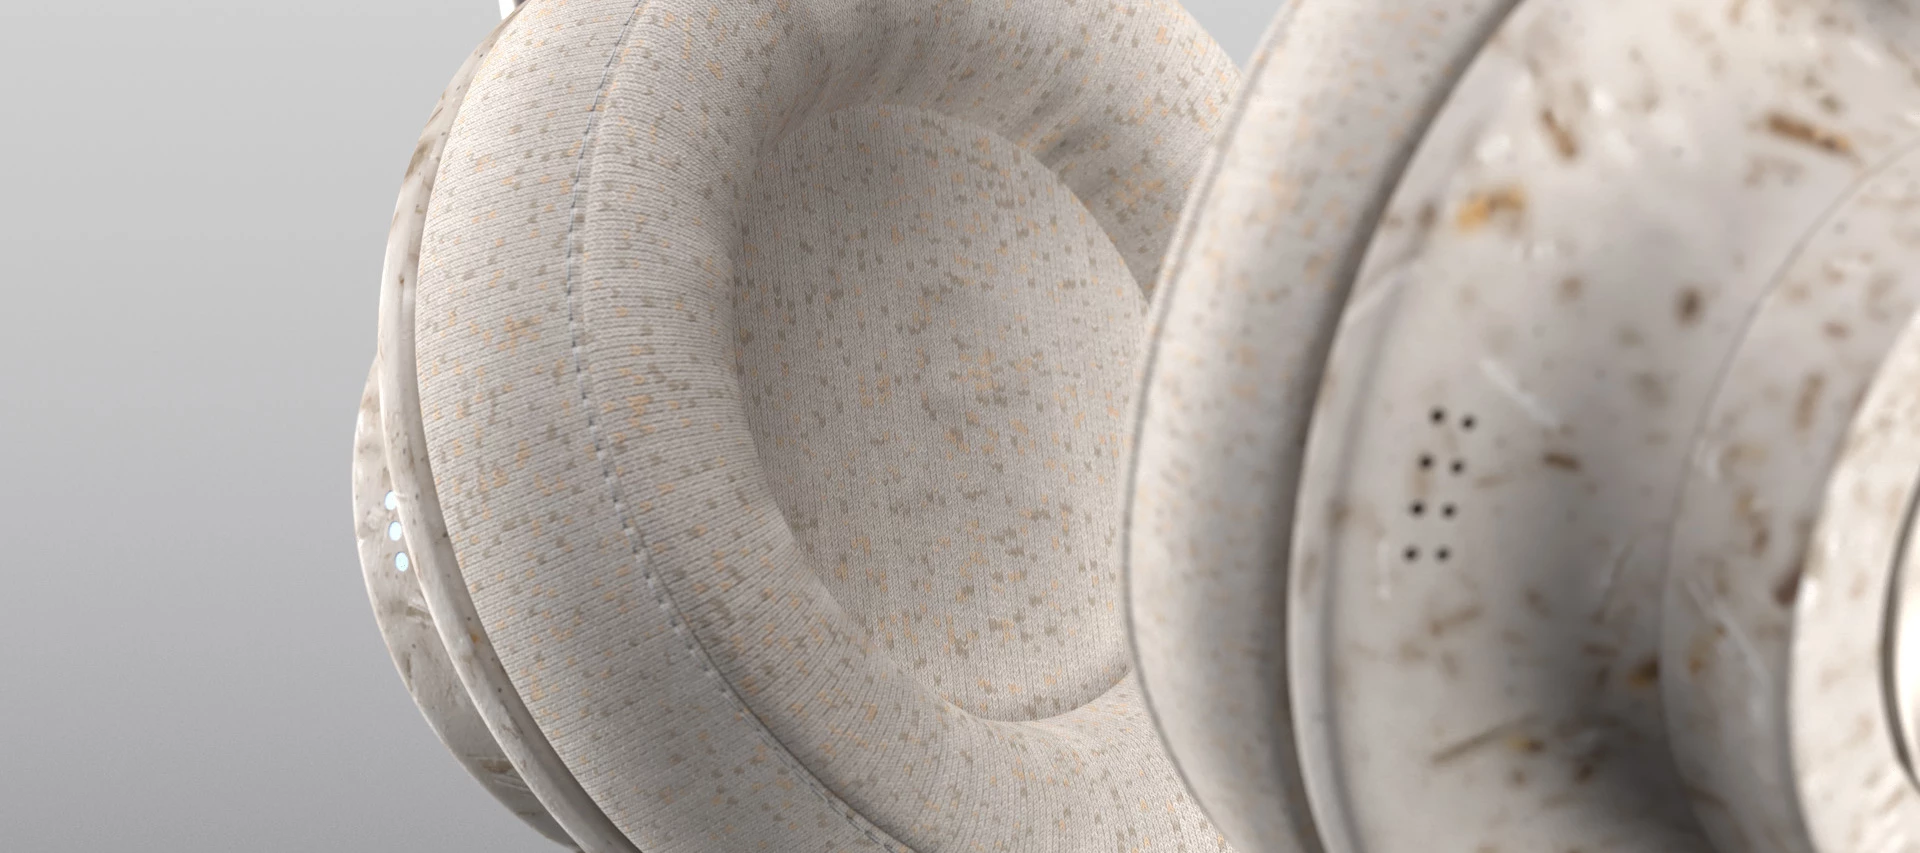
New in AE: Proportional Scrubbing

Beta Build 30.6.27 Release Notes

Hello :)Latest Beta Build 30.6.27 is now available in CCD. We have below fixes in this build:Live Blends Panel:We've redesigned the Blends panel with new controls that give you more creative control over how blends interpolate between objects.Now all Blend properties can be controlled from one place - the Blend panel. Easing: You can now control how blend steps are distributed along the path. Choose from four easing modes -  Ease In, Ease Out, Ease In/Out, and Ease Out/In - and fine-tune the intensity with the Ramp slider. Available when spacing is set to Constant Steps. Color Shift: A new Shift slider lets you independently control how colors accelerate through the blend sequence, separate from the spatial distribution of steps. Available when spacing is set to Constant Steps or Constant Distance. Reorganized Panel: All controls are now organized into collapsible sections -  Easing, Appearance, and Spine Controls - so the panel stays clean and focused. The panel is also scrollable, so all options are accessible regardless of screen size. Make Button:You can now create a blend directly from the panel without going to the Object menu. Per-Blend Settings:Easing and Color Shift values are saved per blend object, so different blends in the same document can have independent settings.Known Limitations- Easing controls are only available with Constant Steps spacing. - Color Shift is not available with Smooth Color spacing. How to Try It:There are three ways to make a blend in Illustrator:1. Blend Tool : Select the Blend tool (keyboard shortcut W), then click on two or more objects to create a blend directly on the canvas2. Menu : Select two or more objects, then go to Object > Blend > Make (Option+Cmd+B on Mac / Alt+Ctrl+B on Windows)3. Blend Panel (new) : Select two or more objects, open the Blend panel, and click the Make buttonOnce your blend is created, open the Blend panel to explore the new Easing and Appearance controls.-----------------------------------------------------------------------------------------------------------Fixed uv issues:[Vote Count : 1] : Adobe illustrator hangs up/not responding whenever the application is closed [Vote Count : 2] : "Open" window loads blank and duplicates-----------------------------------------------------------------------------------------------------------Sketch to Vector -1. Sketch to Vector has been renamed to Concept to Vector2. Generating with the Line Art sample prompt will now produce outputs with strokes3. A new “Create live editable text” checkbox has been added in the Concept to Vector panel. Keeping this enabled during generation converts text in the output into live editable text. (Non-English and highly stylized text are not supported yet)4. The Creativity / Input Deviation slider has been renamed to Match Reference Image

Introducing Prompt to Edit — Refine Your Artwork Without Starting Over

Introducing Prompt to Edit — Refine Your Artwork Without Starting Over

Hello everyone, 🙋🏻Have you ever generated artwork you loved, only to wish you could tweak just one small detail, without regenerating the whole thing or hunting through layers to fix it manually?Then, we have something for you - Prompt to Edit is now live in Adobe Illustrator (Beta) — Build #30.6.11!🤷🏼What is Prompt to Edit?Prompt to Edit lets you generate your artwork and then keep refining it conversationally — no starting over, no losing what you already liked. Just describe the change you want, and Illustrator does the rest.It works with two features you already know and love:Generate Vectors (Text to Vector) Turntable🤔How does it work?Generate Vectors (Text to Vector)Generate your artwork using any model. Hit Done and spot Prompt to Edit in the contextual HUD. Enter a prompt describing your change, or pick from the suggestions provided. Hit Generate and watch your edits come to life.TurntableApply Turntable to any object and load your variations onto the canvas. Ungroup the variations, select a variation or rotate to your desired angle, then click Prompt to Edit. Enter your prompt and hit Generate.Note: Edits apply to that specific angle or variation only, so you stay in full control of each view.💡The idea behind itGreat design is rarely a one-shot process; it's iterative. Prompt to Edit is built around that reality. Instead of treating each generation as a fresh start, you can now have a back-and-forth with your artwork: refine a color, adjust a shape, change a detail and all while keeping everything else exactly as you had it.Try it out! Fire up Illustrator Beta Build #30.6.11, give Prompt to Edit a spin, and let us know what you think. We'd love to hear how it fits into your workflow and of course, any feedback you have as you explore it.Refine, iterate, and finalize your masterpiece  Happy creating! ✨ 

One tap, early access: The Acrobat Reader beta (Android) explained

One tap, early access: The Acrobat Reader beta (Android) explained

About this articleRead time: 3 min.Published: May 21, 2026  Author: Amal Jaiswal – Community Manager TL;DRThe Adobe Acrobat Reader Android beta program gives Android users free, early access to new Adobe Acrobat Reader features via Google Play. Enrolment takes one tap, it's reversible anytime, and your in-app feedback routes directly to the Adobe Acrobat Reader product team.Adobe Acrobat Reader beta access is an opt-in Google Play testing track for the app on Android that lets everyday users try new features before public release. If you sign PDFs on the bus, scan receipts at lunch, and mark up docs at midnight, this is your backstage pass. What is the Adobe Acrobat Reader beta program?The Adobe Acrobat Reader beta program is the side door into the app on Android, a free testing track on the Google Play Store where the features land before they hit everyone else's phone. Beta testers get pre-release builds straight from the team, a dedicated in-app feedback form wired straight to the people building it. Why it matters?Beta feedback from real users, not just internal QA, directly informs which app features ship, get redesigned, or get cut. If you've ever wished Acrobat did something differently, this is the most direct route to the people building it. How does joining the Adobe Acrobat Reader beta work?Setup takes about 30 seconds:Open the enrolment page: Visit the Acrobat Android beta opt-in link on your Android device. Or enrol manually: Open Google Play, search Adobe Acrobat Reader, tap Adobe Acrobat Reader: scroll down, and tap Join the beta. Wait for the update: Google Play will push the latest beta build to your device, usually within a few hours. If it doesn't appear, open the Play Store and check for updates manually. Send feedback: Use the in-app feedback form, post in the Adobe Acrobat Reader Mobile community, or write a Play Store review. To exit, repeat steps 1–2 and tap Leave the program. Beta vs. Stable: which Adobe Acrobat Reader should you run?The Beta channel ships new app features first; the Stable channel is the polished public release most users have by default. Here's how they compare: Dimension  Beta Channel Stable Channel Best for Curious users, power users, feedback-givers. Everyday users who want reliability Feature access New features first, weeks or months before public release Features arrive after Beta validation Update frequency More frequent, smaller builds Scheduled, less frequent releases Stability May contain bugs, rough edges, or incomplete UI Production-grade, fully tested Adobe subscription needed? No No Feedback channel Dedicated in-app feedback form + community forum Standard Play Store reviews + community forum Influence on roadmap High: feedback routes to the product team during development Lower: feedback applies to already-shipped features How to enrol One-tap via Google Play Beta opt-in link Default: no action needed How to exit Tap 'Leave the program' in Play Store N/A Note: Your documents, account, and cloud sync work exactly the same in the beta channel as in the stable release.FAQ: Is the Adobe Acrobat Reader beta free? Yes. The Adobe Acrobat Reader beta program is completely free and does not require an Adobe paid subscription. You only need a Google account and the Google Play Store. Who can join the Adobe Acrobat Reader beta? Any Android user with Google Play access can join. There is no application, waitlist, or NDA enrolment, just one tap on the Play Store. How do I leave the beta program? Open Google Play, search Adobe Acrobat Reader: Edit PDF, scroll to the beta section, and tap 'Leave the program'. You'll be moved back to the public release channel on the next update. Is there an iOS beta for Adobe Acrobat Reader? Right now, public beta testing is Android only. If you're on iOS and want early access, keep an eye on the Acrobat Mobile community - announcements, where any future iOS opportunities will be shared first. Where does my feedback go? Feedback from the in-app form and community posts routes to the Adobe Acrobat Reader product team and informs the roadmap for future releases.  Learn more:📘 Adobe Acrobat Reader Mobile Help 📱 Adobe Acrobat Reader product page  Join the conversation:Already enrolled? What's the first thing you'd want fixed or added in Acrobat Reader on Android? Tell us below. The product team is in this forum. Found a bug or have a "wouldn't it be cool if…" idea? File it in Adobe Feature Requests.

New in AE Beta: Color Labels for Effects!

If you’ve been on recent After Effects Beta builds, you might’ve noticed the Effect Control Panel getting a little tidier: things like GPU Acceleration and Camera Aware have moved to the right side of the effect header, and Reset is a proper button instead of plain text. Today we’re excited to tell you why.As of build 26.5x7, After Effects allows you to assign color labels to individual effect instances on a layer. When you add an effect (or open a project that already has effects), you’ll see that familiar small grey square next to the effect name.  Click it and you get the same kind of label menu you already know from elsewhere in AE.  Upon applying an effect, each effect’s default label is None, but you can tag effects however it helps your workflow, same idea as layers or keyframes.In addition to the familiar square swatches, we've also added (optional) background tinting: the effect row can get a subtle background wash that follows the label color you picked. We've found this to be very helpful when you have a lot of effects and a small Effect Controls Panel.Showing the label swatch and using the label color for that background tint are two separate things, and both are optional. You can turn each on or off from the Effect Controls panel menu. So you can run swatch-only, tint-only, both, or neither (if you want zero label UI at all).Got 5 keying effects, 3 color correction effects, and 2 finishing effects?Got a single effect in the middle of a stack you want to easily find or point out to a teammate?Do you need to identify which version of effects settings your producer signed off on? FAQI didn't read the above but I really don’t like the background color! Turn it off in the Panel menu!I didn't read the above but I really don't like the swatch? Turn it off in the Panel menu!I turned off the swatch but the background color is still applied! Either turn off the background color visibility or turn the swatch back on and set the label to none. If you're interested in other ways of changing the Effect Label, please let us know.Do the Labels that are applied to effects in the Effect Control Panel show up/can be changed in the Timeline? Not right now, but tell us how you'd like that to work and how it would help you? I went to turn off the wash or the background color and I saw this Show Animation Presets option, what's that all about? That has been there for years! It will display a row at the top of each effect that will search your presets folder for any saved presets that only use that effect and show them here. You can use the dropdown to choose from all your matching presets and the left and right arrows to browse through them. Try saving a bunch of Fractal Noise presets, they'll be right there every time you apply Fractal Noise. Known IssuesAt the moment, using shortcuts for effect color labels does not work, we expect that to be fixed shortly.Please give this new feature a try and let us know what you think!!

Now available: Substance 3D Designer 16, Sampler 6, and ZBrush-to-Painter integration

What's new in Adobe ColdFusion 2025 update 8

ColdFusion 2025 update 8 delivers native AI and LLM integration with a unified multi-provider framework, Model Context Protocol support for building and consuming AI tool interfaces, vector stores and RAG for grounding AI in your own content, passwordless passkey authentication, a rebuilt VS Code extension with Linux and Docker support, AI services monitoring in PMT, and significant language improvements including native Sets, async enhancements, and Java interoperability.What’s new in ColdFusion 2025 Update 8Native AI and LLM integrationColdFusion 2025 update 8 adds first-class AI support directly into the language. You access AI providers through built-in CFML functions that integrate with your existing components and application logic — not through generic HTTP calls. A unified provider framework lets you write one set of code that works across OpenAI, Anthropic, Mistral, Google Gemini, and Ollama. Switching providers requires only a configuration change, no code refactoring. Two entry points are available: ChatModel() for simple stateless prompts, and agent() for multi-turn conversations with memory, tool calls, and guardrails.Model Context Protocol (MCP)MCP is an open standard interface layer between AI agents and your application. Agents can discover and use tools without unrestricted access to your codebase. ColdFusion 2025 update 8 supports MCP in both directions — as a client connecting to external MCP servers over HTTP or STDIO, and as a server exposing your own CFC functions as callable tools. The new ColdFusion documentation site also ships with a built-in MCP server for direct IDE integration.Vector stores and RAGColdFusion 2025 update 8 adds a native RAG pipeline that grounds AI responses in your own content. It supports five vector stores — InMemory, Pinecone, Milvus, Qdrant, and Chroma — and offers three approaches: simpleRAG() for quick setup, agent() with INGESTION for full pipeline control in production, and documentService() for scheduled or shared ingestion jobs. A no-code ingestion UI is also available in the Administrator. Supported formats cover most common document and data types including PDF, DOCX, CSV, JSON, and remote URLs.Security enhancementsColdFusion 2025 update 8 adds five security improvements: native passkey support (WebAuthn/FIDO2) for passwordless sign-in, an Argon2-default password hashing API, an expanded Security Analyzer that now detects unscoped variable risks and exports PDF/CSV reports, OEM library upgrades addressing underlying vulnerabilities, and AI guardrails in agent() to filter LLM inputs and outputs via CFC-based validators.ColdFusion Builder VS Code extensionThe ColdFusion Builder VS Code extension now supports Linux and Docker as a first-class server target with full RDS and debugger support. The CFML grammar has been rebuilt to be context-aware, so a single # or <cfif> inside a <script> block no longer breaks syntax highlighting for the entire file. New code completions cover AI, Cloud, and MongoDB services with proactive deprecation warnings. The Security Analyzer ships with new rules covering cryptography, XML injection, and file injection, plus PDF and CSV report export.AI services monitoring in PMTPMT now includes an AI Services dashboard — enabled via Settings > Monitoring > Advanced — with seven tabs covering every layer of the AI stack: LLMs, Agents, RAG, MCP Clients, MCP Servers, Vector Stores, and a Trace Viewer. The Trace Viewer shows a full flamegraph of each AI request, making it straightforward to pinpoint which part of a pipeline is responsible for slowdowns.Language and performance updatesColdFusion 2025 update 8 adds native Sets with set theory operations, CompletableFuture-based async with asyncAllOf(), asyncAnyOf(), and timeout and combining methods, automatic CFML-to-Java functional interface adaptation, member functions on literals, and eight new or enhanced built-in functions. Query of Query is approximately 11x faster than the previous version, and arithmetic operator left-associativity has been corrected to match standard relational database behavior.New documentationThe ColdFusion documentation has moved to a new platform built on Adobe Experience Manager Guides, with improved navigation and search, deeper topic coverage, and a built-in MCP server for IDE integration. Connect a supported IDE directly to the documentation using a free Adobe account.

AI-Powered Image Editing Features in Illustrator

AI-Powered Image Editing Features in Illustrator

Working with images in Illustrator used to mean bouncing between apps — open Photoshop to extend a background, reach for a third‑party tool to knock out a subject, then come back to finish the layout. Two new AI‑powered features in Illustrator change that. You can stay in one file, work with vectors and images side by side, and skip the manual cleanup that used to eat up half your afternoon. Here's a quick look at what each one does, when to reach for it, and where to find it in the interface. Generative Expand for images — Extend any image to fit your layout, no cropping required.Need a wider banner? A taller social post? A different aspect ratio for the same hero shot? Generative Expand for images, powered by Adobe Firefly, lets you grow a placed image beyond its original bounds and fills the new area with generated content that blends naturally with the original.You'll find it tucked inside Crop Image. Select your image, choose Crop Image from the Contextual Task Bar (or the Properties panel, Control panel, right‑click menu, or Object menu), and drag the cropping frame outward — the new area appears in purple. Hit Generate, and Illustrator returns three variations of the expanded image. Use the arrows in the Contextual Task Bar to preview each one, then select Done on the variation that fits.Your original image is preserved as a hidden object in the Layers panel, and the generated output becomes a Generative Object you can re‑run, copy with its linked variations, or manage from the Generation History panel.Learn more about generating content to expand images in Illustrator here.Remove Background — One click, transparent subject, ready to drop into any layout.Cutting a subject out of its background used to mean a clipping mask, a pen tool selection, or a round trip through another app. Remove Background in Illustrator does it in a single click.Select your image and choose Remove Background from the Contextual Task Bar. Illustrator analyzes the image, isolates the subject, and replaces the original with a version that has a transparent background. You can also access it from the Quick Actions section of the Properties panel, the Control panel, the right‑click menu, and the Object menu.It's perfect for product shots heading into packaging, hero images for layouts, social graphics, and branding mockups where you need a clean subject without its surroundings.Learn more about removing background from images in Illustrator here.Better together — Two features, one image‑editing workflow. These two new features in Illustrator pair naturally. Use Remove Background to isolate the subject of a placed image, then drop it into your layout and use Generative Expand to stretch a separate background to the exact aspect ratio you need. What used to be a multi‑app workflow is now a few clicks inside Illustrator — and everything stays editable.Share Your FeedbackHave you tried Generative Expand for images or Remove Background on your own projects yet? Drop a comment and let us know how they're working for you — and if there's a specific image‑editing workflow you'd like us to break down next, we're listening.If you found this post helpful, click 👍 Like. Use ⭐ Subscribe to stay informed about future updates. You may also share this post with others who might benefit from these enhancements.

Photoshop 27.7 Is Live! Faster Performance, Smarter AI, and Cleaner Workflows

Photoshop 27.7 Is Live! Faster Performance, Smarter AI, and Cleaner Workflows

Photoshop 27.7 brings smarter performance, deeper AI flexibility, and smoother everyday workflows, so you can stay focused on creating, not managing complexity. This release sharpens how Photoshop responds to your hardware, gives you more control over AI‑powered tools, and streamlines common tasks to keep documents cleaner and faster. The result is a more responsive, flexible experience that supports both quick edits and deep creative work. What’s newYou can now use an on‑device AI model for the Remove tool, giving you the choice to process object removals locally without relying on the cloud. Sharing and ideation also get a boost with direct integration between Photoshop and Firefly Boards, making it easier to move from creation to moodboarding and comparison in one flow.  On top of that, managing your account is simpler with a Unified Account Menu right inside the Edit workspace, alongside several workflow and performance improvements across the app. Enhancements you’ll noticeThe Save for Web dialog has been refreshed with a modern, more consistent interface. File handling gets more flexible with new preferences that let you open JPEGs as regular layers and start new documents without a default background layer. Behind the scenes, performance has been improved by reducing telemetry overhead, and Canvas HUD diagnostics have been moved to the View menu for a cleaner canvas and better discoverability. Fixed issues — thanks to you!Hue/Saturation ranges now update correctly when selecting prominent color presets from the Properties panel. Fixed the inability to launch Photoshop versions 26.2 and 25.12.1 at the same time on Windows.See the full list of new features and fixes in the release notes. How to updateOpen the Creative Cloud desktop app and update Photoshop to the latest version to start exploring everything in v27.7. Join the conversationWhat are you most excited to try: on‑device Remove, Firefly Boards, or the expanded generative credits? Share your workflows, experiments, or feedback with the community and let us know how this release is shaping your creative process. 

What's New in Adobe Express — April Highlights

What's New in Adobe Express — April Highlights

April's release is a good one. Adobe Express shipped five updates this month that touch almost every part of the editor - from how you style a design to how you build a webpage. Here's what dropped and why it matters for your workflow. CATEGORY: STYLESApply Styles: Transform a design in secondsStyles lets you apply predefined color and font combinations to any design in one click. Open the Styles panel, pick a combination, and hit Apply to all pages - your whole project updates instantly. You can also shuffle color themes, edit individual colors or fonts on the fly, and use the In Use section to see exactly what's applied at any moment. Really useful if you're managing brand consistency across a lot of content! Instead of manually updating colors and fonts page by page, you define the style once and let Express do the heavy lifting. Brand teams and solo creators alike should find this a real time-saver. Learn more here! CATEGORY: PRESENTATIONSClick Order: You control what plays (and when)Click Order gives you precise control over the sequence of animations, video, and audio in presentations. Drag elements into the order you want, group them so they trigger on a single click, or spread them across multiple clicks. Audio defaults to Autoplay but can be repositioned in the sequence. If you've ever built a presentation and wished you could reveal content more deliberately - the way you'd do it in a live keynote - this is the feature you've been waiting for. The Preview button lets you check playback order before you share, and exported MP4s follow the click order you set. Get the step-by-step from our HelpX team! CATEGORY: TEMPLATESAdd Pages to Custom Templates: Start small, grow as you goShared custom templates now let you start with just the pages you need, then pull in more pages from the original template as your project evolves. No more starting over because you need an additional layout. Select Template info in the header, choose the pages you want to add, and they drop right into your file. Especially valuable for Teams and Enterprise users working within brand-controlled templates. Collaborators can request brand access directly from the template screen, which removes a friction point that used to require a separate conversation. Further information here! CATEGORY: VIDEOCollapse Audio Tracks: A cleaner video timelineA small but welcome quality-of-life improvement for video creators. You can now collapse audio tracks in the sceneline view to reduce visual clutter when you're working with complex timelines. It doesn't change anything about how audio behaves - it just gets it out of your way when you don't need to see it. If you regularly work on multi-track video projects, you'll appreciate having a cleaner workspace. Less scrolling, less cognitive load. Find out how to use Express to create videos! CATEGORY: WEBPAGESNavigation Bar: Give your page some structureThe webpage editor now supports a navigation bar - a header with anchor links that let visitors jump between sections of your page. Add it from the layout options, set your anchor points, and your page instantly becomes easier to navigate. This brings Express webpages closer to what you'd expect from a purpose-built web tool. If you're building longer-form pages (portfolios, event pages, product showcases) this makes a real difference in how visitors experience your content. Learn more about webpages here!  All five features are live and waiting for you.Whether you're building brand content, a presentation, or your first webpage - there's something in this release that'll make your next project a little smoother. Go take it for a spin!

Why Is Adobe Charging My Card?

Why Is Adobe Charging My Card?

About this articleRead time: ~3 min Published: May 18, 2026 TL;DR: See an unfamiliar Adobe charge on your statement? Use the Adobe Charge Finder tool to identify it , enter your card and transaction details exactly as they appear on your statement, and it'll show the linked Adobe account, subscription type, and date.Spotted an unfamiliar charge from Adobe on your bank or credit card statement? You’re not alone, and in most cases, the charge can be traced and resolved within minutes. Use the Adobe Charge Finder tool to identify the transaction, locate the associated Adobe account, and take the right next step. We know how unsettling it feels to see a charge you don’t recognize. That’s why Adobe has streamlined the process of identifying unknown charges, so you can quickly confirm whether the transaction came from Adobe, trace it to the right account, and resolve it without the back-and-forth. With the Adobe Charge Finder tool, you can look up any Adobe charge using the transaction ID from your statement. Identify the charge in seconds.Open the Adobe Charge Finder tool and enter your card and transaction details exactly as they appear on your bank or credit card statement. The tool will display the associated Adobe account, subscription type, and transaction date, especially helpful if you have multiple Adobe accounts. Understand the common reasons behind unknown charges.Most unrecognized charges fall into one of a few categories:- Free trial that converted to a paid plan- An annual subscription billed monthly- Renewal on a different email address- Family member’s purchase on a shared card- Recent price update in your region.Reviewing your Adobe account often clears this up right away. Take the right next step.If the Charge Finder tool confirms the charge is from Adobe, sign in to your account to review the plan and choose how you’d like to proceed, including cancellation if needed. If the charge is not from Adobe, or if you still don’t recognize it after checking all your Adobe accounts, contact your credit card issuer or bank to report potential fraud. A quick note on safety. Adobe will never ask for your password, full card number, or personal details through private messages or email. If anyone contacts you privately claiming to be Adobe Support, it is likely a scam, always reach out through the official Adobe contact page. 

May '26 Remix It! Challenge
FAQ: Adobe Express x LinkedIn Premium – 3 Free Months Offer

FAQ: Adobe Express x LinkedIn Premium – 3 Free Months Offer

  What is this offer? Adobe Creative Cloud and Express Premium members can redeem 3 free months of LinkedIn Premium Career, including access to 24,000+ LinkedIn Learning courses, job insights, and hiring manager outreach tools.How do I redeem? Visit adobe.com/benefits or the Benefits tab in the Creative Cloud Desktop app. Redemption links are unique to each member and cannot be shared or transferred.  You qualify if you are:An active Adobe Creative Cloud or Express Premium subscriber New to all LinkedIn Premium tiers - meaning you've never taken a free trial and don't have a current or recent paid subscription to LinkedIn Premium Career, LinkedIn Business, Sales Navigator, or Recruiter LiteYou do NOT qualify if you are:A Creative Cloud Enterprise or Express Free user A previous LinkedIn Premium free trial redeemer (any tier, any time) A paid LinkedIn Premium subscriber within the last 12 months  Q: The Redeem button does nothing or greys out. What do I do? A: Try refreshing the page or switching to a different browser. If the issue persists, contact Adobe support at helpx.adobe.com/support.html.Q: I'm getting an error on the Adobe benefits page. What does that mean?A: This typically means your account is on a Creative Cloud Enterprise plan, which is not eligible for the offer. Unfortunately there is no workaround available for Enterprise users.Q: The Adobe page says I'm eligible, but LinkedIn is giving me an error. Why?A: Adobe and LinkedIn run independent eligibility checks, so passing Adobe's check doesn't guarantee you'll pass LinkedIn's. The LinkedIn-side error is almost always related to your Premium history on that platform.Q: I'm getting the error "You are not eligible for this promotion. This promotion is limited to eligible LinkedIn users and is available only in select regions." What does this mean?A: Despite the wording, this is usually a LinkedIn account history issue rather than a regional one — the offer is available in all regions where LinkedIn operates. If you're certain you've never had any form of LinkedIn Premium, contact Adobe support at helpx.adobe.com/support.html.Q: Are there alternative options if I'm not eligible?A: No — if you fall into any of the ineligible categories, there are no alternative redemption paths. The offer is also non-transferable and may not be resold.  Q: I redeemed the offer but Premium isn't showing up in my LinkedIn app. What do I do?A: Try logging out of the LinkedIn app and back in. If Premium still isn't reflected after a few hours, contact LinkedIn support at linkedin.com/help.Q: My 3-month subscription ended earlier than expected. What do I do?A: Reach out to LinkedIn support to review and correct your expiration date: linkedin.com/help.  Still need help? Don't let a technical hiccup stand between you and 3 free months of LinkedIn Premium Career! Post in the Adobe Express Community and we'll do our best to get you sorted.